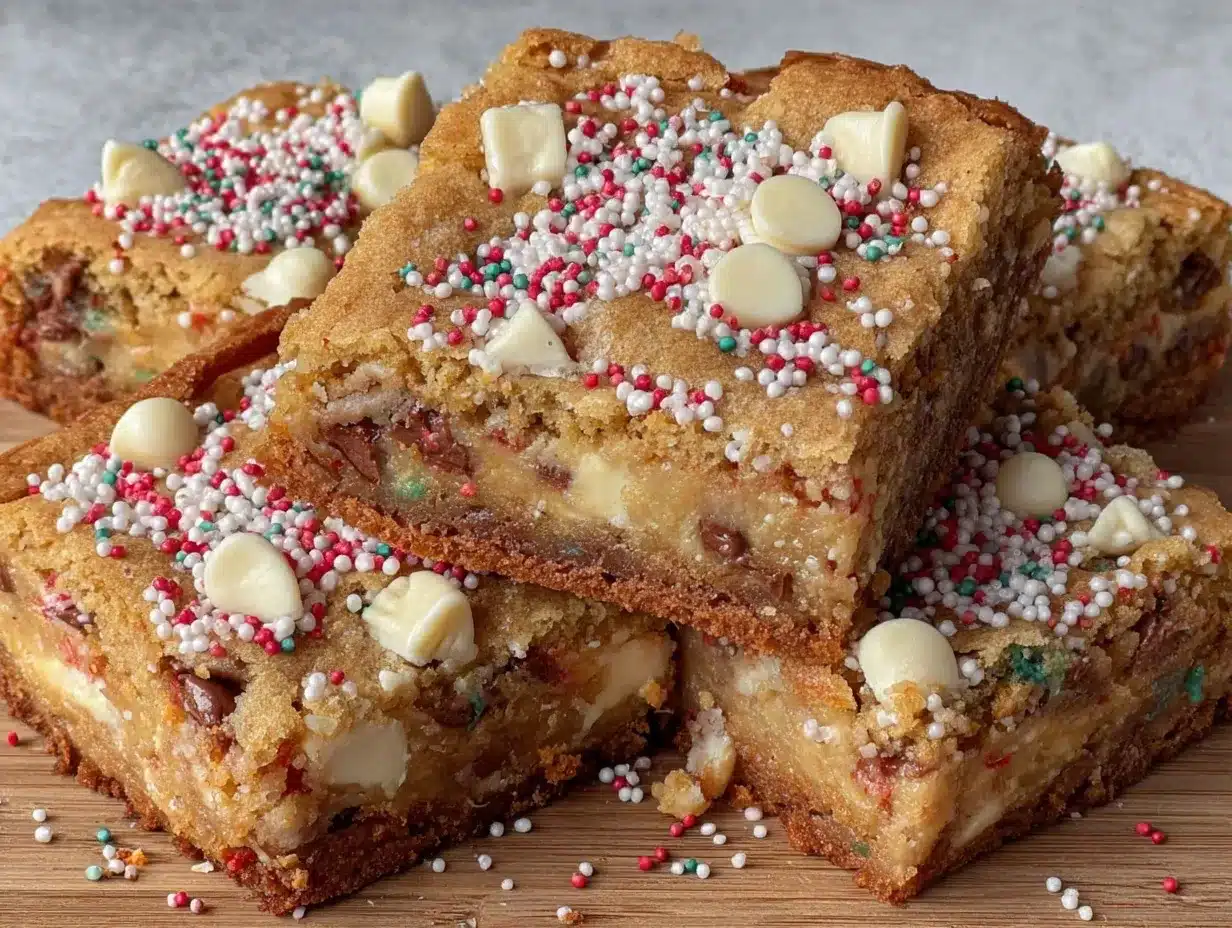
I assumed that cookie bars would be a quick fix—throw some dough in a pan and call it a day. It took about 45 minutes of trial and error for that to fall apart completely. The first batch was a crumbly mess, and honestly, the texture was all over the place. But those bright, speckled confetti bits promised something cheerful, and I wasn’t about to give up. After tweaking the mixing times and pan sizes, I ended up with these easy chewy confetti cookie bars that are as forgiving as they are fun to make.
What surprised me most was how these bars aren’t just kid-friendly snacks for back-to-school chaos—they’re little mood boosters wrapped in chewy, colorful bites. The way the edges get just a tad crisp while the center stays soft is a neat trick I stumbled on, and it’s become my go-to when I want something quick, satisfying, and just a bit nostalgic. No fancy ingredients, no complicated steps—just a dependable recipe that sticks with you through lunchboxes and after-school cravings.
There’s something quietly reassuring about knowing you can whip these up even on the busiest mornings, and their cheerful look somehow turns hectic afternoons into something a little brighter. It’s not just a bar; it’s a small moment of simple joy that makes the back-to-school rush feel less chaotic. I keep coming back to this recipe because it’s honest, practical, and surprisingly comforting—just like a good cookie should be.
Why You’ll Love This Recipe
When it comes to back-to-school snacks, you want something fast and fuss-free but still a little special. These easy chewy confetti cookie bars hit that sweet spot perfectly. I’ve tested this recipe on more than one hectic morning, and trust me, it delivers every time.
- Quick & Easy: These cookie bars come together in about 30 minutes of hands-on time, with a total bake time under 20 minutes—ideal for busy mornings or last-minute after-school treats.
- Simple Ingredients: No need to hunt down exotic stuff. The pantry staples you already have (like butter, eggs, and sprinkles) are all you need.
- Perfect for Back-to-School: They’re portable, not too messy, and loved by kids and adults alike. Great for lunchboxes, snack breaks, or even a quick dessert.
- Crowd-Pleaser: The chewy texture combined with the colorful confetti gives these bars a fun vibe that always gets compliments.
- Unbelievably Delicious: The slightly crisp edges balance the chewy middle, making every bite satisfying and just a little bit addictive.
What really sets this recipe apart is the delicate balance of chewiness and crunch—and the way the confetti sprinkles melt just enough to add bursts of sweetness without turning the bars into a sugar bomb. I also love that you can customize the sprinkles for any season or theme, making these bars versatile beyond just back-to-school.
Honestly, these bars have become my secret weapon for turning hectic afternoons into moments worth savoring. Whether it’s a quick grab from the fridge or a sweet surprise in a lunchbox, they don’t just fill a hunger gap—they bring a little smile with them.
What Ingredients You Will Need
This recipe uses simple, wholesome ingredients to deliver bold flavor and satisfying texture without the fuss. Most are pantry staples, and you can swap a few to suit dietary needs or preferences.
- Unsalted butter, softened (adds richness and chewiness; I prefer Kerrygold for a creamy taste)
- Granulated sugar (for sweetness and structure)
- Brown sugar, packed (adds moisture and depth; light brown sugar is best)
- Large eggs, room temperature (helps bind the dough and add softness)
- Pure vanilla extract (quality matters here—Nielsen-Massey is a favorite)
- All-purpose flour (the base for the dough; you can use almond flour for a gluten-free twist)
- Baking soda (for a slight lift)
- Salt (balances sweetness)
- Confetti sprinkles (choose sturdy ones that don’t bleed color; Wilton brand works well)
Optional:
- Mini chocolate chips (for extra melty pockets)
- Chopped nuts (walnuts or pecans for crunch)
- Dairy-free milk if you want to add a splash to adjust dough consistency
For best results, I recommend weighing your flour or spooning it into the measuring cup rather than scooping directly—that little detail made a world of difference in texture on my second try. Also, if you’re making these during the school year, swapping the confetti for seasonal sprinkles or even some mini M&Ms can keep things fresh and fun.
Equipment Needed
- 9×13-inch baking pan (metal works best for even heat distribution; I used a non-stick one and it was a breeze to clean)
- Mixing bowls (one large for wet ingredients, one for dry)
- Electric hand mixer or stand mixer (optional but speeds up creaming butter and sugars)
- Spatula or wooden spoon (for folding in sprinkles without breaking them)
- Measuring cups and spoons (for precise ingredient amounts)
- Cooling rack (helps the bars cool evenly without sogginess)
If you don’t have a mixer, no worries—you can still make these by hand. Just be prepared for a bit more muscle work when creaming the butter and sugar. For budget-friendly options, a sturdy wooden spoon and good rubber spatula will do the trick. Also, I learned the hard way that a metal pan gives a crisper edge than glass, so if you want that classic cookie bar texture, metal is the way to go.
Preparation Method
- Preheat your oven to 350°F (175°C). Grease the 9×13-inch baking pan lightly with butter or line it with parchment paper for easy removal. This step takes about 5 minutes.
- Cream the butter and sugars. In a large bowl, beat 1 cup (227g) softened unsalted butter with 1 cup (200g) granulated sugar and 1 cup (220g) packed light brown sugar until the mixture is light and fluffy (about 3-5 minutes). The texture should look pale and cloud-like. This helps create that chewy texture.
- Add eggs and vanilla. Beat in 2 large eggs, one at a time, ensuring each is fully incorporated before adding the next. Stir in 2 teaspoons pure vanilla extract. The batter will look glossy and smooth now.
- Combine dry ingredients. In a separate bowl, whisk together 3 cups (375g) all-purpose flour, 1 teaspoon baking soda, and 1 teaspoon salt. Slowly add the dry mix to the wet ingredients, mixing on low speed just until combined—don’t overmix or the bars will be tough.
- Fold in 1 cup of confetti sprinkles gently. Be careful not to over-stir, or the colors might bleed. If you want, add ½ cup mini chocolate chips or chopped nuts here.
- Spread the dough evenly in the prepared pan. Use a spatula to smooth the top, pressing lightly so it’s even. This step takes about 2 minutes.
- Bake for 18-20 minutes. The edges should be golden brown, and the center should look set but still soft when you gently press it. A toothpick inserted in the center might come out with a few moist crumbs but not wet batter. Overbaking will dry the bars out.
- Cool completely in the pan on a wire rack. This usually takes about 30 minutes. Cutting into warm bars will make them crumble.
Pro tip: If you want cleaner edges, chill the dough for 15 minutes before baking. Also, I like to rotate the pan halfway through baking to get even coloring. Once cooled, cut into 12-15 bars depending on desired size.
Cooking Tips & Techniques
One thing I learned the hard way is that the balance between chewy and crisp is all about timing. Bake too long, and you lose that tender bite; too short, and the bars might fall apart. Setting a timer and using an oven thermometer can save you from guesswork.
Creaming butter and sugars thoroughly is key to texture here. It traps air, giving the dough lift and softness. If your butter is too cold, the mixture won’t fluff properly. I usually let mine sit out for at least 30 minutes before starting.
Folding in the sprinkles gently minimizes color bleed and keeps their shape. I’ve tried mixing them aggressively before, and the dough turned into a pastel mess. Patience here really pays off.
When cutting bars, use a sharp knife and wipe it clean between cuts for neater slices. If you’re in a rush, chilling the bars for an hour helps firm them up, making cutting easier.
Multitasking tip: While the bars bake, you can prep school lunches or clean up your workspace. These bars bake relatively quickly, so it’s a nice little window to get other things done without hovering over the oven.
Variations & Adaptations
- Gluten-Free Version: Swap all-purpose flour for a gluten-free baking blend. Make sure it includes xanthan gum for structure.
- Vegan Adaptation: Use vegan butter and substitute eggs with flax eggs (1 tablespoon ground flaxseed + 3 tablespoons water per egg). Use dairy-free sprinkles.
- Flavor Twist: Add ½ teaspoon almond extract along with vanilla for a nutty aroma, or sprinkle some cinnamon into the dry ingredients for warmth.
- Seasonal Sprinkles: Customize sprinkles for holidays or themes—pumpkin shapes for fall, pastel colors for spring, or even mini chocolate chips for a double-chocolate twist.
- Personal Favorite: I’ve tossed in chopped toasted pecans and a handful of mini chocolate chips for extra crunch and gooey pockets. It feels like a little upgrade without complicating the recipe.
For a no-bake variation, you can press the dough into bars and refrigerate them until firm, though the texture won’t be quite the same. If you want to experiment with baking methods, a convection oven can reduce baking time by a couple of minutes but watch closely to avoid drying out.
Serving & Storage Suggestions
These cookie bars are best served at room temperature, but I’ll admit I sometimes enjoy them chilled straight from the fridge when the weather’s warm. Their chewy texture holds up well to both.
Pair these bars with a cold glass of milk, a cup of tea, or even a warm mug of cocoa for an after-school snack that hits just right. They also travel well for lunchboxes or potluck contributions.
Store leftover bars in an airtight container at room temperature for up to 3 days. For longer storage, keep them in the fridge for up to a week or freeze in a sealed bag for up to 3 months. Thaw at room temperature before serving.
Flavors actually mellow and deepen slightly after a day, making second-day bars even tastier. Just don’t expect them to last that long around here!
Nutritional Information & Benefits
One confetti cookie bar (assuming 12 bars per batch) contains roughly:
| Calories | ~200 kcal |
|---|---|
| Fat | 9g |
| Carbohydrates | 28g |
| Sugar | 18g |
| Protein | 2g |
The recipe is rich in energy-dense ingredients, making it a great quick fuel for busy kids. Using unsalted butter and moderate sugar keeps things balanced, while the sprinkles add just a touch of fun without overwhelming sweetness.
If you swap all-purpose flour for almond flour, you’ll boost the protein and reduce carbs, which might suit low-carb dietary needs. Keep in mind that sprinkles can contain allergens like gluten or artificial dyes, so check labels if allergies are a concern.
From a wellness perspective, these bars are a treat that fits into a balanced lifestyle—perfect for those moments when you need a pick-me-up without fuss or guilt.
Conclusion
Easy chewy confetti cookie bars are one of those recipes that stick with you—not just because they’re tasty but because they’re practical and forgiving. They fit neatly into busy back-to-school routines without demanding hours or fancy ingredients. I love that they bring a little bit of color and joy to hectic days, and honestly, I keep coming back to the chewy texture and that subtle crisp edge.
Feel free to tweak the sprinkles, add nuts, or try different extracts to make these bars your own. It’s a recipe that invites a little customization without losing its charm or simplicity.
If you give this recipe a try, I’d love to hear how you make it your own—comments and stories always make my day. Here’s to easy, cheerful snacks that make school days just a little sweeter.
Frequently Asked Questions
Can I use gluten-free flour for these confetti cookie bars?
Yes, a gluten-free baking blend with xanthan gum works well. The texture might be slightly different but still delicious.
How do I prevent the sprinkles from bleeding color?
Fold the sprinkles in gently at the end of mixing and avoid over-stirring. Using sturdy, high-quality sprinkles like Wilton helps too.
Can I make these bars ahead of time?
Absolutely. They store well in an airtight container for several days and freeze nicely for months. Just thaw before serving.
What’s the best way to cut cookie bars neatly?
Let the bars cool completely or chill them for about an hour. Use a sharp knife, wiping between cuts for clean edges.
Are there any good substitutions for eggs in this recipe?
For vegan or egg-free versions, flax eggs (1 tbsp ground flaxseed + 3 tbsp water per egg) work well and maintain chewiness.
For a colorful twist on fun treats, you might also enjoy the Creamy Dr. Seuss Rainbow Cupcake Ice Cream Pops or the Pink Velvet Cookie Crumble Board for a completely different but equally playful dessert idea.
Pin This Recipe!
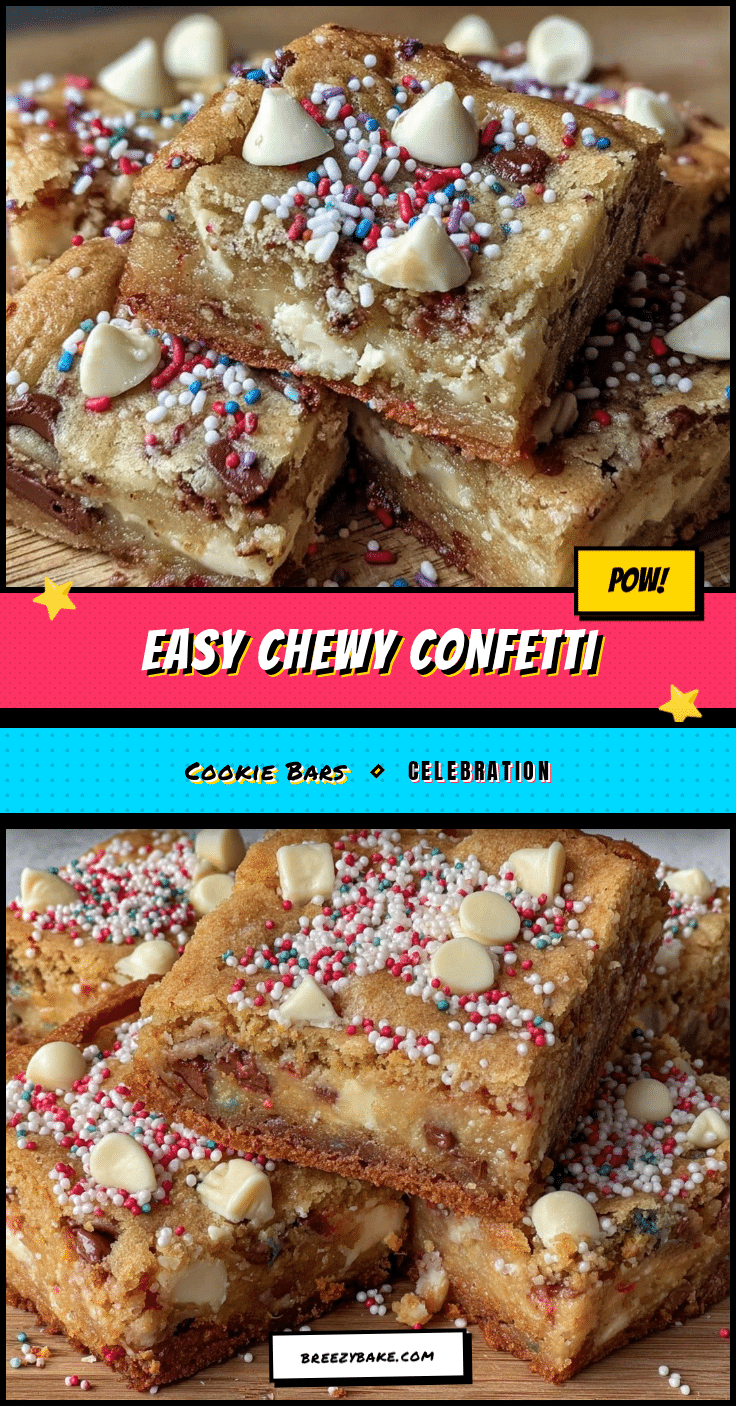
Easy Chewy Confetti Cookie Bars
These easy chewy confetti cookie bars are perfect for back-to-school snacks, featuring a delightful balance of chewy centers and slightly crisp edges with colorful sprinkles.
- Prep Time: 10 minutes
- Cook Time: 20 minutes
- Total Time: 40 minutes
- Yield: 12-15 bars 1x
- Category: Snack
- Cuisine: American
Ingredients
- 1 cup (227g) unsalted butter, softened
- 1 cup (200g) granulated sugar
- 1 cup (220g) packed light brown sugar
- 2 large eggs, room temperature
- 2 teaspoons pure vanilla extract
- 3 cups (375g) all-purpose flour
- 1 teaspoon baking soda
- 1 teaspoon salt
- 1 cup confetti sprinkles
- Optional: ½ cup mini chocolate chips
- Optional: ½ cup chopped nuts (walnuts or pecans)
- Optional: dairy-free milk (to adjust dough consistency)
Instructions
- Preheat your oven to 350°F (175°C). Grease a 9×13-inch baking pan lightly with butter or line it with parchment paper.
- In a large bowl, cream together the softened butter, granulated sugar, and brown sugar until light and fluffy, about 3-5 minutes.
- Beat in the eggs one at a time, ensuring each is fully incorporated, then stir in the vanilla extract until the batter is glossy and smooth.
- In a separate bowl, whisk together the all-purpose flour, baking soda, and salt.
- Slowly add the dry ingredients to the wet ingredients, mixing on low speed just until combined. Do not overmix.
- Fold in the confetti sprinkles gently to avoid color bleeding. Add mini chocolate chips or chopped nuts if desired.
- Spread the dough evenly in the prepared baking pan using a spatula, smoothing the top and pressing lightly.
- Bake for 18-20 minutes until edges are golden brown and the center is set but still soft. A toothpick inserted should come out with a few moist crumbs.
- Cool completely in the pan on a wire rack for about 30 minutes before cutting into 12-15 bars.
Notes
For cleaner edges, chill the dough for 15 minutes before baking. Rotate the pan halfway through baking for even coloring. Use a sharp knife and wipe it clean between cuts for neat slices. Chilling bars before cutting helps prevent crumbling. Use sturdy sprinkles like Wilton to avoid color bleeding. For gluten-free, substitute all-purpose flour with a gluten-free blend containing xanthan gum. For vegan, use vegan butter and flax eggs.
Nutrition
- Serving Size: 1 bar (assuming 12 b
- Calories: 200
- Sugar: 18
- Fat: 9
- Carbohydrates: 28
- Protein: 2
Keywords: confetti cookie bars, chewy cookie bars, back-to-school snacks, easy cookie bars, colorful cookie bars, kid-friendly snacks