My doorbell rang just as I was about to collapse into the couch after a long day. Unexpected, right? My kid’s friend showed up with that hopeful grin, and the fridge was basically echoing back at me—except for a half bag of chocolate chips and a tub of cream cheese. No flour, no eggs, no time to run to the store. Honestly, I was scrambling, but then I remembered a little hack I’d been tinkering with: chocolate chip cookie dough bites that don’t require baking or a ton of fuss.
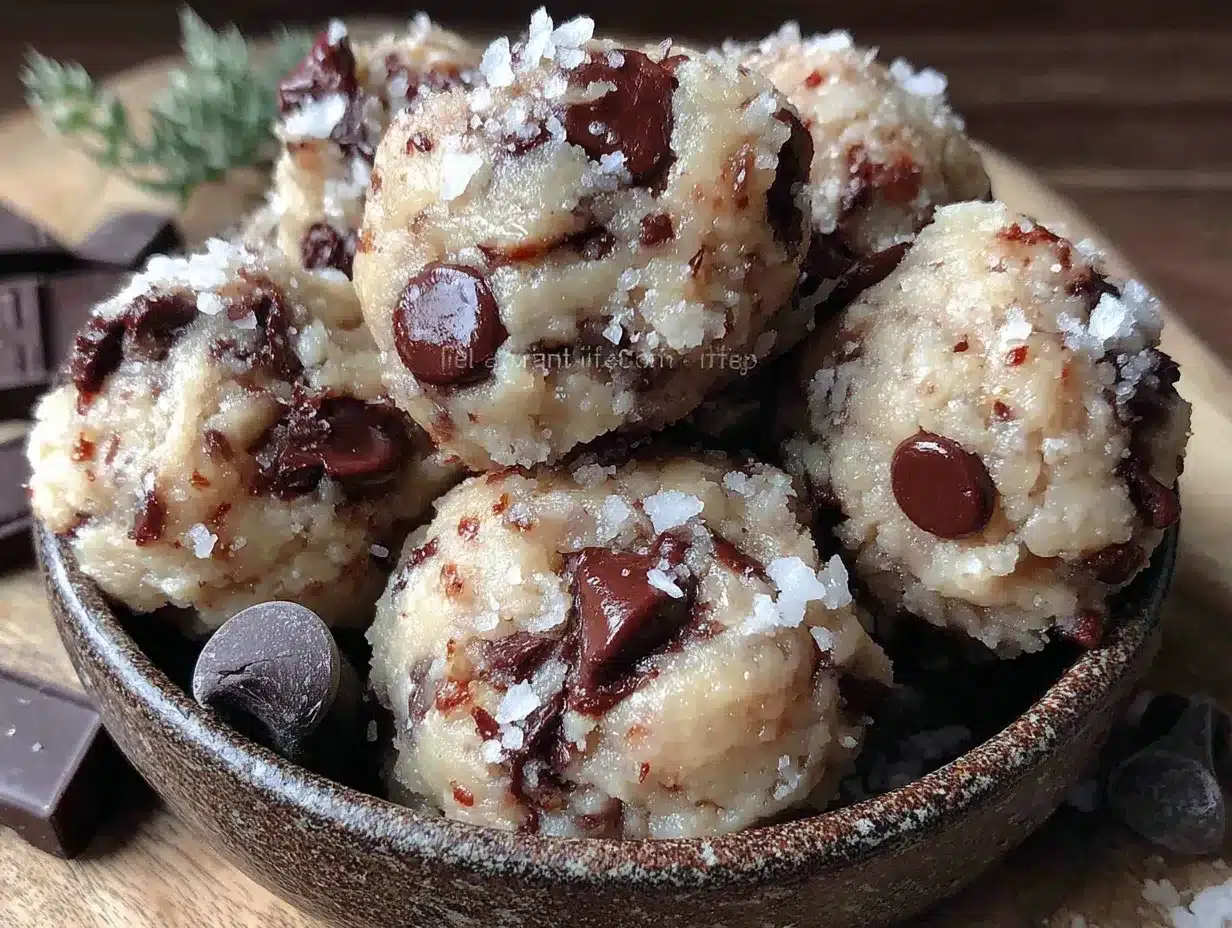
The kitchen smelled faintly of vanilla and butter as I mashed ingredients together, thinking, “Well, this better work.” Those easy after-school chocolate chip cookie dough bites came together quicker than I expected, and the kids gobbled them up like there was no tomorrow. The texture was just right—not too sweet, a little chewy, and packed with tiny chocolate gems. It’s funny how a last-minute scramble can turn into something you find yourself making again and again. No stress, no mess, just a simple snack that feels like a treat but is actually pretty wholesome.
What stuck with me was how this recipe became my go-to for those chaotic afternoons when you want to serve something homemade but don’t have the usual suspects on hand. It’s easy, kid-friendly, and honestly comforting in a way that makes me feel like I’m doing something right—even on the busiest days.
Why You’ll Love This Recipe
Honestly, these easy after-school chocolate chip cookie dough bites are a lifesaver for parents and snack lovers alike. They’re one of those recipes I’ve tested multiple times, tweaking the balance of sweetness and texture until it felt just right. Here’s why this recipe stands out:
- Quick & Easy: Comes together in under 15 minutes—perfect for those hectic school afternoons when hunger strikes hard.
- Simple Ingredients: No fancy trips to specialty stores needed; you’ll likely have everything stocked in your pantry and fridge.
- Perfect for Kids’ Snacks: Bite-sized and mess-free, they’re easy to pack for lunchboxes or snack-time at home.
- Crowd-Pleaser: Every kid I’ve served them to gives a thumbs-up, and adults sneak bites too (not that I blame them).
- Unbelievably Delicious: The creamy, buttery base with mini chocolate chips is the kind of comfort food that feels indulgent but is actually pretty light.
What makes this recipe different? The secret is in using cream cheese and a touch of maple syrup to get that soft, smooth dough texture without any eggs or baking. It’s a little twist I picked up after experimenting with other no-bake cookie dough recipes. Plus, swapping in mini chocolate chips keeps every bite bursting with melty pockets of chocolate goodness. Honestly, it’s like having cookie dough you can eat safely—no oven, no wait. This snack has become my quiet little secret weapon for keeping the kids happy and the kitchen chaos under control.
What Ingredients You Will Need
This recipe is built on simple, wholesome ingredients that come together to deliver a rich, satisfying flavor and soft texture without any complicated steps. Most of these are pantry staples, so you probably won’t have to make a special trip. If you do, the substitutions are pretty flexible too.
- Unsalted Butter, softened – Adds richness and helps bind the dough.
- Cream Cheese, softened – Gives the dough a creamy texture and a slight tang that balances sweetness.
- Brown Sugar, packed – For that deep, caramel-like sweetness and moisture.
- Maple Syrup or honey – Natural sweetener that keeps the dough soft (maple syrup gives a nice flavor).
- Vanilla Extract – Just a teaspoon to bring out the cookie flavors.
- All-Purpose Flour (heat-treated*) – The base of the dough; heat-treating makes it safe to eat raw.
(*Tip: Spread flour on a baking sheet and bake at 350°F/175°C for 5 minutes to kill bacteria.) - Mini Chocolate Chips – I recommend Ghirardelli or Nestle Toll House mini chips for that perfect melt and sweetness.
- Salt, a pinch – To balance the sweetness and enhance flavor.
Substitution tips: Use almond flour for a gluten-free option, but note the texture will be a bit different—more crumbly but still tasty. You can swap cream cheese with a dairy-free alternative if necessary, though the texture will be slightly less creamy. For sweetness, honey works well if you don’t have maple syrup. If you want to sneak in some nutrition, try adding a tablespoon of ground flaxseed or a handful of finely chopped nuts for extra texture and health benefits.
Equipment Needed
- Mixing Bowls: At least one medium bowl to combine ingredients. I like using glass or stainless steel for easy cleanup.
- Hand Mixer or Stand Mixer: Makes cream cheese and butter mixing effortless, but you can also do it by hand with a sturdy wooden spoon if needed.
- Measuring Cups and Spoons: For accuracy, especially with sugar and liquids.
- Spatula: A flexible silicone spatula helps scrape down the bowl and fold in chocolate chips gently.
- Sheet Pan or Plate: For chilling the dough bites before serving.
- Plastic Wrap or Airtight Container: To store the cookie dough bites once formed.
If you don’t have a mixer, no worries—just plan on a bit more arm work to get the butter and cream cheese smooth. I once whipped these up using a fork and patience during a camping trip, so it can be done anywhere! For those on a budget, plastic mixing bowls and a hand whisk work just fine. Also, keep your butter and cream cheese at room temperature before starting; it makes mixing way easier and avoids lumps.
Preparation Method
- Soften your butter and cream cheese: Leave them out for about 30 minutes until they yield slightly to gentle pressure. This step is key for smooth mixing and a creamy dough texture.
- Beat together butter, cream cheese, and brown sugar: In a medium bowl, use a hand mixer or stand mixer on medium speed for about 2-3 minutes until the mixture is light, fluffy, and well combined. You want it to look pale and smooth, almost like frosting.
- Add maple syrup and vanilla extract: Pour in 2 tablespoons of maple syrup and 1 teaspoon of vanilla extract. Beat again for 30 seconds to incorporate evenly. This sweetens the dough naturally and gives it that comforting aroma.
- Mix in heat-treated flour and salt: Gradually add 1 cup (125g) of heat-treated all-purpose flour and a pinch of salt to the wet mixture. Stir gently with a spatula or on low mixer speed until just combined. Resist the urge to overmix; you want the dough soft and pliable, not tough.
- Fold in mini chocolate chips: Add ½ cup (90g) of mini chocolate chips and fold them in carefully so they’re evenly distributed throughout the dough. The mini chips melt just right in each bite.
- Chill the dough: Cover the bowl with plastic wrap and refrigerate for at least 20 minutes. This helps the dough firm up so it’s easier to shape into bites.
- Form dough bites: Using a teaspoon or small cookie scoop, portion out bite-sized balls of dough (about 1 inch or 2.5 cm in diameter). Place them on a lined baking sheet or plate. If the dough feels sticky, wet your hands lightly before rolling.
- Final chilling: Pop the dough bites back into the fridge for another 10 minutes to set. This step makes them hold together nicely when served.
Note: If the dough seems too soft at any point, add a little more flour, a tablespoon at a time, until it’s manageable. If it’s too dry, a touch more maple syrup or a teaspoon of milk can smooth it out. The dough should feel soft, not crumbly or overly sticky. The aroma of vanilla and chocolate chips coming together will tell you you’re on the right track!
Cooking Tips & Techniques
Since this recipe skips baking, the focus is on texture and flavor balance. Here are some tips I’ve picked up over time:
- Heat-Treat Your Flour: This is crucial to keep the dough safe since it’s raw. Don’t skip this step—it’s easy and keeps everyone safe.
- Room Temperature Ingredients: Softened butter and cream cheese blend better, preventing lumps and giving that smooth, creamy consistency you want.
- Don’t Overmix the Dough: Overworking flour can make cookie dough tough. Stir just until combined for a tender bite.
- Mini Chocolate Chips are Key: Regular-sized chips can overwhelm the texture. The minis spread flavor evenly without overpowering.
- Chill Time is Your Friend: Don’t rush the chilling steps. They firm up the dough, making it easier to handle and improving texture.
- Store Properly: Keep the bites chilled until serving to maintain firmness and freshness.
One time I skipped chilling and ended up with gooey little blobs that melted too fast (lesson learned!). Also, if you want to mix it up, adding a tiny pinch of cinnamon or a few chopped nuts can give a lovely twist. I often multitask by prepping these while making a batch of pink velvet cookie crumble board for a party, so it’s a great recipe to have in your back pocket.
Variations & Adaptations
These chocolate chip cookie dough bites are super adaptable, which is great if you want to mix things up or accommodate dietary needs.
- Peanut Butter Swirl: Swap half the butter for creamy peanut butter for a rich, nutty flavor kids tend to love.
- Vegan Version: Use dairy-free cream cheese and vegan butter. Maple syrup keeps it naturally sweet, and you can find vegan mini chocolate chips at most stores.
- Nut-Free: Stick with the base recipe and check your chocolate chips for cross-contamination if allergies are a concern.
- Seasonal Twist: Add mini white chocolate chips and dried cranberries for a festive holiday flavor.
- Protein Boost: Stir in a scoop of your favorite protein powder (vanilla or chocolate) to turn these bites into a post-workout snack.
Personally, I once tried adding a handful of crushed pretzels for a salty crunch and it was a hit at a kid’s birthday party. If you want a fun take, pairing these bites with a creamy layer of your homemade strawberry crème puffs (recipe here) makes for a delicious mini dessert spread.
Serving & Storage Suggestions
These cookie dough bites are best served chilled, straight from the fridge. The cool temperature keeps them firm and chewy—perfect for little hands. I like to pop a few on a colorful plate for after-school snack time or tuck them into small containers for lunchbox treats.
They pair wonderfully with a glass of cold milk or a warm cup of tea if you want something cozy. For a fun snack board, consider adding some fresh fruit and easy treats like chocolate-covered strawberry mousse cups to round things out.
To store, keep the bites in an airtight container in the refrigerator for up to 5 days. They freeze beautifully too—just pop them in a freezer-safe bag and thaw in the fridge overnight when you want a quick snack. Reheating isn’t necessary since these are best enjoyed cold or at room temperature, but if they get too firm, letting them sit out for 5 minutes softens them nicely.
The flavor actually deepens a bit after a day or two, making them even more satisfying. So if you’re prepping snacks ahead for the week, these are a great candidate for meal prep!
Nutritional Information & Benefits
Each bite is roughly 70-80 calories, depending on size, making them a reasonable treat for kids and adults alike. The cream cheese and butter provide a dose of healthy fats and a little protein, while the maple syrup adds natural sweetness without refined sugars.
This recipe is free from eggs and does not require baking, reducing the risk for some common allergens and making it an easy option for families with sensitivities. Gluten-free eaters can swap to almond flour, though the texture will shift slightly.
While these bites are a sweet treat, they feel a bit better knowing they’re made with simple ingredients and no artificial preservatives. I appreciate having a snack that’s quick to pull together and that my kids actually enjoy without a fuss. It’s a small win in the daily snack battle.
Conclusion
Easy after-school chocolate chip cookie dough bites have become a quiet staple in my kitchen—simple, quick, and surprisingly satisfying. They fit perfectly into those moments when you want to offer a homemade snack but life just won’t slow down. Plus, they’re versatile enough to adapt to your family’s tastes and dietary needs.
Whether you’re making them for the kids, yourself, or a last-minute gathering, these bites have a way of landing just right. I love how they combine comfort with convenience, and I hope you find them as handy and delicious as I do.
If you give them a try, I’d love to hear how you customize yours or what moments you find them perfect for—share your thoughts and tweaks below. Here’s to more easy, tasty bites that make the chaos a little sweeter!
FAQs
Can I make these cookie dough bites without cream cheese?
You can try substituting cream cheese with extra butter or a dairy-free cream cheese alternative. Just expect a slightly different texture and tanginess. The cream cheese helps keep the dough soft and creamy.
Are these cookie dough bites safe to eat raw?
Yes, as long as you heat-treat the flour to kill any bacteria. This step is important since the dough isn’t baked. Also, this recipe contains no eggs, which reduces risk.
How long will these cookie dough bites stay fresh?
Stored in an airtight container in the fridge, they last up to 5 days. You can also freeze them for up to 2 months—just thaw overnight in the fridge before enjoying.
Can I use regular chocolate chips instead of mini ones?
You can, but mini chocolate chips distribute more evenly and melt more pleasantly in these small bites. Regular chips might feel too big and overpower the texture.
Is there a way to make this recipe gluten-free?
Absolutely! Swap the all-purpose flour for almond flour or another gluten-free flour blend. Just note the texture will be a little different—more crumbly but still tasty.
Pin This Recipe!

Easy After-School Chocolate Chip Cookie Dough Bites Recipe Perfect for Kids Snacks

These no-bake chocolate chip cookie dough bites are quick, kid-friendly snacks made with simple ingredients like cream cheese and mini chocolate chips. Perfect for after-school treats, they are soft, chewy, and safe to eat raw with heat-treated flour.
- Prep Time: 10 minutes
- Cook Time: 0 minutes
- Total Time: 30 minutes
- Yield: 24 bites 1x
- Category: Snack
- Cuisine: American
Ingredients
- 1/2 cup unsalted butter, softened
- 4 oz cream cheese, softened
- 1/2 cup packed brown sugar
- 2 tablespoons maple syrup or honey
- 1 teaspoon vanilla extract
- 1 cup all-purpose flour (heat-treated)
- 1/2 cup mini chocolate chips
- Pinch of salt
Instructions
- Soften your butter and cream cheese by leaving them out for about 30 minutes until they yield slightly to gentle pressure.
- Beat together butter, cream cheese, and brown sugar in a medium bowl using a hand mixer or stand mixer on medium speed for 2-3 minutes until light, fluffy, and well combined.
- Add maple syrup and vanilla extract, then beat again for 30 seconds to incorporate evenly.
- Gradually add heat-treated flour and salt to the wet mixture. Stir gently with a spatula or on low mixer speed until just combined. Do not overmix.
- Fold in mini chocolate chips carefully so they are evenly distributed throughout the dough.
- Cover the bowl with plastic wrap and refrigerate for at least 20 minutes to firm up the dough.
- Using a teaspoon or small cookie scoop, portion out bite-sized balls of dough (about 1 inch in diameter) and place them on a lined baking sheet or plate. Wet hands lightly if dough is sticky.
- Chill the dough bites in the refrigerator for another 10 minutes to set before serving.
Notes
Heat-treat the flour by spreading it on a baking sheet and baking at 350°F (175°C) for 5 minutes to kill bacteria. Keep butter and cream cheese at room temperature for easier mixing. Do not overmix the dough to avoid toughness. Mini chocolate chips melt better and distribute flavor evenly. Chill dough bites well to help them hold shape. Store in airtight container in fridge up to 5 days or freeze up to 2 months.
Nutrition
- Serving Size: 1 bite (about 1 inch
- Calories: 75
- Sugar: 6
- Sodium: 40
- Fat: 5
- Saturated Fat: 3
- Carbohydrates: 8
- Fiber: 0.3
- Protein: 1
Keywords: chocolate chip cookie dough bites, no bake cookie dough, kids snacks, easy snack recipe, after school snack, no egg cookie dough


