Third time this week I pulled that Firecracker Popsicle Cake out of the freezer—and the only reason it wasn’t a fourth was because I ran out of graham crackers. The first batch came out looking like a toddler’s art project, all smeared and lopsided, but the flavor? That was the hook. My kids stood over the counter, spoons in hand, scraping the edges of the pan before I could even get a proper slice. I knew I was onto something.
This isn’t a fancy dessert. It’s the kind of thing you throw together when the thermometer hits ninety and turning on the oven feels like a personal attack. Layers of vanilla ice cream, strawberry sorbet, and crushed firecracker popsicles (you know, those red, white, and blue ones that turn your tongue all kinds of colors) stacked on a buttery graham cracker crust. It looks like a party on a plate, tastes like childhood, and requires exactly zero baking skills.
I kept tweaking it because the combination of creamy, fruity, and crunchy hit something I didn’t know I was looking for. The popsicles melt into the ice cream layers, leaving behind these little pockets of sweetness that catch you off guard. Honestly, it’s the easiest dessert I’ve made all summer, and I’m not sure I’ll ever go back to regular ice cream cake again.
Why You’ll Love This Recipe
This Easy No-Bake Firecracker Popsicle Cake is the kind of dessert that makes you look like a hero without any of the stress. I’ve tested it three ways (different pans, different layering orders, different freeze times) so you don’t have to guess a thing.
- No Oven Required : Perfect for those sweltering days when you want something cold and sweet without heating up the kitchen.
- Simple Ingredients : You only need a handful of store-bought items—ice cream, popsicles, whipped topping, and graham crackers. Nothing fancy.
- Perfect for Summer Parties : Fourth of July, backyard barbecues, poolside hangouts—this cake fits right in and always gets compliments.
- Crowd-Pleaser : Kids go wild for the colorful layers, and adults love the nostalgic popsicle flavor. Everyone wins.
- Make-Ahead Friendly : Assemble it the night before your event, freeze it, and forget about it until serving time. Zero last-minute panic.
What makes this version different from other ice cream cakes? It’s the firecracker popsicles. They add a subtle fruitiness and that signature red-white-and-blue swirl that regular ice cream just can’t replicate. Plus, the crushed popsicle pieces create little crunchy surprises throughout the creamy layers. It’s not just another frozen dessert—it’s the one that disappears fastest at every gathering I’ve brought it to.
I made this for a neighborhood potluck last week, and three people asked for the recipe before I even got my fork out. That’s when you know it’s a keeper.
What Ingredients You Will Need
This recipe uses simple, everyday ingredients to create something that tastes way more complicated than it actually is. Most of these are probably in your freezer or pantry right now.
- Firecracker popsicles (6-8 popsicles) — You know the ones: red, white, and blue striped, usually found in the box with all the summer flavors. Let them soften slightly at room temperature so you can crush them easily. (I prefer the brand Otter Pops for their intense fruit flavor, but any brand works.)
- Vanilla ice cream (1.5 quarts) — Go for a good quality vanilla bean or French vanilla for the creamiest texture. Let it sit out for 10-15 minutes to soften before spreading.
- Strawberry sorbet (1 pint) — This adds that bright, fruity layer and keeps the cake from being too heavy. Look for one with real fruit pieces if you can find it.
- Graham crackers (2 cups crushed) — You’ll need about 12-14 full sheets. Crush them fine for the crust, but leave a few chunkier pieces for texture on top. (Honey Maid is my go-to.)
- Butter (1/3 cup, melted) — Unsalted is best so you can control the salt level. It binds the crust together and adds richness.
- Whipped topping (8 ounces, thawed) — Cool Whip works perfectly here. It makes the layers light and airy without the fuss of making whipped cream from scratch.
- Condensed milk (1/2 cup, sweetened) — This is my secret ingredient. It helps bind everything together and adds a subtle caramel sweetness that balances the tart popsicles.
- Red and blue food coloring (optional) — If you want extra color contrast for the layers, a few drops go a long way. I used gel coloring for more vibrant results.
- Rainbow sprinkles (for garnish) — Because every no-bake cake deserves a little fun on top. (Use jimmies, not nonpareils—they hold their color better.)
If you’re looking for a gluten-free option, swap the graham crackers for gluten-free vanilla wafers or crushed gluten-free shortbread cookies. The texture will be slightly different, but still delicious. For a dairy-free version, use coconut milk-based ice cream and a dairy-free whipped topping—just make sure everything is softened to room temperature before layering.
Equipment Needed
You don’t need any fancy gadgets for this one. Here’s what you’ll need:
- 9×13-inch baking dish — This is the perfect size for getting nice, thick layers. Glass or metal both work fine. (I prefer glass so I can see the layers through the sides.)
- Mixing bowls (2-3 medium) — For crushing popsicles, mixing crust ingredients, and combining the creamy layers.
- Plastic wrap or parchment paper — Lining the dish makes removal a breeze. Don’t skip this step unless you enjoy wrestling with frozen cake.
- Rolling pin or food processor — For crushing graham crackers. A rolling pin and a zip-top bag work just as well as a food processor if you don’t mind a little arm work.
- Spatula — A rubber or silicone spatula helps spread the ice cream layers evenly without melting everything too fast.
- Sharp knife — For cutting clean slices once the cake is fully frozen. Run it under hot water between cuts for the best results.
I’ve made this cake with a cheap plastic spatula and a wooden spoon, and it still turned out great. Don’t overthink the equipment—just use what you have.
Preparation Method
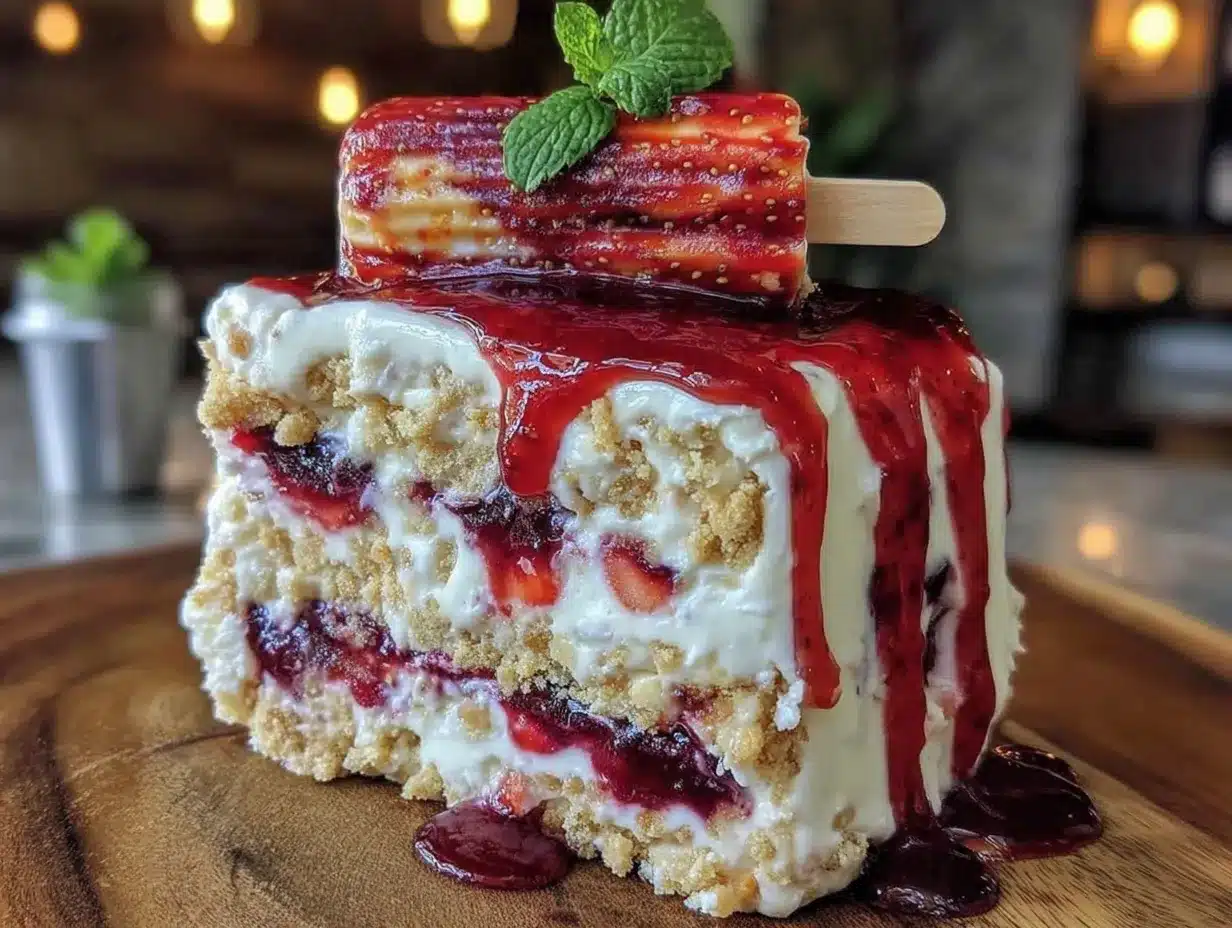
Let’s get to the fun part. This Easy No-Bake Firecracker Popsicle Cake comes together in about 20 minutes of active work, plus a few hours of freezing time.
- Prep the pan. Line your 9×13-inch dish with plastic wrap or parchment paper, leaving a few inches of overhang on the sides. This will help you lift the cake out later like a giant frozen present.
- Make the crust. Crush 2 cups of graham crackers into fine crumbs. (I use a rolling pin and a zip-top bag—therapeutic, honestly.) Mix the crumbs with 1/3 cup melted butter until everything looks like wet sand. Press this mixture firmly into the bottom of your lined dish. Pop it in the freezer while you work on the next step. (This sets the crust so it doesn’t mix into the ice cream layers.)
- Crush the popsicles. Unwrap your 6-8 firecracker popsicles and let them soften for about 5 minutes. Then crush them with a fork or pulse them in a food processor until you have a chunky, slushy mixture. You want some small pieces left—not completely liquid. Set aside.
- Soften the ice cream. Let your vanilla ice cream sit at room temperature for 10-15 minutes until it’s spreadable but not melted. In a large bowl, mix the softened ice cream with 1/2 cup sweetened condensed milk and 1 cup of the thawed whipped topping. Stir until smooth and creamy. (This mixture will be your middle layer—it’s what makes the cake so luscious.)
- Layer one: vanilla cream. Spread half of the vanilla cream mixture over the frozen crust. Use your spatula to smooth it out evenly. Freeze for 30 minutes until firm to the touch.
- Layer two: strawberry sorbet. Let your strawberry sorbet soften for 5 minutes, then spread it gently over the frozen vanilla layer. This layer is thinner than the others—about 1/2 inch thick. Freeze for another 30 minutes.
- Layer three: crushed popsicles. Spread the crushed firecracker popsicle mixture over the sorbet layer. It will look a little messy, but that’s okay—it adds character. Freeze for 20 minutes.
- Layer four: remaining vanilla cream. Spread the rest of the vanilla cream mixture over the popsicle layer. Smooth the top with your spatula. At this point, your cake should have four distinct layers: crust, vanilla, sorbet, popsicle, and another vanilla.
- Top with whipped topping. Spread the remaining thawed whipped topping over the top layer. Use the back of a spoon to create little peaks and swirls if you want that bakery look. Sprinkle rainbow sprinkles generously on top.
- Freeze overnight. Cover the dish with plastic wrap and freeze for at least 6 hours, but overnight is best. The longer it freezes, the cleaner your slices will be. (Trust me on this—I rushed it once and ended up with a delicious mess.)
- Serve. When ready to serve, lift the cake out of the dish using the plastic wrap overhang. Let it sit at room temperature for 5 minutes before slicing. Run your knife under hot water between cuts for those picture-perfect slices.
One tip I learned the hard way: don’t skip the freezing time between layers. If you rush, the colors bleed into each other and you lose that beautiful striped effect. It still tastes amazing, but it won’t look as impressive.
Cooking Tips & Techniques
After making this Firecracker Popsicle Cake half a dozen times, I’ve picked up a few tricks that make all the difference.
Soften ingredients gradually. The biggest mistake people make is leaving ice cream out too long. Ten to fifteen minutes is all you need. If it’s too soft, it won’t hold its shape when you spread it. If it’s too hard, you’ll tear the layer underneath. You want it to be the consistency of thick frosting—spreadable but not runny.
Work in a cool kitchen. If it’s a hot day, turn on the air conditioning or work near a fan. The cooler your workspace, the easier it is to keep the layers separate. I made the mistake of assembling this on a 95-degree afternoon, and let me tell you, it was a race against time. The layers started melting together before I could get them in the freezer.
Use a hot knife for slicing. This is the pro tip that changes everything. Run your knife under hot water, dry it quickly, and slice. Repeat between each cut. You’ll get clean, sharp edges that show off all those beautiful layers.
Don’t overmix the crushed popsicles. You want some chunks remaining—they add texture and visual interest. If you blend them too much, you’ll end up with a uniform pink slush that loses the firecracker magic.
Freeze the crust first. This is non-negotiable. A warm crust will melt your first ice cream layer, creating a soggy mess. Give it at least 15 minutes in the freezer before adding anything on top.
I once forgot to freeze the crust and ended up with a graham cracker sludge at the bottom of my cake. It still tasted fine, but the texture was off. Lesson learned.
Variations & Adaptations
This recipe is endlessly adaptable. Here are a few ways to switch it up:
Berry Blast Version — Swap the strawberry sorbet for raspberry or mixed berry sorbet. Use berry-flavored popsicles instead of firecracker. The result is a deeper, more intense fruit flavor that’s perfect for berry lovers.
Tropical Twist — Replace the strawberry sorbet with mango sorbet and use tropical fruit popsicles (pineapple, mango, or coconut). Add a layer of toasted coconut flakes between the layers for extra texture. This version tastes like a vacation.
Chocolate Lover’s Dream — Swap the graham cracker crust for chocolate cookie crumbs (Oreos work great). Use chocolate ice cream instead of vanilla, and skip the sorbet. Crush chocolate-flavored popsicles for the middle layer. It’s rich, decadent, and completely addictive.
Dairy-Free Option — Use coconut milk-based vanilla ice cream, dairy-free whipped topping, and dairy-free sorbet. The crust can be made with vegan butter and gluten-free cookies if needed. I tested this version for a friend with dairy allergies, and she said it was the best frozen dessert she’d had in years.
Mini Cakes — Instead of a 9×13 dish, use individual ramekins or muffin tins lined with plastic wrap. Layer the ingredients in each cup and freeze. These are perfect for parties where everyone wants their own little cake.
My personal favorite variation is the tropical twist with a drizzle of passion fruit syrup on top. It adds a tangy kick that cuts through the sweetness beautifully.
Serving & Storage Suggestions
This Firecracker Popsicle Cake is best served straight from the freezer, but let it sit at room temperature for 5 minutes before slicing. This softens it just enough to cut cleanly without it being rock-hard.
Presentation ideas: Serve each slice on a chilled plate with a dollop of fresh whipped cream and extra sprinkles. For a Fourth of July party, add a small American flag toothpick to each slice. For a summer barbecue, pair it with fresh berries and a mint sprig.
Complementary dishes: This cake pairs beautifully with fresh fruit salad, grilled pineapple, or a light lemon tart. If you’re serving it at a party, consider adding a batch of decadent chocolate-dipped strawberry coconut bars for variety. For a refreshing drink, serve with iced tea or lemonade.
Storage instructions: Cover the cake tightly with plastic wrap and then aluminum foil. It will keep in the freezer for up to two weeks. After that, the texture starts to degrade and ice crystals form. If you’re storing leftovers, press a piece of plastic wrap directly onto the cut surface to prevent freezer burn.
Reheating (if you can call it that): This is a frozen dessert, so no reheating needed. But if you want a slightly softer texture, let individual slices sit at room temperature for 10 minutes before serving.
The flavors actually develop and meld together after a day or two in the freezer. The popsicle pieces soften slightly, and the layers become more cohesive. Honestly, it tastes even better on day two.
Nutritional Information & Benefits
Per slice (based on 12 servings):
- Calories: 345
- Fat: 18g
- Carbohydrates: 42g
- Protein: 5g
- Sugar: 32g
- Fiber: 1g
While this is definitely a treat-yourself dessert, there are a few bright spots. The strawberry sorbet provides a small amount of vitamin C, and the graham cracker crust offers a bit of whole grain fiber. The calcium from the ice cream and whipped topping is a nice bonus for bone health.
If you’re watching your sugar intake, you can use sugar-free ice cream and popsicles, though the texture will be slightly different. For a lower-fat option, use light ice cream and reduced-fat whipped topping. I’ve tested both versions, and while they’re not as creamy, they still satisfy that sweet tooth.
This recipe is not gluten-free unless you use gluten-free cookies for the crust. It contains dairy from the ice cream and whipped topping. If you have allergies, check the labels on your popsicles—some brands contain artificial colors that may be problematic for sensitive individuals.
I like to think of this as a “sometimes food” that brings joy without guilt. It’s the kind of dessert that makes summer memories, and that’s worth every calorie.
Conclusion
This Easy No-Bake Firecracker Popsicle Cake is the summer dessert you didn’t know you needed. It’s cool, creamy, colorful, and comes together in almost no time. No oven required, no complicated techniques, no stress. Just pure, nostalgic fun in every bite.
I love how this cake brings people together. It reminds me of summer nights as a kid, chasing the ice cream truck down the street, tongue stained blue from a firecracker popsicle. Now I get to share that feeling with my own family, and it’s even better than I remembered.
Feel free to make this your own—swap the flavors, change the crust, add your favorite toppings. That’s the beauty of no-bake desserts: they’re forgiving and flexible. If you try a variation I haven’t thought of, I’d love to hear about it.
Drop a comment below and let me know how your Firecracker Popsicle Cake turned out. Did you stick with the classic red, white, and blue, or did you go rogue with tropical flavors? Share your photos, your tweaks, your happy accidents. I read every single comment, and nothing makes me happier than seeing your creations.
Now go make some summer magic. Your freezer is waiting.
Frequently Asked Questions
Can I use homemade whipped cream instead of Cool Whip?
Absolutely. Whip 1 cup of heavy cream with 2 tablespoons of powdered sugar until stiff peaks form. It will be less stable than Cool Whip, so the cake might be a little softer, but the flavor is incredible. Just make sure your cream is very cold before whipping.
How far in advance can I make this cake?
You can make it up to two weeks ahead of time. Just wrap it tightly in plastic wrap and then aluminum foil to prevent freezer burn. I actually prefer making it two days ahead—the flavors meld together beautifully, and the texture is perfect.
My layers kept mixing together. What did I do wrong?
Most likely, you didn’t freeze each layer long enough. Each layer needs at least 20-30 minutes in the freezer before adding the next one. Also, make sure your ice cream is softened but not melted. If it’s too runny, it will bleed into the layer below. Patience is key with this recipe.
Can I use a different size pan?
Yes, but the layer thickness will change. An 8×8 pan will give you thicker layers and taller slices, while a 9×13 pan (the recommended size) gives you more moderate portions. If you use a smaller pan, you may need to adjust the freezing times slightly since the layers will be thicker.
What if I can’t find firecracker popsicles?
No worries! You can use any red, white, and blue popsicles, or even just strawberry and blue raspberry popsicles. The flavor combination will be slightly different, but the concept remains the same. You could also use fruit juice popsicles for a more natural option. If you’re in a pinch, try this colorful rainbow spiral marshmallow pops recipe for a fun alternative topping idea.
Pin This Recipe!
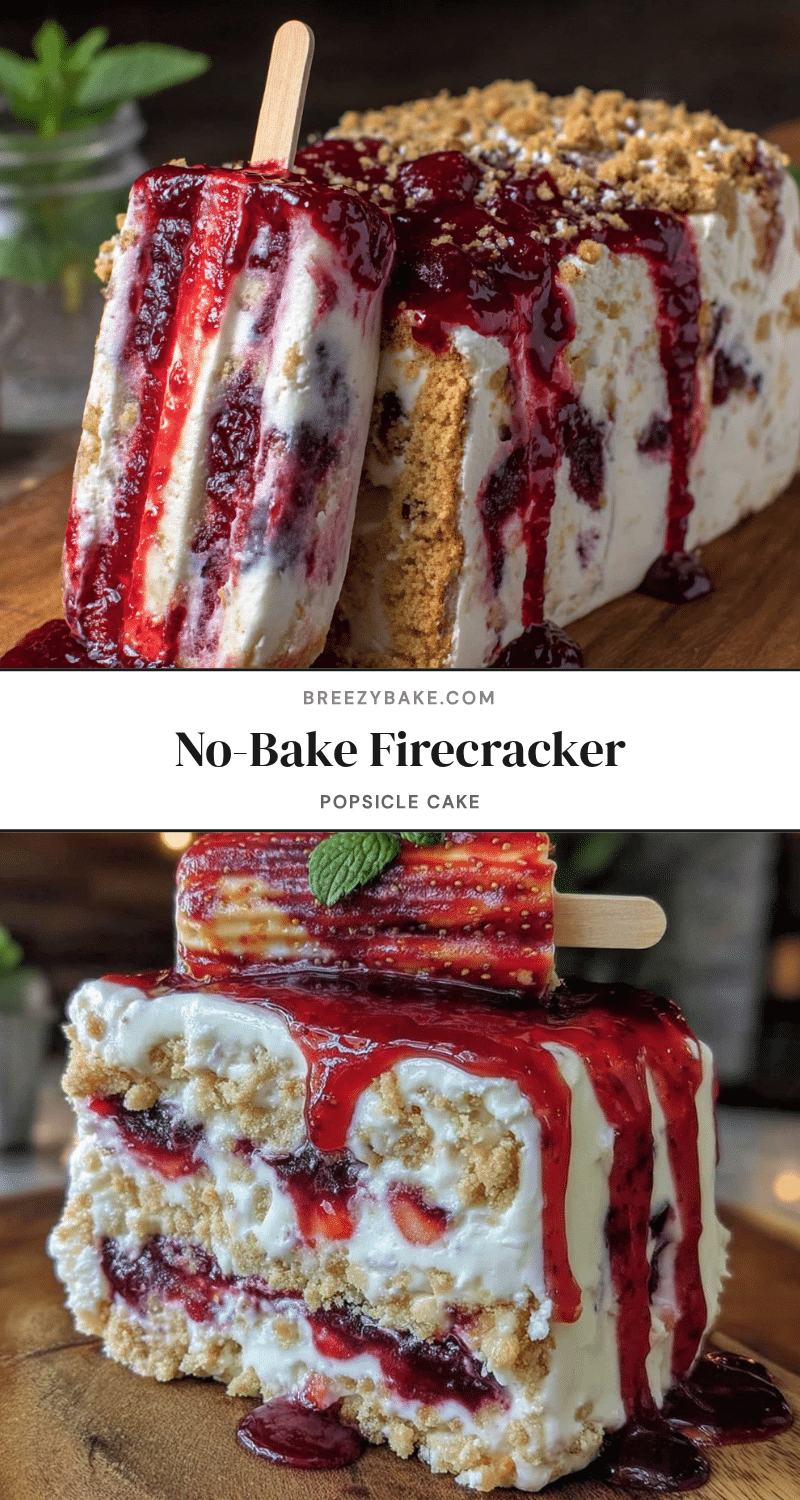
Easy No-Bake Firecracker Popsicle Cake: Best Summer Dessert
This Easy No-Bake Firecracker Popsicle Cake is a cool, creamy, and colorful summer dessert made with layers of vanilla ice cream, strawberry sorbet, and crushed firecracker popsicles on a buttery graham cracker crust. No oven required, simple ingredients, and perfect for summer parties.
- Prep Time: 20 minutes
- Cook Time: 0 minutes
- Total Time: 6 hours 20 minutes (includes freezing)
- Yield: 12 servings 1x
- Category: Dessert
- Cuisine: American
Ingredients
- 6–8 firecracker popsicles
- 1.5 quarts vanilla ice cream
- 1 pint strawberry sorbet
- 2 cups crushed graham crackers (about 12–14 full sheets)
- 1/3 cup unsalted butter, melted
- 8 ounces whipped topping (thawed)
- 1/2 cup sweetened condensed milk
- Red and blue food coloring (optional)
- Rainbow sprinkles (for garnish)
Instructions
- Line a 9×13-inch baking dish with plastic wrap or parchment paper, leaving overhang on the sides.
- Crush 2 cups of graham crackers into fine crumbs. Mix with 1/3 cup melted butter until it looks like wet sand. Press firmly into the bottom of the lined dish. Freeze for at least 15 minutes.
- Unwrap 6-8 firecracker popsicles and let soften for about 5 minutes. Crush with a fork or pulse in a food processor until chunky and slushy. Set aside.
- Let vanilla ice cream sit at room temperature for 10-15 minutes until spreadable. In a large bowl, mix softened ice cream with 1/2 cup sweetened condensed milk and 1 cup of thawed whipped topping until smooth.
- Spread half of the vanilla cream mixture over the frozen crust. Smooth evenly. Freeze for 30 minutes until firm.
- Let strawberry sorbet soften for 5 minutes, then spread gently over the frozen vanilla layer (about 1/2 inch thick). Freeze for 30 minutes.
- Spread the crushed firecracker popsicle mixture over the sorbet layer. Freeze for 20 minutes.
- Spread the remaining vanilla cream mixture over the popsicle layer. Smooth the top.
- Spread the remaining thawed whipped topping over the top layer. Create peaks and swirls with the back of a spoon. Sprinkle rainbow sprinkles generously on top.
- Cover with plastic wrap and freeze for at least 6 hours, preferably overnight.
- When ready to serve, lift the cake out using the plastic wrap overhang. Let sit at room temperature for 5 minutes before slicing. Run a knife under hot water between cuts for clean slices.
Notes
Don’t skip the freezing time between layers to prevent colors from bleeding. For gluten-free, use gluten-free vanilla wafers or shortbread cookies. For dairy-free, use coconut milk-based ice cream and dairy-free whipped topping. The cake can be stored in the freezer for up to two weeks.
Nutrition
- Serving Size: 1 slice
- Calories: 345
- Sugar: 32
- Fat: 18
- Carbohydrates: 42
- Fiber: 1
- Protein: 5
Keywords: no-bake cake, firecracker popsicle cake, ice cream cake, summer dessert, Fourth of July dessert, easy dessert, no oven dessert


