I had been looking for a snack that actually tasted like a treat but didn’t leave me crashing an hour later. For a while, I just accepted that anything labeled “healthy” was going to taste like cardboard mixed with regret. Store-bought protein bars were either too expensive or too sweet, and the ones that claimed to be “all-natural” often had a weird chalky finish that I couldn’t get past. I tried making a few versions at home, but they either fell apart or tasted like I was eating a handful of protein powder. It was frustrating because I knew what I wanted—something chewy, a little sweet, packed with peanut butter flavor, and sturdy enough to toss in my bag without disintegrating. I wanted a snack that could keep up with a busy afternoon without needing a refrigerator or a fork. Honestly, I almost gave up on the idea entirely. Then one afternoon, after a particularly long week, I just started throwing things in a bowl. No recipe, no plan, just a hunch. And somehow, it worked. These easy no-bake peanut butter protein balls came together in about ten minutes, and they were exactly what I had been trying to find—soft, satisfying, and actually good. No baking, no fuss, no weird ingredients. Just a solid snack that stuck around. That first batch didn’t last long, and I knew I had finally cracked the code.
Why You’ll Love This Recipe
These easy no-bake peanut butter protein balls are the kind of snack that solves a dozen problems at once. They come together in under 15 minutes with zero oven time, which means you can make them even on your busiest days. The ingredients are simple pantry staples—no trips to a specialty store required. You probably already have everything you need sitting in your kitchen right now.
- Quick & Easy: Ready in about 10 minutes of active time. No baking, no chilling required before rolling (though a quick chill helps them firm up).
- Simple Ingredients: Just oats, peanut butter, honey, protein powder, and a few mix-ins. Nothing fancy, nothing hard to find.
- Perfect for Busy Days: Great for pre-workout fuel, afternoon slumps, lunchbox additions, or road trip snacks. They travel well and don’t need refrigeration for a few days.
- Crowd-Pleaser: Kids love them, adults love them, and even people who don’t usually go for “healthy snacks” end up grabbing seconds.
- Unbelievably Delicious: The texture is soft and chewy, not dry or crumbly. The peanut butter flavor is front and center, with just enough sweetness to feel like a treat.
What makes these different from the rest is the ratio. I tested this recipe about five times before I got it right. Too much protein powder and they taste chalky. Too much honey and they’re sticky messes. This version hits that sweet spot where everything holds together perfectly without being overly sweet or dry. It’s not just another protein ball recipe—it’s the one I actually look forward to eating.
These easy no-bake peanut butter protein balls are the kind of snack that makes you feel good about grabbing a second one. They’re satisfying without being heavy, and they actually taste like something you’d choose on purpose. Whether you need a quick bite before a workout or something to keep in your bag for emergencies, these have you covered.
What Ingredients You Will Need
This recipe uses simple, wholesome ingredients that work together to create a balanced, flavorful snack. Each ingredient plays a specific role in texture and taste, so it helps to understand what each one does before you start.
- Rolled oats (1 cup / 90g): The base of these protein balls. Rolled oats give the right chewy texture. Quick oats work in a pinch but will make the texture slightly softer. I prefer old-fashioned rolled oats for the best bite.
- Creamy peanut butter (½ cup / 130g): The main flavor and the glue that holds everything together. Use a natural peanut butter that’s well-stirred. Avoid the no-stir kind with added sugar and hydrogenated oils—it’s too thick and won’t mix evenly. I like using a brand like Justin’s or Kirkland for consistent results.
- Honey (⅓ cup / 110g): Adds sweetness and helps bind the mixture. Maple syrup works as a substitute, but the balls will be slightly softer. If you’re vegan, use agave or maple syrup instead.
- Vanilla protein powder (¼ cup / 30g): Adds protein without making the balls dry. I recommend using a vanilla or unflavored whey or plant-based protein powder. Avoid collagen powder—it won’t absorb the same way and can make the mixture too sticky. If you want a lower-carb version, you can use a sugar-free protein powder, but you might need an extra tablespoon of oats to balance the texture.
- Ground flaxseed (2 tablespoons / 14g): Adds fiber and helps with binding. You can substitute chia seeds or skip it entirely if you don’t have it, but the balls will be slightly less firm.
- Mini chocolate chips (¼ cup / 45g): Optional but highly recommended. They add little pockets of sweetness that make these feel more like a treat. Dark chocolate chips work great if you want to cut down on sugar.
- Pinch of salt (¼ teaspoon): Enhances the peanut butter flavor. If your peanut butter is already salted, you can skip this.
Substitution Notes: If you need a nut-free version, use sunflower seed butter instead of peanut butter. The flavor will change slightly, but the texture stays similar. For a gluten-free option, make sure your oats are certified gluten-free. If you don’t have protein powder on hand, you can replace it with an extra ¼ cup of oat flour (just grind oats in a blender) or almond flour for a lower-carb option.
Equipment Needed
You don’t need much for this recipe, which is part of why I love it. Here’s what you’ll need:
- Large mixing bowl: Any medium-to-large bowl works. Glass or stainless steel is fine.
- Spatula or wooden spoon: For mixing everything together. A sturdy spatula works best because the mixture gets thick.
- Measuring cups and spoons: Standard set for dry and wet ingredients. I recommend using a liquid measuring cup for the honey so it slides out easily.
- Cookie scoop or tablespoon: For portioning the balls evenly. A 1.5-tablespoon scoop gives you perfectly sized balls. If you don’t have one, just use a regular tablespoon and roll by hand.
- Parchment paper or baking sheet: To place the rolled balls on while they set. A plate works too.
- Optional: Food processor: If you want a finer texture, you can pulse the oats a few times before mixing. I usually skip this step because I like the texture of whole oats, but it’s a nice option if you prefer a smoother ball.
If you don’t have a cookie scoop, just wet your hands slightly before rolling—it helps prevent the mixture from sticking to your fingers. I learned that the hard way after my first batch turned into a sticky mess on my palms.
Preparation Method
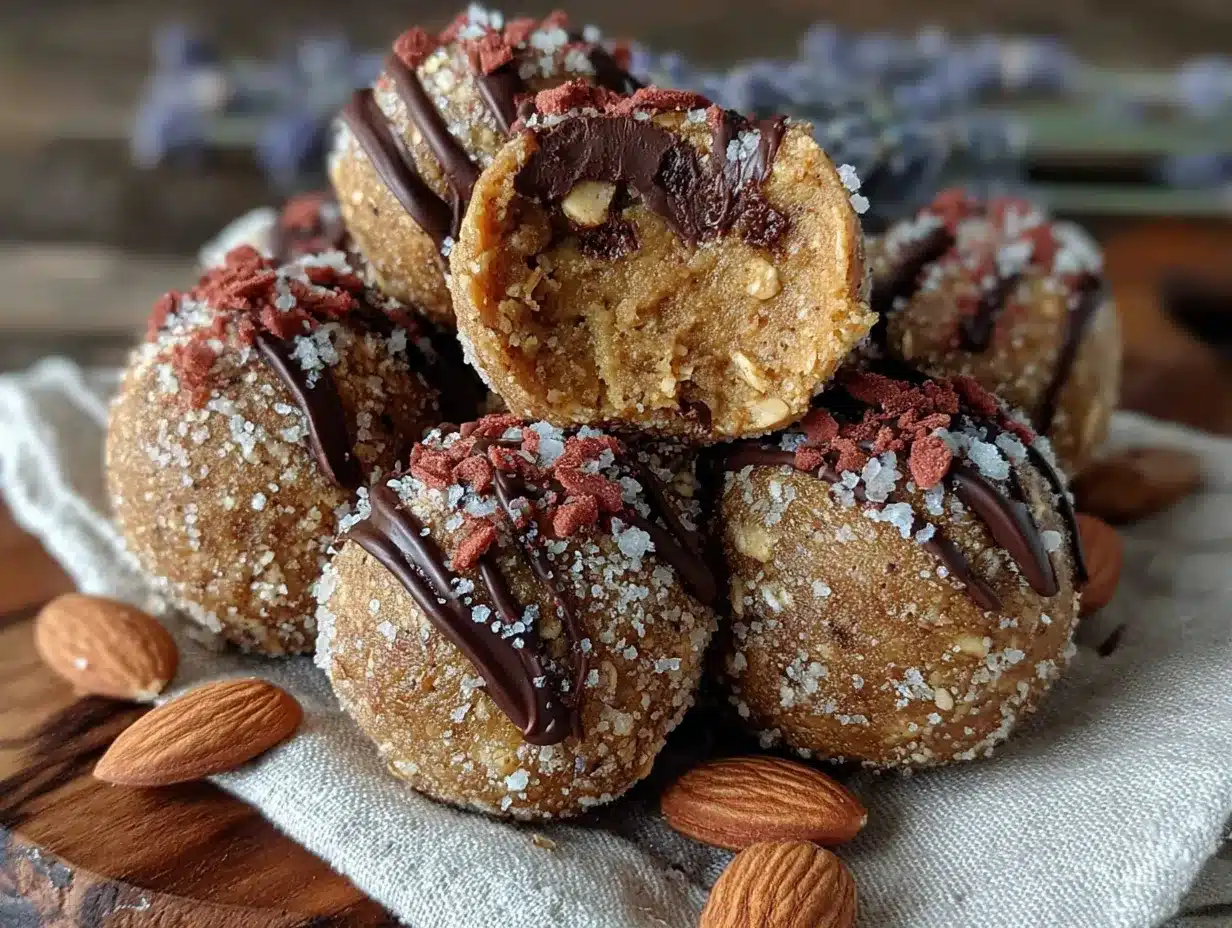
- Combine the dry ingredients: In a large mixing bowl, add 1 cup rolled oats, ¼ cup vanilla protein powder, 2 tablespoons ground flaxseed, and ¼ teaspoon salt. Whisk them together lightly to distribute everything evenly. This step seems small, but it makes a difference—nobody wants a pocket of pure protein powder in one bite.
- Add the wet ingredients: Pour in ½ cup creamy peanut butter and ⅓ cup honey. Make sure your peanut butter is at room temperature or slightly warmed—cold peanut butter is harder to mix and can leave streaks. If your peanut butter has been in the fridge, microwave it for about 10 seconds to soften it up.
- Mix thoroughly: Stir everything together with a spatula or wooden spoon. The mixture will be thick and a little sticky at first. Keep folding it over itself until no dry spots remain. This usually takes about a minute of solid mixing. If the mixture feels too dry and crumbly, add 1 tablespoon of honey or a splash of milk (dairy or plant-based) to bring it together. If it’s too wet and sticky, add another tablespoon of oats.
- Fold in the chocolate chips: Add ¼ cup mini chocolate chips and fold them in gently until they’re evenly distributed. Don’t overmix at this point—you want the chips to stay intact.
- Chill the mixture (optional but helpful): If the mixture feels too sticky to handle, pop the bowl in the fridge for 15-20 minutes. This firms up the peanut butter and makes rolling much easier. I usually skip this step if I’m in a hurry, but on hot days or if my kitchen is warm, it’s a game-changer.
- Roll into balls: Using a cookie scoop or tablespoon, portion out about 1.5 tablespoons of the mixture. Roll it between your palms to form a smooth ball. If the mixture sticks to your hands, lightly wet your palms with water or rub a tiny bit of oil on them. Place each ball on a parchment-lined baking sheet or plate.
- Set and store: Once all the balls are rolled, place them in the refrigerator for at least 30 minutes to firm up. This step is important—it helps them hold their shape. After they’ve set, transfer them to an airtight container. They’ll keep in the fridge for up to two weeks, or in the freezer for up to three months.
Sensory cues: The mixture should feel like a thick, slightly sticky dough that holds together when pressed. It shouldn’t be dry and crumbly, nor should it be so wet that it leaves residue on your hands. The oats should be fully incorporated, and the peanut butter should be evenly distributed throughout. When you taste a tiny bit of the mixture before rolling, it should taste balanced—not too sweet, not overwhelmingly peanut buttery, with a hint of vanilla from the protein powder.
Cooking Tips & Techniques
I’ve made these easy no-bake peanut butter protein balls more times than I can count, and I’ve definitely made my share of mistakes along the way. Here are the lessons I learned so you don’t have to repeat them.
Don’t overmix the oats. The first time I made these, I stirred the mixture for what felt like forever because I wanted it perfectly combined. The result was a dense, almost gummy texture. Oats break down when overworked, especially if you’re using a food processor. Just mix until everything comes together—no more than a minute of stirring.
Watch your protein powder. Not all protein powders are created equal. Some are super absorbent and will dry out your mixture fast. If you’re using a new brand, start with 3 tablespoons instead of ¼ cup and add more if needed. I once used a pea protein powder that turned my batch into a crumbly disaster. Stick with a vanilla whey or a plant-based blend you’ve used before.
Temperature matters. If your kitchen is warm, the peanut butter will be softer and the mixture will feel stickier. That’s normal. Just pop the bowl in the fridge for 10-15 minutes before rolling. On the flip side, if your kitchen is cold, the peanut butter might be stiff—warm it slightly before mixing.
Roll with confidence. The first few balls might look a little rough. That’s okay. Once they chill, they’ll firm up and look much neater. Don’t stress about making them perfectly round—they’re snacks, not sculptures.
Use a cookie scoop for consistency. If you want all your balls to be the same size (which helps with even texture and portion control), a cookie scoop is your best friend. I use a 1.5-tablespoon scoop and it gives me about 14-16 balls per batch.
Don’t skip the chill time. I know it’s tempting to eat them right away, but letting them set in the fridge for at least 30 minutes makes a huge difference. They’ll hold their shape better and the flavors will meld together. Patience pays off here.
Variations & Adaptations
One of the best things about this recipe is how flexible it is. You can change it up based on what you have in your pantry or what you’re craving.
- Chocolate Peanut Butter: Add 1 tablespoon of unsweetened cocoa powder to the dry ingredients. It gives the balls a rich, fudgy undertone that pairs perfectly with the peanut butter. You might need an extra tablespoon of honey to balance the bitterness.
- Crunchy Texture: Swap the mini chocolate chips for chopped peanuts, cacao nibs, or crushed pretzels. The salty crunch is a fantastic contrast to the soft, chewy base.
- Vegan Version: Use maple syrup or agave instead of honey, and choose a plant-based protein powder. Make sure your chocolate chips are dairy-free. The texture will be slightly softer, but they’ll still hold together well.
- Low-Carb/Keto: Replace the oats with almond flour or coconut flour (use about ¾ cup almond flour or ⅓ cup coconut flour). Use a sugar-free protein powder and sugar-free chocolate chips. Sweeten with a few drops of liquid stevia or monk fruit sweetener instead of honey. The texture will be denser and less chewy, but still satisfying.
- Seasonal Twist: In the fall, add ½ teaspoon of pumpkin pie spice and a tablespoon of pumpkin seeds. In the summer, swap the chocolate chips for dried cranberries or chopped dried apricots. Around the holidays, add a pinch of cinnamon and a dash of nutmeg for a cozy flavor.
- Nut-Free: Use sunflower seed butter or tahini instead of peanut butter. The flavor will be earthier, but it’s still delicious. Just note that sunflower seed butter can react with baking soda if you ever bake these (which you won’t for this no-bake recipe), so no worries here.
I once made a batch with a spoonful of espresso powder mixed in, and it was the perfect afternoon pick-me-up. Don’t be afraid to experiment—that’s half the fun.
Serving & Storage Suggestions
These easy no-bake peanut butter protein balls are best served chilled or at room temperature. I prefer them straight from the fridge because they’re firmer and hold their shape better. If you’re taking them on the go, they’ll stay solid for a few hours at room temperature, but I wouldn’t leave them out all day—especially in warm weather.
Serving ideas: Pair them with a glass of cold milk, a smoothie, or your morning coffee for a balanced breakfast. They’re also great crumbled over yogurt or oatmeal for extra texture and protein. If you’re hosting a brunch or a party, arrange them on a platter alongside fresh fruit and other bite-sized snacks. They’re always a hit on a dessert board or a snack spread.
Storage: Keep the balls in an airtight container in the refrigerator. They’ll stay fresh for up to two weeks. If you want to keep them longer, freeze them in a single layer on a baking sheet, then transfer to a freezer-safe bag or container. They’ll last for up to three months in the freezer. To thaw, just leave them in the fridge overnight or let them sit at room temperature for 10-15 minutes.
Reheating: These are no-bake, so there’s no reheating involved. But if you want a softer texture, let them sit out for 5-10 minutes before eating. If you prefer them firmer, eat them straight from the fridge.
Flavor development: The flavors actually get better after a day or two in the fridge. The oats absorb some of the moisture from the peanut butter and honey, making the texture even more uniform. So if you can resist eating them all on day one, you’ll be rewarded on day two.
Nutritional Information & Benefits
Here’s an approximate nutritional breakdown per ball (based on 14 servings):
| Nutrient | Amount per ball |
|---|---|
| Calories | 145 |
| Protein | 6g |
| Carbohydrates | 18g |
| Fiber | 3g |
| Sugar | 9g |
| Fat | 7g |
| Saturated Fat | 2g |
| Sodium | 85mg |
These numbers will vary based on your specific ingredients, especially the protein powder and peanut butter brand. If you use a sugar-free protein powder and sugar-free chocolate chips, you can bring the sugar down to about 5g per ball.
Health benefits: Peanut butter provides healthy monounsaturated fats and protein, which help keep you full and satisfied. Oats are a great source of soluble fiber, which supports heart health and digestion. Flaxseed adds omega-3 fatty acids and extra fiber. This snack is a balanced option for pre-workout fuel, post-workout recovery, or a midday energy boost without the crash.
Dietary considerations: This recipe is naturally vegetarian. For a vegan version, substitute honey with maple syrup and use plant-based protein powder. For gluten-free, use certified gluten-free oats. For nut-free, use sunflower seed butter. Always check your protein powder and chocolate chips for potential allergens if you’re serving others with dietary restrictions.
I personally love that these balls give me a quick energy boost without the sugar spike. They’re my go-to snack when I need something substantial but don’t want a full meal. It’s a small habit that makes a big difference in how I feel throughout the day.
Conclusion
These easy no-bake peanut butter protein balls are proof that healthy snacks don’t have to be complicated or boring. With just a handful of ingredients and about ten minutes of your time, you can have a batch of satisfying, protein-packed bites ready to go. They’re perfect for busy mornings, post-workout refueling, or just when you need something sweet that won’t leave you feeling sluggish.
I love that this recipe is forgiving enough to let you experiment. Swap in different mix-ins, adjust the sweetness, or try a different nut butter—the possibilities are endless. The more you make them, the more you’ll figure out what works best for you.
I’d love to hear how yours turn out. Did you add something unexpected? Did you make a variation that became your new favorite? Drop a comment below and let me know. And if you found a friend who needs a quick, healthy snack idea, share this recipe with them. Happy snacking!
Frequently Asked Questions
Can I make these without protein powder?
Absolutely. Just replace the ¼ cup of protein powder with an extra ¼ cup of oat flour (grind rolled oats in a blender) or almond flour. The texture will be slightly different—less dense and a bit softer—but they’ll still hold together well.
Why are my protein balls too dry?
This usually happens if your peanut butter is too thick or if your protein powder is very absorbent. Try adding 1-2 tablespoons of honey or a splash of milk to bring the mixture together. If you’re using a new protein powder, start with less next time and adjust as you go.
Can I use crunchy peanut butter instead of creamy?
Yes, you can. Crunchy peanut butter adds a nice texture, but the balls might be slightly less cohesive because the peanut pieces create small gaps. If you use crunchy, you might need an extra tablespoon of honey to help bind everything.
How long do these last at room temperature?
They’re fine at room temperature for a few hours, especially if you’re taking them to work or on a road trip. But for longer storage, keep them in the fridge. They’ll last up to two weeks in the refrigerator and up to three months in the freezer.
Can I double this recipe?
Definitely. This recipe doubles beautifully. Just make sure you’re using a large enough bowl to mix everything comfortably. The only thing to watch is the mixing time—you might need an extra minute to get everything evenly combined. The rest of the process stays the same.
Pin This Recipe!
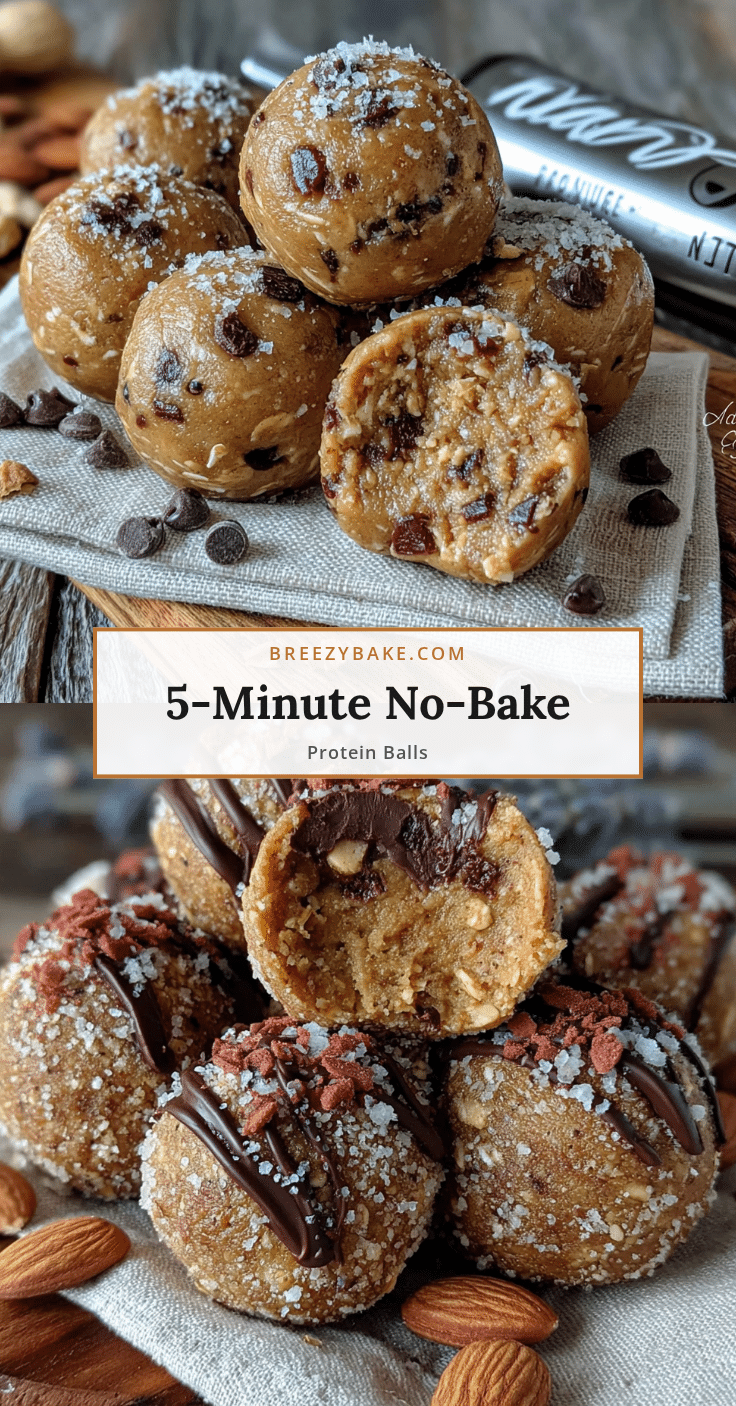
Easy No-Bake Peanut Butter Protein Balls

These easy no-bake peanut butter protein balls are a quick, healthy snack made with simple pantry staples. They come together in about 10 minutes and are perfect for busy days, pre-workout fuel, or a satisfying treat.
- Prep Time: 10 minutes
- Cook Time: 0 minutes
- Total Time: 40 minutes (includes 30 minutes chilling)
- Yield: 14 servings 1x
- Category: Snack
- Cuisine: American
Ingredients
- 1 cup rolled oats (90g)
- ½ cup creamy peanut butter (130g)
- ⅓ cup honey (110g)
- ¼ cup vanilla protein powder (30g)
- 2 tablespoons ground flaxseed (14g)
- ¼ cup mini chocolate chips (45g)
- ¼ teaspoon salt
Instructions
- Combine the dry ingredients: In a large mixing bowl, add 1 cup rolled oats, ¼ cup vanilla protein powder, 2 tablespoons ground flaxseed, and ¼ teaspoon salt. Whisk them together lightly to distribute everything evenly.
- Add the wet ingredients: Pour in ½ cup creamy peanut butter and ⅓ cup honey. Make sure your peanut butter is at room temperature or slightly warmed.
- Mix thoroughly: Stir everything together with a spatula or wooden spoon until no dry spots remain. If the mixture feels too dry and crumbly, add 1 tablespoon of honey or a splash of milk. If it’s too wet and sticky, add another tablespoon of oats.
- Fold in the chocolate chips: Add ¼ cup mini chocolate chips and fold them in gently until evenly distributed.
- Chill the mixture (optional but helpful): If the mixture feels too sticky to handle, pop the bowl in the fridge for 15-20 minutes.
- Roll into balls: Using a cookie scoop or tablespoon, portion out about 1.5 tablespoons of the mixture. Roll it between your palms to form a smooth ball. Place each ball on a parchment-lined baking sheet or plate.
- Set and store: Once all the balls are rolled, place them in the refrigerator for at least 30 minutes to firm up. After they’ve set, transfer them to an airtight container. They’ll keep in the fridge for up to two weeks, or in the freezer for up to three months.
Notes
If the mixture is too sticky, chill it for 15-20 minutes before rolling. For a nut-free version, use sunflower seed butter. For a vegan version, substitute honey with maple syrup and use plant-based protein powder. The flavors develop after a day in the fridge.
Nutrition
- Serving Size: 1 ball
- Calories: 145
- Sugar: 9
- Sodium: 85
- Fat: 7
- Saturated Fat: 2
- Carbohydrates: 18
- Fiber: 3
- Protein: 6
Keywords: no-bake, protein balls, peanut butter, healthy snack, easy, gluten-free option, vegan option


