I messed up focaccia for about two years before I got it right. Not the kind of mess-up where it’s a little dense or the crust is off—I’m talking hockey pucks, dough that stuck to everything like cement, and one particularly sad attempt that my husband politely called “edible bread-ish.” The worst part? I was following the recipes exactly. It took me burning through probably fifteen batches before I understood that focaccia isn’t about precision—it’s about feel. And this garlic herb sourdough version? It’s the one that finally made me stop and say, “Oh, that’s what it’s supposed to be.”
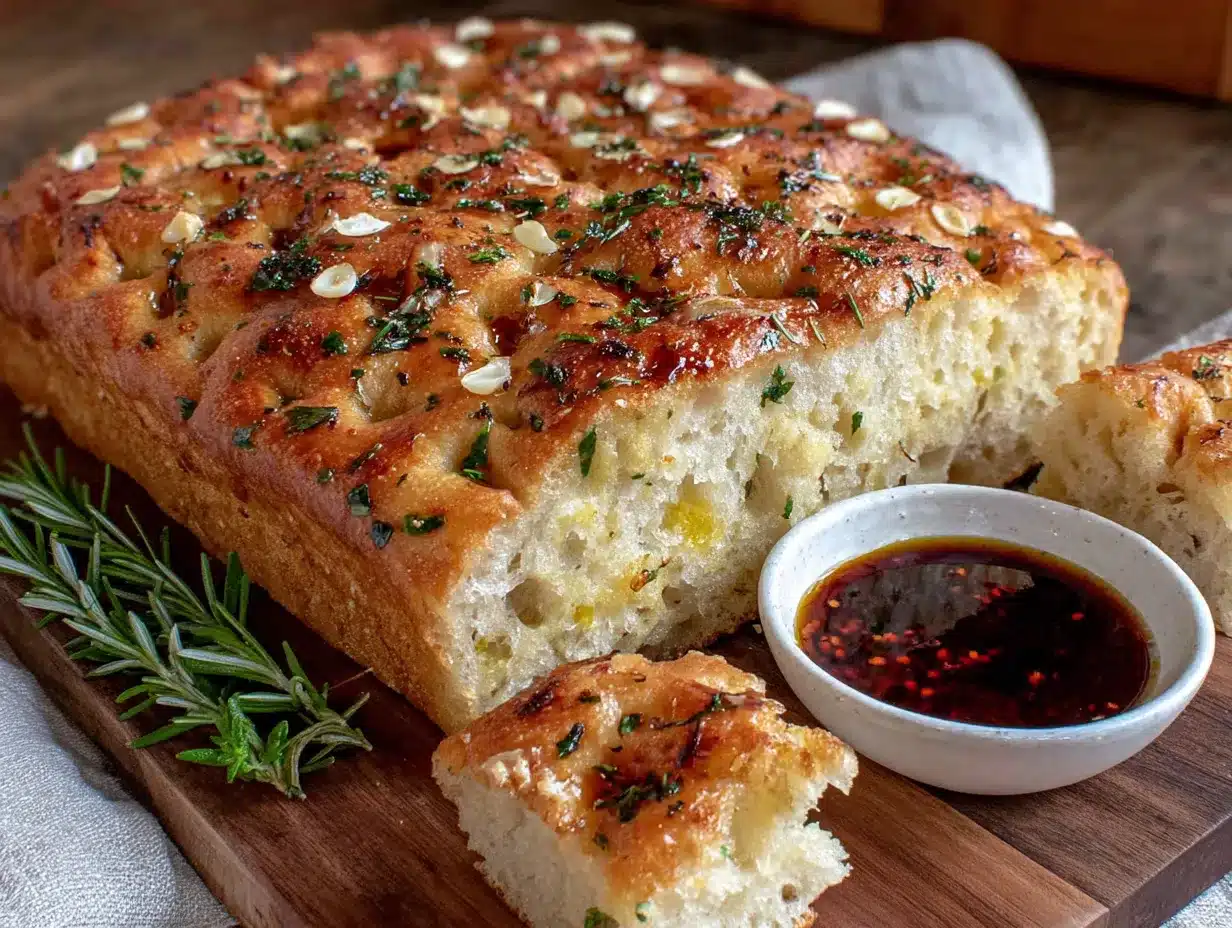
The first time I pulled a proper focaccia out of the oven, I actually teared up a little. The top was golden and crackling, the edges were crispy but not burnt, and when I pressed my finger into the side, it sprang back slowly—that perfect sign of a good crumb. I sliced off a corner while it was still warm, dipped it in olive oil and balsamic, and just stood there in my kitchen eating it like I’d never tasted bread before. My kids came running because I was being suspiciously quiet, and within five minutes, half the loaf was gone.
What makes this focaccia different from the others I tried is the sourdough starter. It adds this subtle tang that plays off the garlic and herbs in a way commercial yeast just can’t replicate. The crust gets shatteringly crisp, the inside stays pillowy and open, and the whole thing smells like an Italian bakery when it’s baking. Honestly, I didn’t think I’d ever be someone who could make bread like this at home. But here I am, and here’s the recipe that changed everything for me.
Why You’ll Love This Recipe
This isn’t just another focaccia recipe floating around the internet. I’ve tested this one more times than I care to count, and I can tell you exactly why it works and why you’ll keep coming back to it.
- Simple Ingredients : You probably already have everything in your pantry right now. Flour, water, olive oil, garlic, herbs, salt, and your sourdough starter. No fancy additives or hard-to-find specialty items.
- No-Knead Method : This dough does the work for you. A few stretch-and-folds over a couple of hours, and you’re done. Your hands barely touch the dough.
- Perfect for Beginners : Focaccia is the most forgiving bread you can make with sourdough. The high hydration means even if you mess up the shaping, it still turns out beautiful.
- Incredible Flavor : The garlic infuses into the olive oil while the herbs crisp up on top. Every bite has that perfect balance of savory, herbal, and tangy sourdough notes.
- Make-Ahead Friendly : You can start the dough one day and bake it the next. The cold fermentation actually makes the flavor even better.
I’ve served this focaccia at casual family dinners and at a small gathering where I was trying to impress my husband’s boss. It disappeared both times. There’s something about warm bread fresh from the oven that makes people feel cared for, you know? And when that bread has crispy garlic edges and a soft, airy center, it’s hard to stop at one piece.
This recipe is comfort food in its purest form. It’s slow food for a fast world. And the best part? You don’t need to be a professional baker to nail it on your first try.
What Ingredients You Will Need
This recipe relies on simple, high-quality ingredients that work together to create that signature focaccia texture and flavor. Let me walk you through each one and why it matters.
For the Dough
- Bread flour (500g / about 4 cups) – I prefer King Arthur or Bob’s Red Mill for consistent protein content. Bread flour gives the focaccia that chewy, structured crumb. All-purpose works in a pinch, but the texture won’t be quite as sturdy.
- Active sourdough starter (150g / about ¾ cup) – Make sure it’s bubbly and doubled in size. I feed mine about 6-8 hours before mixing the dough. A hungry starter won’t give you the rise you need.
- Warm water (375g / about 1½ cups) – Aim for around 85°F (29°C). Too hot and you’ll kill the yeast activity. Too cold and fermentation will drag on forever.
- Olive oil (60g / about ¼ cup) – Use a good-quality extra virgin olive oil here. It’s a major flavor component, not just a fat. I use California Olive Ranch for everyday baking.
- Fine sea salt (10g / about 1½ teaspoons) – Don’t skip this. Sourdough needs salt for structure and flavor. I use fine sea salt because it dissolves more evenly than kosher.
For the Garlic Herb Topping
- Garlic cloves (6-8, thinly sliced) – Fresh garlic only. Pre-minced jarred garlic will burn in the oven and turn bitter. Trust me on this one.
- Fresh rosemary (2 tablespoons, chopped) – I grow my own, but store-bought works great. The aroma when this bakes is unreal.
- Fresh thyme leaves (1 tablespoon) – Adds a subtle earthy note that balances the garlic.
- Flaky sea salt (1 teaspoon) – Maldon is my go-to. The big crystals add crunch and burst of saltiness on top.
- Extra virgin olive oil (60g / about ¼ cup, for the pan and topping) – Don’t skimp here. The oil is what creates that crispy, almost fried bottom crust.
Substitution Notes: If you don’t have fresh herbs, dried rosemary and thyme work—just use half the amount. For a dairy-free version, you’re already good because this recipe has no dairy. If you need gluten-free, I haven’t tested this with gluten-free flour blends, so I can’t guarantee results. You can swap the garlic for roasted garlic if raw garlic is too sharp for your stomach—just mash it into a paste and spread it over the dough before baking.
Equipment Needed
You don’t need a lot of fancy equipment to make great focaccia, but a few tools make the process much smoother.
- Large mixing bowl – I use a glass bowl so I can see the dough’s activity through the sides. Any large bowl will work.
- Digital kitchen scale – This is non-negotiable for me. Measuring flour by volume is too inconsistent. A $15 scale from Amazon will change your baking forever.
- 9×13-inch baking pan – Metal or glass both work. I prefer metal because it conducts heat better and gives a crisper bottom crust. Dark metal pans will brown the bottom faster, so keep an eye on it.
- Bench scraper – Great for handling sticky dough and dividing portions. A plastic dough scraper is cheap and lasts forever.
- Plastic wrap or a reusable bowl cover – You’ll need this to cover the dough during bulk fermentation.
- Instant-read thermometer – Helpful for checking water temperature and dough temperature during fermentation.
If you don’t have a kitchen scale, you can use measuring cups, but I really encourage you to invest in one. I ruined so many loaves before I started weighing my ingredients. It’s the single most impactful change I made in my baking journey.
Preparation Method
Let me walk you through this step by step. I’ve included all the little details I wish someone had told me when I was starting out.
- Mix the dough (8:00 AM) – In a large bowl, combine 375g warm water and 150g active sourdough starter. Stir until the starter mostly dissolves. Add 500g bread flour and 10g fine sea salt. Mix with a dough whisk or your hand until no dry flour remains. The dough will look shaggy and rough—that’s perfect. Cover with plastic wrap and let it rest for 30 minutes. This is called the autolyse, and it gives the flour time to absorb the water and develop gluten naturally.
- Perform stretch and folds (8:30 AM to 10:30 AM) – Over the next 2 hours, you’ll do 4 rounds of stretch and folds, spaced 30 minutes apart. To do a stretch and fold: wet your hand slightly (sticky dough is easier to handle with wet hands), grab one side of the dough, stretch it up as high as it will go without tearing, and fold it over the center. Rotate the bowl 90 degrees and repeat. Do this 4 times total per round. After the fourth round, the dough should feel smoother and more elastic. Cover the bowl between rounds.
- Bulk fermentation (10:30 AM to 2:30 PM) – After the last stretch and fold, cover the bowl and let the dough rise at room temperature (around 72-75°F) for about 4 hours. The dough should roughly double in size and look bubbly and domed on top. If your kitchen is cold, it might take longer. If it’s hot, check it earlier. Temperature matters a lot here.
- Cold retard (optional but recommended, 2:30 PM to next morning) – After bulk fermentation, you can either proceed to baking or place the covered bowl in the refrigerator overnight. Cold fermentation slows down the yeast and develops more complex sourdough flavor. I almost always do this step because the flavor is noticeably better the next day. If you’re short on time, skip it and move to step 5.
- Prepare the pan and second rise (next morning, 8:00 AM) – Pour 2 tablespoons of olive oil into your 9×13-inch baking pan and spread it evenly. Transfer the dough to the pan. Gently stretch it to reach the corners—it might resist and spring back, which is normal. Let it rest for 20 minutes, then stretch it again. Repeat until the dough fills the pan. Cover with plastic wrap and let it rise for 2-3 hours, or until the dough is puffy and has doubled in thickness.
- Dimple the dough (10:30 AM) – Here’s the fun part. Generously drizzle another 2 tablespoons of olive oil over the top of the dough. Dip your fingertips in olive oil and press deep dimples all over the dough, all the way to the bottom of the pan. Don’t be shy—the dimples are what catch the oil and create those crispy, flavorful pockets. Scatter the sliced garlic and fresh herbs evenly over the surface. Sprinkle with flaky sea salt.
- Bake (10:45 AM) – Preheat your oven to 425°F (220°C). Place the pan on the middle rack and bake for 25-30 minutes, or until the top is deep golden brown and the edges are crispy. If the top is browning too fast but the bottom isn’t done, tent loosely with foil for the last 10 minutes. Let the focaccia cool in the pan for 5 minutes, then transfer to a wire rack.
- Cool and serve (11:15 AM) – I know it’s hard to wait, but let the focaccia cool for at least 15 minutes before slicing. The interior is still setting during this time, and cutting too early can make it gummy. Slice into squares or rectangles and serve warm or at room temperature.
Cooking Tips & Techniques
After all those failed batches, I’ve collected a few hard-won lessons that will save you from making the same mistakes I did.
Don’t skip the dimpling. I used to gently press the dough, afraid I’d deflate it. But focaccia needs aggressive dimpling. You want those deep wells because they fill with oil and create the signature crispy, almost fried texture. Go ahead and press all the way to the bottom of the pan. The dough will bounce back enough.
Watch your water temperature. This was my biggest blind spot for months. If your kitchen is cold (below 70°F), use slightly warmer water—around 90°F. If it’s hot, use cooler water, around 75°F. The ideal dough temperature after mixing is about 78°F. Too cold and fermentation stalls. Too hot and the dough over-ferments and becomes slack and sticky.
Use a thermometer for the oil, too. The olive oil you drizzle on top before baking should be at room temperature. Cold oil straight from the fridge can shock the dough and affect the rise. I keep a bottle of olive oil on my counter specifically for baking.
Let it cool properly. I know the smell is intoxicating. But cutting into hot focaccia is like cutting into a cake that hasn’t set—the steam escapes, and the crumb collapses. Give it at least 15 minutes. The crust stays crispy, and the interior stays soft and airy.
If the bottom isn’t crispy, your pan might be the issue. Glass and ceramic pans don’t conduct heat as well as metal. Next time, try baking on the lowest oven rack or preheating the pan in the oven before adding the dough. I’ve also had success placing a baking sheet on the rack below to catch any oil drips and radiate extra heat.
Variations & Adaptations
One of the best things about focaccia is how customizable it is. Here are some variations I’ve tried and loved.
- Roasted Garlic & Parmesan – Instead of raw sliced garlic, roast a whole head of garlic until soft and sweet, then squeeze the cloves over the dimpled dough. Sprinkle with ½ cup freshly grated Parmesan before baking. The cheese gets crispy and golden in the oven.
- Sun-Dried Tomato & Basil – Chop ⅓ cup oil-packed sun-dried tomatoes and scatter them over the dough along with fresh basil leaves. The tomatoes add a sweet, tangy burst that pairs beautifully with the sourdough tang.
- Everything Bagel Focaccia – After dimpling and adding the garlic and herbs, sprinkle the top with everything bagel seasoning (sesame seeds, poppy seeds, dried garlic, dried onion, and salt). This version disappears fastest at parties, I swear.
- Cheese-Stuffed Focaccia – Before the second rise, press small cubes of mozzarella or provolone into the dough. As it bakes, the cheese melts into little pockets of gooey goodness. Just be careful not to add too much, or the dough won’t rise properly.
- Sweet Focaccia – Skip the garlic and herbs. After dimpling, drizzle with honey and sprinkle with cinnamon sugar and a pinch of flaky salt. Bake as directed and serve warm with coffee for a breakfast treat.
I personally love the everything bagel version for game days—it’s become my go-to when I’m making crispy super bowl chicken wing bites for friends. The salty, savory focaccia is the perfect carb companion to spicy wings.
Serving & Storage Suggestions
Focaccia is at its absolute best the day it’s made, but it still holds up well for a day or two with proper storage.
Serving: Serve warm or at room temperature. I like to slice it into squares and arrange them on a wooden board with a small bowl of extra virgin olive oil and balsamic vinegar for dipping. It’s also fantastic split horizontally and used for sandwiches—try it with roasted vegetables, fresh mozzarella, and pesto for an incredible lunch. For breakfast, I’ve been known to toast a slice and top it with a fried egg and a sprinkle of red pepper flakes. Don’t judge until you try it.
Storage: Store leftover focaccia in an airtight container or wrapped in foil at room temperature for up to 2 days. Do not refrigerate it—the cold temperature will dry it out and make the crumb stale faster. If you need to keep it longer, freeze it.
Freezing: Wrap the fully cooled focaccia tightly in plastic wrap, then in aluminum foil. Freeze for up to 3 months. To reheat, unwrap and place directly in a 350°F oven for 8-10 minutes, or until warmed through and the crust crisps up again. You can also toast individual slices in a toaster or under the broiler.
Reheating: The microwave will make focaccia rubbery and sad. Always use the oven or toaster for reheating. If you’re in a hurry, a cast iron skillet on medium heat works well—just add a splash of water and cover with a lid for 2 minutes to steam the interior, then uncover for 1 minute to crisp the bottom.
Nutritional Information & Benefits
While focaccia isn’t exactly health food, it does offer some nutritional benefits worth noting.
Estimated per serving (1/8 of the recipe):
- Calories: 280
- Total Fat: 12g
- Saturated Fat: 2g
- Carbohydrates: 36g
- Fiber: 2g
- Protein: 7g
- Sodium: 480mg
Health Benefits: The sourdough fermentation process breaks down some of the phytic acid in the flour, making the minerals more bioavailable. This means your body can actually absorb more of the nutrients from the bread compared to commercially yeasted versions. The olive oil provides heart-healthy monounsaturated fats, and garlic has been shown to support immune function and cardiovascular health. Fresh herbs like rosemary and thyme are packed with antioxidants.
Dietary Considerations: This recipe is naturally dairy-free and vegan. It contains gluten, so it’s not suitable for celiac disease or gluten sensitivity. If you’re watching your sodium intake, you can reduce the flaky salt on top, but don’t cut the salt in the dough—it’s essential for structure and flavor.
Conclusion
This garlic herb sourdough focaccia has become a staple in my kitchen for a reason. It’s forgiving enough for beginners, rewarding enough for experienced bakers, and delicious enough to make you feel like you’ve accomplished something real. There’s a deep satisfaction in pulling a golden, fragrant loaf out of your own oven—one that you mixed with your own hands and watched rise over the course of a day.
I love that this recipe doesn’t demand perfection. It’s okay if your dimples aren’t perfectly spaced or your herbs aren’t evenly distributed. The focaccia will still taste incredible, and the people you share it with won’t notice the imperfections—they’ll just notice how good it is. That’s the magic of homemade bread.
I’d love to hear how yours turns out. Did you try one of the variations? Did you add your own twist? Drop a comment below and let me know—I read every single one, and your feedback helps me create better recipes for you. And if you’re looking for another cozy, carb-heavy dish to round out your meal, my crispy loaded bacon mac and cheese casserole is the perfect companion to this focaccia. Happy baking, friends!
Frequently Asked Questions
Can I use all-purpose flour instead of bread flour?
Yes, you can. The focaccia will still be delicious, but it won’t have quite as much chew and structure. Bread flour has higher protein content, which creates more gluten and a more substantial crumb. If you use all-purpose, reduce the water slightly to 350g since all-purpose absorbs less liquid.
My dough is extremely sticky. Is that normal?
Yes, absolutely. Focaccia dough is one of the wettest doughs in bread baking—it should feel more like a thick batter than a traditional bread dough. Resist the urge to add more flour. The high hydration is what creates those beautiful air pockets and that light, airy texture. Use wet hands when handling it, and trust the process.
Can I make this without a sourdough starter?
This recipe is specifically designed for sourdough starter, but you can adapt it. Replace the 150g starter with 75g water and 75g flour, plus 1 teaspoon of active dry yeast. Mix the yeast with the warm water and let it sit for 5 minutes before adding the flour. The flavor won’t be as complex, but it will still be a great focaccia.
Why is my focaccia dense and heavy?
This usually happens for one of three reasons: your starter wasn’t active enough, your dough didn’t ferment long enough, or your oven wasn’t hot enough. Make sure your starter is bubbly and passes the float test (a spoonful floats in water) before using. Give the dough enough time to double during bulk fermentation. And preheat your oven fully—425°F is non-negotiable for a good rise and crispy crust.
Can I double this recipe?
Absolutely. Double all the ingredients and bake in two separate 9×13-inch pans. Don’t try to bake it all in one larger pan—the dough needs the sides of the pan to support its rise, and a single giant pan won’t give you the same texture. If you only have one pan, you can stagger the baking or refrigerate the second batch while the first one bakes.
Pin This Recipe!
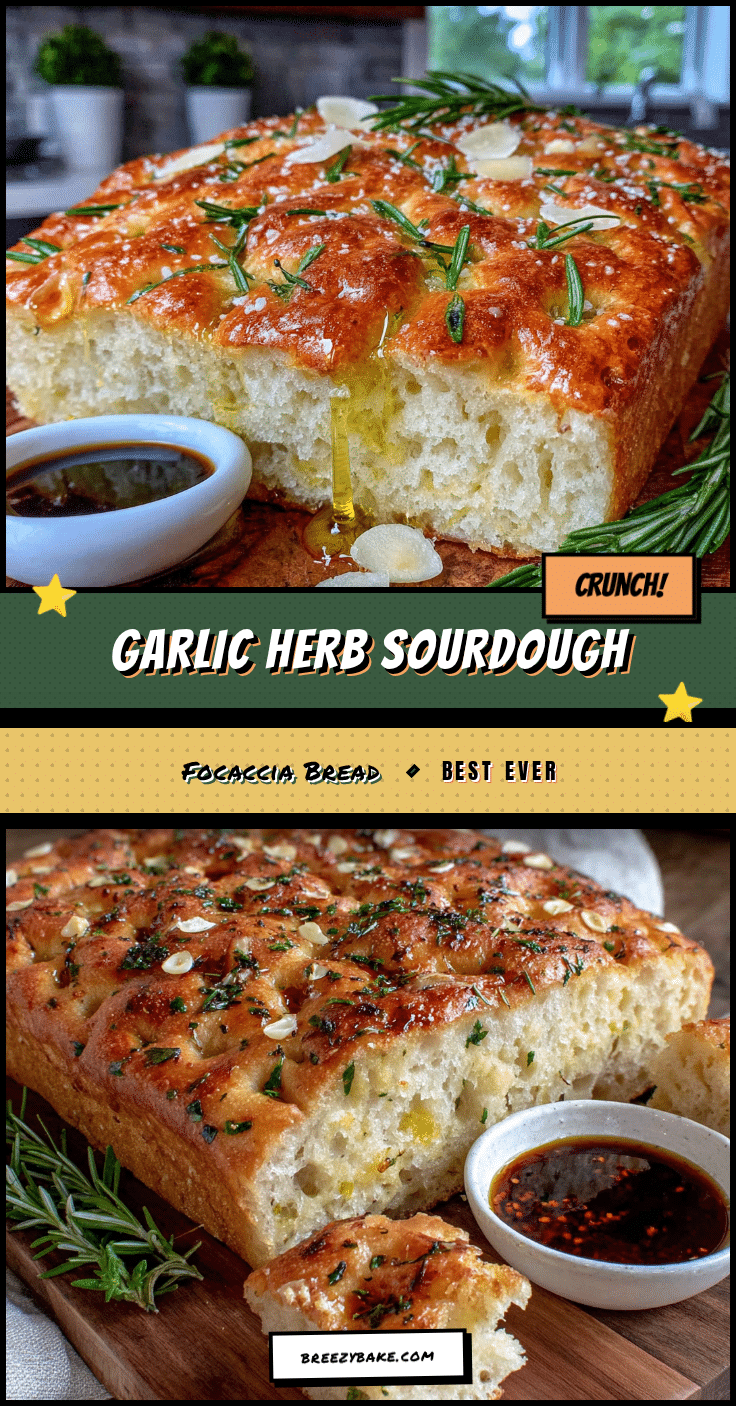
Perfect Garlic Herb Sourdough Focaccia Bread (Easy & Best Recipe)
This garlic herb sourdough focaccia features a shatteringly crisp crust, pillowy interior, and subtle tang from the sourdough starter. It’s forgiving for beginners and rewarding for experienced bakers, with simple ingredients and a no-knead method.
- Prep Time: 20 minutes
- Cook Time: 30 minutes
- Total Time: 4 hours 50 minutes (plus optional overnight cold retard)
- Yield: 8 servings 1x
- Category: Bread
- Cuisine: Italian
Ingredients
- 500g bread flour (about 4 cups)
- 150g active sourdough starter (about ¾ cup)
- 375g warm water (about 1½ cups, 85°F/29°C)
- 60g olive oil (about ¼ cup, for dough)
- 10g fine sea salt (about 1½ teaspoons)
- 6–8 garlic cloves, thinly sliced
- 2 tablespoons fresh rosemary, chopped
- 1 tablespoon fresh thyme leaves
- 1 teaspoon flaky sea salt (e.g., Maldon)
- 60g extra virgin olive oil (about ¼ cup, for pan and topping)
Instructions
- Mix the dough: In a large bowl, combine 375g warm water and 150g active sourdough starter. Stir until the starter mostly dissolves. Add 500g bread flour and 10g fine sea salt. Mix until no dry flour remains. The dough will look shaggy. Cover with plastic wrap and let rest for 30 minutes (autolyse).
- Perform stretch and folds: Over the next 2 hours, do 4 rounds of stretch and folds, spaced 30 minutes apart. Wet your hand slightly, grab one side of the dough, stretch it up, and fold it over the center. Rotate the bowl 90 degrees and repeat 4 times per round. Cover between rounds.
- Bulk fermentation: After the last stretch and fold, cover the bowl and let the dough rise at room temperature (72-75°F) for about 4 hours, until roughly doubled in size and bubbly on top.
- Cold retard (optional but recommended): After bulk fermentation, place the covered bowl in the refrigerator overnight for more complex flavor. If short on time, skip this step.
- Prepare the pan and second rise: Pour 2 tablespoons of olive oil into a 9×13-inch baking pan and spread evenly. Transfer the dough to the pan. Gently stretch to reach the corners; let rest 20 minutes, then stretch again until the dough fills the pan. Cover and let rise for 2-3 hours until puffy and doubled in thickness.
- Dimple the dough: Drizzle another 2 tablespoons of olive oil over the top. Dip fingertips in oil and press deep dimples all over the dough, all the way to the bottom of the pan. Scatter sliced garlic and fresh herbs evenly over the surface. Sprinkle with flaky sea salt.
- Bake: Preheat oven to 425°F (220°C). Bake on the middle rack for 25-30 minutes, until deep golden brown and edges are crispy. If browning too fast, tent with foil for the last 10 minutes. Cool in the pan for 5 minutes, then transfer to a wire rack.
- Cool and serve: Let cool for at least 15 minutes before slicing. Slice into squares or rectangles and serve warm or at room temperature.
Notes
Don’t skip the dimpling—press all the way to the bottom of the pan for crispy pockets. Use a thermometer for water temperature; ideal dough temp after mixing is about 78°F. Let the focaccia cool at least 15 minutes before slicing to avoid a gummy texture. For a crisper bottom, use a metal pan and bake on the lowest rack. Store at room temperature for up to 2 days; freeze for up to 3 months.
Nutrition
- Serving Size: 1/8 of recipe
- Calories: 280
- Sodium: 480
- Fat: 12
- Saturated Fat: 2
- Carbohydrates: 36
- Fiber: 2
- Protein: 7
Keywords: sourdough focaccia, garlic herb focaccia, easy focaccia recipe, no-knead bread, homemade focaccia, sourdough bread, Italian bread


