My neighbor Karen texted me a photo of her toast last Tuesday. It was slathered with something golden and speckled, and the caption just said, “This is the third day in a row. I think I have a problem.” She had made my Homemade Cinnamon Vanilla Pear Preserves over the weekend, and apparently, she couldn’t stop eating it. I laughed, but honestly? I knew exactly how she felt. I had gone through the same thing when I first made this batch — standing over the stove, stirring, and thinking about how this was nothing like the store-bought stuff I grew up on.
This recipe started because I had a box of pears that were getting too soft for snacking. You know those pears — the ones you buy with good intentions, thinking you’ll eat one every day, and then suddenly they’re all ripe at once? That was my situation. I didn’t want to bake another pear crisp, and I definitely didn’t want to toss them. So I grabbed my biggest pot, some cinnamon sticks I’d been hoarding, and a vanilla bean that was just sitting in my pantry looking pretty. What came out of that pot was something I never expected — a preserve that tastes like fall in a jar, but comes together in about fifteen minutes of active work.
The thing about making your own preserves is that it feels like a secret superpower. You take fruit that’s on its last leg, add a little sugar and some warmth, and suddenly you have something that feels special. Something you’d be proud to give as a gift. Something that makes plain yogurt taste like a fancy brunch item. I’ve been making this batch every few weeks since that first experiment, and I still get a little thrill when I see the jars lined up on my counter. It’s not complicated. It’s not fussy. It just works.
Why You’ll Love This Recipe
Let me tell you why this Homemade Cinnamon Vanilla Pear Preserves recipe has become my most-requested jar gift. It’s not just because it tastes good — though it absolutely does. It’s because this recipe actually respects your time and your kitchen skills.
- Quick & Easy: You only need about 15 minutes of active cooking time. No standing over a bubbling pot for hours. No complicated canning equipment required if you’re eating it within a few weeks.
- Simple Ingredients: Pears, sugar, lemon juice, cinnamon, and vanilla. That’s it. Five ingredients you can find at any grocery store, and you probably already have most of them.
- Perfect for Gifting: Tie a ribbon around a jar, and you’ve got a hostess gift that beats a bottle of wine any day. I’ve brought these to holiday parties and watched people hoard the jar.
- Forgiving & Foolproof: This isn’t one of those finicky recipes where you have to hit an exact temperature. If it’s a little thicker or thinner, it still tastes amazing. No stress.
- Unbelievably Versatile: I’ve used this on toast, stirred into oatmeal, spooned over cheesecake, and even mixed into salad dressings. It does everything.
What makes this recipe different from other pear preserves you might have tried is the vanilla. Most recipes just do cinnamon and pear, which is lovely but kind of one-note. The vanilla adds this round, floral sweetness that makes the whole thing feel more sophisticated. It’s the difference between a good preserve and one that makes people close their eyes when they taste it. I learned this trick from a pastry chef friend who told me that vanilla and pear are a match made in heaven — and she was right.
This is the kind of recipe that makes you feel like you’ve got your life together. You made preserves. From scratch. On a Tuesday. That’s the energy we’re going for here.
What Ingredients You Will Need
This recipe uses simple, wholesome ingredients to deliver bold flavor and satisfying texture without the fuss. Here’s what you’ll need to grab:
For the Preserves
- 3 pounds ripe but firm pears — Bartlett or Anjou work best (they break down nicely but keep some texture). Peeled, cored, and diced into ½-inch pieces. If your pears are super ripe, they’ll cook faster, so keep an eye on them.
- 1 ½ cups granulated sugar — Regular white sugar works perfectly. You can reduce this to 1 cup if your pears are very sweet, but the sugar helps with preservation and texture.
- 2 tablespoons fresh lemon juice — This adds brightness and helps the preserves set. Bottled lemon juice works in a pinch, but fresh really does taste better here.
- 2 cinnamon sticks — I prefer whole cinnamon sticks over ground cinnamon for this recipe. They infuse the preserves with warmth without making the texture grainy. Cinnamon powder works if that’s all you have — use 1 teaspoon.
- 1 vanilla bean (or 2 teaspoons pure vanilla extract) — This is where the magic happens. A vanilla bean gives you those beautiful black specks and a deep, authentic flavor. If using extract, add it after you remove the pot from heat so the alcohol doesn’t cook off.
Ingredient Selection Tips
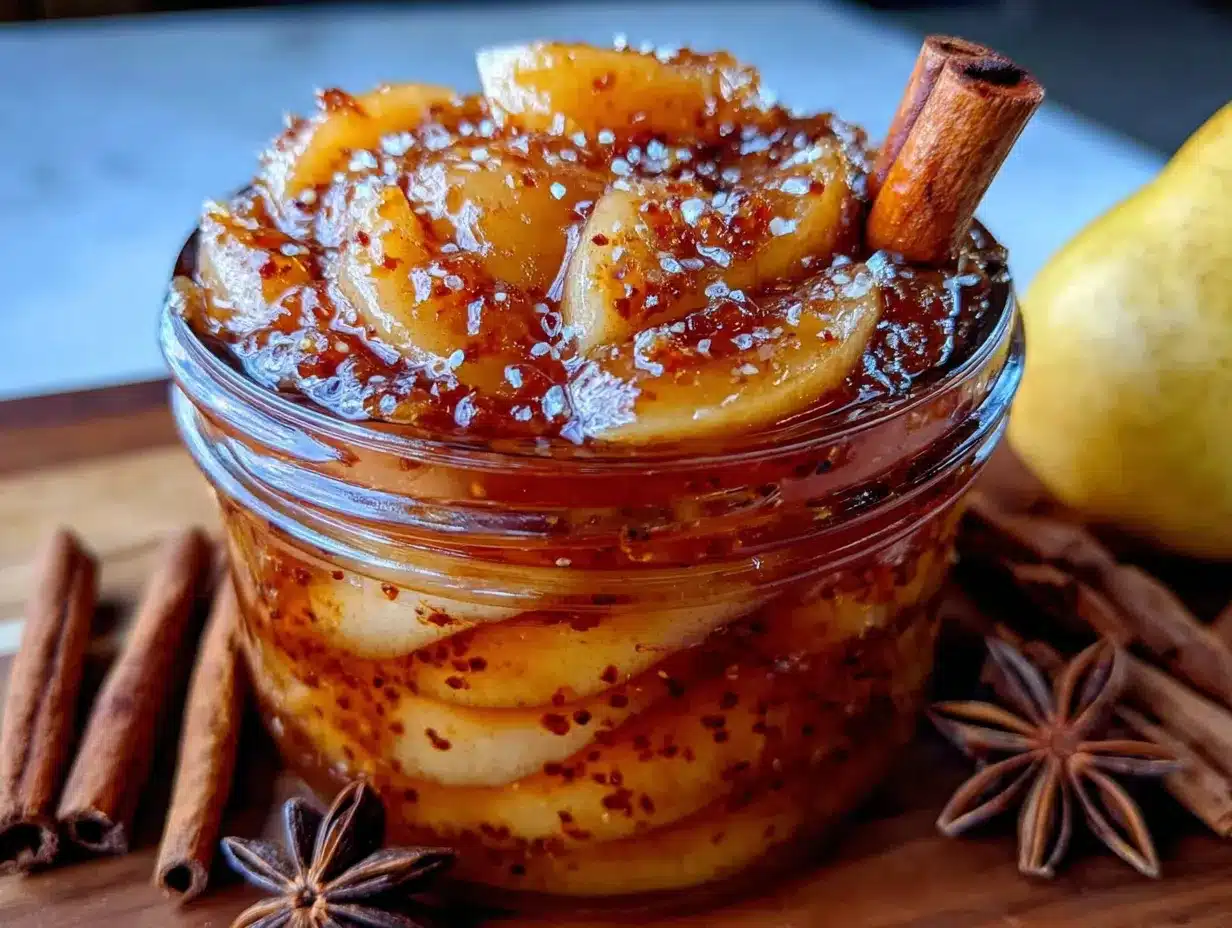
I recommend using Bartlett pears when they’re in season — they have that classic pear flavor and break down into a lovely, spreadable texture. Anjou pears are a great second choice and hold their shape a bit more if you like chunkier preserves. Avoid Bosc pears for this one; they’re too dense and don’t soften as nicely.
For the vanilla, I’ve tried a few brands, and honestly, Madagascar vanilla beans are my go-to. They’re plump, moist, and have that buttery vanilla flavor that makes this recipe sing. If you’re using extract, Nielsen-Massey is worth the splurge — it’s double-strength and makes a noticeable difference.
One thing I’ve learned the hard way: don’t skip the lemon juice. I made a batch without it once because I was out of lemons, and the preserves came out flat and a little too sweet. That little bit of acid balances everything out and helps the pectin in the fruit do its job.
Equipment Needed
You don’t need a fancy kitchen to make this recipe. Here’s what you’ll actually use:
- Large heavy-bottomed pot or Dutch oven — A 5- to 6-quart pot works perfectly. The heavy bottom prevents scorching, which is important because fruit sugars can burn easily. I use my Le Creuset, but any sturdy pot will do.
- Wooden spoon or silicone spatula — You’ll be stirring frequently, so use something that won’t scratch your pot. I prefer a wooden spoon because it feels right for jam-making.
- Chef’s knife and cutting board — For peeling and dicing the pears. A sharp knife makes the job go faster and safer.
- Vegetable peeler — A Y-peeler is my favorite for pears because it glides around their curves easily.
- Measuring cups and spoons — For accurate measurements. I know I said this recipe is forgiving, but measuring helps with consistency.
- Glass jars with lids — Two 16-ounce jars or four 8-ounce jars. I save my pasta sauce jars for this purpose. Make sure they’re clean and sterilized.
- Small plate and freezer — For testing if the preserves are set. Pop a plate in the freezer before you start cooking.
If you don’t have a heavy-bottomed pot, just use what you have and stir more frequently. I’ve made this in a regular stainless steel pot, and it worked fine — I just had to stay close to the stove. Budget-friendly tip: thrift stores often have great Dutch ovens for a fraction of the price.
Preparation Method
Let’s get cooking. This is the part where the magic happens, and I promise it’s easier than you think.
- Prep your pears (10 minutes): Peel the pears using your vegetable peeler. Cut them in half, scoop out the cores with a spoon or melon baller, and dice them into ½-inch pieces. Don’t stress about uniformity — some smaller pieces will break down and create a nice texture, while bigger pieces stay chunky. Toss the diced pears with the lemon juice in a large bowl to prevent browning.
- Start cooking (15 minutes active + simmer): Place the diced pears, sugar, and cinnamon sticks in your large pot. If you’re using a vanilla bean, split it lengthwise with a sharp knife and scrape the seeds into the pot. Drop the empty pod in too — it’ll infuse the preserves with even more flavor. Stir everything together until the sugar starts to dissolve.
- Bring to a gentle boil (5-7 minutes): Turn the heat to medium-high and stir occasionally. You’ll see the pears start to release their juice and the sugar melt into a syrupy liquid. Once it reaches a gentle boil — not a raging one, just a steady bubble — reduce the heat to medium-low.
- Simmer and stir (10-15 minutes): Let the mixture simmer gently, stirring every few minutes. You want the pears to soften and the liquid to thicken. The preserves are ready when the pears are tender and the syrup coats the back of your spoon. If you’re using vanilla extract instead of a bean, add it now, after you remove the pot from heat.
- Test for doneness (1 minute): Grab that cold plate from your freezer. Drop a small spoonful of the preserves onto it and let it sit for 30 seconds. Run your finger through it — if it wrinkles and holds its shape, it’s ready. If it’s still runny, cook for another 2-3 minutes and test again. Don’t overcook, though; the preserves will thicken more as they cool.
- Remove the cinnamon sticks and vanilla pod (30 seconds): Fish out the cinnamon sticks and the used vanilla pod with tongs. Rinse the vanilla pod, let it dry, and stick it in a jar of sugar — you just made vanilla sugar for your next baking project.
- Jar it up (5 minutes): Ladle the hot preserves into your clean jars, leaving about ¼ inch of headspace at the top. Wipe the rims with a clean, damp cloth, and screw on the lids. Let the jars cool to room temperature on your counter, then refrigerate.
Pro tip from my first failed batch: Don’t walk away during the simmering stage. I did that once — got distracted by a phone call — and came back to a pot that had started to scorch on the bottom. It still tasted fine, but I had to pick out some burnt bits. Stay close, stir often, and your preserves will thank you.
Cooking Tips & Techniques
I’ve made this recipe more times than I can count, and I’ve learned a few things along the way. Here’s what I wish someone had told me when I first started making preserves:
Don’t rush the pears. I know the recipe says 15 minutes, and that’s accurate for active cooking time. But if your pears are on the firmer side, they might need a few extra minutes to soften. That’s okay. Let them tell you when they’re ready. You’re looking for pears that are tender but not mushy — they should still have a little bite.
Use the freezer plate test. This is a game-changer. I used to guess whether my preserves were done, and I ended up with either runny jam or something closer to pear candy. The cold plate test takes the guesswork out. Just remember to put your plate in the freezer before you start cooking — I’ve forgotten this step more times than I’d like to admit.
Watch your heat. Medium-low is your friend here. If you cook the preserves on high heat, the sugar can caramelize too quickly, and you’ll end up with a darker color and a slightly bitter taste. Low and slow gives you that beautiful golden color and clean fruit flavor.
Skim the foam if you want. Sometimes a white foam forms on top of the preserves as they cook. This is just air bubbles and impurities from the fruit. You can skim it off with a spoon for a clearer preserve, or you can stir it back in — it’s totally harmless and you won’t taste it. I usually skim it because I like the way clear preserves look in the jar, but that’s just me being extra.
One thing I messed up early on: I used ground cinnamon instead of sticks once, and the texture was… not great. The ground cinnamon clumped up and left little gritty spots throughout the preserves. If you only have ground cinnamon, whisk it into the sugar before adding it to the pears, and use a little less — about 1 teaspoon for this batch size.
Variations & Adaptations
This recipe is a great base for experimentation. Here are some variations I’ve tried and loved:
Spiced Pear Preserves: Add a star anise pod and a piece of fresh ginger (about 1 inch, peeled and sliced) along with the cinnamon sticks. The anise adds a subtle licorice note that pairs surprisingly well with pear. Remove the star anise and ginger before jarring. I made this version for a holiday gift exchange, and it was the first jar to disappear.
Low-Sugar Version: Reduce the sugar to ¾ cup and add 2 tablespoons of honey or maple syrup. The preserves will be a little looser and won’t keep as long, but they’ll still taste amazing. Use within 2-3 weeks and keep refrigerated. I’ve made this for a friend who’s watching her sugar intake, and she said it was perfect on her morning toast.
Bourbon Pear Preserves: Add 2 tablespoons of good bourbon (I like Maker’s Mark for this) after you remove the pot from heat. The bourbon adds a warm, oaky depth that’s incredible on buttermilk biscuits. This is my go-to for adult brunch gatherings. Just be aware that the alcohol won’t cook off completely, so skip this one for kids.
Apple-Pear Mix: Swap half the pears for Granny Smith apples. The apples add tartness and a firmer texture that contrasts nicely with the soft pears. This version is especially good if your pears are very ripe and soft. I’ve also used this mix to make a Fresh Galentine’s Berry Parfait Mini Platter — just spoon the preserves over yogurt and granola for a quick, pretty breakfast.
Dairy-Free Adaptation: This recipe is naturally dairy-free, so no changes needed. But if you’re serving it with something like Creamy Valentine’s Pink Strawberry Crème Puff Bars, the pear preserves add a nice contrast to the sweet, creamy filling.
Serving & Storage Suggestions
This Homemade Cinnamon Vanilla Pear Preserves is incredibly versatile. Here’s how I like to use it:
Serving temperature: I prefer these preserves at room temperature or slightly chilled. If you’re spreading them on toast or biscuits, let the preserves sit out for 10-15 minutes to soften. Straight from the fridge, they’re a bit stiff — still delicious, just harder to spread.
Classic pairings: Spread on warm buttered toast, scones, or croissants. Swirl into Greek yogurt or oatmeal. Spoon over pancakes, waffles, or French toast. Use as a filling for thumbprint cookies or linzer tarts. I’ve even used it as a topping for vanilla ice cream — don’t judge until you try it.
Savory applications: This might sound weird, but trust me — this preserve is amazing with cheese. Spread it on a cracker with sharp cheddar or brie, and you’ve got an instant appetizer. I’ve also used it as a glaze for roasted pork chops or chicken thighs. Just brush it on during the last 10 minutes of cooking.
Storage instructions: Store in airtight jars in the refrigerator. The preserves will keep for 3-4 weeks. If you want to keep them longer, you can water-bath can them — process the jars in a boiling water bath for 10 minutes (adjust for altitude), and they’ll keep in a cool, dark pantry for up to a year. I’ve done this with a few batches, and they taste just as good months later.
Freezing option: You can freeze these preserves in freezer-safe containers for up to 6 months. Leave about ½ inch of headspace because the liquid expands as it freezes. Thaw in the refrigerator overnight before using. The texture might be slightly softer after freezing, but the flavor stays perfect.
How flavors develop: These preserves actually taste better after a day or two in the fridge. The cinnamon and vanilla have time to really meld with the pears, and the texture sets up nicely. So if you’re making them for a party, make them a day ahead — your future self will thank you.
Nutritional Information & Benefits
Here’s a rough estimate for a 2-tablespoon serving of these preserves:
| Nutrient | Amount per serving |
|---|---|
| Calories | 45 |
| Total Fat | 0g |
| Sodium | 1mg |
| Total Carbohydrates | 12g |
| Sugars | 10g |
| Fiber | 1g |
| Protein | 0g |
Health benefits of key ingredients: Pears are a good source of fiber, vitamin C, and copper. They’re also hydrating — pears are about 84% water. Cinnamon has anti-inflammatory properties and can help regulate blood sugar. Vanilla contains small amounts of B vitamins and minerals like magnesium and potassium.
Dietary considerations: This recipe is naturally gluten-free, dairy-free, and vegan. It’s also nut-free and egg-free, making it safe for most common allergies. The low-sugar variation mentioned above works well for those watching their sugar intake. Just keep in mind that preserves are still a sweet treat, so enjoy in moderation.
Potential allergens: None from the ingredients themselves, but always check your vanilla extract or vanilla beans for any additives if you have sensitivities. Some cheaper vanilla extracts contain corn syrup or artificial flavors.
I like to think of this preserve as a way to enjoy fruit in a more concentrated, satisfying form. It’s not health food, but it’s made from real ingredients — and that counts for something in my book.
Conclusion
This Homemade Cinnamon Vanilla Pear Preserves has become a staple in my kitchen for a reason. It’s simple enough for a weekday project but special enough to give as a gift. It uses up fruit that might otherwise go to waste, and it turns basic pantry ingredients into something that feels luxurious. Plus, it makes your kitchen smell amazing — like a cozy fall day, even in the middle of summer.
I hope you give this recipe a try and make it your own. Maybe you’ll add a little extra cinnamon, or swap in honey for some of the sugar, or serve it alongside Cozy Galentine’s Heart-Shaped Waffle Dessert Board for a brunch that’ll wow your friends. However you make it, I think you’ll love having a jar of this in your fridge.
If you make these preserves, I’d love to hear about it. Drop a comment below and let me know what you paired them with, or if you tried any fun variations. And if you’re feeling generous, share this recipe with a friend who loves homemade gifts — because honestly, that’s what this recipe is all about. Happy cooking!
Frequently Asked Questions
Can I use canned pears for this recipe?
You can, but the texture will be different. Canned pears are already soft, so they’ll break down much faster and you’ll end up with a smoother, more jam-like consistency. Drain them well and reduce the sugar slightly since they’re often packed in syrup. Fresh pears really do give the best results here.
Why didn’t my preserves thicken?
This usually happens for one of two reasons: either you didn’t cook it long enough, or your pears were very ripe and low in natural pectin. Try cooking it for another 5-10 minutes and testing again with the cold plate method. If it still won’t thicken, you can stir in a teaspoon of lemon juice or a tablespoon of chia seeds to help it set.
Can I reduce the sugar in this recipe?
Yes, you can reduce the sugar to 1 cup without affecting the texture too much. The preserves won’t keep as long — plan to use them within 2-3 weeks — and they’ll be a little looser. If you reduce it further, the preserves might not set properly and will be more like a pear compote. That’s still delicious, just different.
How do I know if my preserves have gone bad?
Look for signs of mold, an off smell, or a fermented taste. If you see any fuzzy spots on the surface, toss the whole jar — don’t try to scoop them out. Properly stored preserves should last 3-4 weeks in the fridge. If you water-bath canned them, they’ll last up to a year in the pantry.
Can I make this recipe with other fruits?
Absolutely! This technique works beautifully with apples, peaches, nectarines, or plums. Adjust the sugar based on the sweetness of the fruit — tart fruits like plums might need a little more sugar. The cinnamon and vanilla pairing works especially well with apples and peaches. I’ve even made a version with Decadent Chocolate-Dipped Strawberry Coconut Bars — just swap the pears for strawberries and reduce the cooking time since berries break down faster.
Pin This Recipe!
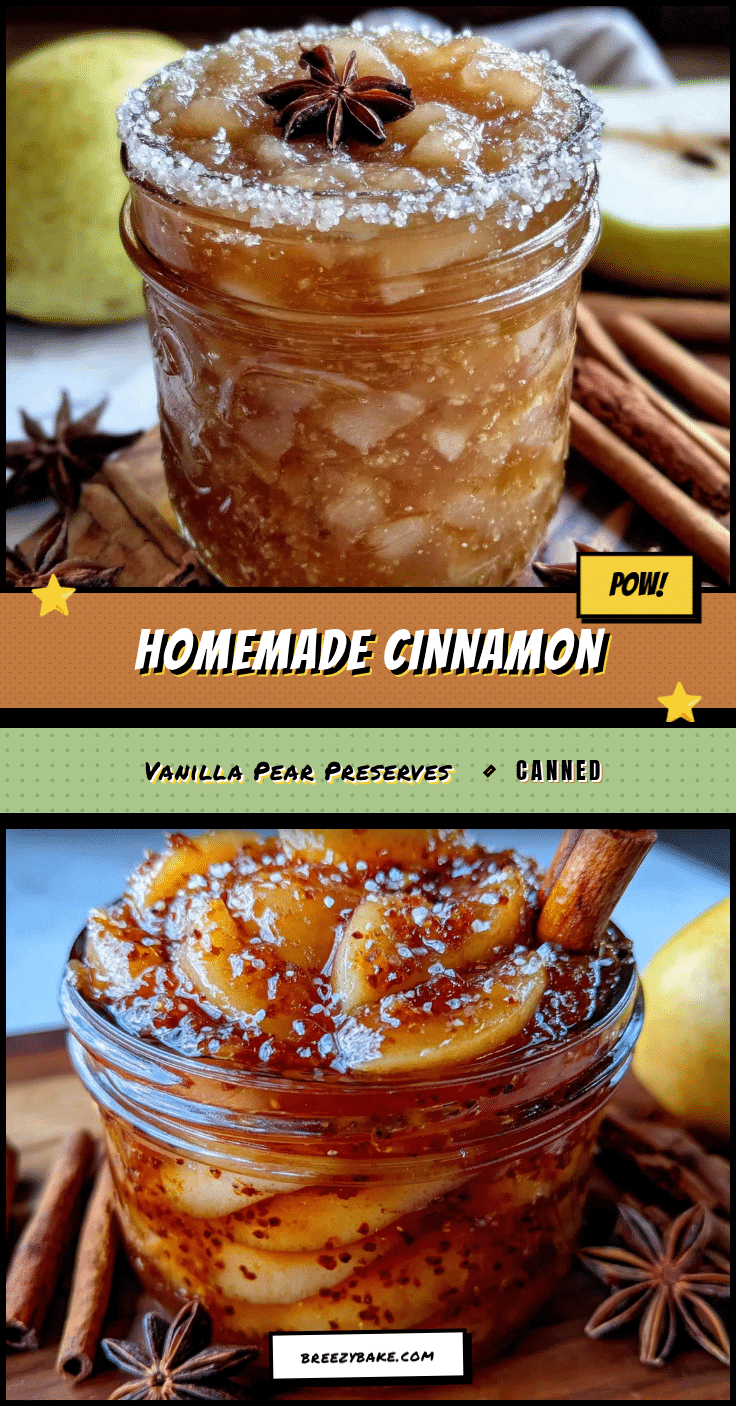
Homemade Cinnamon Vanilla Pear Preserves – Easy 15-Minute Recipe
This quick and easy pear preserve recipe combines ripe pears with cinnamon and vanilla for a sophisticated, spreadable treat that comes together in about 15 minutes of active cooking time. Perfect for gifting or enjoying on toast, yogurt, and more.
- Prep Time: 10 minutes
- Cook Time: 15 minutes
- Total Time: 25 minutes
- Yield: 4 servings (2 16-ounce jars or 4 8-ounce jars) 1x
- Category: Preserves
- Cuisine: American
Ingredients
- 3 pounds ripe but firm pears (Bartlett or Anjou), peeled, cored, and diced into ½-inch pieces
- 1 ½ cups granulated sugar
- 2 tablespoons fresh lemon juice
- 2 cinnamon sticks
- 1 vanilla bean (or 2 teaspoons pure vanilla extract)
Instructions
- Prep your pears (10 minutes): Peel the pears using your vegetable peeler. Cut them in half, scoop out the cores with a spoon or melon baller, and dice them into ½-inch pieces. Toss the diced pears with the lemon juice in a large bowl to prevent browning.
- Start cooking (15 minutes active + simmer): Place the diced pears, sugar, and cinnamon sticks in your large pot. If using a vanilla bean, split it lengthwise with a sharp knife and scrape the seeds into the pot. Drop the empty pod in too. Stir everything together until the sugar starts to dissolve.
- Bring to a gentle boil (5-7 minutes): Turn the heat to medium-high and stir occasionally. Once it reaches a gentle boil, reduce the heat to medium-low.
- Simmer and stir (10-15 minutes): Let the mixture simmer gently, stirring every few minutes. The preserves are ready when the pears are tender and the syrup coats the back of your spoon. If using vanilla extract instead of a bean, add it now, after you remove the pot from heat.
- Test for doneness (1 minute): Grab a cold plate from your freezer. Drop a small spoonful of the preserves onto it and let it sit for 30 seconds. Run your finger through it — if it wrinkles and holds its shape, it’s ready. If still runny, cook for another 2-3 minutes and test again.
- Remove the cinnamon sticks and vanilla pod (30 seconds): Fish out the cinnamon sticks and the used vanilla pod with tongs. Rinse the vanilla pod, let it dry, and stick it in a jar of sugar to make vanilla sugar.
- Jar it up (5 minutes): Ladle the hot preserves into clean jars, leaving about ¼ inch of headspace. Wipe the rims with a clean, damp cloth, and screw on the lids. Let the jars cool to room temperature, then refrigerate.
Notes
Don’t walk away during simmering to avoid scorching. Use the freezer plate test to check doneness. If using ground cinnamon instead of sticks, whisk 1 teaspoon into the sugar first to avoid clumps. The preserves taste even better after a day or two in the fridge.
Nutrition
- Serving Size: 2 tablespoons
- Calories: 45
- Sugar: 10
- Sodium: 1
- Carbohydrates: 12
- Fiber: 1
Keywords: pear preserves, cinnamon vanilla pear preserves, homemade preserves, easy pear jam, quick pear preserves, fall preserves, gift jar recipe


