I want deep, concentrated tomato flavor in a jar right now, and I have everything except the patience to stand over a stovetop for hours. That’s the thing about homemade sauce—you either spend your afternoon stirring and splattering, or you let your oven do the heavy lifting. I choose the oven every single time. This slow-roasted method isn’t just easier; it changes the entire personality of the sauce. The tomatoes caramelize in a way that no stovetop simmer can replicate, turning sweet and almost jammy before they even hit the pot. I stumbled into this technique during a particularly chaotic tomato season a few years back when my counter was buried under a mountain of Roma tomatoes and I simply refused to babysit another bubbling pot.
There’s a quiet magic to walking past the oven and catching that sweet, roasted aroma filling the kitchen. It smells like summer savings, honestly. The tomatoes shrink and concentrate, their edges catching just a hint of color, releasing juices that pool and intensify. By the time they’re soft enough to collapse under a fork, you’ve got something that already tastes like finished sauce. It feels almost like cheating. I’ve made this recipe every September since then, and it’s become my favorite way to preserve the season’s best produce without feeling tied to the stove all day.
Why You’ll Love This Recipe
This isn’t just another canning recipe. It’s the one that makes you wonder why you ever bothered with store-bought jars. The slow-roasting step transforms ordinary tomatoes into something deeply savory and naturally sweet, without adding any sugar. You get a rich, complex sauce that tastes like it simmered all day, but the oven did most of the work.
- Hands-Off Method: The oven does the hard part. You just halve, roast, and blend.
- Intense Flavor: Roasting concentrates the tomatoes, creating a sauce with incredible depth and natural sweetness.
- Pantry-Friendly: Uses simple, whole ingredients you can find at any grocery store or farmers market.
- Perfect for Canning: This sauce is designed for safe water bath canning, so you can enjoy summer tomatoes all year long.
- Versatile Base: Use it for pasta, pizza, soups, stews, or as a dipping sauce. It’s a blank canvas for your favorite flavors.
- Crowd-Pleasing: Even people who claim they don’t like tomato sauce will ask for the recipe. It’s that good.
This recipe came from a place of pure kitchen frustration, and it turned into my most requested preserve. It’s the kind of sauce that makes a simple weeknight pasta feel like a special meal. You’ll close your eyes after the first bite, I promise.
What Ingredients You Will Need
This recipe relies on a short list of quality ingredients. Each one plays a role in building that deep, slow-roasted flavor. Most of these are pantry staples, especially during tomato season.
- Roma Tomatoes (10 lbs): These are my go-to for canning. They have fewer seeds and less water than other varieties, which means a thicker sauce with less cooking time. Look for firm, deep red tomatoes with no soft spots. If you can’t find Romas, San Marzano or Amish Paste tomatoes work beautifully too.
- Large Onions (2, roughly chopped): Yellow onions add a savory backbone. I’ve tried sweet onions, but yellow gives a more balanced flavor that doesn’t overpower the tomatoes. Chop them roughly—they’ll soften and blend into the sauce.
- Garlic Cloves (8-10, peeled): Whole cloves roast gently in the oven, turning sweet and mellow. Don’t skip these. Roasted garlic adds a subtle richness you can’t get from fresh.
- Extra Virgin Olive Oil (1/4 cup): A good quality olive oil helps the vegetables roast evenly and adds a fruity note. I use a California brand I trust for its consistent flavor.
- Fresh Basil Leaves (1/2 cup, packed): Added after roasting, fresh basil keeps its bright, peppery flavor. Dried basil just doesn’t compare here.
- Fresh Oregano (2 tablespoons, chopped) or 1 teaspoon dried: A little goes a long way. Oregano adds that classic Italian note without being overwhelming.
- Kosher Salt (2-3 teaspoons, to taste): Salt is crucial for balancing acidity and bringing out sweetness. I start with 2 teaspoons and adjust at the end.
- Freshly Ground Black Pepper (1 teaspoon): Adds a gentle warmth. Use freshly ground for the best flavor.
- Bottled Lemon Juice (1 tablespoon per pint jar): This is non-negotiable for safe canning. Bottled lemon juice has a consistent acidity level that fresh lemon juice can’t guarantee. Do not substitute.
Ingredient Selection Tip: For the best flavor, use in-season, locally grown tomatoes whenever possible. They’re sweeter and more flavorful than out-of-season supermarket tomatoes. If you’re buying from a farmers market, ask the grower which variety they recommend for sauce. Most will point you toward paste tomatoes.
Equipment Needed
You don’t need a professional kitchen to make this sauce, but a few key tools make the process smoother and safer. Here’s what you’ll need:
- Large Baking Sheets (2-3): Rimmed baking sheets are essential for catching the tomato juices as they roast. I use half-sheet pans for even roasting.
- Large Stockpot or Dutch Oven: For simmering the sauce after roasting. A 12-quart pot is ideal for this batch size.
- Immersion Blender or Regular Blender: An immersion blender lets you puree the sauce right in the pot, which means less cleanup. A countertop blender works too, just work in batches and be careful with hot liquids.
- Water Bath Canner or Large Pot with Rack: For safely processing the jars. You need a pot deep enough to cover the jars with at least 1 inch of water.
- Canning Jars, Lids, and Bands (about 6-7 pint jars): Standard Mason jars work perfectly. Check for cracks or chips before using.
- Jar Lifter and Canning Funnel: These make handling hot jars much safer. A jar lifter is worth every penny.
- Kitchen Towels: For drying tomatoes and wiping jar rims. Clean, lint-free towels are best.
Budget-Friendly Options: If you don’t have a water bath canner, any large, deep pot with a lid and a rack will work. You can also use a folded kitchen towel in the bottom of the pot to keep jars off the direct heat. Just make sure the pot is deep enough to cover the jars by at least an inch of water.
Preparation Method
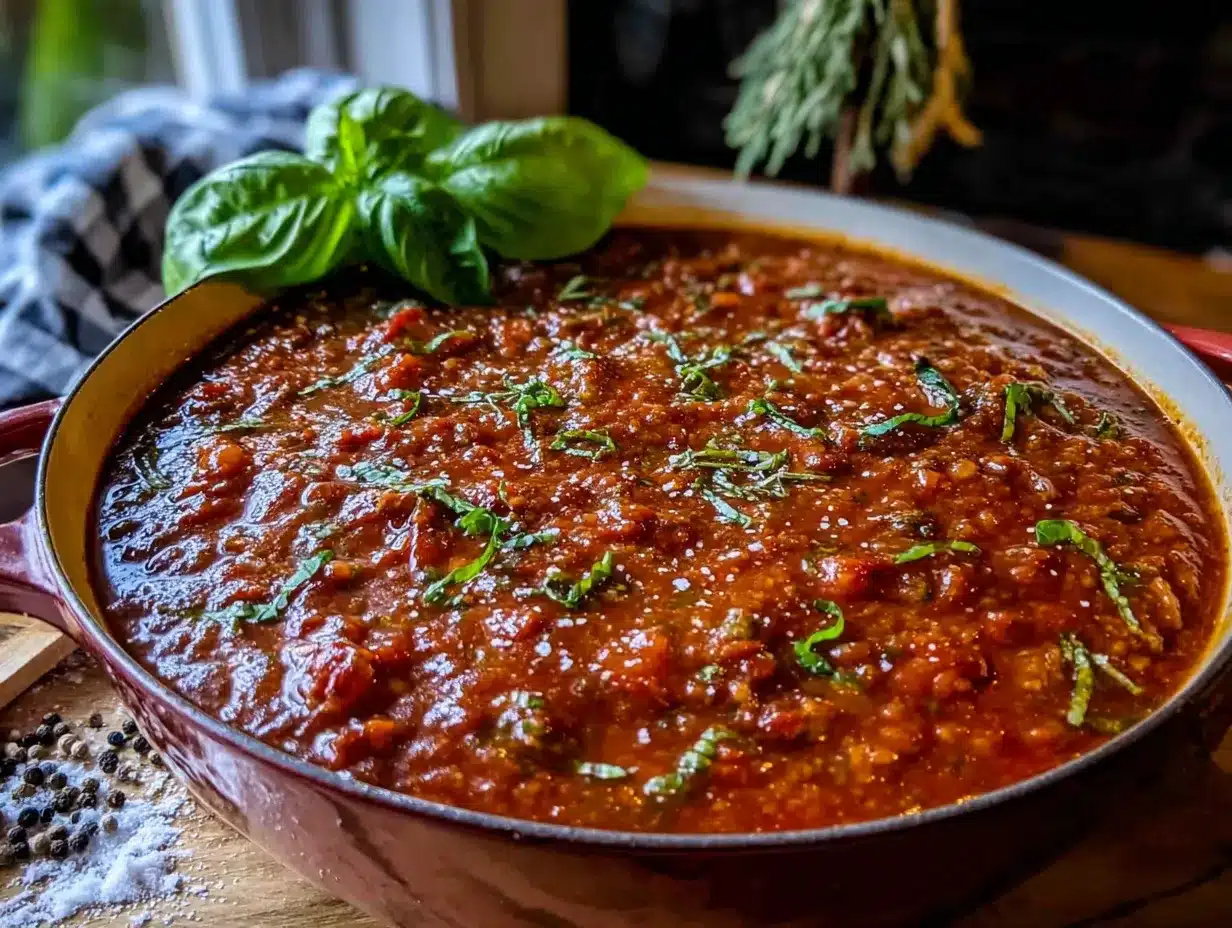
This method is straightforward, but each step matters. Take your time, especially with the roasting—it’s where the magic happens.
- Preheat and Prep: Preheat your oven to 300°F (150°C). Wash all your tomatoes thoroughly and remove any stems or blemishes. Cut each tomato in half lengthwise. Place them cut-side up on your baking sheets, packing them tightly but not overlapping too much.
- Roast the Vegetables: Scatter the chopped onions and whole garlic cloves over the tomatoes. Drizzle everything with the olive oil and season with 1 teaspoon of salt and 1/2 teaspoon of pepper. Toss gently with your hands to coat. Roast for 2 to 2.5 hours, until the tomatoes are very soft, wrinkled, and starting to brown around the edges. The onions should be translucent and caramelized. The garlic will be soft and golden. Your kitchen will smell incredible at this point.
- Cool and Blend: Let the roasted vegetables cool on the baking sheets for about 15 minutes. This makes them safer to handle and blend. Transfer everything—including all the juices from the baking sheets—to your large stockpot. Add the fresh basil and oregano. Use an immersion blender to puree the mixture until smooth. If using a regular blender, work in batches and fill the blender no more than halfway to avoid hot liquid explosions. Vent the lid slightly to let steam escape.
- Simmer and Season: Bring the pureed sauce to a gentle simmer over medium heat. Reduce the heat to low and cook, stirring occasionally, for 30 to 45 minutes. The sauce will thicken slightly and the flavors will meld. Taste and adjust seasoning with additional salt and pepper. Remember, the flavors will concentrate further during canning, so don’t oversalt.
- Prepare for Canning: While the sauce simmers, prepare your water bath canner and jars. Wash the jars, lids, and bands in hot, soapy water. Rinse well. Place the jars in the canner and cover with water. Bring to a simmer (180°F) and keep the jars hot until you’re ready to fill them. Place the lids in a small saucepan of hot water (not boiling) to soften the sealing compound.
- Fill the Jars: Add 1 tablespoon of bottled lemon juice to each hot pint jar. Using your canning funnel and ladle, fill the jars with hot sauce, leaving 1/2 inch of headspace. Run a non-metallic spatula or chopstick around the inside of the jar to release any air bubbles. Wipe the jar rims clean with a damp paper towel. Center a lid on each jar and screw on the band until fingertip-tight—don’t overtighten.
- Process the Jars: Place the filled jars back into the water bath canner. Make sure the water covers the jars by at least 1 inch. Bring the water to a full rolling boil. Process pint jars for 35 minutes (adjust for altitude if needed). Start the timer only after the water returns to a full boil.
- Cool and Check Seals: After processing, turn off the heat and let the jars sit in the canner for 5 minutes. Use your jar lifter to remove the jars and place them on a clean kitchen towel. Let them cool undisturbed for 12 to 24 hours. You’ll hear the satisfying “ping” of the lids sealing as they cool. After cooling, press the center of each lid. It should not flex up or down. Remove the bands and gently lift the jar by the lid edge to test the seal. Any unsealed jars should be refrigerated and used within a week.
Sensory Cue: When the tomatoes are properly roasted, they’ll look slightly shriveled and the edges will be a deep, caramelized brown. The juices in the pan will be syrupy and fragrant. This is the moment the sauce transforms from good to extraordinary.
Cooking Tips & Techniques
I’ve made this sauce more times than I can count, and I’ve learned a few things the hard way. Here are my best tips for perfect results every time.
Don’t Skip the Roasting: I know it’s tempting to just dump everything in a pot and simmer, but roasting is non-negotiable for the best flavor. The high, dry heat caramelizes the natural sugars in the tomatoes, creating a depth you can’t achieve any other way. Trust the process—your patience will be rewarded.
Watch Your Headspace: This is a common mistake for new canners. Too much headspace means the jars might not seal properly. Too little headspace can cause the sauce to bubble out during processing. Use a ruler or the markings on your canning funnel to measure exactly 1/2 inch. It makes a difference.
Altitude Adjustments: If you live above 1,000 feet, you need to increase your processing time. At 1,001-3,000 feet, add 5 minutes. At 3,001-6,000 feet, add 10 minutes. Above 6,000 feet, add 15 minutes. Check your local extension office for exact recommendations.
One Batch Disaster: I once tried to double this recipe and roast everything on a single baking sheet. The tomatoes steamed instead of roasted, and the sauce was watery and bland. Don’t overcrowd your pans. Use multiple sheets or roast in batches. Crowded tomatoes release too much steam and never get that caramelized edge.
Timing is Everything: Start your canning water heating up while the sauce simmers. This saves time and ensures your jars are hot when you’re ready to fill them. Cold jars can crack when filled with hot sauce, and hot jars help maintain the temperature during processing.
Variations & Adaptations
This recipe is a fantastic base, and you can easily adapt it to suit your tastes or what you have on hand. Here are a few variations I’ve tried and loved.
- Spicy Arrabbiata Style: Add 2-3 dried red chili peppers to the roasting pan along with the vegetables. Remove them before blending, or leave them in for a more intense heat. I love this version for pasta with sausage.
- Roasted Red Pepper and Tomato: Add 2 large red bell peppers, seeded and quartered, to the baking sheets. They roast alongside the tomatoes and add a subtle sweetness and a beautiful color to the sauce. This is my go-to for pizza sauce.
- Herb-Infused Oil Finish: After blending the sauce, stir in a tablespoon of fresh thyme or rosemary that’s been briefly steeped in warm olive oil. It adds a fragrant, sophisticated note that’s perfect for special dinners.
- Smoky Chipotle Version: Add 1-2 chipotle peppers in adobo sauce to the pot during the simmering stage. This gives the sauce a smoky, complex heat that’s incredible in chili or on tacos. Start with one pepper and taste before adding more.
- Low-Sodium Option: Reduce the salt to 1 teaspoon during roasting and skip the salt during simmering. You can add salt to taste when you use the sauce later. The roasted flavor is still fantastic without much salt.
I once added a whole head of roasted garlic to a batch on a whim, and it was so good I almost didn’t share it. That’s the beauty of this recipe—it’s forgiving and encourages experimentation.
Serving & Storage Suggestions
This sauce is incredibly versatile, and how you serve it can change the whole meal. Here are my favorite ways to enjoy it.
Serving Suggestions: Serve the sauce warm over your favorite pasta—spaghetti, rigatoni, or pappardelle all work beautifully. It’s also fantastic as a pizza base, spread over a par-baked crust with fresh mozzarella and basil. For a quick weeknight meal, toss it with cooked gnocchi and a handful of fresh spinach. It even works as a dipping sauce for crispy tater tots or homemade breadsticks.
Storage Instructions: Properly sealed jars of this sauce can be stored in a cool, dark place for up to 18 months. Once opened, refrigerate and use within 5-7 days. The flavor actually deepens after a few weeks in the jar, so don’t be afraid to let it sit.
Reheating Tips: For the best texture, reheat the sauce gently on the stovetop over low heat. Add a splash of pasta water or broth if it seems too thick. Avoid boiling, which can make the sauce taste slightly flat. If you’re in a hurry, microwave it in a covered bowl for 1-2 minutes, stirring halfway through.
Freezer Option: If you don’t want to can the sauce, you can freeze it instead. Let the sauce cool completely, then transfer it to freezer-safe containers or bags. Leave about 1 inch of headspace for expansion. Frozen sauce will keep for 6-8 months. Thaw overnight in the refrigerator before using.
Nutritional Information & Benefits
This homemade sauce is not only delicious but also packed with nutritional benefits. Here’s a quick overview per 1/2 cup serving (approximate).
| Nutrient | Amount |
|---|---|
| Calories | 70 |
| Total Fat | 4g |
| Saturated Fat | 0.5g |
| Sodium | 200mg |
| Total Carbohydrates | 9g |
| Dietary Fiber | 2g |
| Sugars | 6g |
| Protein | 2g |
| Vitamin C | 20% DV |
| Vitamin A | 15% DV |
| Potassium | 8% DV |
Health Benefits: Tomatoes are rich in lycopene, a powerful antioxidant linked to heart health and cancer prevention. Roasting actually increases the bioavailability of lycopene, making it easier for your body to absorb. The olive oil adds healthy monounsaturated fats, and the garlic provides anti-inflammatory properties. This sauce is naturally gluten-free, dairy-free, and vegan, making it a great option for many dietary needs. It’s a wholesome, nutrient-dense addition to any meal.
Conclusion
This homemade slow-roasted canning tomato sauce is more than just a recipe—it’s a way to capture the peak of summer and enjoy it all year long. The oven does most of the work, transforming simple tomatoes into a rich, complex sauce that tastes like slow-simmered tradition. Whether you’re a seasoned canner or trying it for the first time, this method is forgiving and rewarding. You’ll end up with jars of liquid gold that make every meal feel special.
I love this recipe because it reminds me that good things take time, but they don’t have to be complicated. It’s a small act of preservation that pays off in flavor and convenience for months to come. I’d love to hear how your batch turns out. Did you try any variations? How did you serve it? Leave a comment below and share your experience. And if you’re looking for another comforting, make-ahead meal, you might enjoy this healthy chicken veggie skillet wrap for a quick weeknight dinner. Happy canning, friends!
Frequently Asked Questions
Can I use this recipe for canning without a water bath?
No, this recipe is specifically formulated for water bath canning due to its acidity level. If you want to skip canning, you can freeze the sauce instead. Just let it cool completely and store it in freezer-safe containers for up to 8 months.
Why do I need to use bottled lemon juice instead of fresh?
Bottled lemon juice has a standardized acidity level (around 5% acidity), which is essential for safe canning. Fresh lemon juice can vary in acidity, which might make your sauce unsafe for long-term storage. Stick with bottled for consistent results.
Can I use different types of tomatoes?
Absolutely! Roma tomatoes are ideal for their low moisture content, but you can use San Marzano, Amish Paste, or any paste-type tomato. If you use larger, juicier varieties like beefsteak tomatoes, you’ll need to simmer the sauce longer to reach the desired thickness.
How do I know if my jars are properly sealed?
After the jars cool completely, press the center of each lid. If it doesn’t flex up or down, it’s sealed. You can also remove the band and gently lift the jar by the lid edge. If the lid holds, it’s sealed. Any unsealed jars should be refrigerated and used within a week.
Can I add meat or other vegetables to this sauce before canning?
For safe canning, stick to the recipe as written. Adding meat, low-acid vegetables, or extra oil changes the acidity and processing requirements. If you want to customize, add those ingredients when you open the jar and reheat the sauce for serving.
Pin This Recipe!
Best Homemade Slow-Roasted Canning Tomato Sauce

This slow-roasted method transforms ordinary tomatoes into a deeply savory and naturally sweet sauce without adding any sugar. The oven does most of the work, creating a rich, complex sauce that tastes like it simmered all day.
- Prep Time: 20 minutes
- Cook Time: 2 hours 30 minutes
- Total Time: 3 hours 30 minutes
- Yield: 6-7 pint jars 1x
- Category: Sauce
- Cuisine: Italian
Ingredients
- 10 lbs Roma tomatoes
- 2 large onions, roughly chopped
- 8–10 garlic cloves, peeled
- 1/4 cup extra virgin olive oil
- 1/2 cup packed fresh basil leaves
- 2 tablespoons fresh oregano, chopped (or 1 teaspoon dried)
- 2–3 teaspoons kosher salt, to taste
- 1 teaspoon freshly ground black pepper
- 1 tablespoon bottled lemon juice per pint jar
Instructions
- Preheat oven to 300°F (150°C). Wash tomatoes, remove stems and blemishes, and cut each in half lengthwise. Place cut-side up on baking sheets.
- Scatter chopped onions and whole garlic cloves over tomatoes. Drizzle with olive oil, season with 1 teaspoon salt and 1/2 teaspoon pepper, and toss gently to coat. Roast for 2 to 2.5 hours until tomatoes are very soft, wrinkled, and starting to brown around the edges.
- Let roasted vegetables cool on baking sheets for 15 minutes. Transfer everything (including juices) to a large stockpot. Add fresh basil and oregano. Puree with an immersion blender until smooth. (If using a regular blender, work in batches, filling no more than halfway and venting the lid.)
- Bring pureed sauce to a gentle simmer over medium heat. Reduce heat to low and cook, stirring occasionally, for 30 to 45 minutes until thickened. Taste and adjust seasoning with additional salt and pepper.
- While sauce simmers, prepare water bath canner and jars. Wash jars, lids, and bands in hot soapy water. Place jars in canner, cover with water, and bring to a simmer (180°F). Keep jars hot. Place lids in hot water to soften sealing compound.
- Add 1 tablespoon bottled lemon juice to each hot pint jar. Using a canning funnel and ladle, fill jars with hot sauce, leaving 1/2 inch headspace. Run a non-metallic spatula around inside to release air bubbles. Wipe rims clean, center lids, and screw on bands fingertip-tight.
- Place filled jars in water bath canner, ensuring water covers jars by at least 1 inch. Bring to a full rolling boil. Process pint jars for 35 minutes (adjust for altitude if needed). Start timer after water returns to a full boil.
- After processing, turn off heat and let jars sit in canner for 5 minutes. Remove jars with jar lifter and place on a clean kitchen towel. Cool undisturbed for 12 to 24 hours. Check seals: press center of lid; it should not flex. Remove bands and gently lift jar by lid edge to test seal. Refrigerate any unsealed jars and use within a week.
Notes
Don’t skip the roasting step—it caramelizes natural sugars for deep flavor. Use bottled lemon juice for safe canning (standardized acidity). Adjust processing time for altitude: add 5 minutes at 1,001-3,000 ft, 10 minutes at 3,001-6,000 ft, 15 minutes above 6,000 ft. Avoid overcrowding baking sheets to ensure proper roasting. Start heating canning water while sauce simmers to save time.
Nutrition
- Serving Size: 1/2 cup
- Calories: 70
- Sugar: 6
- Sodium: 200
- Fat: 4
- Saturated Fat: 0.5
- Carbohydrates: 9
- Fiber: 2
- Protein: 2
Keywords: homemade tomato sauce, slow-roasted tomato sauce, canning tomato sauce, Roma tomatoes, water bath canning, preserving tomatoes, homemade pasta sauce


