I want a pumpkin roll. Not a cake, not a pie, not even those cute little pumpkin muffins I made last week. A roll. Specifically, that tight spiral of spiced orange cake hugging a ribbon of cream cheese filling that I can slice into perfect little pinwheels. And I have everything except patience—which, let’s be honest, is the one ingredient you really need for this recipe.
The first time I attempted a pumpkin roll, I was maybe twenty-two, living in an apartment with a warped baking sheet and way too much confidence. I’d watched my grandmother make them for years, her hands moving like she was born rolling cake. She never measured anything, just tossed flour and sugar into a bowl until it looked right. That approach? It does not work for jelly rolls. My first attempt cracked in three places. The filling oozed out the sides like it was trying to escape. I stood there, spatula in hand, wondering if I could just call it deconstructed pumpkin dessert and serve it in a bowl.
But here’s the thing about recipes that humble you—they’re usually the ones worth mastering. After that first disaster, I called my grandmother. She laughed (for a solid minute), then walked me through every detail she’d never written down. The towel, she said. That’s the secret. Not the cake, not the filling, but the clean kitchen towel dusted with powdered sugar. Roll it while it’s warm. Let it cool that way. Unroll, fill, reroll. Simple, but not obvious.
This classic pumpkin roll with cream cheese filling is the version I’ve made dozens of times since that phone call. It’s the one I bring to Thanksgiving, the one friends request for fall gatherings, the one that actually works without making you want to throw a towel at the wall. And honestly? Once you get the technique down, it’s easier than you think.
Why You’ll Love This Recipe
Let me tell you why this particular pumpkin roll earns a permanent spot in your fall baking rotation. I’ve tested this recipe across multiple ovens, different brands of pumpkin puree, and even one ill-advised attempt with a gluten-free flour blend (we’ll talk about that later). This version is the one that delivers every single time.
- Impressive Without the Stress : This looks like something you’d buy at a fancy bakery, but it’s really just a thin cake rolled around cream cheese filling. The swirl does all the heavy lifting visually.
- Perfect Make-Ahead Dessert : In fact, it’s better the next day. The flavors meld, the filling sets, and slicing becomes much cleaner. You can make this two days ahead and just pull it out before serving.
- Uses Simple Pantry Ingredients : No weird extracts or specialty flours here. Canned pumpkin, basic baking staples, and cream cheese. You probably have most of this already.
- Naturally Seasonal : The pumpkin and warm spices make this taste like autumn in slice form. It’s perfect for Thanksgiving, Halloween parties, or just a cozy weekend baking project.
- Customizable to Your Taste : Want more spice? Add extra cinnamon. Prefer a thicker filling? Easy adjustment. This recipe handles tweaks really well.
- Freezes Beautifully : Make two, freeze one, and thank yourself later when you need a last-minute dessert for unexpected guests.
I’ve brought this pumpkin roll to more gatherings than I can count, and it always gets that pause—you know, the one where someone takes a bite, stops talking, and just looks at the roll with appreciation. That’s the reaction you want. And it’s totally achievable on your first try, as long as you follow a few key steps.
What Ingredients You Will Need
This recipe uses straightforward ingredients, but each one plays a specific role in creating that tender cake and silky filling. Let me walk you through what you need and why it matters.
For the Pumpkin Cake
- ¾ cup all-purpose flour – Spoon and level this. Scooping directly from the bag packs in too much flour and makes the cake dense.
- 1 teaspoon baking powder – The leavening agent that gives the cake just enough lift without making it fluffy. We want thin and flexible here.
- ½ teaspoon baking soda – Reacts with the acid in the pumpkin for extra tenderness.
- ½ teaspoon salt – Balances sweetness and enhances the spices.
- 2 teaspoons ground cinnamon – I use Vietnamese cinnamon here. It’s stronger and sweeter than regular cinnamon, and it really shines in this recipe.
- 1 teaspoon pumpkin pie spice – If you don’t have this, use ½ teaspoon nutmeg, ¼ teaspoon ginger, and ¼ teaspoon cloves as a substitute.
- 3 large eggs, room temperature – Cold eggs seize the batter. Leave them on the counter for 30 minutes before starting.
- 1 cup granulated sugar – White sugar keeps the cake light. Brown sugar would add moisture but also make it heavier, which complicates rolling.
- ⅔ cup canned pumpkin puree – Not pumpkin pie filling. That’s sweetened and spiced differently. I prefer Libby’s brand for consistent texture and moisture content.
- 1 teaspoon vanilla extract – Pure vanilla, not imitation. It makes a difference in the overall flavor depth.
- Powdered sugar, for dusting – You’ll need about ¼ cup for the towel and more for the finished roll.
For the Cream Cheese Filling
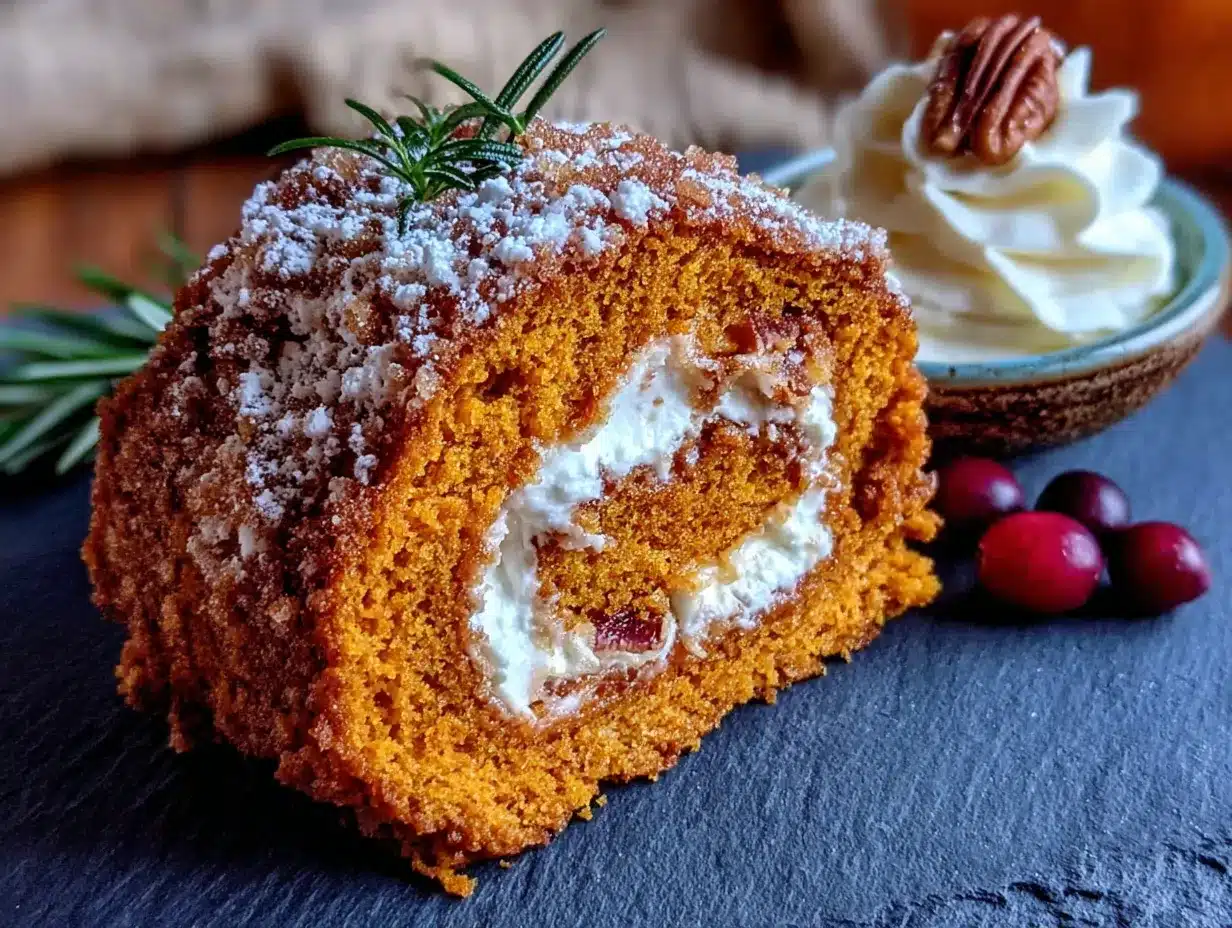
- 8 ounces cream cheese, softened – Full-fat, block-style cream cheese. Not the spreadable kind in a tub. It has stabilizers that change the texture.
- ¼ cup unsalted butter, softened – Adds richness and helps the filling hold its shape when chilled.
- 1 cup powdered sugar, sifted – Sifting prevents lumps. Trust me on this one—lumpy cream cheese filling is sad.
- 1 teaspoon vanilla extract – Same rule applies. Use the good stuff.
- Pinch of salt – Just a tiny bit to cut the sweetness and make the filling taste more like actual cheesecake.
Ingredient Tips I Learned the Hard Way : Don’t substitute low-fat cream cheese. I tried it once, thinking I’d make a slightly healthier version, and the filling turned out runny and sad. It would not hold its shape, and the whole roll collapsed into a pumpkin-flavored puddle. Full-fat cream cheese is non-negotiable here. Also, make sure your eggs and cream cheese are genuinely at room temperature. Cold ingredients create a lumpy batter and a grainy filling. Leave everything on the counter for at least 30 minutes before you start.
Equipment Needed
You don’t need a lot of fancy tools for this recipe, but a few specific items make the process much smoother.
- 15×10-inch jelly roll pan – This is the exact size you need. A different size changes the cake thickness and affects how it rolls. Standard half-sheet pans are usually 18×13, which is too big.
- Parchment paper – Line your pan with this. Greasing alone won’t cut it—the cake needs to release cleanly.
- Clean kitchen towel – A thin, lint-free towel works best. Terry cloth leaves texture on the cake. I use a plain cotton flour sack towel.
- Electric mixer – Hand mixer or stand mixer, either works. You need good aeration for the eggs and sugar.
- Sifter or fine-mesh strainer – For dusting powdered sugar and sifting the powdered sugar for the filling.
- Offset spatula – Not required, but it makes spreading the batter and filling much easier. A butter knife works in a pinch.
- Wire cooling rack – Helps the cake cool evenly before rolling.
If you don’t have a jelly roll pan, you can use a standard 9×13 baking dish, but the cake will be thicker and harder to roll without cracking. I’d recommend sticking with the proper pan if possible—they’re inexpensive and worth having for this recipe alone.
Preparation Method
Okay, let’s get into the actual process. I’m going to walk you through every step, including the little details that make the difference between a roll that cracks and one that coils beautifully.
Step 1: Preheat and Prep the Pan
Preheat your oven to 375°F (190°C). Line your 15×10-inch jelly roll pan with parchment paper, leaving a little overhang on the long sides. Lightly spray the parchment with non-stick cooking spray. This extra insurance prevents sticking, even though the cake should release easily.
Step 2: Mix the Dry Ingredients
In a medium bowl, whisk together the flour, baking powder, baking soda, salt, cinnamon, and pumpkin pie spice. Whisking aerates the mixture and distributes the spices evenly. Set this aside while you work on the wet ingredients.
Step 3: Beat the Eggs and Sugar
In a large mixing bowl, beat the eggs and granulated sugar together with an electric mixer on medium-high speed for 3 to 4 minutes. The mixture should become thick, pale, and ribbon-like—meaning when you lift the beaters, the batter falls back into the bowl in a slow ribbon that sits on the surface for a few seconds before disappearing. This step is crucial. The air you incorporate here is what gives the cake its light texture.
Step 4: Add Pumpkin and Vanilla
Reduce the mixer speed to low and beat in the pumpkin puree and vanilla extract until just combined. Don’t overmix here—you want to keep as much of that air as possible.
Step 5: Fold in the Dry Ingredients
Add the dry ingredients to the wet mixture in two additions, folding gently with a rubber spatula. Use a light hand here. Fold until you see the last streaks of flour disappear, then stop. Overmixing develops gluten and makes the cake tough. You want tender, flexible cake that rolls without breaking.
Step 6: Spread and Bake
Pour the batter into the prepared pan and spread it evenly with an offset spatula. The layer should be thin and reach all four corners of the pan. Bake for 13 to 15 minutes. The cake is done when the top springs back lightly when touched and the edges just start to pull away from the pan. Don’t overbake—dry cake cracks when you roll it.
Step 7: The Critical Rolling Step
While the cake bakes, lay your clean kitchen towel flat on the counter and dust it generously with powdered sugar. As soon as the cake comes out of the oven, run a knife around the edges to loosen it. Invert the cake onto the sugared towel and carefully peel off the parchment paper. Starting at one short end, roll the cake and towel together into a tight log. Let it cool completely on a wire rack, seam-side down. This takes about 1 hour.
Why this matters : Rolling the cake while it’s warm “trains” it to hold that shape. If you let it cool flat, it will crack when you try to roll it later. The powdered sugar on the towel prevents the cake from sticking to the fabric as it cools.
Step 8: Make the Filling
While the cake cools, make the filling. In a medium bowl, beat the softened cream cheese and butter together until smooth and creamy, about 2 minutes. Add the sifted powdered sugar, vanilla extract, and pinch of salt. Beat on low speed until combined, then increase to medium and beat for another minute until light and fluffy. Scrape down the bowl as needed.
Step 9: Unroll, Fill, and Reroll
Once the cake is completely cool, carefully unroll it. The cake will want to curl back up slightly—that’s normal. Spread the cream cheese filling evenly over the cake, leaving a ½-inch border on all sides. Using the towel to help you, reroll the cake gently but tightly. Don’t squeeze—just guide it into a log. Wrap the finished roll tightly in plastic wrap and refrigerate for at least 1 hour before serving. This chilling time lets the filling firm up and makes slicing much cleaner.
Cooking Tips & Techniques
I’ve made this pumpkin roll more times than I can count, and I’ve definitely made every mistake possible. Here’s what I’ve learned so you don’t have to repeat my errors.
The Towel Matters More Than You Think : My grandmother was right. The towel needs to be clean, lint-free, and generously dusted with powdered sugar. I once used a towel that had a faint fabric softener scent, and it transferred to the cake. Use unscented detergent for your baking towels, or keep a dedicated set just for this purpose.
Don’t Skip the Cooling Time : I know it’s tempting to rush this step. I’ve been there—filling ready, coffee poured, hungry guests waiting. But if you unroll the cake before it’s fully cool, it will crack. The cake needs to set in that rolled shape. Give it the full hour.
Watch Your Baking Time : Every oven runs differently. Start checking at 12 minutes. The cake should be golden brown on top and spring back when lightly pressed. If it’s still shiny and jiggly, give it another minute. Overbaked cake cracks. Underbaked cake collapses. That 13 to 15 minute window is your sweet spot.
Use Sharp Knife for Slicing : For clean slices, use a sharp serrated knife and wipe it clean between each cut. The cream cheese filling can smear if you drag a dull blade through it. I learned this after serving a platter of smeared, messy slices at a Thanksgiving dinner. They tasted fine, but they looked like I’d fought the roll and lost.
Room Temperature Ingredients Are Not Optional : Cold cream cheese creates lumps that no amount of beating will fully smooth out. Cold eggs don’t aerate properly. Set everything out 30 to 45 minutes before you start. Set a timer if you need to—I’ve forgotten and ended up microwaving cream cheese, which is a disaster in its own way.
Variations & Adaptations
Once you’ve mastered the basic version, there are plenty of ways to make this recipe your own. Here are some variations I’ve tried and loved.
Chocolate Pumpkin Roll : Replace ¼ cup of the all-purpose flour with ¼ cup of unsweetened cocoa powder. Sift it with the other dry ingredients to avoid clumps. The chocolate and pumpkin combination is surprisingly good—think pumpkin spice with a dark chocolate edge.
Gluten-Free Version : Substitute the all-purpose flour with a good 1:1 gluten-free baking flour blend. I’ve had success with Bob’s Red Mill 1-to-1 Baking Flour. The texture is slightly more delicate, so be extra gentle when rolling. Chill the rolled cake for at least 2 hours before slicing for best results.
Maple Cream Cheese Filling : Replace the vanilla extract in the filling with 2 tablespoons of pure maple syrup and add ¼ teaspoon of maple extract. This gives the filling a warm, autumnal flavor that pairs beautifully with the pumpkin spices.
Nutty Addition : Sprinkle ½ cup of finely chopped pecans or walnuts over the filling before rerolling. Toast the nuts first for deeper flavor. This adds a nice crunch and makes the roll feel extra special for holiday gatherings.
Spice Adjustments : If you prefer a more pronounced spice profile, increase the cinnamon to 3 teaspoons and add ¼ teaspoon of ground cardamom. Cardamom and pumpkin are a match made in fall dessert heaven.
I once made a version with a layer of salted caramel drizzled over the filling before rolling. It was delicious but messy—the caramel seeped out the sides and made the whole thing sticky. Tasted incredible, though. Sometimes the messy versions are the ones you remember most.
Serving & Storage Suggestions
This pumpkin roll is versatile enough for casual snacking or fancy dessert tables. Here’s how to serve and store it for best results.
Serving Temperature : Serve cold or at room temperature. I prefer it straight from the fridge—the filling is firmer and the slices hold their shape better. If you prefer room temperature, let it sit out for about 15 minutes before slicing.
Presentation Ideas : Dust the top with powdered sugar just before serving for a snowy effect. You can also drizzle with caramel sauce and sprinkle with chopped pecans for a more decadent presentation. For holiday gatherings, arrange slices on a platter with fresh cranberries and rosemary sprigs around the edges.
What to Serve With It : A dollop of whipped cream is the classic pairing. For a more indulgent experience, serve with a scoop of vanilla ice cream. A cup of hot coffee or spiced chai tea complements the pumpkin flavors perfectly.
Storage Instructions : Wrap the pumpkin roll tightly in plastic wrap and store in the refrigerator for up to 5 days. The flavors actually improve after a day or two as the spices meld with the filling.
Freezing Instructions : This freezes beautifully. Wrap the un-sliced roll in plastic wrap, then in a layer of aluminum foil. Freeze for up to 3 months. To thaw, transfer to the refrigerator overnight. Do not thaw at room temperature—the condensation can make the cake soggy. Once thawed, dust with powdered sugar and slice as usual.
Flavor Development Note : The cake absorbs moisture from the filling over time, becoming more tender and cohesive. This is why day-old pumpkin roll often tastes better than fresh. If you can plan ahead, make this a day before you need it.
Nutritional Information & Benefits
Let’s be real—this is a dessert, not a health food. But it does have some redeeming qualities worth mentioning.
Estimated Per Serving (1 slice, based on 10 servings) :
– Calories: 295
– Fat: 14g
– Carbohydrates: 38g
– Protein: 5g
– Fiber: 1g
– Sugar: 27g
Health Highlights : Pumpkin is rich in vitamin A (beta-carotene), which supports eye health and immune function. It also provides fiber and potassium. The eggs add high-quality protein, and the cream cheese offers calcium. Of course, there’s sugar and butter here too—this is a treat, enjoyed in moderation.
Dietary Considerations : This recipe contains gluten, dairy, and eggs. For a dairy-free version, use vegan cream cheese and vegan butter in the filling. The cake itself can be made with dairy-free butter alternatives, though the texture may be slightly different. For a lower-sugar option, reduce the granulated sugar in the cake to ¾ cup and use a sugar substitute in the filling—though I haven’t tested this extensively, so results may vary.
I personally believe that dessert should taste like dessert. A slice of this pumpkin roll isn’t an everyday thing—it’s a celebration. And celebrations deserve real sugar and real butter. Balance comes from the rest of your plate, not from depriving yourself of the good stuff.
Conclusion
This classic pumpkin roll with cream cheese filling is one of those recipes that looks complicated but isn’t. It’s just a thin cake, a simple filling, and one clever rolling technique that makes it look like you spent hours in the kitchen. The first time you unroll that cake and see the perfect spiral, you’ll feel like a baking wizard.
I love this recipe because it reminds me of my grandmother, but also because it’s genuinely reliable. It works in my oven, it works in my friend’s oven, and it works in the temperamental oven at my parents’ house. The ingredients are simple, the steps are clear, and the result is always impressive. That’s the kind of recipe worth keeping in your back pocket.
If you make this pumpkin roll, I’d love to hear how it turns out. Leave a comment below and let me know if your family loved it, if you tried a variation, or if you have any questions I didn’t answer. And if you’re looking for more fall baking inspiration, you might enjoy my decadent chocolate-dipped strawberry coconut bars for a different kind of sweet treat, or these healthy chicken veggie skillet wraps when you need a break from all the sugar.
Happy baking, friends. And remember—the towel is the secret.
Frequently Asked Questions
Why did my pumpkin roll crack when I rolled it?
Cracking usually happens for one of three reasons: the cake was overbaked (making it too dry), it cooled completely before rolling (it needs to be rolled warm), or you didn’t roll it tightly enough in the towel initially. Make sure you roll the cake while it’s still warm from the oven, and check your baking time—13 to 15 minutes at 375°F is usually perfect.
Can I use fresh pumpkin instead of canned?
You can, but I don’t recommend it. Fresh pumpkin puree has higher water content than canned, which can make the cake too wet and prone to collapsing. If you want to use fresh, roast and puree your pumpkin, then strain it through cheesecloth overnight to remove excess moisture. Even then, the texture won’t be as consistent as canned.
How do I get clean slices without smearing the filling?
Use a sharp serrated knife and wipe it clean with a damp paper towel between each cut. Chill the roll for at least 1 hour before slicing—the firmer the filling, the cleaner the cut. For the prettiest slices, trim off the very ends of the roll first (the cook gets those).
Can I make this recipe dairy-free?
Yes, with some adjustments. Use a high-quality vegan cream cheese and vegan butter for the filling. In the cake, you can substitute the butter with a neutral oil like avocado or vegetable oil. The texture will be slightly different, but it works. I’ve made a dairy-free version for a friend with allergies, and it held together well.
How far in advance can I make this pumpkin roll?
You can make it up to two days ahead and keep it wrapped tightly in the refrigerator. The flavors actually improve over time. You can also freeze it for up to three months—just wrap it well in plastic wrap and foil, then thaw overnight in the refrigerator before serving.
Pin This Recipe!
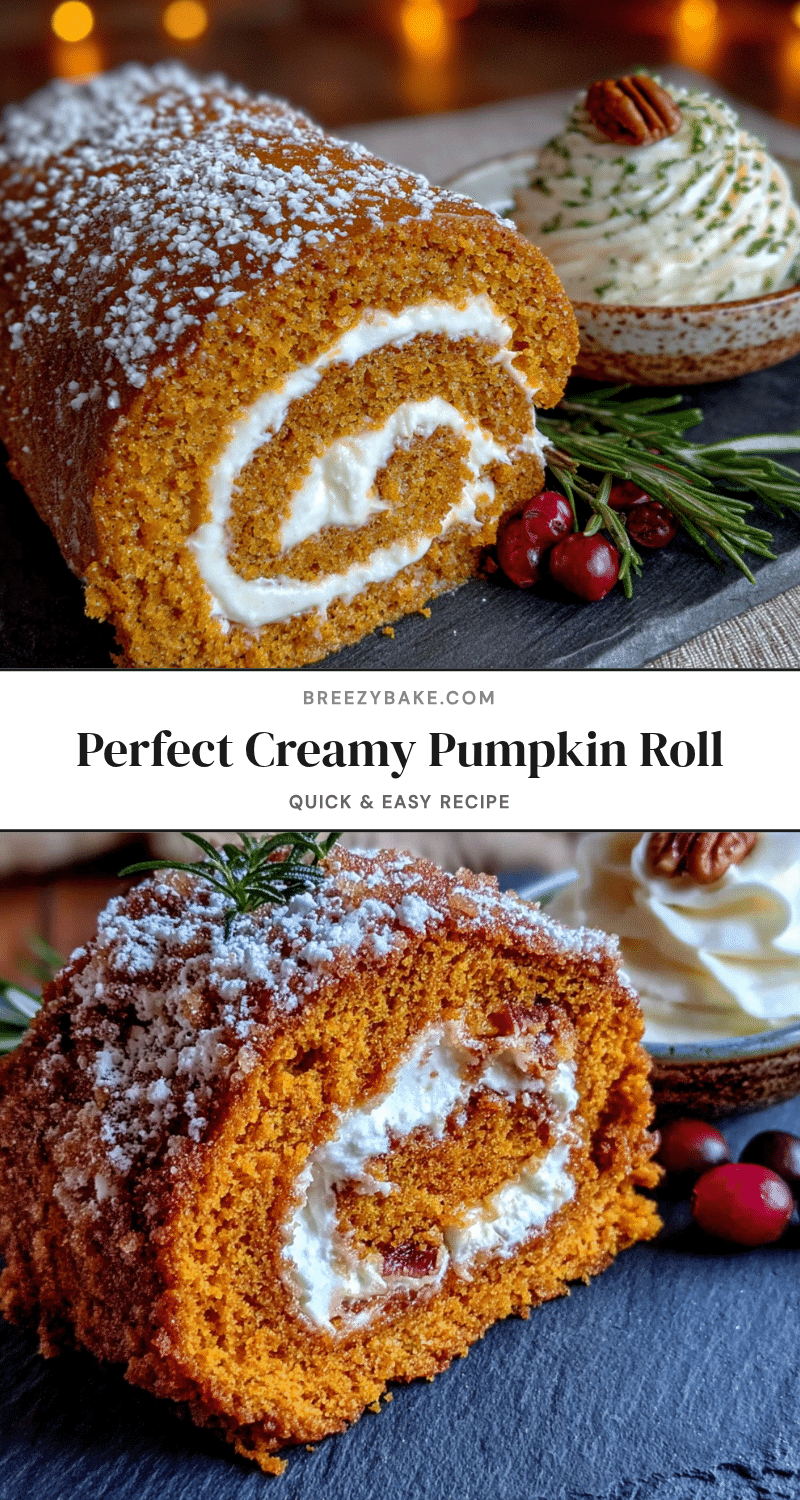
Easy Classic Pumpkin Roll with Cream Cheese Filling
A tender spiced pumpkin cake rolled around a creamy, tangy cream cheese filling, creating perfect pinwheels that are impressive yet surprisingly simple to make. This classic fall dessert is perfect for Thanksgiving, holiday gatherings, or any autumn celebration.
- Prep Time: 30 minutes
- Cook Time: 15 minutes
- Total Time: 1 hour 45 minutes (includes cooling and chilling)
- Yield: 10 servings 1x
- Category: Dessert
- Cuisine: American
Ingredients
- ¾ cup all-purpose flour
- 1 teaspoon baking powder
- ½ teaspoon baking soda
- ½ teaspoon salt
- 2 teaspoons ground cinnamon
- 1 teaspoon pumpkin pie spice
- 3 large eggs, room temperature
- 1 cup granulated sugar
- ⅔ cup canned pumpkin puree
- 1 teaspoon vanilla extract
- ¼ cup powdered sugar (for dusting)
- 8 ounces cream cheese, softened
- ¼ cup unsalted butter, softened
- 1 cup powdered sugar, sifted
- 1 teaspoon vanilla extract
- Pinch of salt
Instructions
- Preheat oven to 375°F (190°C). Line a 15×10-inch jelly roll pan with parchment paper, leaving overhang on the long sides. Lightly spray the parchment with non-stick cooking spray.
- In a medium bowl, whisk together flour, baking powder, baking soda, salt, cinnamon, and pumpkin pie spice. Set aside.
- In a large mixing bowl, beat eggs and granulated sugar with an electric mixer on medium-high speed for 3-4 minutes until thick, pale, and ribbon-like.
- Reduce mixer speed to low and beat in pumpkin puree and vanilla extract until just combined.
- Add dry ingredients to wet mixture in two additions, folding gently with a rubber spatula until just combined. Do not overmix.
- Pour batter into prepared pan and spread evenly with an offset spatula. Bake for 13-15 minutes until top springs back when lightly touched and edges start to pull away from pan.
- While cake bakes, lay a clean kitchen towel flat on the counter and dust generously with powdered sugar. As soon as cake comes out of oven, run a knife around edges to loosen. Invert cake onto sugared towel and carefully peel off parchment paper.
- Starting at one short end, roll cake and towel together into a tight log. Let cool completely on a wire rack, seam-side down, about 1 hour.
- While cake cools, make filling: In a medium bowl, beat softened cream cheese and butter together until smooth and creamy, about 2 minutes. Add sifted powdered sugar, vanilla extract, and pinch of salt. Beat on low until combined, then increase to medium and beat for 1 minute until light and fluffy.
- Once cake is completely cool, carefully unroll it. Spread cream cheese filling evenly over cake, leaving a ½-inch border on all sides. Using the towel to help, reroll cake gently but tightly. Wrap in plastic wrap and refrigerate for at least 1 hour before serving.
Notes
Roll the cake while it’s still warm to train it to hold the shape. Use full-fat cream cheese for best results. The cake can be made up to two days ahead and stored in the refrigerator. Freezes well for up to 3 months.
Nutrition
- Serving Size: 1 slice
- Calories: 295
- Sugar: 27
- Sodium: 280
- Fat: 14
- Saturated Fat: 8
- Carbohydrates: 38
- Fiber: 1
- Protein: 5
Keywords: pumpkin roll, pumpkin dessert, cream cheese filling, fall dessert, Thanksgiving dessert, jelly roll, pumpkin cake


