The ground beef was already thawed. That was the only plan I had on a Tuesday night that felt like it was running away from me before dinner even started. I opened the fridge and found half an onion, a bell pepper that had seen better days, and a block of cheddar staring back at me like it was waiting for its moment.
I stood there for a second, honestly a little overwhelmed. You know those nights where you want something hearty and satisfying but you also don’t want to wash a sink full of dishes? That was this night. I grabbed the skillet—my go-to pan that has seen more weeknight dinners than I can count—and decided I was just going to make it work with whatever I had.
The rice came from the back of the pantry. The garlic was starting to sprout, but I chopped off the green bits and it was fine. And somehow, twenty-five minutes later, I was sitting down to a plate of the most comforting, cheesy, beefy skillet dinner I had made in months. My husband asked if this was a new recipe I had been testing. I told him the truth: I just threw things in a pan and prayed. That skillet taught me something that night—you don’t need a fancy plan to make a meal worth remembering.
Why You’ll Love This Recipe
Let me tell you why this Easy Cheesy Ground Beef and Rice Skillet has earned a permanent spot in my weekly rotation. I have tested this recipe about six times now to get the rice-to-broth ratio exactly right, and I can tell you with confidence—this is the version you want.
- Quick & Easy: From fridge to table in about 30 minutes. No marinating, no complicated steps, no waiting around.
- Simple Ingredients: You probably have 90% of these in your kitchen right now. No trips to specialty stores or hunting down obscure spices.
- One-Pot Wonder: One skillet, minimal cleanup, and your sink thanks you. This is the kind of meal that makes you feel like you have your life together.
- Crowd-Pleaser: Kids devour it. Adults ask for seconds. It is the kind of dinner that disappears before you can pack leftovers for lunch.
- Budget-Friendly: Ground beef, rice, cheese, and basic veggies—this meal stretches your grocery dollar without skimping on flavor.
What makes this version different from every other beef and rice skillet out there? It is the layering. Most recipes just dump everything in and hope for the best. I spent time figuring out the exact moment to add the rice, how to toast it just slightly in the beef drippings for nutty flavor, and the perfect cheese-to-meat ratio that gives you that stretchy, gooey finish without turning the whole dish into a grease bomb. It is comfort food that actually works—not just a Pinterest fail waiting to happen.
Honestly, this is the kind of meal that makes you close your eyes after the first bite. It is simple, sure. But it is also deeply satisfying in a way that feels like a hug on a plate.
What Ingredients You Will Need
This recipe uses simple, honest ingredients that come together to create something greater than the sum of their parts. Nothing fancy, just smart cooking with pantry staples.
- Ground Beef (1 lb / 450g): I use 85/15 for the best balance of flavor and rendered fat. Too lean and it gets dry; too fatty and the rice gets greasy. If you only have 70/30, drain off the excess fat after browning.
- Long-Grain White Rice (1 cup / 200g): This is not the time for instant rice or short-grain sushi rice. Long-grain holds its shape and cooks evenly. I prefer jasmine or basmati for the subtle fragrance, but standard white rice works perfectly too.
- Beef Broth (2 cups / 480ml): Low-sodium is your friend here. You control the salt, and the concentrated flavor from the broth does the heavy lifting. I like Swanson or Kitchen Basics for consistent results.
- Yellow Onion (1 medium, diced): The aromatic backbone of the dish. Sweet and savory once it softens in the beef fat.
- Bell Pepper (1 medium, diced): Adds color, slight sweetness, and a little crunch. Red, orange, or yellow are sweeter; green is more savory. Both work.
- Garlic (3 cloves, minced): Fresh is non-negotiable here. The jarred stuff has its place, but this recipe deserves the real thing.
- Shredded Cheddar Cheese (1.5 cups / 170g): Sharp cheddar gives you the most flavor. Pre-shredded has anti-caking agents that affect melt quality, so shred your own if you can. I promise it makes a difference.
- Tomato Paste (2 tablespoons): Adds depth and a slight tang that cuts through the richness. It is the secret ingredient that makes people ask what is in this.
- Worcestershire Sauce (1 tablespoon): Umami bomb. Adds that savory depth that makes beef taste beefier.
- Paprika (1 teaspoon): Smoked paprika if you have it—adds a subtle smokiness that elevates the whole dish.
- Dried Oregano (½ teaspoon): A little earthy, a little floral. It plays nicely with the beef and tomatoes.
- Salt and Black Pepper (to taste): Season as you go, not just at the end. Layers of seasoning build better flavor.
- Olive Oil (1 tablespoon): For sautéing the veggies if your beef is lean. Skip it if you have enough rendered fat.
- Optional Garnishes: Fresh parsley, chopped green onions, or a pinch of red pepper flakes for heat.
Equipment Needed
You do not need a kitchen full of gadgets for this one. Here is what you will actually use:
- Large Skillet or Deep Sauté Pan (12-inch / 30cm with lid): This is the star of the show. A heavy-bottomed pan distributes heat evenly and prevents the rice from scorching. I use my trusty cast iron skillet for this recipe, but a stainless steel or non-stick pan works great too. If you do not have a lid, a sheet of aluminum foil works as a makeshift cover.
- Wooden Spoon or Silicone Spatula: For breaking up the ground beef and stirring without scratching your pan.
- Chef’s Knife and Cutting Board: For dicing the onion, bell pepper, and mincing garlic.
- Measuring Cups and Spoons: Accuracy matters with the rice-to-liquid ratio. Eyeballing it can lead to mushy or undercooked rice.
- Box Grater: If you are shredding your own cheese (and you should be), a box grater is faster than a food processor for small amounts.
I have made this recipe in a cheap non-stick skillet from the grocery store and it turned out fine. Do not overthink the equipment. A lid and a pan is really all you need.
Preparation Method
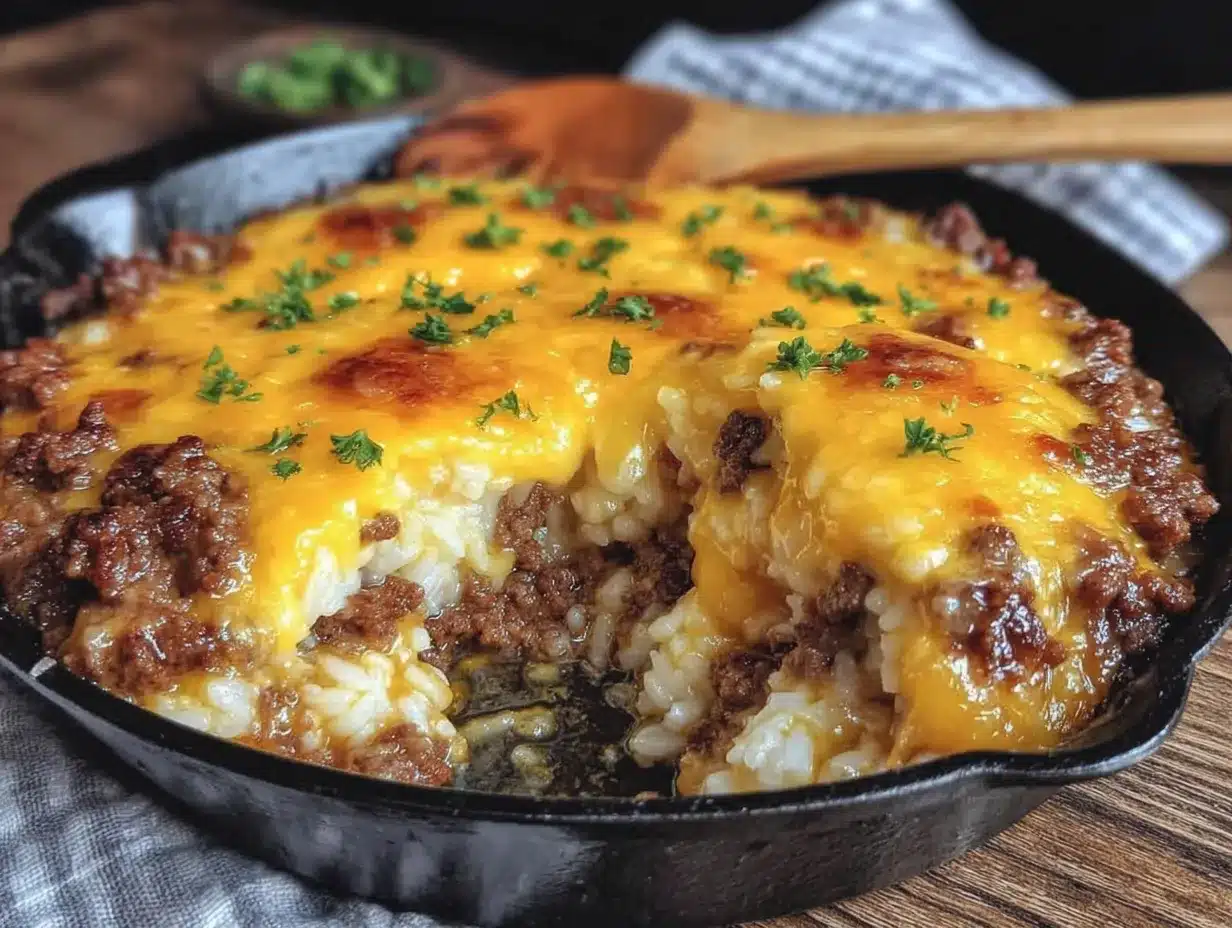
Let me walk you through this step by step. I have made this enough times to know where things can go wrong, so I will point those out as we go.
- Brown the Ground Beef (5 minutes): Heat your skillet over medium-high heat. Add a drizzle of olive oil if your pan is not non-stick. Add the ground beef and break it apart with your wooden spoon. Let it sit undisturbed for a minute or two to develop a nice brown crust—this is where flavor comes from. Stir and continue cooking until no pink remains, about 4-5 minutes total. If there is more than a tablespoon of rendered fat, spoon some out, leaving about a tablespoon in the pan.
- Sauté the Aromatics (3 minutes): Reduce heat to medium. Add the diced onion and bell pepper to the skillet with the beef. Cook, stirring occasionally, until the onion turns translucent and the pepper softens, about 3 minutes. Add the minced garlic and cook for 30 seconds until fragrant. Do not let the garlic burn—it turns bitter fast.
- Toast the Rice (2 minutes): Push the beef and veggies to one side of the pan. Add the rice to the empty space and let it toast in the hot pan for about 1-2 minutes, stirring occasionally. You want it to smell nutty and see a few grains turn golden. This step is optional but trust me—it adds a layer of flavor you will miss if you skip it.
- Add the Liquids and Seasonings (1 minute): Stir in the tomato paste, Worcestershire sauce, paprika, oregano, salt, and pepper. Cook for 30 seconds to caramelize the paste slightly. Pour in the beef broth and stir everything together, scraping up any browned bits from the bottom of the pan. Those bits are pure flavor.
- Simmer the Rice (15-18 minutes): Bring the mixture to a boil, then reduce the heat to low. Cover the skillet with a tight-fitting lid and let it simmer gently. Do not lift the lid during cooking—the steam is what cooks the rice evenly. Set a timer for 15 minutes and check at that point. The rice should be tender and most of the liquid absorbed. If it needs more time, cover and cook for another 2-3 minutes.
- Add the Cheese (2 minutes): Remove the skillet from the heat. Sprinkle the shredded cheddar evenly over the top. Cover the pan again and let it sit for 2 minutes. The residual heat will melt the cheese to a perfect gooey consistency without overcooking it. If you want a bubbly, browned top, pop the skillet under the broiler for 1-2 minutes—just watch it carefully.
- Rest and Serve (2 minutes): Let the skillet rest off the heat for 2 minutes before serving. This allows the rice to finish absorbing any remaining steam and makes it easier to scoop without it being watery. Garnish with fresh parsley or green onions if you are feeling fancy.
Cooking Tips & Techniques
I have burned my fair share of rice skillets to share these lessons with you. Here is what I have learned the hard way:
Do not skip the toasting step. I know it seems like an extra thing to do, but toasting the rice in the beef drippings for just a minute or two prevents it from turning mushy. The heat seals the outer starch layer, so each grain stays separate and has a slight chew. It is the difference between fluffy skillet rice and sad, sticky porridge.
Resist the urge to stir. Once you put the lid on and lower the heat, walk away. Every time you lift that lid, steam escapes and the cooking time extends. I have ruined perfectly good skillets by checking on them too much. Trust the process.
Watch your heat. If your burner runs hot, keep the heat on low instead of medium-low. Rice scorches easily on the bottom if the heat is too high. You want a gentle simmer, not a rolling boil. If you hear crackling sounds after 10 minutes, your heat is too high.
Season in layers. Add a pinch of salt when you brown the beef, another when you add the veggies, and a final adjustment at the end. Seasoning only at the end leads to bland food with salty spots. Build it gradually.
Let it rest. I know you are hungry. I am always hungry when I make this. But letting the skillet sit for those 2-3 minutes after cooking makes a real difference in texture. The rice firms up slightly, the cheese sets, and every scoop holds together beautifully.
Variations & Adaptations
One of the best things about this recipe is how flexible it is. Here are some ways I have adapted it depending on what I have in the fridge or who I am feeding:
- Mexican-Style Skillet: Swap the oregano for cumin and chili powder. Add a can of drained black beans and a can of diced green chiles. Top with Monterey Jack cheese and serve with tortilla chips or in warm tortillas. This version is a crowd favorite when I am making game day snacks.
- Low-Carb Version: Replace the rice with riced cauliflower. Sauté it in the skillet after the beef and veggies are cooked, then add only ½ cup of broth since cauliflower releases its own liquid. Cook for 5-7 minutes covered, then add the cheese. It is not exactly the same, but it scratches the itch when I am watching my carbs.
- Extra Veggie Boost: Add a cup of frozen peas and carrots along with the broth, or stir in a handful of fresh spinach right before adding the cheese. The spinach wilts into the rice and adds nutrients without changing the flavor much. I do this when I want to pretend I am eating a balanced meal.
- Spicy Southwestern: Add ½ teaspoon of cayenne pepper and a diced jalapeño (seeds removed unless you like heat) with the onions. Top with pepper jack cheese instead of cheddar. This version pairs beautifully with a side of fresh grain bowls for a lighter lunch the next day.
- Dairy-Free Option: Use a good quality dairy-free shredded cheese (I like Violife or Miyoko’s) and skip the Worcestershire sauce or use a vegan version. The texture will be slightly different, but the flavor is still solid.
- Ground Turkey or Chicken: Swap the beef for ground turkey or chicken. Add an extra tablespoon of olive oil since poultry is leaner, and consider adding a splash more Worcestershire sauce to boost the savory flavor. It is a lighter take that still satisfies that comfort food craving.
Serving & Storage Suggestions
This skillet is a complete meal on its own, but here is how I like to serve it:
Serving Temperature: Serve hot, straight from the skillet. The cheese should be melted and stretchy. Let it cool for 2-3 minutes so nobody burns their tongue—speaking from experience here.
Presentation: I bring the whole skillet to the table for a casual, family-style dinner. Garnish with fresh parsley or chopped green onions for color. A sprinkle of red pepper flakes adds a pop of red and a hint of heat. If you are feeling extra, a dollop of sour cream or Greek yogurt on top cuts through the richness nicely.
What to Serve With It: A simple side salad with a tangy vinaigrette balances the richness. Steamed green beans or roasted broccoli work well too. If you want something starchy, warm tortillas or crusty bread for sopping up every last bit of cheesy goodness are never a bad idea.
Storage: Transfer leftovers to an airtight container and refrigerate for up to 4 days. The rice will absorb more liquid as it sits, so it will be slightly softer the next day. That is not a bad thing—the flavors actually meld together beautifully overnight.
Reheating: The best way to reheat is in a skillet over medium-low heat with a splash of beef broth or water to loosen it up. Cover and cook for 5-7 minutes, stirring occasionally. The microwave works in a pinch (2 minutes, stirring halfway), but the stovetop gives you better texture.
Freezing: This freezes well for up to 3 months. Let it cool completely, then portion into freezer-safe containers. Thaw overnight in the refrigerator and reheat as directed above. I often double the recipe and freeze half for busy weeks.
Nutritional Information & Benefits
Here is an approximate nutritional breakdown per serving (based on 4 servings):
| Nutrient | Amount Per Serving |
|---|---|
| Calories | 485 |
| Protein | 32g |
| Fat | 22g |
| Saturated Fat | 10g |
| Carbohydrates | 38g |
| Fiber | 2g |
| Sugar | 4g |
| Sodium | 680mg |
This meal is a solid source of protein from the beef and cheese, which keeps you full and satisfied. The bell peppers and onions add vitamin C and antioxidants. Brown rice (if you choose to swap) adds more fiber, but white rice is easier to digest and works better texturally in this recipe.
If you are watching your sodium, use low-sodium broth and go easy on the added salt. The cheese and Worcestershire sauce already bring plenty of flavor. This dish is not exactly health food, but it is real food made from real ingredients—and sometimes that is exactly what you need.
Frequently Asked Questions
Can I use brown rice instead of white rice?
Yes, but you will need to adjust the cooking time and liquid. Brown rice takes about 40-45 minutes to cook and needs about 2½ cups of broth. You may also need to add more liquid halfway through if it looks dry. The texture will be chewier and nuttier, which some people prefer.
Why is my rice still crunchy after 15 minutes?
This usually happens for one of three reasons: your heat was too low, you lifted the lid too often, or your rice is old. Old rice takes longer to cook because it has lost moisture. Next time, check at 15 minutes, and if it needs more time, add ¼ cup of hot broth or water, cover, and cook for another 5 minutes.
Can I make this in an Instant Pot or slow cooker?
For the Instant Pot, brown the beef using the sauté function, then add the remaining ingredients (use 1:1 rice to liquid ratio). Pressure cook on high for 5 minutes with a natural release. For a slow cooker, brown the beef first, then add everything except the cheese and cook on low for 4-6 hours. Add the cheese at the end. The texture will be softer, almost like a porridge, but the flavor is still great.
How do I prevent the cheese from getting greasy?
Shred your own cheese from a block. Pre-shredded cheese is coated with anti-caking agents like potato starch and cellulose, which prevent it from melting smoothly and can cause it to separate into grease pools. Freshly shredded cheddar melts into a creamy, cohesive layer every time.
Can I add other vegetables to this?
Absolutely. This recipe is very forgiving. Frozen peas, corn, diced zucchini, mushrooms, or spinach all work well. Add heartier vegetables like mushrooms or zucchini with the onions so they have time to cook through. Stir in delicate greens like spinach or peas right before adding the cheese so they just wilt.
Conclusion
This Easy Cheesy Ground Beef and Rice Skillet is the kind of recipe that saves dinner on those nights when you have nothing planned and even less energy. It is forgiving, flexible, and deeply satisfying in a way that only simple, honest cooking can be.
I have made this for busy weeknights, for lazy Sundays, and even for friends who stopped by unexpectedly. Every single time, it disappears. There is something about that combination of seasoned beef, tender rice, and melted cheese that hits a primal comfort spot. It is not fancy. It is not complicated. But it is exactly what dinner should be—good food made with love, served from one pan, and shared with people you care about.
Try it this week. Customize it with whatever you have in your fridge. Add extra cheese if that feels right. And when you make it your own, come back and tell me about it in the comments. I love hearing how these recipes find their way into your kitchens.
Now go grab that skillet. Dinner is waiting.
Pin This Recipe!
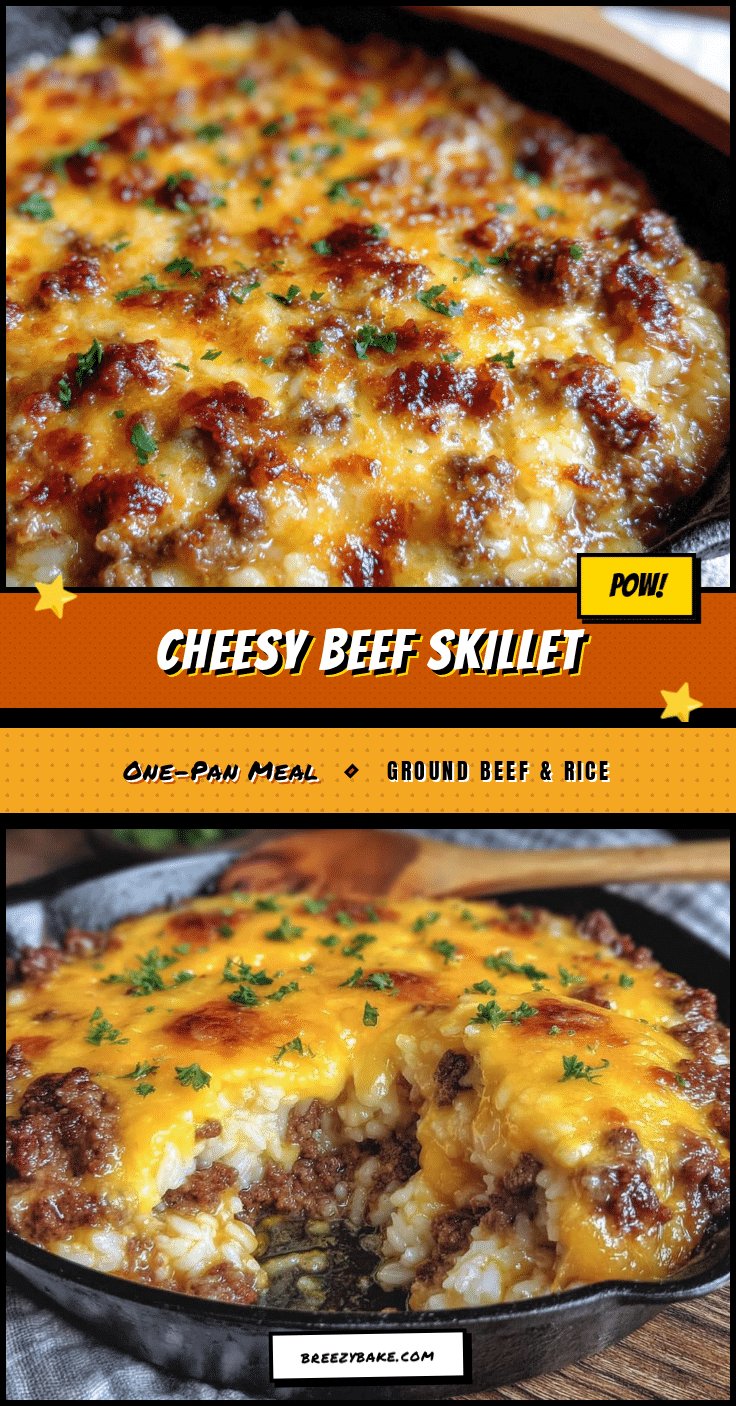
Easy Cheesy Ground Beef and Rice Skillet: 30-Minute One-Pot Dinner

A quick and easy one-pot dinner featuring seasoned ground beef, tender rice, and melted cheddar cheese, ready in about 30 minutes. Perfect for busy weeknights with minimal cleanup.
- Prep Time: 10 minutes
- Cook Time: 20 minutes
- Total Time: 30 minutes
- Yield: 4 servings 1x
- Category: Main Course
- Cuisine: American
Ingredients
- 1 lb (450g) ground beef (85/15)
- 1 cup (200g) long-grain white rice (jasmine or basmati preferred)
- 2 cups (480ml) low-sodium beef broth
- 1 medium yellow onion, diced
- 1 medium bell pepper, diced
- 3 cloves garlic, minced
- 1.5 cups (170g) shredded sharp cheddar cheese
- 2 tablespoons tomato paste
- 1 tablespoon Worcestershire sauce
- 1 teaspoon paprika (smoked preferred)
- ½ teaspoon dried oregano
- Salt and black pepper to taste
- 1 tablespoon olive oil (if needed)
- Optional garnishes: fresh parsley, chopped green onions, red pepper flakes
Instructions
- Brown the ground beef: Heat a large skillet over medium-high heat. Add olive oil if needed. Add ground beef and break apart with a wooden spoon. Let sit undisturbed for 1-2 minutes to develop a brown crust. Cook until no pink remains, about 4-5 minutes. Drain excess fat, leaving about 1 tablespoon in the pan.
- Sauté the aromatics: Reduce heat to medium. Add diced onion and bell pepper. Cook, stirring occasionally, until onion is translucent and pepper softens, about 3 minutes. Add minced garlic and cook for 30 seconds until fragrant.
- Toast the rice: Push beef and veggies to one side. Add rice to the empty space and toast for 1-2 minutes, stirring occasionally, until nutty and slightly golden.
- Add liquids and seasonings: Stir in tomato paste, Worcestershire sauce, paprika, oregano, salt, and pepper. Cook for 30 seconds. Pour in beef broth and stir, scraping up browned bits from the bottom.
- Simmer the rice: Bring to a boil, then reduce heat to low. Cover with a tight-fitting lid and simmer for 15-18 minutes without lifting the lid. Check at 15 minutes; rice should be tender and most liquid absorbed. Cook 2-3 more minutes if needed.
- Add the cheese: Remove skillet from heat. Sprinkle shredded cheddar evenly over the top. Cover and let sit for 2 minutes until cheese melts. For a browned top, broil for 1-2 minutes.
- Rest and serve: Let skillet rest off heat for 2 minutes before serving. Garnish with fresh parsley or green onions if desired.
Notes
Do not skip toasting the rice; it prevents mushiness. Resist lifting the lid during simmering. Season in layers for best flavor. Let the skillet rest before serving for better texture. Shred your own cheese for optimal melting.
Nutrition
- Serving Size: 1 serving (about 1.5
- Calories: 485
- Sugar: 4
- Sodium: 680
- Fat: 22
- Saturated Fat: 10
- Carbohydrates: 38
- Fiber: 2
- Protein: 32
Keywords: ground beef, rice, skillet, one-pot, cheesy, 30-minute, weeknight dinner, comfort food


