My buddy Marcus claimed he made the best nachos on the block. I’d heard that before, you know? People say it, and then you get a soggy pile of chips with cheese that congealed five minutes ago. I told him I’d believe it when I saw it. So, during a playoff game last January, he slid this sheet pan onto the coffee table. The thing was massive. It was a full-on landscape of crispy chips, perfectly melted cheese, and toppings that hadn’t turned into a sad, warm salad. I took a bite, and honestly, I had to stop myself from grabbing the whole pan. The crunch was still there. The cheese was stretchy. The jalapeños were blistered just right. I asked him what his secret was, and he just shrugged. “Timing, man. And not piling everything on at once.” That moment changed how I approach feeding a crowd. This Best Sheet-Pan Loaded Nachos for a Crowd recipe is the direct result of that conversion. It’s the recipe that made me a believer, and it’s the one I now take to every gathering. It’s reliable. It’s crunchy. And it disappears faster than anything else on the table.
Why You’ll Love This Recipe
I’ve tested this method about a dozen times now, tweaking the layering and the bake time to get that perfect balance. It’s not just about throwing chips and cheese on a pan. There’s a method to the madness, and it works every single time.
- Perfect for a Crowd: This recipe scales up beautifully. One sheet pan feeds 6-8 hungry people without any fuss. No standing over a skillet making individual plates.
- Stays Crispy: The trick is layering. A base layer of chips gets a little cheese, then a second layer of chips gets the rest. This prevents the bottom from turning into a mushy mess. You get a crunch in every single bite.
- Customizable Toppings: Everyone can grab what they want. Set out bowls of salsa, sour cream, and guacamole, and let people build their own perfect bite. It’s interactive and fun.
- Quick Assembly: From fridge to table in under 20 minutes. Seriously. It’s faster than ordering delivery, and way more impressive.
- Game Day Hero: Whether it’s the Super Bowl or just a Tuesday night, this dish is always the star. I’ve brought it to potlucks, and the pan comes back empty every single time. If you love game day snacks, you’ll also love these Crispy Super Bowl Chicken Wing Bites for another easy option.
This isn’t just another nacho recipe. It’s the one that solves the soggy-chip problem. It’s the one that makes you look like a kitchen pro with almost zero effort. The first time I made it for my family, my dad—who never compliments food—asked for the recipe. That’s when I knew I had something special.
What Ingredients You Will Need
This recipe uses simple, everyday ingredients to create something truly spectacular. Most of these are pantry staples or easy to find at any grocery store.
- Tortilla Chips: Use a sturdy, restaurant-style chip. Thin chips will break under the weight of the toppings. I prefer the Tostitos brand for their thickness. You’ll need about one standard 13-ounce bag.
- Ground Beef: One pound of 80/20 ground beef gives you the best flavor. It has enough fat to stay juicy without making the chips greasy.
- Taco Seasoning: Use a packet of your favorite store-bought brand or make your own. I often use McCormick for convenience. If you’re feeling ambitious, a homemade mix of chili powder, cumin, garlic powder, and smoked paprika is incredible.
- Refried Beans: A can of refried beans adds a creamy, savory layer that holds everything together. Use vegetarian refried beans if you prefer.
- Shredded Cheese: A blend of sharp cheddar and Monterey Jack is my go-to. It melts beautifully and has a rich flavor. Pre-shredded cheese is fine, but freshly shredded melts even better (it has less anti-caking powder).
- Jalapeños: Pickled jalapeños from a jar add a tangy heat that cuts through the richness. If you want fresh heat, slice a fresh jalapeño thinly and add it before baking.
- Black Olives: Canned, sliced black olives add a briny, earthy note. They’re optional but highly recommended for texture.
- Roma Tomatoes: Diced tomatoes add freshness and acidity. You’ll need about two medium tomatoes.
- Green Onions: Sliced green onions add a mild onion flavor and a pop of color.
- Sour Cream: For serving. A dollop of cold sour cream balances the heat and saltiness.
- Salsa: Your favorite jarred or homemade salsa for dipping or drizzling.
- Guacamole: Store-bought or homemade. I like to make a quick one with mashed avocado, lime juice, and salt.
- Cilantro: Fresh cilantro leaves for garnish. If you’re one of those people who thinks cilantro tastes like soap, leave it out.
Equipment Needed
- Sheet Pan: A standard 13×18-inch half-sheet pan is perfect. It gives you enough surface area for a generous layer of nachos without overcrowding.
- Large Skillet: For browning the ground beef. A non-stick or cast-iron skillet works great.
- Spatula: For breaking up the meat as it cooks.
- Cutting Board and Knife: For dicing the tomatoes and slicing the green onions and jalapeños.
- Measuring Spoons: For the taco seasoning and any spices.
- Small Bowls: For holding the toppings. I like to use a set of nesting bowls to keep everything organized.
- Oven Mitts: That pan gets hot!
Preparation Method
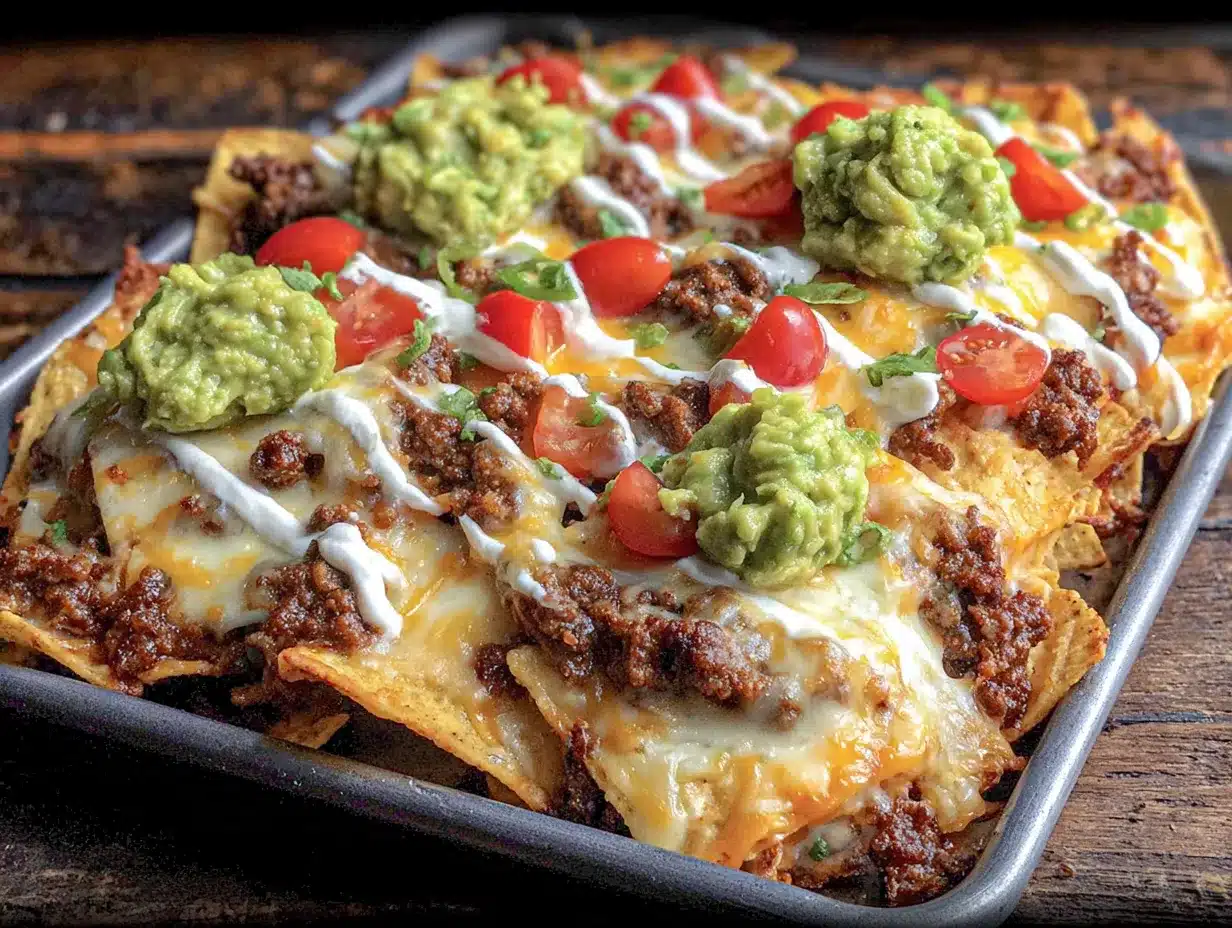
- Preheat your oven to 400°F (200°C). This high heat is key to getting the chips crispy and the cheese bubbly without drying everything out.
- Cook the ground beef. Place a large skillet over medium-high heat. Add the ground beef and cook, breaking it up with a spatula, until it’s fully browned (about 6-8 minutes). Drain off any excess fat. Return the pan to the stove, reduce heat to low, and stir in the taco seasoning with ¼ cup (60 ml) of water. Let it simmer for 2-3 minutes until it thickens into a saucy, seasoned meat.
- Warm the refried beans. In a small microwave-safe bowl, heat the refried beans for about 45 seconds to 1 minute, until they’re spreadable. You can also do this on the stove in a small saucepan over low heat.
- Layer the chips. Spread half of the tortilla chips in a single, even layer on your sheet pan. Try not to overlap them too much. Dollop small spoonfuls of the warmed refried beans over these chips. Then, sprinkle about a third of the shredded cheese over the beans. This base layer of cheese helps glue the chips together.
- Add the second layer. Arrange the remaining chips on top of the first layer, again trying to keep them as flat as possible. Sprinkle the seasoned ground beef evenly over the chips. Add the pickled jalapeños and sliced black olives. Then, pile on the remaining shredded cheese. Make sure every chip gets a little bit of cheese love.
- Bake. Place the sheet pan in the preheated oven and bake for 8-10 minutes. Keep an eye on it. You want the cheese to be fully melted and bubbly, and the edges of the chips to be just starting to turn a deeper golden brown. The smell in your kitchen will be incredible.
- Top and serve. Remove the pan from the oven. Immediately sprinkle the diced tomatoes, sliced green onions, and fresh cilantro over the hot nachos. The residual heat will slightly warm the tomatoes. Serve straight from the sheet pan with bowls of sour cream, salsa, and guacamole on the side.
Pro Tip: If you want a little extra smoky flavor, you can throw the sheet pan under the broiler for the last 30 seconds of baking. Watch it like a hawk—it can burn in an instant!
Cooking Tips & Techniques
I’ve made a lot of mistakes with nachos. I’ve had the soggy-bottom disaster. I’ve had the burnt-cheese tragedy. Here’s what I’ve learned so you don’t have to suffer the same fate.
The biggest mistake? Overloading the pan. It’s tempting to pile everything on, but that traps steam and makes the chips soft. Stick to two layers of chips. If you need more nachos, make a second pan. Your guests will thank you.
Don’t skip the refried beans. They act as a barrier between the chips and the wet ingredients. They also add a creamy texture that contrasts beautifully with the crunchy chips. I used to leave them out, and the nachos were never as good.
Timing is everything. Have all your cold toppings prepped and ready to go before you put the pan in the oven. The nachos are at their absolute best within five minutes of coming out of the oven. If you’re chopping tomatoes while the cheese is melting, you’re losing precious crunch time.
For extra crispy chips, you can spread the chips on the sheet pan and bake them for 2 minutes before adding any toppings. It’s an extra step, but it gives you a bulletproof crunch.
Multitask like a pro. While the ground beef is browning, dice your tomatoes and slice your green onions. This way, everything is ready to go the second the nachos come out of the oven. It makes the whole process feel effortless.
Variations & Adaptations
This recipe is a fantastic base, but don’t be afraid to make it your own. Here are a few variations I’ve tried and loved.
- Chicken Nachos: Swap the ground beef for shredded rotisserie chicken. Toss it with the taco seasoning and a splash of chicken broth before layering. It’s a lighter option that’s just as satisfying.
- Vegetarian Nachos: Skip the meat entirely and double up on the beans. Add a can of drained and rinsed black beans to the refried beans layer. Roasted corn, bell peppers, and zucchini are also fantastic additions.
- Breakfast Nachos: This is a game-changer for brunch. Use the same base, but top with scrambled eggs, crispy bacon, and a drizzle of hot sauce. Serve with a side of salsa verde.
- Spicy Nachos: If you like heat, add some diced chipotle peppers in adobo sauce to the ground beef while it’s simmering. Or, use a habanero salsa for serving. I once made a batch with ghost pepper cheese, and it cleared the room. In a good way.
- Gluten-Free Option: This recipe is naturally gluten-free as long as you use certified gluten-free tortilla chips and taco seasoning. Most standard brands are fine, but always check the label.
I once tried a version with pulled pork and a tangy BBQ sauce instead of taco seasoning. It was a completely different dish, but absolutely delicious. Don’t be afraid to experiment!
Serving & Storage Suggestions
These nachos are best served immediately, straight from the sheet pan. That’s the whole point. The contrast between the hot, melty cheese and the cool, fresh toppings is unbeatable.
Serving Temperature: Serve hot from the oven. Set the sheet pan on a trivet in the middle of the table so everyone can dig in. Provide small plates and forks, though I’ve seen people eat them just with their hands.
What to Serve With: These nachos are a meal on their own, but they pair beautifully with a Healthy Ranch Chicken Grain Bowl if you want a lighter side. For a full game day spread, add a bowl of chili or a Crispy Loaded Bacon Cheeseburger Tater Tot Casserole for the ultimate comfort food lineup.
Storage: Nachos do not store well. The chips will absorb moisture and become soft. If you absolutely have leftovers, store them in an airtight container in the refrigerator for up to 2 days. To reheat, spread them on a sheet pan and bake at 350°F (175°C) for 5-7 minutes. They won’t be as crispy as fresh, but they’ll still be tasty.
Make-Ahead Tips: You can prep all the components ahead of time. Cook the ground beef and chop the vegetables up to a day in advance. Store them separately in the fridge. When you’re ready to serve, just assemble and bake. It’s the perfect strategy for party hosting.
Nutritional Information & Benefits
Let’s be real—this isn’t health food. But it’s comfort food that brings people together, and that has its own kind of value. Here’s a rough estimate per serving (based on 8 servings).
| Nutrient | Amount Per Serving |
|---|---|
| Calories | 450-550 |
| Protein | 22g |
| Fat | 28g |
| Carbohydrates | 38g |
| Fiber | 6g |
| Sodium | 850mg |
The black beans and refried beans provide a good amount of fiber and plant-based protein. The tomatoes and jalapeños add a dose of vitamin C and antioxidants. If you use fresh ingredients and go easy on the cheese, you can make this a slightly lighter dish. I always feel better about indulging when I know there are real vegetables involved.
This recipe is not gluten-free unless you use certified gluten-free chips and seasoning. It contains dairy from the cheese and sour cream. For a dairy-free version, use a vegan cheese shred and a cashew-based sour cream.
Conclusion
This Best Sheet-Pan Loaded Nachos for a Crowd recipe is more than just a snack. It’s a centerpiece. It’s the dish that gets everyone talking and reaching for more. It’s the one that makes you the hero of the party without spending hours in the kitchen. I love this recipe because it’s forgiving, it’s flexible, and it always delivers. It turned me from a nacho skeptic into a full-on believer. I want that for you, too.
Try it this weekend. Customize it with your favorite toppings. Make a mess. Have fun. And when you do, come back and tell me about it in the comments. I’d love to hear how yours turned out. Did you try a wild variation? Did your family fight over the last crispy corner? Share your stories—they make my day.
Frequently Asked Questions
Can I make these nachos in the air fryer?
Yes, you can! Work in batches. Layer the chips, beans, meat, and cheese in an air fryer basket that fits your model. Cook at 350°F (175°C) for 4-5 minutes, until the cheese is melted. It’s a great way to make a smaller, single-serving portion.
How do I keep the chips from getting soggy?
The key is the two-layer method with the refried beans acting as a barrier. Also, don’t overload the pan. Too many chips trap steam. Bake at a high temperature (400°F) to evaporate moisture quickly.
Can I use ground turkey instead of beef?
Absolutely. Ground turkey works perfectly. Just make sure to add a little oil to the pan before cooking, as turkey is leaner than beef. You might also want to add a splash of water to the taco seasoning to keep it moist.
What if I don’t have refried beans?
You can substitute with a can of drained and rinsed black beans or pinto beans. Mash them slightly with a fork before spreading them on the chips. It won’t be as creamy, but it will still be delicious.
Can I prepare these nachos ahead of time and bake later?
I don’t recommend assembling them more than 30 minutes before baking. The chips will start to absorb moisture from the beans and meat, which leads to sogginess. You can prep all the components separately, but assemble and bake right before serving for the best results.
Pin This Recipe!
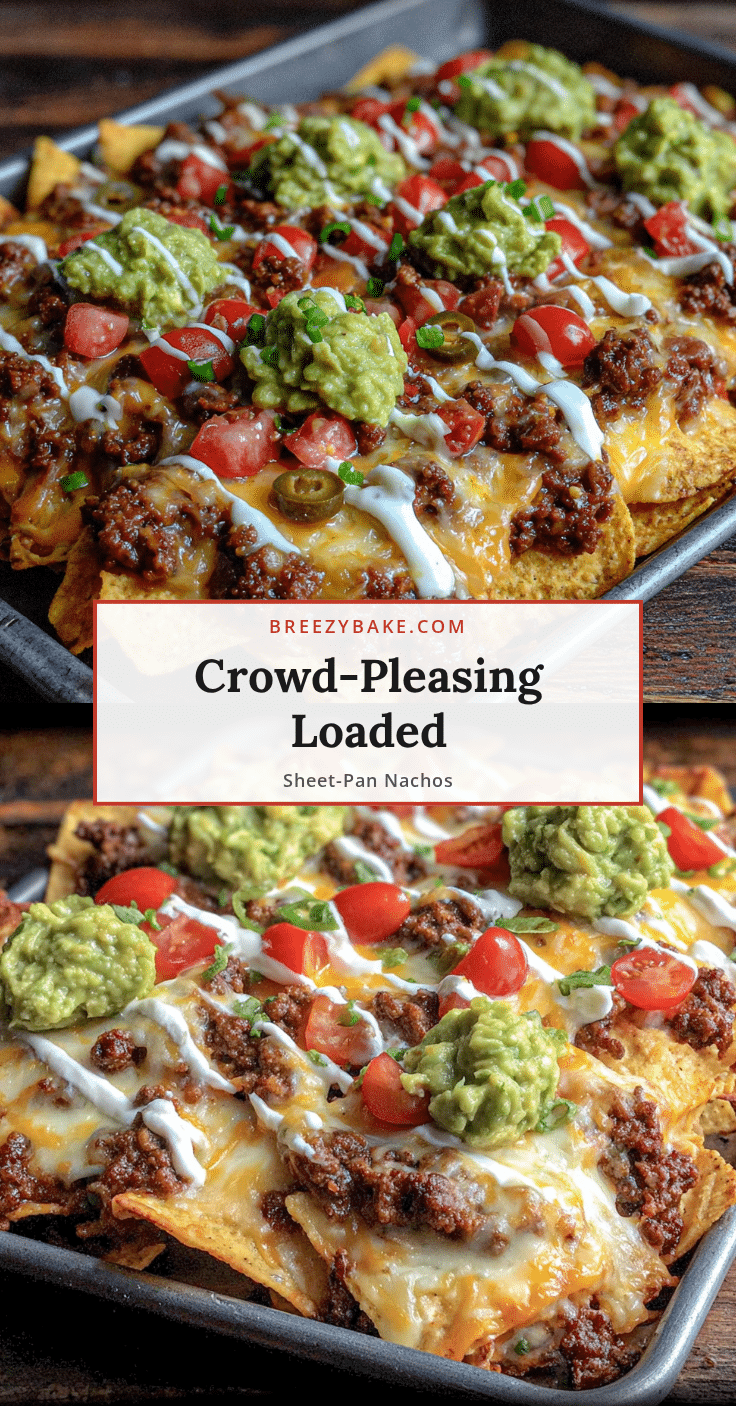
Best Sheet-Pan Loaded Nachos for a Crowd (Easy Game Day Recipe)
This recipe solves the soggy-chip problem with a clever two-layer method and refried bean barrier. Perfect for game day or any gathering, these nachos stay crispy, cheesy, and disappear faster than anything else on the table.
- Prep Time: 15 minutes
- Cook Time: 10 minutes
- Total Time: 25 minutes
- Yield: 8 servings 1x
- Category: Appetizer
- Cuisine: Mexican-American
Ingredients
- 1 (13-ounce) bag sturdy tortilla chips (e.g., Tostitos)
- 1 pound ground beef (80/20)
- 1 packet taco seasoning (e.g., McCormick) or homemade mix
- 1 (16-ounce) can refried beans
- 2 cups shredded sharp cheddar and Monterey Jack cheese blend
- 1/2 cup pickled jalapeños (from a jar)
- 1/2 cup canned sliced black olives
- 2 Roma tomatoes, diced
- 4 green onions, sliced
- 1/2 cup sour cream (for serving)
- 1/2 cup salsa (for serving)
- 1/2 cup guacamole (for serving)
- Fresh cilantro leaves (for garnish)
Instructions
- Preheat your oven to 400°F (200°C).
- Cook the ground beef: Place a large skillet over medium-high heat. Add the ground beef and cook, breaking it up with a spatula, until fully browned (about 6-8 minutes). Drain off any excess fat. Return the pan to the stove, reduce heat to low, and stir in the taco seasoning with 1/4 cup (60 ml) of water. Let it simmer for 2-3 minutes until it thickens into a saucy, seasoned meat.
- Warm the refried beans: In a small microwave-safe bowl, heat the refried beans for about 45 seconds to 1 minute, until spreadable. Alternatively, warm them in a small saucepan over low heat.
- Layer the chips: Spread half of the tortilla chips in a single, even layer on a standard 13×18-inch half-sheet pan. Dollop small spoonfuls of the warmed refried beans over these chips. Sprinkle about one-third of the shredded cheese over the beans.
- Add the second layer: Arrange the remaining chips on top of the first layer, keeping them as flat as possible. Sprinkle the seasoned ground beef evenly over the chips. Add the pickled jalapeños and sliced black olives. Pile on the remaining shredded cheese, making sure every chip gets some cheese.
- Bake: Place the sheet pan in the preheated oven and bake for 8-10 minutes, until the cheese is fully melted and bubbly and the edges of the chips are just starting to turn golden brown.
- Top and serve: Remove the pan from the oven. Immediately sprinkle the diced tomatoes, sliced green onions, and fresh cilantro over the hot nachos. Serve straight from the sheet pan with bowls of sour cream, salsa, and guacamole on the side.
Notes
For extra crispy chips, spread the chips on the sheet pan and bake for 2 minutes before adding any toppings. To add smoky flavor, place the sheet pan under the broiler for the last 30 seconds of baking, watching carefully to prevent burning. Have all cold toppings prepped before baking, as nachos are best within 5 minutes of coming out of the oven. Nachos do not store well; if necessary, store leftovers in an airtight container in the refrigerator for up to 2 days and reheat at 350°F (175°C) for 5-7 minutes.
Nutrition
- Serving Size: 1 serving (approxima
- Calories: 500
- Sugar: 4
- Sodium: 850
- Fat: 28
- Saturated Fat: 12
- Carbohydrates: 38
- Fiber: 6
- Protein: 22
Keywords: sheet pan nachos, loaded nachos, game day recipe, easy nachos, crispy nachos, crowd-pleasing nachos, beef nachos


