Third batch of the night and I finally stopped wrapping the cheese strips too tight. By the third time I made these Crispy Mummy Mozzarella Bites for Halloween, I figured out the dough strips need to look a little messy—like a zombie wrapped them, not a pastry chef. The first batch? Perfectly neat little bundles. Cute, sure, but they looked more like tiny burritos than mummies. The second batch I got impatient and the cheese started leaking out during frying. Hot oil and mozzarella is a combination that teaches you patience real quick.
Look, I wasn’t even planning on making Halloween snacks that Tuesday night. I was supposed to be meal prepping for the week—healthy chicken and veggie stuff, you know the drill. But then I saw the bag of mozzarella sticks in the freezer and the crescent roll dough in the fridge, and my brain just went there. Little bandaged cheese sticks. It was one of those ideas that sounds ridiculous until you take that first bite and the crispy, buttery exterior gives way to that hot, stretchy cheese pull. Then it doesn’t sound ridiculous at all. It sounds like the only thing you should be making all October.
These aren’t complicated. That’s the thing. They look like you spent an hour fussing over them, but honestly? They come together in about twenty minutes. The hardest part is not eating them all before the party starts. Or before you finish taking pictures, which is honestly harder. I’ve made these for three different Halloween gatherings now and every single time, someone asks for the recipe before they’ve even finished chewing. That’s how you know a snack has earned its spot.
Why You’ll Love This Recipe
I’ve tested this recipe more times than I care to admit, and here’s what I’ve learned: these bites hit that perfect sweet spot between impressive and effortless. They look like you planned a themed menu, but they’re secretly the easiest thing on your Halloween spread.
- Quick & Easy: From fridge to plate in under 25 minutes. No marinating, no complicated folding techniques, no special equipment.
- Simple Ingredients: Mozzarella sticks, crescent roll dough, and a few pantry staples. That’s it. No weird Halloween-specific ingredients you’ll never use again.
- Perfect for Halloween Parties: They’re portable, they’re fun, and they disappear faster than anything else on the snack table. Kids go crazy for them, adults pretend they’re just eating them for the kids.
- Crowd-Pleaser: I’ve served these alongside a crispy chicken nacho crust pizza for game day and they somehow stole the show. Cheese and crispy dough is a universal language.
- Unbelievably Delicious: The contrast between the flaky, golden exterior and the molten cheese inside is honestly addictive. You’ll make a batch for the party and a secret batch for yourself.
What makes these different from every other mozzarella stick recipe out there? The technique. Most recipes tell you to wrap the cheese completely, but I’ve found that leaving small gaps in the dough—like actual mummy bandages—creates those perfect crispy edges where the cheese barely peeks through. It browns in the oven and creates this little caramelized crust that’s absolutely chef’s kiss. Plus, using crescent roll dough instead of traditional breading means you get that buttery, flaky texture instead of the usual crunchy coating. It’s a game changer.
Honestly, this is the kind of recipe that makes you feel like a kitchen genius without actually having to be one. And isn’t that the best kind of recipe?
What Ingredients You Will Need
This recipe keeps things simple—you probably have most of these in your kitchen already. The magic is in how they come together, not in hunting down obscure ingredients.
- Mozzarella string cheese (8 sticks): Look for the full-fat kind. The low-fat version doesn’t melt as smoothly and won’t give you that glorious stretch. I usually grab the store brand—it works perfectly fine. Cut each stick in half crosswise so you end up with 16 bite-sized pieces.
- Refrigerated crescent roll dough (1 can, 8 ounces): This is the shortcut that makes the recipe work. Pillsbury is the classic choice, but any brand works. You’ll unroll the dough and separate it along the perforations, then cut each triangle lengthwise into thin strips. About 4-5 strips per triangle is the sweet spot.
- Egg (1 large): For the egg wash. It gives the dough that gorgeous golden-brown color. Beat it with a tablespoon of water until it’s uniform.
- Garlic powder (½ teaspoon): Don’t skip this. It adds that savory depth that makes these bites irresistible. I’ve tried onion powder too, but garlic is the winner.
- Italian seasoning (½ teaspoon): Optional but recommended. The little flecks of herbs make them look more finished and add a subtle flavor layer.
- Salt (¼ teaspoon): Flaky sea salt is ideal for sprinkling on top right when they come out of the oven. Kosher salt works too.
- Marinara sauce (for dipping): Warm it up before serving. Cold sauce with hot cheese bites just feels wrong. I like Rao’s or whatever jarred brand is on sale—just heat it with a pinch of red pepper flakes for a little kick.
For the mummy eyes (optional but highly recommended):
- Candy eyeballs (16 small ones): You can find these at any craft store or grocery store around Halloween. Press them onto the baked bites using a tiny dab of mustard or ketchup as “glue.” It’s silly and completely unnecessary and kids absolutely lose their minds over it.
If you’re making these for a crowd, double the recipe. Trust me on this. I made a single batch for a small gathering once and regretted it within ten minutes.
Equipment Needed
You don’t need much for this recipe, which is part of the appeal. Here’s what you’ll need:
- Baking sheet: A standard half-sheet pan works perfectly. Line it with parchment paper for easy cleanup—trust me, the cheese that inevitably leaks will stick to bare metal.
- Sharp knife or pizza cutter: For cutting the crescent roll dough into strips. A pizza cutter makes this go faster, but a knife works fine.
- Small bowl: For the egg wash. Any small bowl you have will do.
- Pastry brush: For applying the egg wash. If you don’t have one, you can use a spoon to drizzle it over the tops—just be gentle so you don’t dislodge the dough strips.
- Cooling rack: Optional but helpful. Placing the baked bites on a rack for a minute or two before serving keeps them from getting soggy on the bottom.
Honestly, I’ve made these with just a baking sheet and a butter knife when I was visiting my parents’ house and didn’t have my usual tools. They turned out fine. Don’t let missing equipment stop you.
Preparation Method

Let’s get into the actual making of these little guys. I’ve broken it down step by step so you don’t end up with cheese explosions like I did on my first attempt.
- Preheat your oven to 375°F (190°C). Line a baking sheet with parchment paper. Don’t skip the parchment—I learned the hard way that leaked cheese bonds to aluminum foil like it’s superglue.
- Prepare the mozzarella: Unwrap all 8 mozzarella sticks and cut each one in half crosswise. You should have 16 pieces total. Pat them dry with a paper towel if they feel moist—excess moisture can make the dough soggy. Set them aside on a plate.
- Prepare the dough: Open the can of crescent roll dough (that pop sound never gets old). Unroll it and separate along the perforations so you have 8 triangles. Using a sharp knife or pizza cutter, cut each triangle lengthwise into thin strips—aim for about 4-5 strips per triangle. They don’t need to be perfectly uniform. Actually, imperfect strips look more authentic when wrapped.
- Wrap the mummies: Take one piece of mozzarella and start wrapping a dough strip around it, stretching the dough slightly as you go. Leave small gaps between the strips so some cheese is visible—that’s the “mummy” look. Don’t wrap too tightly or the cheese won’t have room to expand as it melts. Overlap the strips slightly where they meet so they stay put during baking. Repeat with all 16 pieces. Place them seam-side down on the prepared baking sheet, spaced about an inch apart.
- Apply the egg wash: Beat the egg with 1 tablespoon of water until smooth. Brush the egg wash over the exposed dough strips. This is what gives them that beautiful golden color. Don’t drown them—a light coating is enough.
- Season: Sprinkle the garlic powder, Italian seasoning (if using), and salt evenly over all the bites. I like to do this from a height so the seasoning distributes evenly instead of clumping in one spot.
- Bake: Place the baking sheet in the preheated oven and bake for 10-12 minutes, or until the dough is golden brown and puffed. The cheese should be melted and bubbly but not leaking everywhere. If you see cheese starting to pool on the parchment, they’re done—pull them out immediately.
- Cool slightly: Let them rest on the baking sheet for 2-3 minutes before transferring to a serving plate. This gives the cheese a chance to set up just enough that it won’t burn your mouth. Trust me on this one—I’ve made that mistake too.
- Add eyes (optional): If you’re using candy eyeballs, dab a tiny bit of mustard or ketchup on the back of each one and press it gently onto the cheese or dough. Do this while the bites are still warm so the “glue” sets as they cool.
- Serve immediately: Arrange them on a platter with warm marinara sauce for dipping. These are best eaten within 10 minutes of coming out of the oven. After that, the cheese starts to set and the dough loses some of its crispiness.
Cooking Tips & Techniques
I’ve made approximately seven thousand batches of these (okay, maybe more like twelve) and here’s what I’ve learned the hard way so you don’t have to:
Don’t overwork the dough. Crescent roll dough gets tough if you handle it too much. Stretch it gently when wrapping, but don’t knead or reroll the scraps. If you run out of strips, just open another can—it’s worth it.
Cold cheese is your friend. If you have time, pop the wrapped mummies in the freezer for 10 minutes before baking. This gives the cheese a head start and helps prevent it from leaking out before the dough is fully cooked. I’ve done this and skipped this, and the difference is noticeable.
Watch your oven like a hawk. Every oven runs differently. My old oven would brown these in exactly 11 minutes. My current one? 9 minutes and they’re done. Start checking at the 8-minute mark and look for that deep golden color.
Spacing matters. If you crowd the baking sheet, the bites will steam instead of crisp up. Give them at least an inch of space. If you’re doubling the recipe, use two baking sheets or bake in batches.
Leakage happens. Don’t panic if a little cheese escapes onto the parchment. That’s normal. Just peel the bite off carefully—the cheese that leaked will crisp up into these amazing little cheese crisps that are honestly a cook’s treat. Consider it your reward for all that wrapping.
Variations & Adaptations
One of the best things about this recipe is how easy it is to tweak. Here are some variations I’ve tried and loved:
- Spicy version: Add ¼ teaspoon of red pepper flakes to the seasoning mix, or sprinkle some cayenne over the egg wash before baking. I did this for a Halloween party and they disappeared faster than the regular ones.
- Pepperoni mummies: Place a small piece of pepperoni between the cheese and the dough before wrapping. It adds a salty, savory kick that pairs beautifully with the marinara. Think of it as a pizza-flavored mummy.
- Air fryer method: Cook at 350°F (175°C) for 6-8 minutes. No need to flip them. The air fryer gives them an even crispier exterior, though you lose a tiny bit of that buttery crescent roll texture. I actually prefer the oven version, but the air fryer is great when you’re in a hurry.
- Gluten-free option: Use gluten-free crescent roll dough (it exists, I promise) or gluten-free puff pastry sheets cut into strips. The texture will be slightly different, but the concept works the same way.
- Different cheeses: Try this with cheddar sticks for a different flavor profile. The melt won’t be as stretchy, but the taste is fantastic. I made a batch with pepper jack once and they were incredible—spicy and gooey and perfect.
If you’re looking for another easy snack that disappears fast, you should check out these crispy chicken wing bites—they have a similar “everyone grabs one and suddenly the plate is empty” energy.
Serving & Storage Suggestions
These are best served hot and fresh, but let’s be real—sometimes you need to make them ahead or deal with leftovers.
Serving: Arrange the mummy bites on a Halloween-themed platter or a dark plate for contrast. Serve with warm marinara sauce in a small bowl. I like to add a few extra candy eyeballs scattered around the platter for decoration. If you’re serving these at a party, keep them warm in a 200°F (93°C) oven for up to 20 minutes—any longer and the dough starts to soften.
Storage: Leftover bites can be stored in an airtight container in the refrigerator for up to 3 days. But honestly? They’re never as good reheated. The dough loses its crispiness and the cheese sets into a solid mass. If you must reheat them, use an air fryer at 350°F (175°C) for 3-4 minutes. The microwave will turn them into sad, soggy cheese blobs.
Make-ahead tip: You can assemble the mummies up to 4 hours ahead of time and keep them in the refrigerator on the baking sheet, covered with plastic wrap. Bake them right before serving. This is my go-to strategy for parties—I do all the wrapping in the afternoon, then pop them in the oven when guests start arriving.
Flavor development: These don’t really improve with age—they’re a fresh-from-the-oven kind of snack. But the seasoning does meld together a bit more if you let the assembled bites sit in the fridge for 30 minutes before baking. Just don’t go longer than 4 hours or the dough might get soggy from the cheese moisture.
Nutritional Information & Benefits
Let’s be honest—these are not health food. They’re a fun Halloween treat. But here’s the approximate nutritional breakdown per serving (2 bites):
- Calories: 210
- Protein: 10g
- Fat: 12g
- Carbohydrates: 16g
- Calcium: 15% of daily value (from the mozzarella)
The mozzarella does provide a decent amount of calcium and protein, which is something. And if you’re serving these as part of a larger spread alongside something like a healthy chicken veggie skillet wrap, you’re balancing out the indulgence. That’s my story and I’m sticking to it.
Dietary considerations: These contain gluten, dairy, and eggs. For a dairy-free version, try using vegan mozzarella sticks (they exist, though the melt is different). For egg-free, skip the egg wash and brush the dough with milk or melted butter instead—it won’t brown quite as well, but it’ll still work.
Conclusion
These Crispy Mummy Mozzarella Bites for Halloween are exactly the kind of recipe I wish I’d found years ago. They’re fun without being fussy, impressive without being complicated, and they genuinely taste amazing. The buttery, flaky crescent dough wrapped around hot, stretchy mozzarella is a combination that just works—no fancy techniques or obscure ingredients required.
I love that you can customize them to fit your party theme, your dietary needs, or just whatever you have in the fridge. Add pepperoni, spice them up, skip the eyes if you’re not feeling it—they’re forgiving and flexible. That’s my favorite kind of recipe.
If you make these, I’d love to hear how they turned out. Drop a comment below and let me know if your guests went for the eyes first (they always do at my house). And if you come up with a variation I haven’t tried, definitely share it—I’m always looking for an excuse to make another batch.
Happy Halloween, and may your cheese pulls be long and your dough be golden!
Frequently Asked Questions
Can I use puff pastry instead of crescent roll dough?
Absolutely. Thaw a sheet of puff pastry and cut it into thin strips. The texture will be flakier and more buttery, which is honestly amazing. Just note that puff pastry puffs up more than crescent dough, so your mummies might look a little chunkier. Still delicious, just different.
How do I prevent the cheese from leaking out?
This happens for two reasons: either the dough is wrapped too tightly (leaving no room for the cheese to expand) or the oven temperature is too high. Keep your oven at 375°F (190°C) and leave small gaps in the wrapping. Also, make sure the cheese is fully enclosed—any exposed edges will leak. If you’re really worried, freeze the wrapped bites for 10 minutes before baking.
Can I make these in an air fryer?
Yes! Cook at 350°F (175°C) for 6-8 minutes. No need to flip them. The air fryer gives them an extra-crispy exterior, though the crescent roll texture is slightly different from the oven version. I’d recommend checking them at the 6-minute mark and adding time as needed.
What can I use instead of candy eyeballs?
If you can’t find candy eyeballs or just don’t want to use them, you can draw little eyes on the cheese with black food coloring gel and a toothpick. Or skip them entirely—the mummies still look cute with just the bandaged dough. Some people use small dots of black olive or cut nori sheets into eye shapes, but honestly, candy eyeballs are the easiest option.
How far ahead can I make these?
You can assemble them up to 4 hours ahead and keep them in the fridge, covered. Bake them right before serving for the best texture. I don’t recommend baking them more than 20 minutes ahead of time—they lose their crispiness pretty quickly. If you need to reheat them, use an air fryer, not a microwave.
Pin This Recipe!
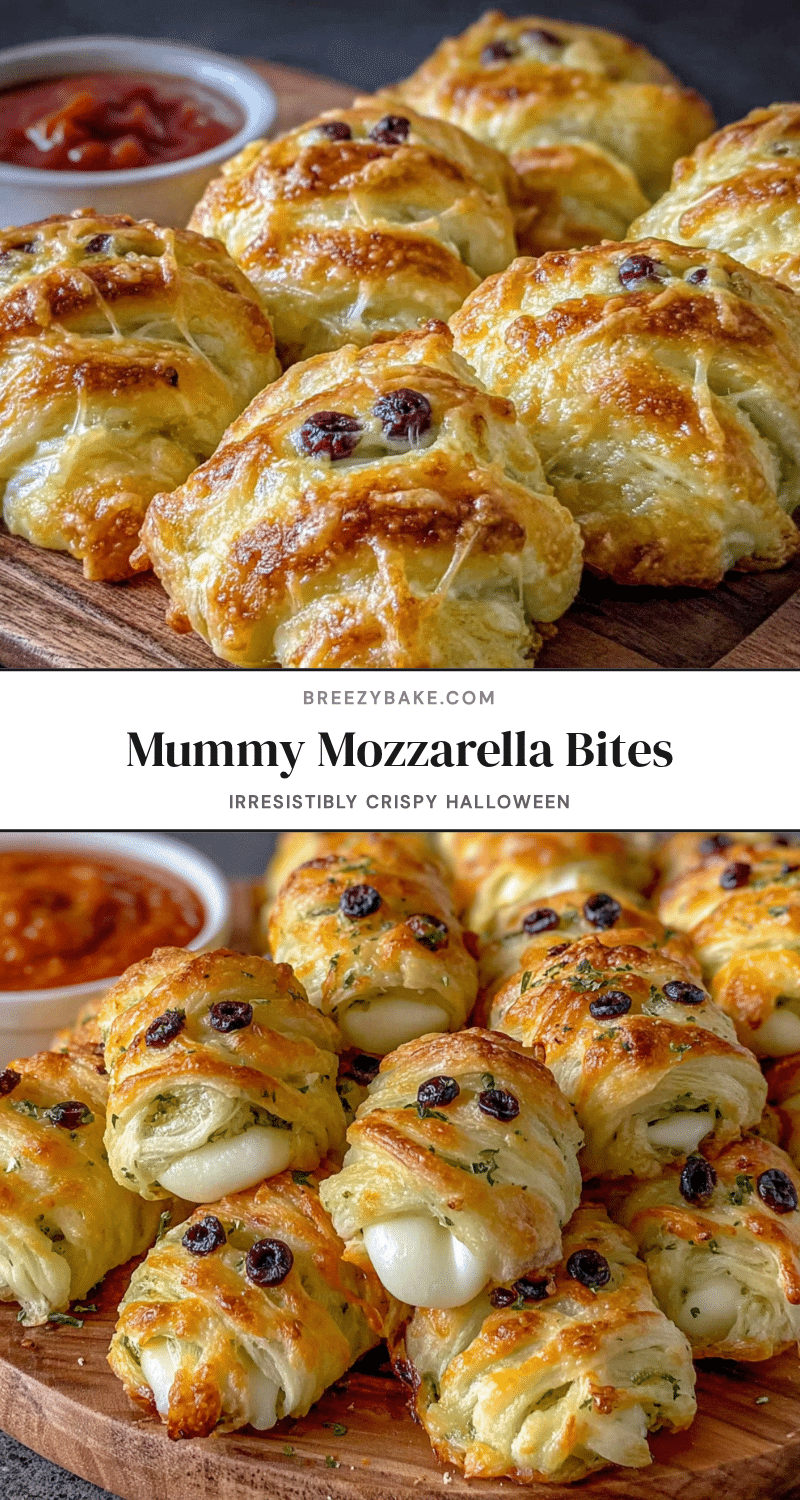
Easy Crispy Mummy Mozzarella Bites for Halloween

These fun and easy Halloween snacks feature mozzarella sticks wrapped in crescent roll dough to look like mummies, baked until golden and served with warm marinara sauce. They’re quick to make and always a crowd-pleaser.
- Prep Time: 15 minutes
- Cook Time: 12 minutes
- Total Time: 27 minutes
- Yield: 8 servings (2 bites per serving) 1x
- Category: Appetizer
- Cuisine: American
Ingredients
- 8 mozzarella string cheese sticks (full-fat), each cut in half crosswise
- 1 can (8 ounces) refrigerated crescent roll dough
- 1 large egg
- 1 tablespoon water
- ½ teaspoon garlic powder
- ½ teaspoon Italian seasoning (optional)
- ¼ teaspoon salt (flaky sea salt or kosher)
- Marinara sauce, for dipping
- 16 small candy eyeballs (optional)
- Mustard or ketchup (for attaching eyeballs, optional)
Instructions
- Preheat oven to 375°F (190°C). Line a baking sheet with parchment paper.
- Unwrap mozzarella sticks and cut each in half crosswise to make 16 pieces. Pat dry with a paper towel if moist.
- Open crescent roll dough, unroll, and separate along perforations into 8 triangles. Cut each triangle lengthwise into 4-5 thin strips.
- Wrap a dough strip around each mozzarella piece, stretching slightly and leaving small gaps for a mummy look. Don’t wrap too tightly. Place seam-side down on prepared baking sheet, spaced about 1 inch apart.
- Beat egg with 1 tablespoon water to make egg wash. Brush lightly over exposed dough strips.
- Sprinkle garlic powder, Italian seasoning (if using), and salt evenly over the bites.
- Bake for 10-12 minutes, until dough is golden brown and puffed. Check at 8 minutes to avoid over-browning.
- Let rest on baking sheet for 2-3 minutes before transferring to a serving plate.
- If using candy eyeballs, dab a tiny bit of mustard or ketchup on the back of each and press onto the warm bites.
- Serve immediately with warm marinara sauce for dipping.
Notes
For best results, freeze wrapped bites for 10 minutes before baking to prevent cheese leakage. Don’t overwork the dough. Serve within 10 minutes of baking for optimal crispiness. Leftovers can be stored in an airtight container in the refrigerator for up to 3 days; reheat in an air fryer at 350°F (175°C) for 3-4 minutes.
Nutrition
- Serving Size: 2 bites
- Calories: 210
- Sugar: 2
- Sodium: 480
- Fat: 12
- Saturated Fat: 5
- Carbohydrates: 16
- Protein: 10
Keywords: Halloween, mummy, mozzarella bites, crescent roll, appetizer, party snack, cheese


