“So, you’re going to make the gravy from scratch, right?”
My mother-in-law asked me this over the phone about two weeks before my first Thanksgiving hosting. I had confidently told her I was handling the turkey, the sides, and the desserts. But gravy? I had a packet in my pantry. A nice one, sure, but a packet nonetheless. I could practically hear her eyebrow raise through the phone line. That question—that simple, terrifying question—sent me down a rabbit hole of roux ratios, stock temperatures, and the very real panic of a lumpy, bland sauce threatening to ruin the entire meal. I spent that entire week testing, failing, and finally, succeeding. The result? A gravy so rich, so silky, so deeply flavored that it made the turkey a supporting actor in its own story. This isn’t just any gravy recipe. This is my make-ahead turkey gravy from scratch, born from a moment of frantic kitchen panic and a deep desire to never, ever serve a packet again. It’s the one dish that gets the most compliments, and honestly, it’s the easiest part of the whole meal to get right—especially when you make it ahead.
Why You’ll Love This Make-Ahead Turkey Gravy
Let’s be real for a second. The holidays are stressful. You’ve got a bird to wrangle, sides to time perfectly, and a table to set. The last thing you need is a last-minute gravy scramble. That’s the whole point of this recipe.
- Stress-Free Holidays: Make it up to three days in advance. Imagine the freedom of just reheating and serving while everyone else is panicking. It’s a game-changer.
- Deep, Rich Flavor: We’re not using drippings here. We’re building flavor from the ground up with roasted turkey wings and vegetables. The result is a gravy that tastes like it’s been simmering for hours—because it has.
- Perfect Consistency, Every Time: No lumps. No watery mess. We use a classic roux technique that gives you total control over the thickness. It’s foolproof once you see the method.
- Simple, Real Ingredients: You likely have everything in your fridge and pantry right now. No fancy stocks, no weird additives. Just butter, flour, aromatics, and a good turkey base.
- Crowd-Pleaser: This gravy is the star. It’s silky, savory, and so delicious that people will be spooning it over their mashed potatoes, their stuffing, and maybe even their dessert (I won’t judge).
This isn’t just another recipe you find online. It’s the one that has saved my sanity every Thanksgiving since. It’s the one that my father-in-law, a man of few words, called “the best gravy he’s ever had.” It’s the one that lets you actually enjoy the party instead of sweating over a hot stove.
What Ingredients You Will Need
This recipe uses simple ingredients to build a foundation of flavor that’s miles above anything from a packet. We’re not using turkey drippings, so the flavor comes entirely from roasting and simmering. Here’s what you’ll need to gather.
- For the Roasted Turkey Base (The Flavor Foundation):
- 2 pounds turkey wings or drumsticks: These are cheap and packed with flavor. Roasting them is the secret to that deep, savory taste. Don’t skip this step—it’s non-negotiable for the best gravy.
- 1 large yellow onion, quartered: Adds sweetness and depth after roasting.
- 2 large carrots, chopped into 2-inch chunks: For natural sweetness and body.
- 2 celery stalks, chopped into 2-inch chunks: Adds a subtle herbal note.
- 4 cloves garlic, smashed: We want the flavor, not the burn. Smashing them releases their oils without burning them in the oven.
- 2 tablespoons olive oil: For coating the turkey and veggies for roasting.
- 1 tablespoon tomato paste: This is a secret weapon. It adds umami and a beautiful rich color. I like the double-concentrated tube kind for convenience.
- For the Aromatics & Simmer:
- 6 cups low-sodium chicken or turkey broth: Use a good brand like Swanson or Kitchen Basics. Low-sodium is key so you can control the salt level later.
- 2 sprigs fresh thyme: Or 1 teaspoon dried thyme.
- 1 bay leaf: For a subtle, earthy background note.
- ½ teaspoon whole black peppercorns: Adds a gentle, floral heat. You’ll strain these out later.
- For the Roux (The Thickener):
- ½ cup unsalted butter: Use good quality butter. It makes a difference in flavor and texture.
- ½ cup all-purpose flour: Standard white flour works perfectly. For a gluten-free version, you can use a 1:1 gluten-free flour blend.
- For Finishing:
- Salt and freshly ground black pepper, to taste: You’ll need more salt than you think. Taste as you go.
- Optional: ¼ cup heavy cream or half-and-half: For a luxuriously silky finish. I add this when I’m feeling fancy, but it’s perfect without it too.
Ingredient Tip: If you can’t find turkey wings, use 1.5 pounds of chicken thighs and drumsticks. The flavor will be slightly different but still incredibly delicious. You can also use the neck and giblets from your Thanksgiving turkey if you’re making this the day of, but for a true make-ahead version, the wings are your best friend.
Equipment Needed
You don’t need a professional kitchen to pull this off. Most of these items you probably already have. Here’s what you’ll need:
- Large roasting pan or rimmed baking sheet: For roasting the turkey and vegetables. A sheet pan works great if you don’t have a roasting pan.
- Large stockpot or Dutch oven: For simmering the stock and building the gravy. A 5-6 quart pot is perfect.
- Fine-mesh strainer or cheesecloth: Essential for straining out all the solids so you get a perfectly smooth gravy. A fine-mesh strainer is a worthwhile investment.
- Whisk: A good, sturdy whisk is your best friend for making a lump-free roux. I prefer a flat whisk for getting into the corners of the pot.
- Liquid measuring cup: For measuring your stock and the finished gravy.
- Sharp knife and cutting board: For prepping the vegetables.
- Airtight storage container: For storing the finished gravy in the fridge or freezer.
Budget-Friendly Tip: Don’t have a fine-mesh strainer? You can line a colander with a couple of layers of cheesecloth or even a clean, lint-free kitchen towel. It works just as well!
Preparation Method
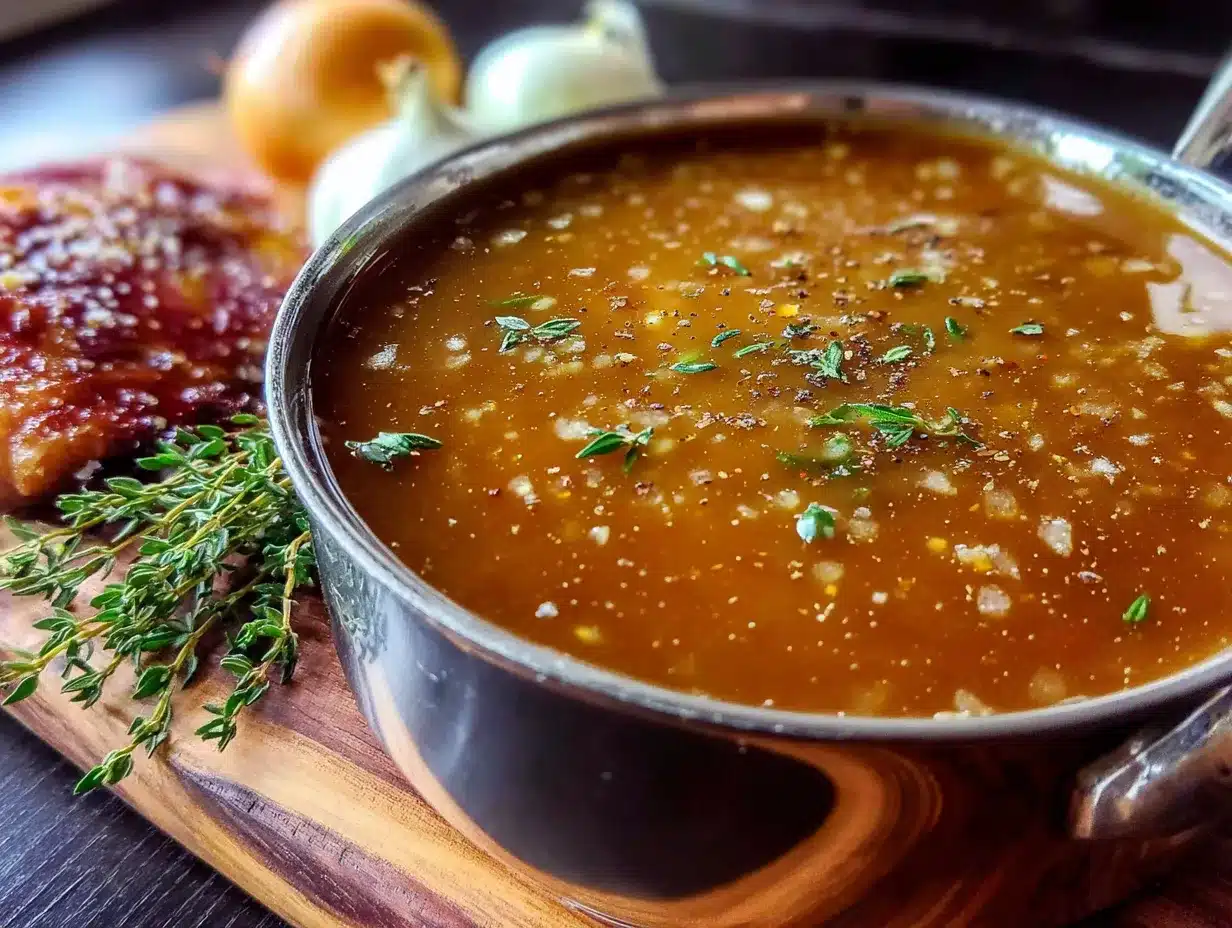
This method breaks down into two main parts: making the roasted turkey stock, and then turning that stock into the gravy. It looks like a lot of steps, but each one is simple. Let’s get started.
- Roast the Turkey and Vegetables: Preheat your oven to 425°F (220°C). On your roasting pan or baking sheet, toss the turkey wings, quartered onion, chopped carrots, celery, and smashed garlic cloves with the olive oil. Spread everything in a single layer. Roast for 35-40 minutes, flipping the turkey pieces halfway through, until the turkey is golden brown and the vegetables are softened and starting to caramelize. This step builds all the deep flavor.
- Build the Stock: Carefully transfer the roasted turkey and vegetables to your large stockpot. Don’t worry about leaving any brown bits on the pan—we’ll get those in a second. Place the roasting pan on your stove over two burners on medium heat. Add about 1 cup of the chicken broth to the hot pan and use a wooden spoon or spatula to scrape up all the browned bits from the bottom. This is called deglazing, and it’s pure flavor gold. Pour this liquid into the stockpot with the turkey and veggies.
- Simmer the Stock: Add the remaining 5 cups of broth, the tomato paste, thyme sprigs, bay leaf, and peppercorns to the pot. Bring everything to a boil over high heat, then reduce the heat to low and let it simmer gently, uncovered, for 45 minutes to 1 hour. The liquid should reduce slightly and become deeply fragrant. You’ll see the turkey meat starting to fall off the bones.
- Strain the Stock: Place your fine-mesh strainer over a large liquid measuring cup or a clean bowl. Carefully pour the entire contents of the pot through the strainer. Press down on the solids with the back of a spoon to extract every last drop of flavorful liquid. Discard the solids. You should have about 4 cups of rich, brown turkey stock. If you have more, that’s fine—just use 4 cups for the gravy and save the rest for another use. If you have less, add a little water or extra broth to make 4 cups.
- Make the Roux: In the same stockpot (wipe it clean if you want, but I just give it a quick rinse), melt the butter over medium heat. Once it’s fully melted and starting to bubble, whisk in the flour. Keep whisking constantly for 2-3 minutes. The mixture will start to smell slightly nutty and turn a light golden-brown color. This cooks out the raw flour taste and ensures a smooth gravy.
- Whisk in the Stock: This is the most important step for a lump-free gravy. Slowly pour the warm strained stock into the roux while whisking constantly. Start with a thin stream, whisking vigorously to incorporate. Once all the stock is added, continue whisking until the mixture is smooth and starts to thicken. This usually takes about 2-3 minutes. Don’t walk away—whisking is your friend here.
- Simmer and Season: Bring the gravy to a gentle simmer, then reduce the heat to low. Let it cook for 5-10 minutes, stirring occasionally, until it reaches your desired consistency. It should coat the back of a spoon. Taste it. Now, season generously with salt and freshly ground black pepper. You will likely need a good teaspoon of salt, maybe more. Taste again. If you want that extra velvety finish, stir in the heavy cream or half-and-half.
- Make-Ahead and Cool: Remove the pot from the heat. Let the gravy cool completely at room temperature. Do not put hot gravy directly into the fridge. Once it’s cool, transfer it to an airtight container. You can refrigerate it for up to 3 days, or freeze it for up to 3 months.
Sensory Cue: When you’re making the roux, it should look like a thick, sandy paste that bubbles gently. When you add the stock, the gravy will look thin and watery at first—don’t panic! It will thicken beautifully as it simmers. You’re looking for a consistency that’s slightly thinner than you want it to be at room temperature, because it will thicken more as it cools and again when you reheat it.
Cooking Tips & Techniques
I’ve made this gravy more times than I can count, and I’ve definitely had my share of mishaps. Here are the lessons I learned the hard way so you don’t have to.
- The Roux is Everything: Don’t rush the roux. If you add the flour and don’t cook it long enough, your gravy will taste like raw flour. If you burn it, you have to start over. Medium heat and constant whisking are your safety net. I once got distracted by a football game and burned my roux. The whole pot smelled like burnt toast. Just start fresh—it’s only butter and flour.
- Warm Stock, Cold Stock: Always add warm stock to your hot roux. Cold stock can cause the roux to seize up and create lumps. I keep my strained stock in a warm pot or a microwave-safe measuring cup and give it a quick 30-second zap if it’s cooled down too much.
- Lumpy Gravy? Don’t despair! If you end up with lumps, you have two options. First, keep whisking vigorously—sometimes they break up. Second, pour the whole thing through your fine-mesh strainer. It will catch all the lumps and give you a perfectly smooth gravy. I’ve done this more times than I’d like to admit.
- Timing is Key: The best part of this recipe is that you do the hard work days ahead. On the big day, just pour the gravy into a saucepan and reheat it gently over low heat, whisking occasionally. If it’s too thick, add a splash of broth or water. If it’s too thin, let it simmer for a few more minutes.
- Seasoning is a Process: Taste your gravy at least three times: once after it thickens, once after you add salt, and once after it’s finished. The flavor deepens as it sits, so don’t over-salt at the beginning. A final pinch of black pepper right before serving adds a lovely freshness.
Variations & Adaptations
This recipe is a fantastic base, but don’t be afraid to make it your own. Here are a few ways I’ve adapted it over the years.
- Herb-Infused Gravy: Add a couple of sprigs of fresh sage and rosemary to the stock while it simmers. It gives the gravy a classic Thanksgiving herb flavor that pairs beautifully with turkey. I do this every year for our family dinner.
- Mushroom Gravy: For a vegetarian version, swap the turkey wings for 1 pound of cremini mushrooms and a large portobello mushroom cap. Roast them the same way. The result is a deeply savory, umami-rich gravy that’s perfect for vegetarians. It’s also incredible over a crispy loaded mac and cheese casserole.
- Spicy Kick: Add a pinch of cayenne pepper or a finely chopped chipotle pepper in adobo sauce to the roux while it cooks. It adds a subtle warmth that doesn’t scream “spicy” but just makes everything more interesting. I tried this on a whim last year and it was a huge hit.
- White Wine Deglaze: After roasting the turkey and veggies, deglaze the pan with ½ cup of dry white wine instead of broth. Let it reduce by half before adding it to the pot. It adds a lovely acidity that cuts through the richness.
- Dairy-Free Version: Use a high-quality vegan butter (like Miyoko’s) and a gluten-free 1:1 flour blend. The technique is exactly the same, and the result is just as creamy and delicious.
Serving & Storage Suggestions
This gravy is designed to be the star of the show, but it plays well with others. Here’s how to serve and store it like a pro.
- Serving Temperature: Serve this gravy hot, straight from the saucepan. I like to pour it into a warmed gravy boat right before serving to keep it hot throughout the meal. A cold gravy boat will cool it down in seconds.
- What to Serve It With: Obviously, roasted turkey. But don’t stop there. This gravy is incredible over mashed potatoes, stuffing, biscuits, and even roasted vegetables. I’ve been known to use it as a dipping sauce for crispy chicken wing bites on game day—it’s that good.
- Storage: Store the cooled gravy in an airtight container in the refrigerator for up to 3 days. For longer storage, freeze it in a freezer-safe bag or container for up to 3 months. I like to freeze it in 1-cup portions so I can thaw just what I need.
- Reheating: The best way to reheat this gravy is gently on the stovetop. Pour it into a small saucepan and warm it over low heat, whisking occasionally. If it’s too thick, add a splash of broth or water to loosen it up. You can also microwave it in 30-second bursts, stirring in between, but be careful not to overheat it.
- Flavor Development: Here’s a secret: this gravy actually tastes better the next day. The flavors have time to meld and deepen in the fridge. So don’t be afraid to make it a day or two ahead. It’s a wonderful thing to cross off your to-do list.
Nutritional Information & Benefits
Let’s be honest, gravy isn’t a health food, but it can be part of a balanced meal. Here’s a rough estimate of what’s in a ¼-cup serving.
| Nutrient | Amount per Serving (approx.) |
|---|---|
| Calories | 120-150 |
| Total Fat | 10-12g |
| Saturated Fat | 6-7g |
| Cholesterol | 30-40mg |
| Sodium | 350-450mg (varies with added salt) |
| Total Carbohydrates | 6-8g |
| Protein | 2-3g |
Pin This Recipe!
Best Make-Ahead Turkey Gravy from Scratch (Easy & Perfect)

This make-ahead turkey gravy is rich, silky, and deeply flavored, made from scratch with roasted turkey wings and vegetables. It’s the perfect stress-free solution for holiday meals, allowing you to prepare it up to three days in advance.
- Prep Time: 20 minutes
- Cook Time: 1 hour 30 minutes
- Total Time: 1 hour 50 minutes
- Yield: 8 servings 1x
- Category: Sauce
- Cuisine: American
Ingredients
- 2 pounds turkey wings or drumsticks
- 1 large yellow onion, quartered
- 2 large carrots, chopped into 2-inch chunks
- 2 celery stalks, chopped into 2-inch chunks
- 4 cloves garlic, smashed
- 2 tablespoons olive oil
- 1 tablespoon tomato paste
- 6 cups low-sodium chicken or turkey broth
- 2 sprigs fresh thyme (or 1 teaspoon dried thyme)
- 1 bay leaf
- ½ teaspoon whole black peppercorns
- ½ cup unsalted butter
- ½ cup all-purpose flour
- Salt and freshly ground black pepper, to taste
- Optional: ¼ cup heavy cream or half-and-half
Instructions
- Preheat your oven to 425°F (220°C). On a roasting pan or baking sheet, toss the turkey wings, quartered onion, chopped carrots, celery, and smashed garlic cloves with the olive oil. Spread in a single layer. Roast for 35-40 minutes, flipping the turkey pieces halfway through, until golden brown and vegetables are softened and caramelized.
- Carefully transfer the roasted turkey and vegetables to a large stockpot. Place the roasting pan on the stove over two burners on medium heat. Add about 1 cup of the chicken broth to the hot pan and scrape up all the browned bits from the bottom (deglazing). Pour this liquid into the stockpot.
- Add the remaining 5 cups of broth, tomato paste, thyme sprigs, bay leaf, and peppercorns to the pot. Bring to a boil over high heat, then reduce heat to low and simmer gently, uncovered, for 45 minutes to 1 hour, until the liquid reduces slightly and becomes deeply fragrant.
- Place a fine-mesh strainer over a large liquid measuring cup or bowl. Pour the entire contents of the pot through the strainer. Press down on the solids with the back of a spoon to extract all liquid. Discard solids. You should have about 4 cups of stock. If less, add water or extra broth to make 4 cups.
- In the same stockpot (rinsed if desired), melt the butter over medium heat. Once melted and bubbling, whisk in the flour. Whisk constantly for 2-3 minutes until the mixture turns a light golden-brown and smells slightly nutty.
- Slowly pour the warm strained stock into the roux while whisking constantly. Start with a thin stream and whisk vigorously to incorporate. Continue whisking until smooth and thickened, about 2-3 minutes.
- Bring the gravy to a gentle simmer, then reduce heat to low. Cook for 5-10 minutes, stirring occasionally, until it reaches desired consistency (should coat the back of a spoon). Season generously with salt and freshly ground black pepper. If desired, stir in the heavy cream or half-and-half.
- Remove from heat and let cool completely at room temperature. Transfer to an airtight container. Refrigerate for up to 3 days or freeze for up to 3 months.
Notes
For a vegetarian version, substitute turkey wings with 1 pound cremini mushrooms and a large portobello mushroom cap. For a gluten-free version, use a 1:1 gluten-free flour blend. The gravy tastes better the next day as flavors meld. To fix thin gravy, make a slurry with 1 tablespoon cornstarch and 2 tablespoons cold water, then whisk into simmering gravy. To fix thick gravy, whisk in warm broth or water.
Nutrition
- Serving Size: ¼ cup
- Calories: 135
- Sugar: 1
- Sodium: 400
- Fat: 11
- Saturated Fat: 6.5
- Carbohydrates: 7
- Protein: 2.5
Keywords: turkey gravy, make-ahead gravy, Thanksgiving gravy, homemade gravy, from scratch gravy, holiday gravy, turkey stock gravy


