My mother-in-law did not trust stuffing in muffin form. She said it looked like a gimmick, something from a Pinterest board that would fall apart the second you tried to eat it. Honestly, I kind of agreed with her at first. I had seen those viral stuffing muffin photos on social media, and they always seemed either dry as sawdust or so soggy they collapsed into a sad pile on the plate. But I needed a Thanksgiving side dish that could travel to her house without requiring a full-on oven reheat, and the idea of portion-controlled, grab-and-go stuffing was just too practical to ignore. So I made a batch of these Make-Ahead Cranberry Apple Stuffing Muffins as a test run, fully expecting to be proven right.
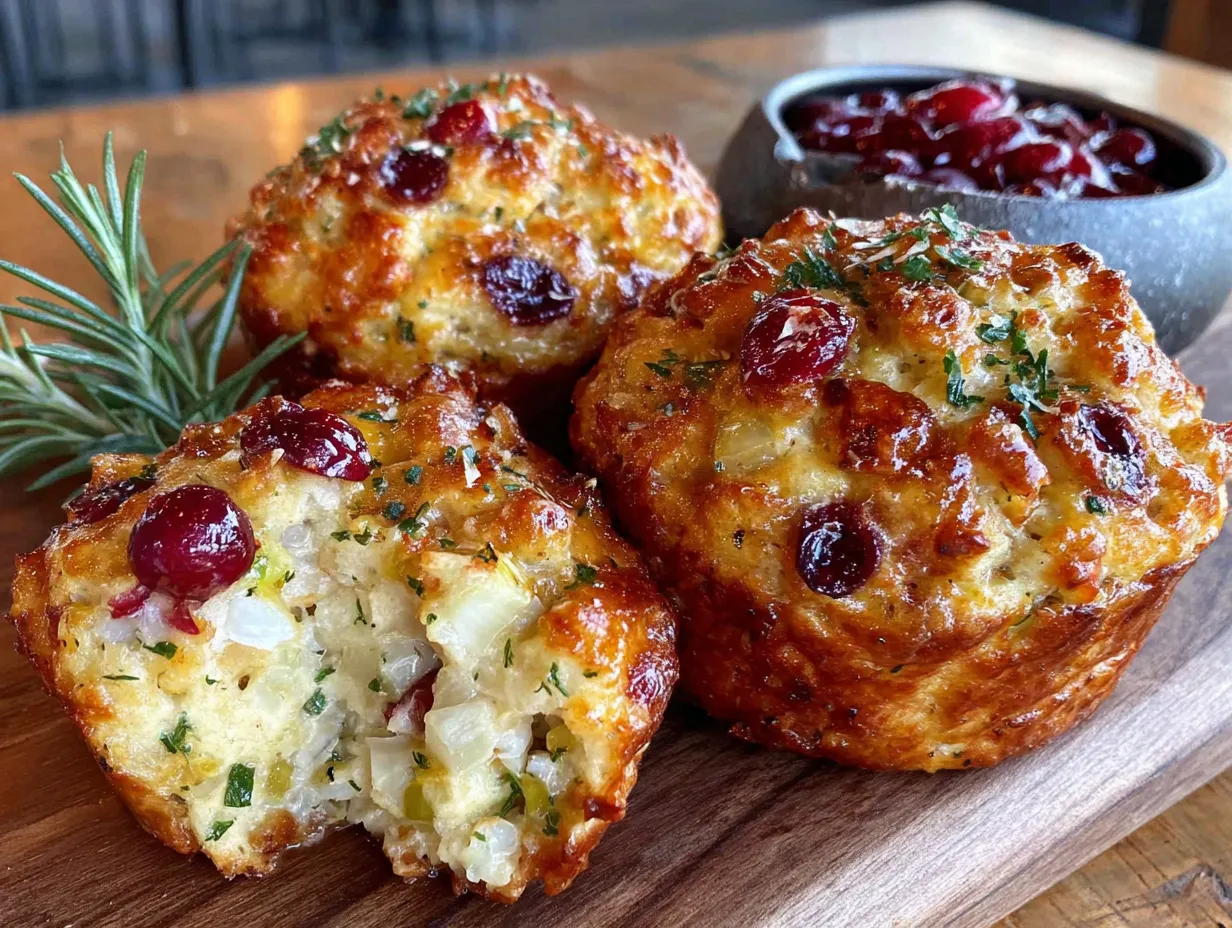
Instead, I watched her take one bite and pause mid-chew. She didn’t say anything, just finished that muffin and reached for another. That quiet, wordless reach told me everything I needed to know. The edges were perfectly crisp and golden, while the inside stayed tender and almost custard-like from the broth and egg. The tart bursts of cranberry and the sweet, soft pieces of apple cut through all that savory richness in a way that regular stuffing just doesn’t. These muffins held their shape beautifully, traveled like a dream, and honestly, they tasted better than the traditional stuff I had been making for years.
I have been making them for every holiday gathering since that first test batch. They solved the real problem of limited oven space and the frantic last-minute scramble to get everything on the table. There is something deeply satisfying about pulling a pan of these out of the fridge, popping them in the oven, and knowing the hardest part was already done.
Why You’ll Love This Recipe
These Make-Ahead Cranberry Apple Stuffing Muffins are not just another side dish. They are a complete game-changer for holiday meal planning. Let me tell you why they earned a permanent spot in my recipe rotation.
- Truly Make-Ahead Friendly: Assemble these up to two days in advance and bake them right before serving. No more rushing around the kitchen while guests are arriving.
- Perfectly Portioned: No more fighting over the corner pieces or worrying about who gets the crispy bits. Everyone gets their own muffin with plenty of browned, crunchy edges.
- Simple Ingredients: You probably already have most of these in your pantry. No weird specialty items required for this one.
- Crowd-Pleaser: I have served these to everyone from picky toddlers to my uncle who “doesn’t like stuffing.” They disappear every single time.
- Unbelievably Delicious: The combination of savory herbs, tart cranberries, and sweet apples creates a flavor profile that feels both familiar and exciting. The texture is what really gets people—crispy outside, soft and almost creamy inside.
What makes this recipe different from all the other stuffing muffin recipes out there is the technique. I tested this about six times to get the liquid ratio exactly right. Too much broth and they turn into dense hockey pucks. Too little and they crumble apart. The secret is using a mix of chicken broth and a beaten egg to bind everything together without making it soggy. Plus, the apples release a little moisture as they bake, which keeps the center from drying out.
This is the kind of recipe that makes you feel like you have your life together. It is comfort food that actually reduces stress instead of adding to it. Perfect for Thanksgiving, Christmas, or even a cozy Sunday dinner when you want something special without the chaos.
What Ingredients You Will Need
This recipe relies on a handful of simple, wholesome ingredients to create something that tastes far greater than the sum of its parts. Each component plays a specific role in building that perfect balance of flavor and texture.
- 1 (12-ounce) loaf day-old French bread or sourdough, cut into ½-inch cubes (about 8 cups). Stale bread is key here. Fresh bread will turn into mush. If your bread is too fresh, spread the cubes on a baking sheet and toast them at 300°F for 10 minutes to dry them out.
- ½ cup unsalted butter (1 stick). I use salted butter in a pinch and just reduce the added salt by a pinch. Kerrygold is my go-to for the rich flavor it brings to the savory base.
- 1 large yellow onion, diced (about 1½ cups). A sweet onion like Vidalia works beautifully here too, but yellow onion gives the classic savory backbone.
- 3 celery ribs, diced (about 1 cup). Do not skip this. Celery adds that essential crunch and aromatic flavor that defines good stuffing.
- 1 large Honeycrisp or Granny Smith apple, peeled, cored, and diced into ½-inch pieces (about 1 cup). Granny Smith holds its shape better during baking, but Honeycrisp adds more natural sweetness. Both work great.
- ¾ cup dried cranberries. Look for ones that are plump and soft, not hard and shriveled. Craisins are perfectly fine here.
- 2 teaspoons dried sage. This is the star herb in stuffing. Fresh sage is wonderful too—use about 1 tablespoon finely chopped.
- 1 teaspoon dried thyme. Adds that earthy, almost floral note that makes stuffing taste complete.
- ½ teaspoon dried rosemary, crushed. Go easy on rosemary, it can overpower everything else if you use too much.
- 1 teaspoon kosher salt, plus more to taste. Diamond Crystal is my preference because it is less salty per teaspoon, giving you more control.
- ½ teaspoon black pepper, freshly ground.
- 1½ cups low-sodium chicken or vegetable broth. Low-sodium is important here because the dried herbs and salt already add plenty of seasoning.
- 2 large eggs, lightly beaten. These are the glue that holds the muffins together. Do not skip them.
- 2 tablespoons fresh parsley, chopped (optional, for garnish). Adds a pop of color right before serving.
For the best texture, make sure your bread cubes are uniformly sized. I have found that cutting them by hand gives me more control than using a food processor, which tends to create uneven pieces. If you are short on time, you can buy pre-cubed stuffing mix from the store, but the texture will be finer and less rustic. I personally prefer the heartier texture of hand-cut cubes from a good loaf of bakery bread.
Equipment Needed
You do not need a fancy kitchen to pull these off. Here is what you will need.
- 12-cup standard muffin tin. Non-stick is helpful but not required. If you only have a dark metal pan, keep an eye on the muffins during the last few minutes of baking, they brown faster.
- Large skillet or sauté pan. A 12-inch skillet gives you plenty of room to cook the vegetables without overcrowding them.
- Large mixing bowl. Big enough to toss all the bread cubes with the vegetable mixture without spilling everything everywhere.
- Whisk. For beating the eggs and broth together.
- Chef’s knife and cutting board. A sharp knife makes dicing the onion, celery, and apple much easier and safer.
- Measuring cups and spoons. Accurate measurements matter here, especially for the broth and seasonings.
- Wooden spoon or silicone spatula. For stirring the bread mixture without crushing the cubes.
- Cooling rack. Lets the muffins cool evenly after baking so the bottoms do not get soggy.
If you do not have a muffin tin, you can bake this mixture in a greased 9×13 baking dish. Just spread it evenly and bake for about 35-40 minutes, or until the top is golden brown and crispy. The baking time will be slightly longer because of the larger surface area. I have done this when my muffin tin was already in use, and it works perfectly fine.
Preparation Method
Follow these steps carefully, and you will have perfect stuffing muffins every single time. I have numbered everything for clarity, but read through the whole method once before you start.
- Preheat your oven to 375°F (190°C). Generously grease a 12-cup muffin tin with butter or non-stick cooking spray. Pay special attention to the corners and the bottom of each cup. If you use paper liners, the muffins will not get that beautiful crispy edge you want.
- Prepare the bread cubes. If your bread is not already stale, spread the cubes on a large baking sheet in a single layer. Bake for 8-10 minutes, stirring halfway through, until they are dry and just starting to turn golden. Let them cool completely while you work on the vegetables.
- Cook the aromatics. Melt the butter in a large skillet over medium heat. Add the diced onion and celery. Cook, stirring occasionally, for about 6-8 minutes, until the onions are translucent and the celery has softened. You want them tender but not browned. Browning them too much will change the flavor profile of the final dish.
- Add the apple and cranberries. Stir in the diced apple and dried cranberries. Cook for another 2 minutes, just until the apple starts to soften slightly. The apple should still hold its shape at this point. Remove the skillet from the heat and let it cool for about 5 minutes. This step is important because if the mixture is too hot, it will partially cook the eggs later and create a scrambled egg texture in your muffins.
- Combine the dry ingredients. In your large mixing bowl, combine the cooled bread cubes, the cooked vegetable mixture, dried sage, dried thyme, crushed rosemary, salt, and black pepper. Toss everything together gently with your hands or a wooden spoon until the herbs are evenly distributed. I use my hands for this because it is easier to feel if everything is mixed properly without crushing the bread.
- Whisk the wet ingredients. In a separate small bowl or liquid measuring cup, whisk together the chicken broth and the lightly beaten eggs until they are completely combined. The mixture should look pale yellow and slightly frothy.
- Combine wet and dry. Pour the broth and egg mixture over the bread cube mixture. Use a silicone spatula or your hands to gently fold everything together until the liquid is evenly absorbed. Do not overmix or you will end up with mush. The bread cubes should be moist but not swimming in liquid. Let the mixture sit for 5 minutes to allow the bread to fully absorb the broth.
- Fill the muffin cups. Divide the stuffing mixture evenly among the 12 muffin cups. Press each portion down firmly with the back of a spoon or your fingers. This is crucial for getting muffins that hold their shape. You want them packed tightly, not loosely mounded. The tops should be slightly domed above the rim of the pan.
- Bake the muffins. Place the muffin tin on the middle rack of your preheated oven. Bake for 25-30 minutes, or until the tops are deep golden brown and the edges are crispy to the touch. If you want extra-crispy tops, you can switch the oven to broil for the last 1-2 minutes, but watch them carefully so they do not burn.
- Cool and serve. Let the muffins cool in the pan for 5 minutes. Then run a butter knife around the edges of each muffin to loosen them. Carefully lift them out and transfer them to a cooling rack. If you try to remove them immediately, they will fall apart. Serve them warm, garnished with fresh parsley if you like.
For the make-ahead option, prepare the muffins through step 8, then cover the muffin tin tightly with plastic wrap and refrigerate for up to 48 hours. When you are ready to bake, remove the plastic wrap and let the tin sit at room temperature for 20 minutes while the oven preheats. Then bake as directed, adding an extra 5-7 minutes to the baking time since the mixture will be cold.
Cooking Tips & Techniques
I have made this recipe more times than I can count, and I have definitely made my share of mistakes along the way. Here is what I have learned so you do not have to repeat my failures.
The biggest mistake people make is using fresh bread. I learned this the hard way during a dry run for a Friendsgiving dinner. The muffins came out dense and gummy because the fresh bread absorbed too much liquid and turned into a paste. Stale bread is non-negotiable. If you forgot to leave your bread out overnight, the 300°F oven trick works like a charm.
Do not skip the resting time after adding the liquid. I know it is tempting to get them into the oven faster, but those 5 minutes allow the bread to hydrate evenly. If you bake them immediately, you will end up with dry spots in some muffins and soggy spots in others. Patience pays off here.
Pack those muffin cups firmly. The first time I made these, I gently spooned the mixture in and left it loose. The muffins completely fell apart when I tried to remove them from the pan. You need to compress the mixture so it holds together during baking. Think of it like packing a snowball—firm enough to hold its shape but not so tight that it becomes a brick.
Use a cookie scoop for even portions. A ⅓-cup cookie scoop makes filling the muffin cups quick and consistent. If you do not have one, use two spoons to fill each cup evenly, then press down firmly.
For extra crispy tops, brush the tops with melted butter before baking. This is not in the original recipe, but I started doing it after a reader suggested it. It adds a beautiful golden sheen and makes the tops even crunchier. Just use about 2 tablespoons of melted butter and brush it gently over each muffin before they go into the oven.
Multitasking tip: While the bread cubes are toasting in the oven, you can chop your vegetables and prepare the skillet. This saves about 10 minutes of total prep time. I also measure out all my dried herbs and spices into a small bowl while the vegetables cook so everything is ready to go when I need it.
One thing that surprised me is how well these freeze. I make a double batch every year and freeze half of them unbaked. They thaw in the refrigerator overnight and bake up perfectly fresh. It is like having a secret stash of holiday magic waiting in your freezer.
Variations & Adaptations
This recipe is incredibly forgiving, and I have tried quite a few variations over the years. Here are some of my favorites.
Gluten-Free Version: Substitute the French bread with a good quality gluten-free bread. I have had the best luck with Schär brand or a homemade gluten-free sourdough. The texture will be slightly more delicate, so be extra gentle when mixing and packing the muffin cups. You might also want to add an extra tablespoon of broth since gluten-free bread tends to be drier.
Vegetarian/Vegan Adaptation: Use vegetable broth instead of chicken broth. For a vegan version, replace the eggs with a flax egg (1 tablespoon ground flaxseed mixed with 3 tablespoons water per egg, let sit for 5 minutes). The texture will be a little less firm, but the flavor is still fantastic. I have also used aquafaba (the liquid from a can of chickpeas) with good results—use 3 tablespoons per egg.
Sausage and Apple Stuffing Muffins: Brown ½ pound of ground breakfast sausage in the skillet before adding the butter and vegetables. Drain off most of the fat, then proceed with the recipe as written. The sausage adds a savory, slightly spicy depth that pairs beautifully with the sweet apples. This is my husband’s absolute favorite version.
Herb Swap: If you are not a fan of sage, try using 1 tablespoon of fresh chopped tarragon or 2 teaspoons of dried marjoram instead. Both herbs have a slightly sweet, anise-like quality that complements the apples and cranberries wonderfully. I tried tarragon one year when I ran out of sage, and it was a happy accident that I now use regularly.
Nutty Crunch: Add ½ cup of toasted pecans or walnuts to the bread mixture along with the vegetables. Toast the nuts in a dry skillet over medium heat for 3-4 minutes until fragrant, then chop them roughly. They add a wonderful crunch and a rich, buttery flavor. Just be aware of any nut allergies among your guests.
If you are looking for another savory, make-ahead option that travels well, you might enjoy these crispy loaded bacon cheeseburger tater tot casserole. It is a completely different flavor profile but follows the same make-ahead philosophy that saves you time on busy days.
Serving & Storage Suggestions
These stuffing muffins are best served warm, right out of the oven. The contrast between the crispy exterior and the tender interior is at its peak within the first 15 minutes of baking. I like to arrange them on a platter with a sprig of fresh rosemary and a handful of fresh cranberries scattered around for a festive look.
They pair beautifully with almost any main dish. Obviously, they are perfect alongside a roasted turkey or chicken. But I have also served them with healthy chicken veggie skillet wraps for a lighter weeknight dinner, and the combination was surprisingly perfect. The savory herb notes in the muffins complement the fresh vegetables in the wraps wonderfully.
For a full holiday spread, I recommend serving these with roasted Brussels sprouts, mashed potatoes with gravy, and a tangy cranberry sauce on the side. The sweetness of the cranberry sauce echoes the dried cranberries in the muffins and ties the whole meal together.
Storage: Leftover muffins can be stored in an airtight container in the refrigerator for up to 4 days. To reheat, place them on a baking sheet in a 350°F oven for 8-10 minutes, or until heated through and the edges crisp up again. The microwave works in a pinch, but the texture will be softer and less crispy.
Freezer Instructions: These muffins freeze beautifully, both baked and unbaked. For baked muffins, let them cool completely, then wrap each one individually in plastic wrap and place them in a freezer-safe bag. They will keep for up to 3 months. To reheat, unwrap and bake at 350°F for 15-20 minutes. For unbaked muffins, prepare them through step 8, freeze the entire muffin tin for 2 hours until solid, then pop the frozen muffins out and store them in a freezer bag. Bake directly from frozen, adding 10-15 minutes to the baking time.
I have noticed that the flavors actually deepen after a day in the refrigerator. The herbs meld together more, and the apple and cranberry flavors become more pronounced. So do not be disappointed if leftovers taste even better than the fresh batch.
Nutritional Information & Benefits
Here is the estimated nutritional breakdown for one muffin, based on the recipe as written. Keep in mind that these values will vary depending on the specific brands and ingredients you use.
| Nutrient | Amount Per Muffin |
|---|---|
| Calories | 215 |
| Total Fat | 10g |
| Saturated Fat | 6g |
| Cholesterol | 45mg |
| Sodium | 410mg |
| Total Carbohydrates | 27g |
| Dietary Fiber | 2g |
| Sugars | 8g |
| Protein | 5g |
While these are not exactly health food, they do offer some nutritional benefits. The apples provide a good dose of fiber and vitamin C, while the dried cranberries are packed with antioxidants. The celery adds a small amount of vitamin K and folate. Using low-sodium broth helps keep the sodium content in check compared to traditional stuffing recipes that often call for salted butter and high-sodium broth.
This recipe is not gluten-free, dairy-free, or vegan in its standard form, but I have included substitutions above for each of those dietary needs. It does contain eggs, which are a common allergen, so keep that in mind if you are serving a crowd with known allergies.
From a wellness perspective, I love that this recipe lets me control exactly what goes into it. No preservatives, no artificial flavors, just real food. And because it is portion-controlled into individual muffins, it is easier to enjoy a serving without overindulging during the holidays.
Conclusion
These Make-Ahead Cranberry Apple Stuffing Muffins have genuinely changed how I approach holiday cooking. They took something that used to stress me out—timing the stuffing to be ready at the exact same moment as the turkey—and turned it into the easiest part of the meal. I can prep them two days ahead, relax during the chaos of cooking day, and still serve something that tastes like I spent hours on it.
I encourage you to treat this recipe as a starting point. Swap the apples for pears if that is what you have on hand. Use dried cherries instead of cranberries. Add some crispy bacon or toasted pecans. The structure is solid enough to handle your creativity. That is the beauty of a well-tested base recipe.
Honestly, I love these muffins because they remind me that the best holiday dishes do not have to be complicated. They just need to be made with care and shared with people you love. If you make these for your next gathering, I would love to hear how they turned out. Drop a comment below and let me know what variations you tried or how your family reacted. And if you are looking for another easy, make-ahead side dish, check out this crispy loaded bacon mac and cheese casserole with garlic herb crust for your next big meal. Happy cooking!
Frequently Asked Questions
Can I use a different type of bread?
Absolutely. While French bread or sourdough gives the best texture, you can use any firm, day-old bread. Whole wheat, brioche, or even cornbread all work, though the texture and flavor will change. Brioche will be richer and softer, while cornbread will be more crumbly. Just make sure whatever bread you use is stale or toasted before mixing.
Why did my stuffing muffins fall apart?
This usually happens for one of three reasons: the bread was too fresh, you did not pack the muffin cups firmly enough, or you tried to remove them from the pan too soon. Let them cool in the pan for at least 5 minutes after baking so the structure can set. If they still fall apart, try adding an extra egg next time to help bind everything together.
Can I make these without eggs?
Yes, you can use a flax egg or aquafaba as a substitute. The texture will be slightly more delicate, so handle the muffins gently when removing them from the pan. I have also heard of readers using ¼ cup of unsweetened applesauce as a binder, though I have not tested that myself.
How far in advance can I prepare these?
You can assemble the muffins in the tin and refrigerate them for up to 48 hours before baking. You can also freeze them unbaked for up to 3 months. If you want to bake them fully in advance, they will keep in the refrigerator for 4 days and reheat beautifully in the oven.
Can I double this recipe?
Yes, this recipe doubles easily. You will need two 12-cup muffin tins or you can bake them in batches. If you do not have two tins, you can refrigerate the prepared mixture while the first batch bakes. Just make sure to stir it gently before filling the second tin to redistribute the liquid.
Pin This Recipe!

Best Make-Ahead Cranberry Apple Stuffing Muffins Recipe

These Make-Ahead Cranberry Apple Stuffing Muffins are perfectly portioned, crispy on the outside and tender inside, with tart cranberries and sweet apples. They can be assembled up to two days in advance, making holiday meal planning a breeze.
- Prep Time: 20 minutes
- Cook Time: 30 minutes
- Total Time: 50 minutes
- Yield: 12 servings 1x
- Category: Side Dish
- Cuisine: American
Ingredients
- 1 (12-ounce) loaf day-old French bread or sourdough, cut into ½-inch cubes (about 8 cups)
- ½ cup unsalted butter (1 stick)
- 1 large yellow onion, diced (about 1½ cups)
- 3 celery ribs, diced (about 1 cup)
- 1 large Honeycrisp or Granny Smith apple, peeled, cored, and diced into ½-inch pieces (about 1 cup)
- ¾ cup dried cranberries
- 2 teaspoons dried sage
- 1 teaspoon dried thyme
- ½ teaspoon dried rosemary, crushed
- 1 teaspoon kosher salt, plus more to taste
- ½ teaspoon black pepper, freshly ground
- 1½ cups low-sodium chicken or vegetable broth
- 2 large eggs, lightly beaten
- 2 tablespoons fresh parsley, chopped (optional, for garnish)
Instructions
- Preheat your oven to 375°F (190°C). Generously grease a 12-cup muffin tin with butter or non-stick cooking spray.
- If your bread is not already stale, spread the cubes on a large baking sheet in a single layer. Bake for 8-10 minutes, stirring halfway through, until dry and just starting to turn golden. Let cool completely.
- Melt the butter in a large skillet over medium heat. Add the diced onion and celery. Cook, stirring occasionally, for about 6-8 minutes, until the onions are translucent and the celery has softened.
- Stir in the diced apple and dried cranberries. Cook for another 2 minutes, just until the apple starts to soften slightly. Remove from heat and let cool for about 5 minutes.
- In a large mixing bowl, combine the cooled bread cubes, cooked vegetable mixture, dried sage, dried thyme, crushed rosemary, salt, and black pepper. Toss gently until evenly distributed.
- In a separate small bowl, whisk together the chicken broth and lightly beaten eggs until completely combined.
- Pour the broth and egg mixture over the bread cube mixture. Gently fold until the liquid is evenly absorbed. Let the mixture sit for 5 minutes to allow the bread to fully absorb the broth.
- Divide the stuffing mixture evenly among the 12 muffin cups. Press each portion down firmly with the back of a spoon or your fingers. The tops should be slightly domed above the rim of the pan.
- Place the muffin tin on the middle rack of the preheated oven. Bake for 25-30 minutes, or until the tops are deep golden brown and the edges are crispy. For extra-crispy tops, broil for the last 1-2 minutes, watching carefully.
- Let the muffins cool in the pan for 5 minutes. Run a butter knife around the edges to loosen them, then carefully lift them out and transfer to a cooling rack. Serve warm, garnished with fresh parsley if desired.
Notes
For make-ahead: prepare through step 8, cover tightly with plastic wrap, and refrigerate for up to 48 hours. When ready to bake, let sit at room temperature for 20 minutes, then bake as directed, adding 5-7 minutes. For extra crispy tops, brush with melted butter before baking. Freezes well both baked and unbaked.
Nutrition
- Serving Size: 1 muffin
- Calories: 215
- Sugar: 8
- Sodium: 410
- Fat: 10
- Saturated Fat: 6
- Carbohydrates: 27
- Fiber: 2
- Protein: 5
Keywords: stuffing muffins, make-ahead stuffing, cranberry apple stuffing, Thanksgiving side dish, holiday stuffing, portion-controlled stuffing


