The pan was still warm when my neighbor knocked. She didn’t even pretend she was there for anything else — just stood there, holding an empty dish, and said, “I need the recipe for whatever that was.” I hadn’t even cleaned up yet. There were still garlic butter splatters on the stove, a few stray thyme leaves on the counter. That’s how good this easy one-pan garlic butter chicken thighs and potatoes turned out. It was one of those weeknights where I’d opened the fridge, sighed, and just started throwing things together. Chicken thighs were on sale. Potatoes were starting to sprout in the pantry. Garlic — well, I always have garlic.
I wasn’t trying to create anything special. Honestly, I was just tired of washing dishes. One pan meant less cleanup, and that was the only goal. But something about the way the chicken fat rendered into the potatoes, and the butter mingled with all those garlic cloves… it smelled like Sunday dinner on a Tuesday. My husband walked in from work, stopped mid-sentence, and just said, “What is that?”
That first bite was the kind that makes you close your eyes. Not because it was fancy — it wasn’t. But because it tasted like real food. Simple, honest, no fuss. The kind of meal that reminds you why cooking at home is worth it. And ever since that night, this easy one-pan garlic butter chicken thighs and potatoes has become my go-to when I need a win in the kitchen. No stress, no complicated steps, just a good meal that makes everyone happy.
Why You’ll Love This Recipe
Let me tell you why this one-pan garlic butter chicken thighs and potatoes has earned a permanent spot in my weekly rotation. I’ve tested this recipe more times than I can count — tweaking the temperature, adjusting the butter ratio, figuring out the perfect potato size so everything finishes at the same time. It’s been through my picky eaters, my in-laws who don’t usually go for “simple” food, and even that one friend who claims she doesn’t like chicken thighs. She asked for seconds.
- Quick & Easy : From fridge to table in about 45 minutes, with only 10 minutes of active prep. I’m not kidding — you chop some potatoes, smash some garlic, and let the oven do the heavy lifting.
- Simple Ingredients : Chicken thighs, potatoes, garlic, butter, and a few pantry spices. No weird grocery store hunts. No specialty items you’ll use once and forget about.
- Perfect for Busy Weeknights : Whether it’s a Tuesday dinner rush or a lazy Sunday, this dish fits. It’s fancy enough for company but easy enough for a regular night.
- Crowd-Pleaser : I’ve served this to kids who swear they don’t like potatoes and adults who usually skip chicken. The garlic butter situation wins everyone over.
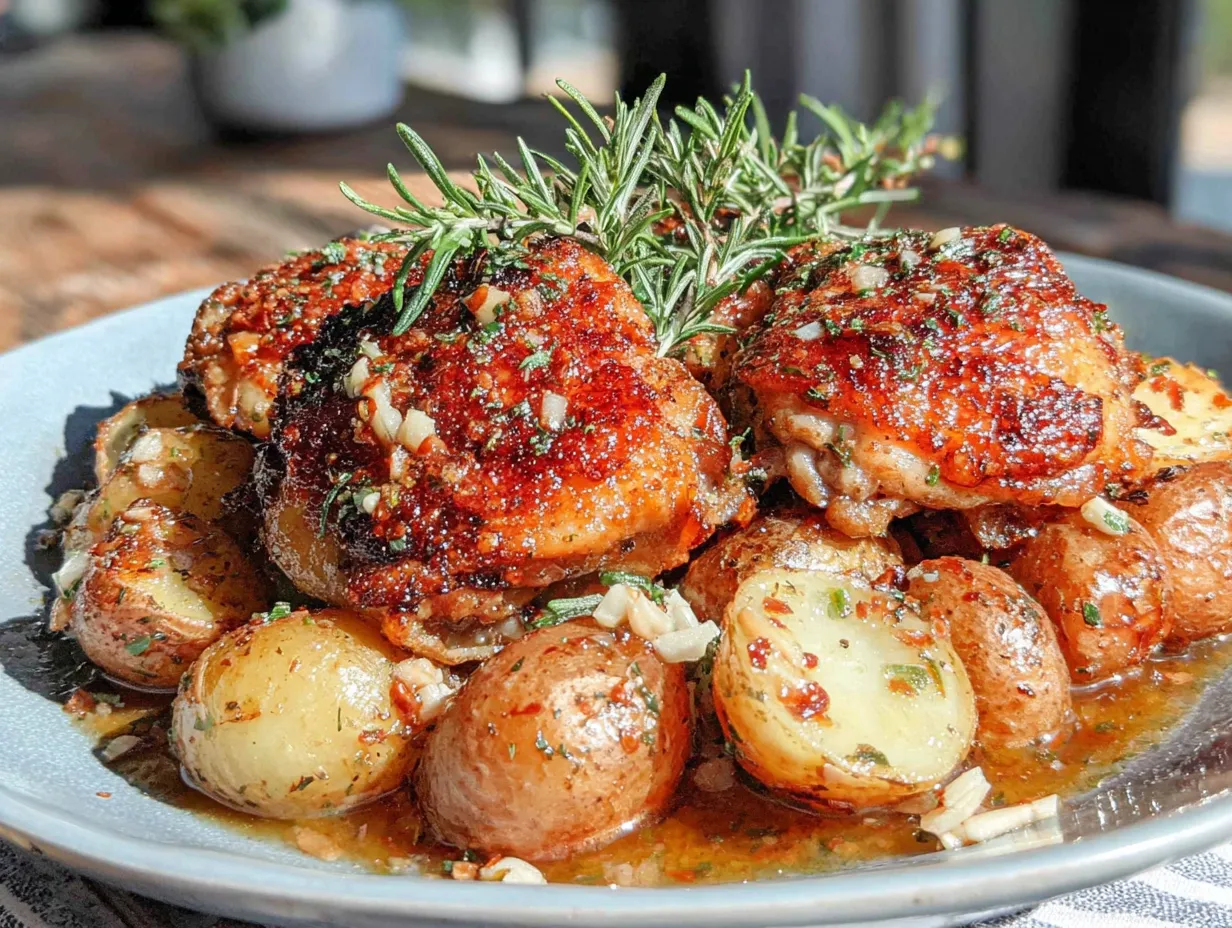
- Unbelievably Delicious : The chicken thighs come out juicy with crispy skin, the potatoes soak up all that buttery garlic goodness, and the whole thing tastes like you spent hours in the kitchen when you really didn’t.
What sets this recipe apart? It’s the technique. Most one-pan chicken and potato recipes either dry out the chicken or leave the potatoes undercooked. I’ve figured out the sweet spot — starting the potatoes first so they get a head start, then adding the chicken so everything finishes together. Plus, that garlic butter baste at the end? It’s the secret to the glossy, flavorful finish that makes this dish feel special.
This is the kind of meal that makes you feel like you’ve got it all together, even on days when you definitely don’t. It’s comfort food that doesn’t require a nap afterward. And honestly? That’s the best kind.
What Ingredients You Will Need
This recipe uses simple, everyday ingredients that work together to create something genuinely impressive. Most of these are probably already in your kitchen — which is exactly why this has become my emergency dinner move.
- Chicken Thighs (bone-in, skin-on) — 4 to 6 pieces (about 1.5 to 2 lbs). Bone-in thighs stay juicier during roasting, and the skin gets beautifully crispy. If you only have boneless, reduce cooking time by about 10 minutes.
- Baby Potatoes — 1.5 lbs, halved or quartered depending on size (aim for 1-inch pieces). Yukon Gold or red potatoes work great. They hold their shape and get creamy inside.
- Garlic — 1 whole head, plus 4 extra cloves minced. Yes, a whole head. Don’t be shy — roasting mellows the garlic into sweet, buttery goodness.
- Unsalted Butter — 4 tablespoons, melted. I use Kerrygold when I have it. The European-style butter has a higher fat content, which means more flavor.
- Olive Oil — 2 tablespoons. Helps the potatoes crisp up and keeps the garlic from burning.
- Fresh Thyme — 6 to 8 sprigs. If you only have dried, use 1 teaspoon. But fresh really makes a difference here.
- Fresh Rosemary — 2 sprigs, leaves stripped and roughly chopped. Adds that earthy, piney note that pairs perfectly with garlic butter.
- Paprika — 1 teaspoon. I use sweet paprika, but smoked works beautifully too if you want a deeper flavor.
- Garlic Powder — 1 teaspoon. Not a typo — we’re using fresh garlic AND garlic powder. They hit different notes.
- Onion Powder — ½ teaspoon. Adds subtle savory depth.
- Salt — 1½ teaspoons, plus more for finishing. I use kosher salt. If using table salt, reduce slightly.
- Black Pepper — ½ teaspoon, freshly ground.
- Chicken Broth — ¼ cup. This deglazes the pan and creates a little saucy magic at the bottom.
- Lemon — 1 lemon, halved. You’ll squeeze one half over the finished dish and slice the other for serving.
- Fresh Parsley — A handful, chopped, for garnish.
Ingredient Tips: I’ve found that smaller potatoes work better here — they cook faster and get more surface area for browning. If you’re using larger potatoes, cut them into even 1-inch chunks. And please, please use fresh garlic. The jarred stuff just doesn’t caramelize the same way. Trust me on this — I learned the hard way when I was out of fresh garlic one night and thought it would be fine. It wasn’t.
Equipment Needed
One of the best things about this recipe is how little equipment it requires. Here’s what you’ll need:
- Large Oven-Safe Skillet — 12-inch cast iron is ideal. It holds heat beautifully and gives you that perfect sear. If you don’t have cast iron, any oven-safe heavy-bottomed pan works. Just make sure it can go from stovetop to oven.
- Cutting Board — For chopping potatoes and herbs.
- Chef’s Knife — A sharp one makes all the difference. Dull knives are dangerous and frustrating.
- Mixing Bowl — For tossing the potatoes with oil and seasonings.
- Tongs — For flipping chicken and moving potatoes around.
- Meat Thermometer — Not strictly necessary, but highly recommended. Chicken thighs are done at 165°F, but I pull mine at 175°F for that fall-apart texture.
- Pastry Brush — For basting the garlic butter over the chicken. A spoon works too, but a brush gives you better coverage.
- Aluminum Foil — For tenting the chicken while it rests.
If you don’t have a cast iron skillet, don’t worry. I’ve made this in a stainless steel pan and even a ceramic-coated one. The key is making sure the pan is oven-safe up to 400°F. Check the bottom of your pan — most modern skillets are fine. And if you’re in the market for one, Lodge makes affordable cast iron that’ll last a lifetime. I’ve had mine for eight years, and it only gets better with use.
Preparation Method
- Preheat your oven to 400°F. Position the rack in the middle. While it’s heating, take your chicken thighs out of the fridge. Let them sit at room temperature for about 15 minutes — this helps them cook more evenly.
- Prep the potatoes. Wash and dry your baby potatoes. Cut any larger ones in half (or quarters if they’re on the bigger side). You want pieces about 1 inch thick so they cook through in the same time as the chicken. Toss them in a bowl with 1 tablespoon olive oil, ½ teaspoon salt, ¼ teaspoon pepper, and ½ teaspoon paprika. Set aside.
- Season the chicken. Pat the chicken thighs dry with paper towels. This is crucial for crispy skin — moisture is the enemy of browning. Season both sides with the remaining salt, pepper, garlic powder, onion powder, and the rest of the paprika. Don’t skip the underside — it adds flavor to the pan juices.
- Start the potatoes. Heat your oven-safe skillet over medium-high heat. Add 1 tablespoon olive oil. Once it shimmers, add the potatoes in a single layer. Let them cook undisturbed for 5 minutes. You want a nice golden crust on the bottom. Then stir and cook another 3 minutes. The potatoes won’t be fully cooked yet — that’s okay. Remove them to a plate for now.
- Sear the chicken. In the same hot skillet, add 1 tablespoon butter. Place the chicken thighs skin-side down. Listen for that satisfying sizzle. Cook for 4-5 minutes without moving them. The skin should be deep golden brown and release easily from the pan. Flip and cook the other side for 3 minutes. Remove chicken to the plate with the potatoes.
- Build the garlic butter base. Reduce heat to medium. Add the remaining 3 tablespoons butter to the pan. Once melted, add the minced garlic and cook for 30 seconds — just until fragrant. Don’t let it burn, or it’ll turn bitter. Add the chicken broth and scrape up any browned bits from the bottom of the pan. This is called deglazing, and it’s where all the flavor lives.
- Assemble the dish. Return the potatoes to the skillet, spreading them in an even layer. Nestle the chicken thighs skin-side up among the potatoes. Tuck the whole garlic head (cut in half crosswise) and the fresh herb sprigs around the pan. Spoon some of the garlic butter mixture over the chicken.
- Roast. Transfer the skillet to the preheated oven. Roast for 25 minutes. At the 15-minute mark, baste the chicken with the pan juices. This keeps everything moist and builds that gorgeous glossy finish.
- Check for doneness. After 25 minutes, the chicken should read 165°F at the thickest part (I aim for 175°F for juicier meat). The potatoes should be fork-tender and golden. If the chicken needs more time, give it 5 more minutes.
- Finish and rest. Squeeze half a lemon over the top. Sprinkle with fresh parsley. Let the pan rest for 5-10 minutes before serving. This lets the juices redistribute and makes the chicken even more tender.
Sensory Cue: When it’s done, the kitchen will smell like garlic butter heaven — rich, savory, with hints of thyme and lemon. The chicken skin should be crackling crisp, and the potatoes will be golden with crispy edges and fluffy insides. If you tap a potato with a fork, it should slide right through.
Cooking Tips & Techniques
After making this recipe more times than I can count, I’ve learned a few things the hard way. Here are my best tips so you don’t have to make the same mistakes I did.
Don’t crowd the pan. This is the number one mistake people make with one-pan recipes. If your skillet is too full, everything steams instead of browning. Use a 12-inch pan, and if you’re doubling the recipe, use two pans or cook in batches. I learned this lesson when I tried to cram eight thighs into one pan — the skin never got crispy, and the potatoes were soggy. Never again.
Pat those chicken thighs dry. I know it seems fussy, but wet chicken skin will never get crispy. Take the extra 30 seconds to blot them with paper towels. Your future self will thank you when you bite into that golden, crackling skin.
Let the pan get hot before adding the potatoes. If the pan isn’t hot enough, the potatoes will stick and won’t develop that beautiful crust. Wait until the oil shimmers — that’s your cue. And don’t stir them too soon. Let them sit and develop color before you move them around.
Use a meat thermometer. I used to think I could tell by sight alone. Then I served undercooked chicken to guests once. Now I always use my Thermapen. It’s worth the investment. Chicken thighs are safe at 165°F, but I’ve found they’re most tender around 175°F. The extra heat breaks down connective tissue without drying out the meat.
Baste, baste, baste. That mid-roast basting step isn’t optional. It keeps the chicken moist and builds layers of flavor. Set a timer so you don’t forget. I’ve missed it a few times when I got distracted, and the difference is noticeable.
Let it rest. I know it’s hard to wait when your kitchen smells this good, but resting is crucial. If you cut into the chicken right away, all those juices run out onto the cutting board instead of staying in the meat. Five minutes makes a huge difference.
Scale the potatoes right. If your potato pieces are too big, they’ll still be crunchy when the chicken is done. Too small, and they’ll turn to mush. Aim for 1-inch pieces, and try to keep them uniform. This is one of those things that seems nitpicky but actually matters.
Variations & Adaptations
One of the best things about this easy one-pan garlic butter chicken thighs and potatoes is how adaptable it is. Here are some variations I’ve tried and loved.
Dietary Adaptations: For a dairy-free version, substitute the butter with a high-quality vegan butter or use all olive oil. I’ve tried it with avocado oil too — it works, but you lose some of that rich flavor. For a lower-carb option, swap the potatoes for cauliflower florets or radishes. Roast them a little less time since they cook faster. My friend Sarah does this and swears by it.
Seasonal Variations: In spring, add asparagus spears during the last 10 minutes of roasting. In summer, toss in cherry tomatoes and zucchini chunks. Fall calls for cubed butternut squash alongside the potatoes. And in winter, I love adding quartered Brussels sprouts — they get crispy and caramelized in all that garlic butter. Each season brings something new to the dish.
Flavor Twists: Try a lemon-herb version by adding lemon zest and extra rosemary. Or go Mediterranean with oregano, olives, and a sprinkle of feta at the end. My personal favorite variation is the spicy version — add ½ teaspoon red pepper flakes and a drizzle of honey before roasting. The sweet-heat combo with the garlic butter is incredible.
Different Proteins: This method works beautifully with chicken drumsticks, bone-in chicken breasts (adjust cooking time), or even pork chops. I’ve also done it with turkey thighs around the holidays. Just adjust cooking times based on the protein you choose. Thicker cuts need more time, thinner ones less.
Vegetarian Version: Skip the chicken and double the potatoes and vegetables. Add chickpeas or white beans for protein. The garlic butter and herbs are flavorful enough to carry a meatless meal. I’ve served this to vegetarian friends, and they didn’t miss the chicken at all.
Quick Weeknight Shortcut: If you’re really short on time, skip the stovetop searing step. Toss everything together on the pan and roast for 35-40 minutes. You’ll lose some of that crispy skin magic, but it’s still delicious. I do this on nights when I’m too tired to stand at the stove.
Serving & Storage Suggestions
This dish is best served hot, straight from the skillet. There’s something about that sizzling presentation that makes everyone at the table feel special. I like to bring the pan right to the table on a trivet — less dishes to wash, more time with my people.
Serving Temperature: Serve immediately after the 5-minute rest. The chicken should be piping hot, the potatoes golden and crispy. A final squeeze of fresh lemon brightens everything up. Don’t skip this — it cuts through the richness of the garlic butter perfectly.
What to Serve With It: This dish is pretty complete on its own, but if you want to round it out, a simple green salad with lemon vinaigrette is perfect. Steamed green beans or roasted broccoli work well too. For something heartier, try it alongside my healthy chicken veggie skillet wraps for a full meal prep situation. And if you’re feeding a crowd, these crispy loaded bacon mac and cheese casserole would be a fantastic side dish.
Storage Instructions: Store leftovers in an airtight container in the refrigerator for up to 4 days. The flavors actually get better after a day — the garlic butter seeps into everything. Reheat in a 350°F oven for about 10 minutes to restore some crispiness. The microwave works in a pinch, but the skin won’t be as crispy.
Freezing: This dish freezes well for up to 3 months. Let it cool completely, then transfer to a freezer-safe container. To reheat, thaw overnight in the fridge, then warm in a 350°F oven until heated through. I’ve done this for meal prep, and it’s a lifesaver on busy weeks.
Flavor Development: Here’s a little secret — this dish is actually better the next day. The potatoes absorb all that garlic butter, and the chicken stays moist. I sometimes make it a day ahead on purpose. Just reheat gently, and no one will know it wasn’t freshly made.
Nutritional Information & Benefits
Here’s the approximate nutritional breakdown for one serving (based on 4 servings):
| Nutrient | Amount per Serving |
|---|---|
| Calories | 485 |
| Protein | 32g |
| Fat | 28g |
| Saturated Fat | 12g |
| Carbohydrates | 28g |
| Fiber | 3g |
| Sugar | 2g |
| Sodium | 680mg |
| Vitamin A | 15% DV |
| Vitamin C | 20% DV |
| Iron | 12% DV |
Chicken thighs are a great source of protein, iron, and B vitamins. The skin provides healthy fats that help your body absorb fat-soluble vitamins from the vegetables. Potatoes often get a bad rap, but they’re actually packed with potassium (more than a banana!), vitamin C, and fiber when you eat the skin.
Dietary Considerations: This recipe is naturally gluten-free and nut-free. For a lower-fat option, remove the chicken skin before eating — though you’ll lose some of the crispy goodness. If you’re watching your sodium, reduce the added salt and use low-sodium chicken broth.
I personally love that this meal feels indulgent but is actually pretty balanced. It’s real food — protein, carbs, healthy fats, and vegetables — all in one pan. No weird additives, no processed ingredients. Just honest cooking that makes you feel good.
Conclusion
This easy one-pan garlic butter chicken thighs and potatoes has become more than just a recipe in my kitchen — it’s my go-to when I need a guaranteed win. It’s the meal I make when I want to impress without stress, when I need comfort without complication, when I just want to sit down to something that tastes like love.
What I love most about this dish is how forgiving it is. You can swap herbs, adjust the seasoning, use different vegetables — and it still works. It’s a template for good cooking, not a rigid formula. That’s the kind of recipe I want in my back pocket, and I hope it becomes that for you too.
I’d love to hear how yours turns out. Did you try a variation? Did your family go back for seconds? Drop a comment below and let me know. And if you’re looking for more easy weeknight dinners, check out my healthy low-cal ranch chicken skillet or these healthy air fryer BBQ chicken lettuce wraps — they’re both lifesavers on busy nights.
Until next time, happy cooking. And don’t forget the garlic butter.
Frequently Asked Questions
Can I use boneless, skinless chicken thighs?
Yes, you can. Reduce the cooking time by about 10 minutes, and expect less crispy results since there’s no skin. The meat will still be juicy and flavorful. Just check for doneness at 165°F.
Do I have to use a cast iron skillet?
Not at all. Any oven-safe skillet or baking dish works. The key is using something that can go from stovetop to oven. If you’re using a baking dish, sear the chicken in a regular pan first, then transfer everything to the dish for roasting.
Can I add more vegetables?
Absolutely. Carrots, parsnips, bell peppers, and zucchini all work well. Add heartier vegetables like carrots at the beginning and softer ones like zucchini during the last 15 minutes of roasting.
How do I prevent the garlic from burning?
Keep an eye on it during the stovetop step — 30 seconds is enough. During roasting, the garlic cloves will caramelize and sweeten. If they start looking too dark, you can cover the pan loosely with foil for the last 10 minutes.
Can I make this ahead of time?
Yes! Assemble everything in the pan up to 24 hours ahead, cover, and refrigerate. Add 10-15 minutes to the roasting time since you’re starting from cold. It’s perfect for meal prep or when you know you’ll have a busy evening.
Pin This Recipe!
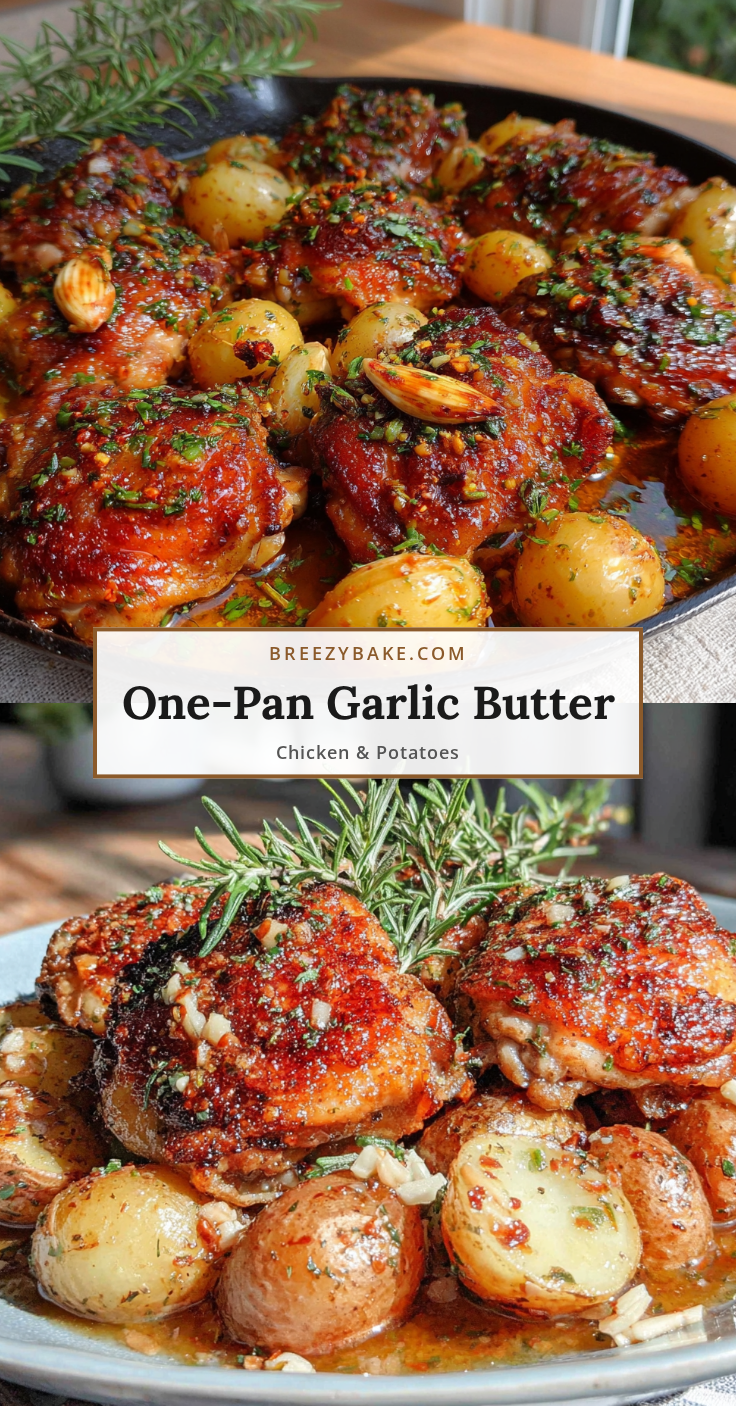
Easy One-Pan Garlic Butter Chicken Thighs and Potatoes
Juicy, crispy-skinned chicken thighs and golden potatoes roasted together in a rich garlic butter sauce. This simple one-pan meal is perfect for busy weeknights and requires only 10 minutes of active prep.
- Prep Time: 10 minutes
- Cook Time: 35 minutes
- Total Time: 45 minutes
- Yield: 4 servings 1x
- Category: Main Course
- Cuisine: American
Ingredients
- 4 to 6 bone-in, skin-on chicken thighs (about 1.5 to 2 lbs)
- 1.5 lbs baby potatoes, halved or quartered (1-inch pieces)
- 1 whole head garlic, plus 4 cloves minced
- 4 tablespoons unsalted butter, melted
- 2 tablespoons olive oil
- 6 to 8 sprigs fresh thyme
- 2 sprigs fresh rosemary, leaves stripped and chopped
- 1 teaspoon paprika (sweet or smoked)
- 1 teaspoon garlic powder
- ½ teaspoon onion powder
- 1½ teaspoons kosher salt, plus more for finishing
- ½ teaspoon freshly ground black pepper
- ¼ cup chicken broth
- 1 lemon, halved
- Fresh parsley, chopped, for garnish
Instructions
- Preheat oven to 400°F. Remove chicken thighs from fridge and let sit at room temperature for 15 minutes.
- Wash and dry potatoes. Cut larger ones into 1-inch pieces. Toss with 1 tablespoon olive oil, ½ teaspoon salt, ¼ teaspoon pepper, and ½ teaspoon paprika. Set aside.
- Pat chicken thighs dry with paper towels. Season both sides with remaining salt, pepper, garlic powder, onion powder, and paprika.
- Heat an oven-safe skillet over medium-high heat. Add 1 tablespoon olive oil. Add potatoes in a single layer and cook undisturbed for 5 minutes. Stir and cook 3 more minutes. Remove potatoes to a plate.
- In the same skillet, add 1 tablespoon butter. Place chicken skin-side down and cook 4-5 minutes until deep golden brown. Flip and cook 3 minutes. Remove chicken to plate with potatoes.
- Reduce heat to medium. Add remaining 3 tablespoons butter. Once melted, add minced garlic and cook 30 seconds until fragrant. Add chicken broth and scrape up browned bits from pan bottom.
- Return potatoes to skillet in an even layer. Nestle chicken skin-side up among potatoes. Add halved garlic head and herb sprigs. Spoon garlic butter mixture over chicken.
- Transfer skillet to oven and roast for 25 minutes. At 15-minute mark, baste chicken with pan juices.
- Check doneness: chicken should reach 165°F (or 175°F for juicier meat) and potatoes should be fork-tender. Roast 5 more minutes if needed.
- Squeeze half a lemon over top. Sprinkle with fresh parsley. Let rest 5-10 minutes before serving.
Notes
For best results, don’t crowd the pan. Pat chicken dry for crispy skin. Let pan get hot before adding potatoes. Use a meat thermometer for perfect doneness. Baste mid-roast for moist chicken. Let rest before serving. Potatoes should be cut into uniform 1-inch pieces. For dairy-free, substitute butter with vegan butter or olive oil. For lower-carb, swap potatoes for cauliflower or radishes.
Nutrition
- Serving Size: 1 serving (about 1 c
- Calories: 485
- Sugar: 2
- Sodium: 680
- Fat: 28
- Saturated Fat: 12
- Carbohydrates: 28
- Fiber: 3
- Protein: 32
Keywords: one-pan chicken, garlic butter chicken, chicken thighs and potatoes, easy weeknight dinner, sheet pan dinner, roasted chicken thighs


