Two scones left on the plate. I’d made a full batch—eight of them—and somehow, by noon on a Saturday, only two remained. My husband had already eaten three, my neighbor who’d stopped by for coffee had one, and I’d had two myself with my morning tea. That’s when I knew this small-batch pumpkin scones recipe was something special. Not because they disappeared fast—plenty of baked goods do that in my house—but because my husband, who claims he doesn’t like pumpkin-flavored things, asked if I could make them again next weekend.
I’d been craving something cozy, something that tasted like fall without requiring a whole can of pumpkin or committing to a dozen scones I’d have to freeze. Most pumpkin scone recipes make eight to twelve, which is great for a crowd but not so great for a quiet Saturday morning when you just want a little treat. So I scaled it down, played with the ratios, and landed on this version that makes exactly four tender, flaky scones with just enough maple glaze to drizzle over each one. They’re not too sweet, not too dense, and that glaze? Honestly, it’s the kind of thing you want to lick off the fork.
The funny thing is, I almost didn’t try making them at all. I had this memory of dry, crumbly pumpkin scones from a coffee shop that shall remain nameless—the kind that look beautiful in the case but fall apart the second you try to pick them up. I wanted something different. Something that stayed moist for two days, that had actual pumpkin flavor (not just spice), and that didn’t require me to run out for heavy cream or buttermilk. This recipe uses ingredients I almost always have on hand, and the result is a scone that’s crisp on the outside, soft in the middle, and completely worth the 30 minutes it takes to make. Trust me on this one.
Why You’ll Love This Recipe
These small-batch pumpkin scones are the kind of recipe that makes you feel like you’ve got it all figured out. They come together in under 30 minutes—no stand mixer required, no chilling the dough for hours, no special equipment. Just a bowl, a fork, and a baking sheet.
- Quick & Easy : From start to finish, you’re looking at about 25 minutes. That includes baking time. Perfect for when you wake up craving something warm and spiced but don’t want to spend your whole morning in the kitchen.
- Simple Ingredients : You likely have everything in your pantry right now. All-purpose flour, sugar, baking powder, butter, pumpkin puree, and a few warm spices. The maple glaze uses powdered sugar and maple syrup—two things I always keep stocked.
- Perfect for Quiet Mornings : This recipe makes exactly four scones. Not eight, not twelve. Just enough for you and maybe one other person, or for you to enjoy over two days without feeling like you’re eating the same thing all week.
- Crowd-Pleaser : Even people who think they don’t like pumpkin scones love these. The texture is tender and flaky, not dry or dense. The maple glaze adds just the right amount of sweetness without overpowering the pumpkin.
- Unbelievably Delicious : The combination of pumpkin, cinnamon, ginger, and nutmeg with that maple glaze is pure comfort. It’s the kind of scone that pairs perfectly with a hot cup of coffee or tea on a cool morning.
What makes this recipe different from all the others? It’s the ratio of butter to pumpkin. Most recipes use too much pumpkin, which makes the dough sticky and difficult to handle, resulting in dense, heavy scones. I’ve found the sweet spot—enough pumpkin for flavor and moisture, but not so much that you lose that flaky, tender texture that makes a scone a scone. Plus, the maple glaze isn’t an afterthought. It’s a thin, glossy drizzle that soaks into the warm scone just enough to make every bite taste like fall.
These scones are the kind of thing you make when you want to feel like you’re treating yourself without going overboard. They’re cozy, they’re simple, and they’re exactly what a small-batch recipe should be—satisfying without being overwhelming. If you’re looking for a cozy breakfast or brunch treat, these scones are it.
What Ingredients You Will Need
This recipe uses simple, pantry-friendly ingredients to create scones that are tender, flaky, and full of warm fall flavor. Nothing fancy here—just good basics that work together beautifully.
For the Scones
- 1 cup all-purpose flour (plus a little extra for dusting) — Spoon and level it for accuracy. Too much flour makes dry scones.
- 2 tablespoons granulated sugar — Just enough to sweeten without making them taste like cookies. You could use coconut sugar here, but the scones will be slightly darker.
- 1 ½ teaspoons baking powder — Make sure it’s fresh. Old baking powder is the number one reason scones don’t rise properly.
- ½ teaspoon ground cinnamon — I prefer Saigon cinnamon for its stronger, warmer flavor, but regular cinnamon works great too.
- ¼ teaspoon ground ginger — Adds a little warmth without being spicy. Skip it if you’re not a fan, but I think it makes a difference.
- ⅛ teaspoon ground nutmeg — Freshly grated if you have it, but pre-ground is totally fine.
- ¼ teaspoon salt — Don’t skip this. It balances the sweetness and brings out the pumpkin flavor.
- 3 tablespoons cold unsalted butter — Cut into small cubes and keep it cold until you’re ready to use it. This is crucial for flaky scones.
- ¼ cup pumpkin puree — Not pumpkin pie filling. Make sure you’re getting 100% pure pumpkin. Libby’s is my go-to brand for consistent texture.
- 2 tablespoons milk — Any milk works. I use whole milk for richness, but 2%, oat milk, or almond milk all work well.
- ½ teaspoon vanilla extract — Pure vanilla extract adds warmth. Imitation vanilla will work in a pinch.
For the Maple Glaze
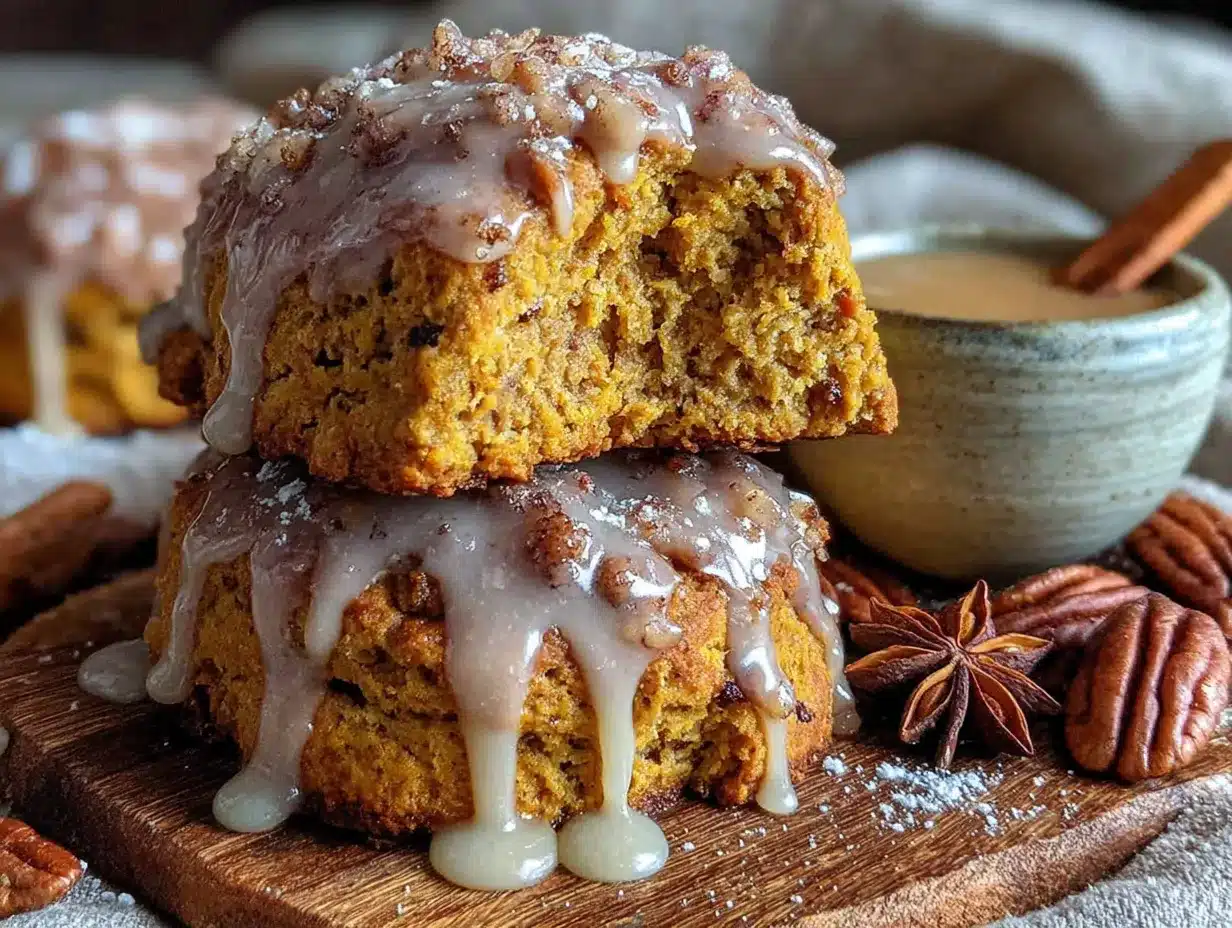
- ½ cup powdered sugar — Sift it if it’s lumpy. Nobody wants lumpy glaze on their scones.
- 1 ½ tablespoons maple syrup — Use real maple syrup, not pancake syrup. The flavor is noticeably better. Grade A dark amber is my favorite for baking.
- ½ to 1 teaspoon milk — Add just enough to get a drizzling consistency. Start with less; you can always add more.
A note on substitutions: If you need these to be dairy-free, use cold coconut oil or vegan butter in place of the regular butter, and swap the milk for your favorite non-dairy option. The texture will be slightly different—coconut oil scones tend to be a bit more crumbly—but they’re still delicious. For a gluten-free version, use a 1:1 gluten-free flour blend that contains xanthan gum. I’ve had good results with Bob’s Red Mill 1:1 Baking Flour.
Equipment Needed
One of the best things about this recipe is that you don’t need much. Here’s what you’ll need to have on hand:
- Mixing bowl — Any medium-sized bowl will do. I use a ceramic one, but glass or metal works just as well.
- Pastry cutter or two forks — A pastry cutter makes cutting butter into flour faster, but two forks work perfectly fine. You could even use your fingertips if you work quickly and don’t mind getting a little messy.
- Baking sheet — A standard half-sheet pan works great. No need to grease it—just line it with parchment paper for easy cleanup.
- Parchment paper — Not strictly necessary, but it prevents sticking and makes transferring the scones a breeze.
- Sharp knife or bench scraper — For cutting the dough into triangles. A bench scraper is ideal because it cuts cleanly without dragging.
- Measuring cups and spoons — Accurate measurements matter in baking. Use dry measuring cups for flour and sugar, and liquid measuring cups for milk and pumpkin.
- Small whisk or fork — For mixing the glaze. A fork works surprisingly well for this.
- Cooling rack — Helps the scones cool evenly and prevents soggy bottoms. If you don’t have one, you can transfer them to a plate after a few minutes.
I’ve made these scones with a cheap baking sheet and a butter knife, and they turned out just fine. Don’t let the lack of fancy equipment stop you. That said, investing in a good pastry cutter and a bench scraper will make your scone-making life easier—I picked up both at a kitchen supply store for under $10 total.
Preparation Method
Preheat your oven to 400°F (200°C). Line a baking sheet with parchment paper and set it aside. Now let’s make some scones.
- Mix the dry ingredients. In a medium mixing bowl, whisk together the all-purpose flour, granulated sugar, baking powder, cinnamon, ginger, nutmeg, and salt. Make sure everything is evenly distributed—nobody wants a pocket of baking powder in their scone.
- Cut in the butter. Add the cold butter cubes to the flour mixture. Using a pastry cutter or two forks, cut the butter into the flour until the mixture resembles coarse crumbs with some pea-sized butter pieces remaining. This takes about 2 minutes. The key here is to work quickly so the butter stays cold. If the butter starts to soften, pop the bowl in the fridge for 5 minutes. Those little butter pieces are what create flaky layers in the finished scones.
- Combine the wet ingredients. In a small bowl or liquid measuring cup, whisk together the pumpkin puree, milk, and vanilla extract until smooth. It should look like a thick, orange-colored liquid.
- Bring it together. Pour the wet mixture into the dry ingredients. Stir with a fork or spatula until just combined. The dough will look shaggy and a little dry in spots—that’s exactly what you want. Overmixing leads to tough scones, so stop as soon as the flour is mostly incorporated. If there are a few dry bits at the bottom of the bowl, that’s fine.
- Shape the dough. Lightly flour your work surface and your hands. Turn the dough out onto the floured surface. Gently bring the dough together with your hands, patting it into a circle about ¾-inch thick. Don’t knead it—just press it together gently. If the dough is too sticky to handle, sprinkle a little more flour on top, but go easy. Too much flour makes dry scones.
- Cut the scones. Using a sharp knife or bench scraper, cut the circle into four wedges like you’re cutting a pizza. For cleaner edges, wipe the knife clean between cuts. Place the wedges on the prepared baking sheet, spacing them about 2 inches apart. They’ll spread slightly as they bake, but not much.
- Bake. Bake for 12 to 15 minutes, or until the scones are lightly golden on the bottom and edges. The tops should look set and feel firm to the touch. Every oven runs a little differently—mine takes exactly 13 minutes. Start checking at 12 minutes to avoid overbaking.
- Cool. Transfer the scones to a cooling rack and let them cool for at least 5 minutes before glazing. If you glaze them while they’re too hot, the glaze will melt right off and soak into the scone completely. If you wait until they’re completely cool, the glaze will sit on top. I prefer somewhere in the middle—warm enough that the glaze sinks in just a little, but cool enough that it still looks like glaze.
- Make the glaze. While the scones cool, make the maple glaze. In a small bowl, whisk together the powdered sugar and maple syrup until smooth. Add milk ½ teaspoon at a time until you reach a drizzling consistency. The glaze should be thin enough to drizzle but thick enough that it doesn’t run off the scone completely.
- Glaze and serve. Drizzle the glaze over the warm scones using a spoon or a small whisk. Let the glaze set for a minute or two before serving. The scones are best eaten the day they’re made, ideally while still slightly warm.
A quick note on timing: The whole process from start to finish takes about 25 minutes. That includes prep, baking, and glazing. If you want to get ahead, you can mix the dry ingredients the night before and store them in a sealed container. In the morning, just add the butter and wet ingredients, and you’re 20 minutes away from fresh scones.
Cooking Tips & Techniques
I’ve made these scones at least a dozen times, and I’ve learned a few things along the way. Here are my best tips for getting perfect results every time.
Keep everything cold. This is the single most important tip for flaky scones. Cold butter creates steam pockets as it melts in the oven, which gives you those tender, flaky layers. If your kitchen is warm, pop the butter in the freezer for 10 minutes before cutting it into the flour. You can even chill the flour mixture for a few minutes before adding the wet ingredients. I’ve forgotten to do this on a hot summer day, and the scones turned out flat and dense. Learn from my mistakes.
Don’t overwork the dough. I know I’ve said this already, but it’s worth repeating. Scone dough should be handled as little as possible. Overmixing develops gluten, which makes scones tough and chewy instead of tender and flaky. When you add the wet ingredients, stir just until the flour is incorporated. When you shape the dough, pat it gently into a circle—don’t knead it. A few streaks of flour in the finished dough are perfectly fine.
Use a bench scraper for clean cuts. A bench scraper cuts through the dough cleanly without dragging, which helps the scones rise evenly. If you use a knife, use a sharp one and wipe it clean between cuts. Press straight down—don’t saw back and forth. This seals the edges and prevents the scones from spreading unevenly.
Check your baking powder. Baking powder loses its potency over time. If your baking powder is more than six months old, it might not have enough lift to give you tall, fluffy scones. To test it, drop a teaspoon of baking powder into a small bowl of hot water. If it bubbles vigorously, it’s still good. If it barely fizzes, it’s time to buy a new can.
Let them cool properly. I know it’s tempting to eat these scones straight out of the oven, but giving them a few minutes on the cooling rack makes a big difference. The internal structure needs time to set, and the glaze needs time to firm up slightly. Plus, scones that are too hot will burn your mouth—trust me, I’ve been there. Five minutes of patience is all it takes.
Variations & Adaptations
One of the best things about this recipe is how easy it is to adapt. Here are a few variations I’ve tried and loved.
Chocolate Chip Pumpkin Scones. Add ¼ cup of mini chocolate chips to the dry ingredients before adding the wet mixture. The chocolate pairs beautifully with the pumpkin and warm spices. Use mini chips instead of regular-sized ones so they distribute evenly throughout the dough. I’ve made this version for a small dessert platter, and everyone raved about them.
Vegan Pumpkin Scones. Substitute the butter with 3 tablespoons of cold coconut oil or vegan butter. Use oat milk or almond milk instead of dairy milk, and swap the milk in the glaze for a non-dairy alternative. The texture will be slightly more crumbly, but the flavor is still fantastic. I’ve made these for a friend who’s vegan, and she said they were the best scones she’d had since going plant-based.
Gluten-Free Pumpkin Scones. Use a 1:1 gluten-free flour blend that contains xanthan gum. I’ve had the best results with Bob’s Red Mill 1:1 Baking Flour. The dough will be a bit stickier than the regular version, so you might need to add an extra tablespoon of flour. The scones won’t rise quite as high, but they’ll still be tender and delicious.
Spiced Maple Variation. Add ¼ teaspoon of cardamom and a pinch of cloves to the spice mix for a warmer, more complex flavor profile. This version is especially nice in the fall when you want something that tastes like a pumpkin spice latte in scone form. I made these for a Thanksgiving brunch, and they disappeared before the main course.
Savory Pumpkin Scones. Reduce the sugar to 1 tablespoon, omit the cinnamon, ginger, and nutmeg, and add ¼ cup of shredded cheddar cheese and 1 tablespoon of chopped fresh sage. These are surprisingly good with soup or chili. I served them alongside a bowl of tomato soup last fall, and it was the perfect cozy lunch.
Serving & Storage Suggestions
These scones are best served warm, ideally within an hour of baking. The maple glaze should be slightly set but still soft, and the scones themselves should be tender on the inside with a slight crispness on the outside. If you’re serving them for a brunch or gathering, arrange them on a small plate or board with fresh fruit and coffee or tea alongside.
For a cozy presentation, I like to serve these scones on a small wooden board with a little dish of extra maple glaze for dipping. They pair beautifully with a hot cup of chai latte, spiced apple cider, or a simple black tea. If you’re feeling indulgent, serve them with a dollop of clotted cream or a pat of salted butter.
Storage. Store leftover scones in an airtight container at room temperature for up to 2 days. The glaze might soften slightly over time, but they’ll still taste great. If you live in a humid environment, I recommend storing them with a paper towel in the container to absorb excess moisture.
Freezing. You can freeze the unbaked scones for up to 3 months. Cut the dough into wedges, place them on a baking sheet, and freeze until solid. Transfer the frozen scones to a zip-top bag or airtight container. When you’re ready to bake, place the frozen scones on a parchment-lined baking sheet and bake at 400°F for 15 to 18 minutes—no need to thaw. Add the glaze after baking.
Reheating. To reheat a baked scone, pop it in a 350°F oven for 5 minutes or microwave it for 15 seconds. The microwave is faster, but the oven will give you a crispier exterior. I usually go with the oven because it makes the scone taste almost fresh-baked.
One thing I’ve noticed: these scones actually taste better on the second day. The flavors meld together, and the texture becomes even more tender. If you can resist eating them all on day one, you’re in for a treat on day two.
Nutritional Information & Benefits
Here’s the estimated nutritional breakdown for one scone (with glaze), based on the recipe as written:
| Nutrient | Amount per Scone |
|---|---|
| Calories | 295 |
| Total Fat | 10g |
| Saturated Fat | 6g |
| Cholesterol | 25mg |
| Sodium | 310mg |
| Total Carbohydrates | 48g |
| Dietary Fiber | 1g |
| Sugars | 25g |
| Protein | 3g |
These scones are a source of vitamin A from the pumpkin puree, which supports eye health and immune function. Pumpkin also provides fiber and antioxidants like beta-carotene. The maple syrup in the glaze contains small amounts of minerals like zinc and manganese, though let’s be honest—we’re eating these for the taste, not the health benefits.
If you’re watching your sugar intake, you can reduce the maple glaze or skip it entirely. The scones themselves are only lightly sweetened with 2 tablespoons of sugar. You could also substitute the granulated sugar with a sugar-free alternative like monk fruit sweetener, though the texture might be slightly different.
These scones are vegetarian and can easily be made vegan or gluten-free using the substitutions mentioned in the variations section. They contain dairy, wheat, and gluten in their standard form, so keep that in mind if you’re serving someone with allergies or dietary restrictions.
Conclusion
These small-batch pumpkin scones with maple glaze are exactly what a cozy fall morning calls for. They’re quick, simple, and made with ingredients you probably already have in your kitchen. No fancy techniques, no special equipment, no stress—just tender, flaky scones with warm spices and a sweet maple drizzle that makes everything better.
What I love most about this recipe is how adaptable it is. Whether you’re making them for yourself on a quiet Saturday morning, serving them at a brunch with friends, or customizing them with chocolate chips or cheese and herbs, they always deliver. They’re the kind of recipe you’ll come back to again and again, not because they’re complicated or impressive, but because they’re exactly what you want when you need something warm and comforting.
I’d love to hear how these turn out for you. Did you add chocolate chips? Try the vegan version? Drizzle extra glaze on top? Drop a comment below and let me know—I read every single one. And if you share a photo on social media, tag me so I can see your beautiful scones. Happy baking, friends!
Frequently Asked Questions
Can I use pumpkin pie filling instead of pumpkin puree?
No, I don’t recommend it. Pumpkin pie filling is pre-sweetened and spiced, which will throw off the sugar and spice ratios in this recipe. Stick with 100% pure pumpkin puree for the best results. If you only have pumpkin pie filling on hand, reduce the sugar to 1 tablespoon and omit the cinnamon, ginger, and nutmeg, but the texture might still be off.
Why did my scones turn out dry?
Dry scones usually come from one of three things: too much flour, overmixing the dough, or baking them too long. Make sure you’re spooning and leveling your flour rather than scooping it directly from the bag. Mix the dough just until the flour is incorporated—a few streaks of flour are fine. And check your scones at 12 minutes; every oven runs differently.
Can I double this recipe?
Absolutely. If you want to make a full batch of eight scones, simply double all the ingredients. The baking time might increase by a minute or two, so start checking at 13 minutes. You’ll need to bake them on two separate baking sheets or in two batches unless you have a very large oven.
How do I store leftover maple glaze?
Store leftover glaze in an airtight container in the refrigerator for up to a week. When you’re ready to use it, let it come to room temperature and whisk it well. You might need to add a few drops of milk to thin it out again. The glaze is also great drizzled over pancakes, waffles, or oatmeal.
Can I make these scones without a pastry cutter?
Yes, definitely. If you don’t have a pastry cutter, you can use two forks to cut the butter into the flour. Alternatively, you can use your fingertips to rub the butter into the flour—just work quickly so the butter stays cold. Some people even use a food processor, pulsing in short bursts until the mixture looks like coarse crumbs. Any of these methods will work.
Pin This Recipe!
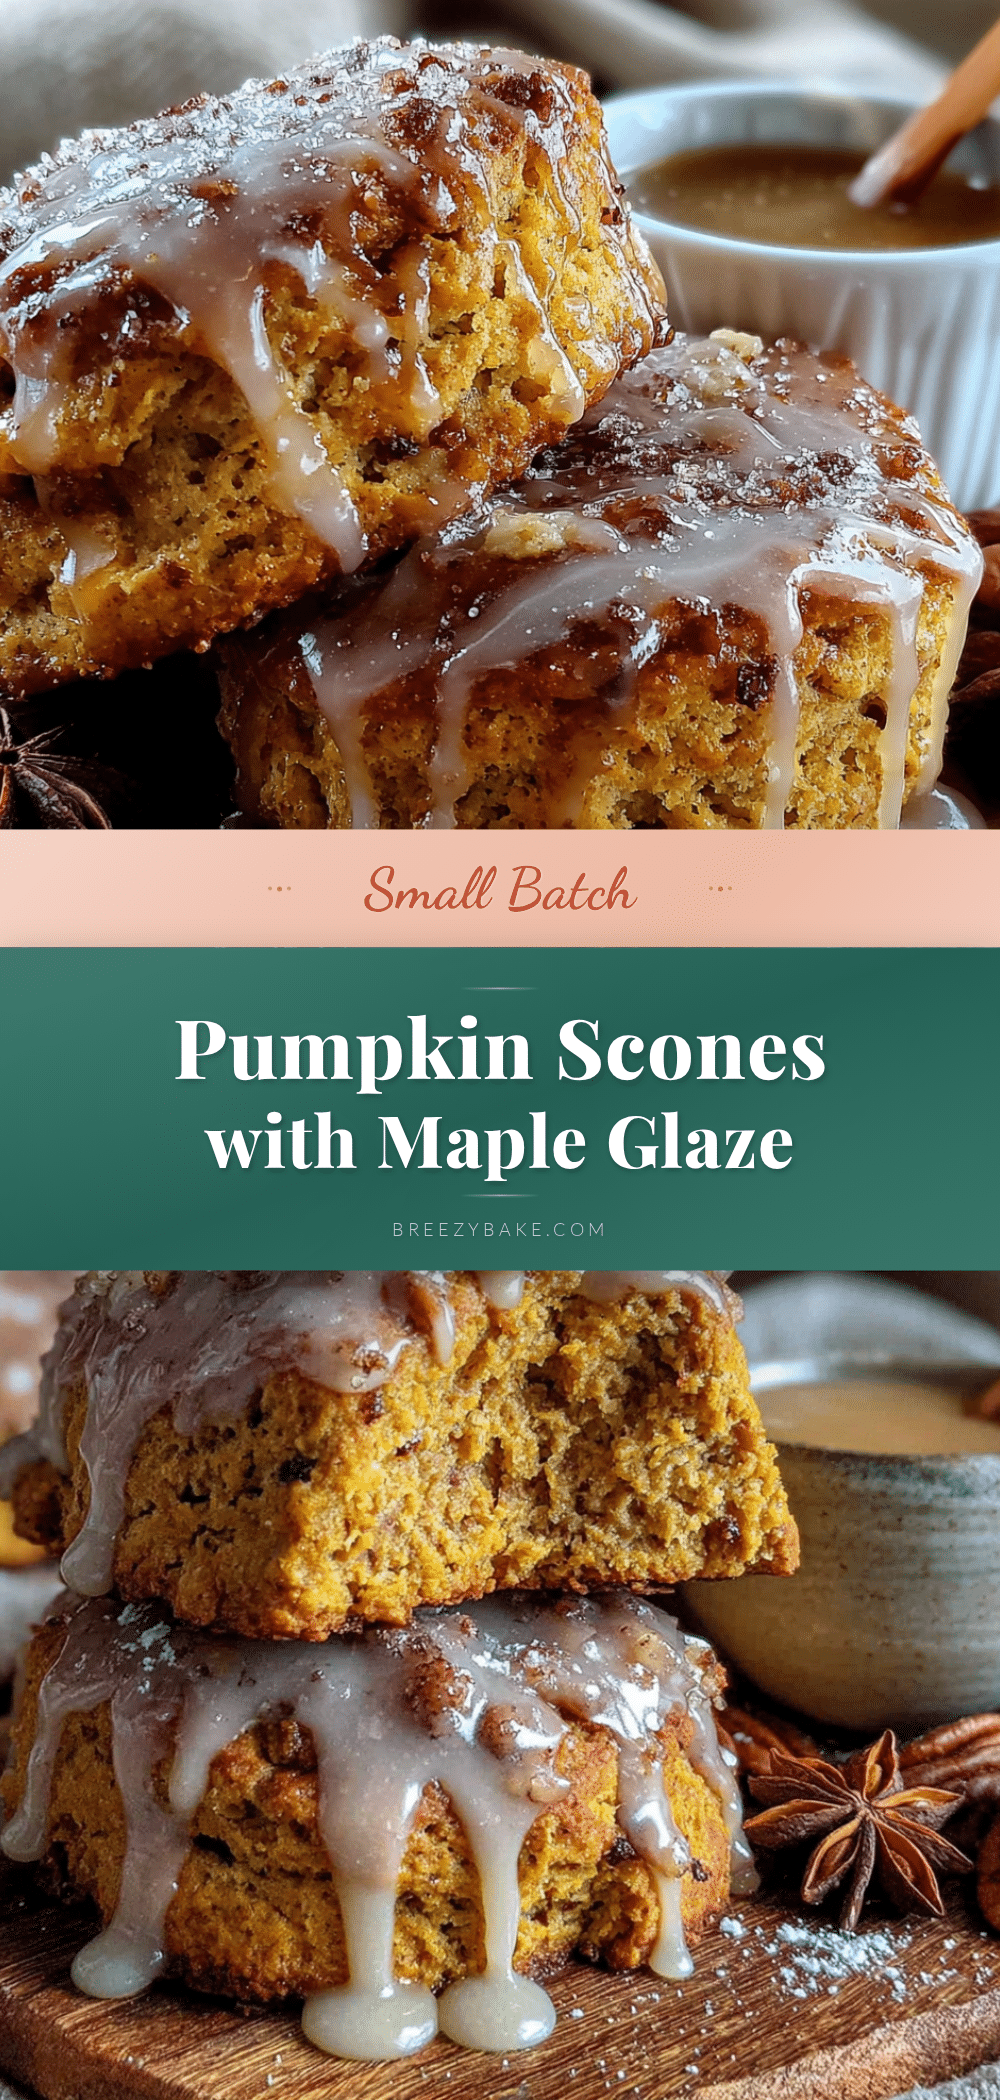
Best Easy Small-Batch Pumpkin Scones with Maple Glaze
These small-batch pumpkin scones are tender, flaky, and made with simple pantry ingredients. Topped with a sweet maple glaze, they’re the perfect cozy treat for a quiet fall morning.
- Prep Time: 10 minutes
- Cook Time: 13 minutes
- Total Time: 25 minutes
- Yield: 4 servings 1x
- Category: Breakfast
- Cuisine: American
Ingredients
- 1 cup all-purpose flour (plus extra for dusting)
- 2 tablespoons granulated sugar
- 1 ½ teaspoons baking powder
- ½ teaspoon ground cinnamon
- ¼ teaspoon ground ginger
- ⅛ teaspoon ground nutmeg
- ¼ teaspoon salt
- 3 tablespoons cold unsalted butter, cut into small cubes
- ¼ cup pumpkin puree (100% pure pumpkin)
- 2 tablespoons milk (any kind)
- ½ teaspoon vanilla extract
- ½ cup powdered sugar
- 1 ½ tablespoons maple syrup (real maple syrup)
- ½ to 1 teaspoon milk (for glaze)
Instructions
- Preheat oven to 400°F (200°C). Line a baking sheet with parchment paper.
- In a medium mixing bowl, whisk together flour, sugar, baking powder, cinnamon, ginger, nutmeg, and salt.
- Add cold butter cubes to the flour mixture. Using a pastry cutter or two forks, cut the butter into the flour until the mixture resembles coarse crumbs with some pea-sized butter pieces remaining.
- In a small bowl, whisk together pumpkin puree, milk, and vanilla extract until smooth.
- Pour the wet mixture into the dry ingredients. Stir with a fork or spatula until just combined. The dough will look shaggy and a little dry.
- Lightly flour your work surface and hands. Turn the dough out onto the floured surface and gently pat it into a circle about ¾-inch thick. Do not knead.
- Using a sharp knife or bench scraper, cut the circle into four wedges. Place wedges on the prepared baking sheet, spacing them about 2 inches apart.
- Bake for 12 to 15 minutes, until lightly golden on the bottom and edges. Transfer to a cooling rack and let cool for at least 5 minutes.
- While scones cool, make the glaze: In a small bowl, whisk together powdered sugar and maple syrup until smooth. Add milk ½ teaspoon at a time until drizzling consistency.
- Drizzle glaze over warm scones. Let set for a minute or two before serving.
Notes
Keep butter cold for flaky scones. Do not overmix the dough. Check baking powder freshness. Scones are best eaten the day they are made, but can be stored in an airtight container for up to 2 days. Unbaked scones can be frozen for up to 3 months.
Nutrition
- Serving Size: 1 scone
- Calories: 295
- Sugar: 25
- Sodium: 310
- Fat: 10
- Saturated Fat: 6
- Carbohydrates: 48
- Fiber: 1
- Protein: 3
Keywords: pumpkin scones, small batch scones, maple glaze, fall breakfast, easy scone recipe


