I need something for lunchboxes that won’t turn into a sad, soggy mess by noon. That’s the thought that hits me every Sunday night around 8 PM, standing in front of the fridge with the week stretching out like a long, boring meeting. Turkey and cheese pinwheels. The idea just pops into my head fully formed, like it was waiting there all along. I’ve got the tortillas, the deli meat, the cream cheese, and honestly, I don’t even need to check if I have the cheddar because I always do. There’s something deeply satisfying about solving a problem before it even becomes one, you know? These little spirals of goodness aren’t just easy—they’re the kind of thing that makes you look forward to packing lunch. And let’s face it, that’s a pretty big win on a Sunday night.
The first time I made these, I was in a rush and just threw everything together. My kid came home and said they were the best thing I’d ever packed. No joke. That’s when I knew I had stumbled onto something special. These pinwheels have become my go-to for school lunches, picnics, and even quick snacks when I’m working from home. They’re the kind of recipe that feels like cheating because it’s so simple, but tastes like you actually tried. And that’s the sweet spot, isn’t it?
Why You’ll Love This Recipe
Let me tell you why these turkey and cheese pinwheels have earned a permanent spot in my weekly rotation. After years of testing lunchbox ideas and dealing with the inevitable “I didn’t eat my sandwich” complaints, I can confidently say this recipe is a game-changer.
- Quick & Easy: These come together in under 15 minutes. Seriously, you can make a whole batch while your coffee is brewing. Perfect for those manic weekday mornings when every second counts.
- Simple Ingredients: You probably have everything you need already. No fancy grocery store trips, no obscure ingredients you’ll use once and forget about. Just basic stuff that’s already in your fridge.
- Perfect for Lunchboxes: These pinwheels hold up beautifully. No sogginess, no falling apart, just perfect little spirals that stay fresh until lunchtime. They’re great for school, work, picnics, or road trips.
- Crowd-Pleaser: Kids love them, adults love them, picky eaters love them. I’ve brought these to playdates and watched them disappear in minutes. Even my friend who claims she doesn’t like sandwiches ate four in one sitting.
- Unbelievably Delicious: The cream cheese spread adds this creamy, tangy layer that takes ordinary turkey and cheese to a whole new level. The texture is perfect—soft but not mushy, with just the right amount of chew from the tortilla.
What makes this recipe different from every other pinwheel recipe out there? It’s the balance. I’ve tested this exact combination more times than I can count, tweaking the cream cheese ratio, trying different tortilla brands, and figuring out the perfect rolling technique so they don’t fall apart. This isn’t just another version—it’s the version that actually works every single time.
These pinwheels are the kind of thing that makes you feel like a good parent (or a good adult, if you’re packing for yourself). They’re comfort food reimagined—faster, simpler, but with the same satisfying feeling of eating something that was made with care. Perfect for busy mornings when you need to get out the door but still want to pack something that shows you care.
What Ingredients You Will Need
This recipe uses simple, everyday ingredients that come together to create something surprisingly delicious. No fancy stuff here—just good, honest food that works.
For the Cream Cheese Spread:
- 8 ounces cream cheese, softened to room temperature (I prefer Philadelphia for the smoothest texture, but any brand works fine)
- 1/4 cup sour cream (adds tanginess and helps the spread stay creamy even when chilled)
- 1/2 teaspoon garlic powder
- 1/4 teaspoon onion powder
- 1/4 teaspoon salt
- 1/8 teaspoon black pepper
- 1 tablespoon fresh chives, finely chopped (or 1 teaspoon dried chives—totally fine in a pinch)
For the Pinwheels:
- 4 large flour tortillas (10-inch size works best—burrito-sized, not taco-sized)
- 8 ounces deli turkey breast, thinly sliced (I like oven-roasted turkey for its mild flavor, but honey smoked works great too)
- 8 ounces cheddar cheese, thinly sliced or shredded (sharp cheddar gives the best flavor, but mild works if you prefer)
- 1 cup fresh spinach leaves, washed and dried (optional but highly recommended—adds color and nutrients without changing the flavor much)
- 1/4 cup mayonnaise (optional—adds extra creaminess if you want it)
Ingredient Selection Tips:
For the tortillas, look for ones that are soft and pliable, not stiff or dry. If they seem a bit stiff, microwave them for 10 seconds wrapped in a damp paper towel—this makes them much easier to roll without cracking. I’ve learned this the hard way after a few tortilla disasters.
When it comes to the turkey, ask for it to be sliced thin but not shaved. Too thin and it gets lost in the roll; too thick and the pinwheels are hard to bite through. A medium-thin slice is perfect. For the cheese, I recommend slicing it yourself from a block rather than using pre-sliced—it’s usually thinner and more flexible, which means better rolling.
Substitution Guidance:
If you’re dairy-free, use dairy-free cream cheese and dairy-free cheddar-style shreds. The texture will be slightly different, but it still works. For a gluten-free version, use gluten-free tortillas—just be extra gentle when rolling because they tend to crack more easily. You can swap the turkey for ham, roast beef, or even grilled chicken strips. The cream cheese spread is versatile enough to work with any deli meat.
Equipment Needed
You don’t need much for this recipe, which is part of the beauty. Here’s what you’ll need:
- A medium mixing bowl for the cream cheese spread
- A rubber spatula or wooden spoon for mixing
- A cutting board for assembling the pinwheels
- A sharp knife for slicing (a serrated knife works best—it cuts through without squishing the roll)
- Plastic wrap or parchment paper for wrapping the rolls before chilling
- A baking sheet or large plate for chilling the rolls in the fridge
- Toothpicks (optional, for securing the pinwheels if they’re being transported)
If you don’t have a serrated knife, use the sharpest knife you have and make sure it’s clean. I’ve used a regular chef’s knife in a pinch and it worked fine—just saw gently rather than pressing down hard. For the mixing bowl, any medium-sized bowl works. I use my grandmother’s old Pyrex mixing bowl because it reminds me of her, but honestly, a cereal bowl works just as well.
One tip: invest in a good cutting board that won’t slide around. A damp paper towel under the board keeps it stable while you’re slicing. Trust me, this makes a huge difference when you’re trying to get clean, even slices.
Preparation Method
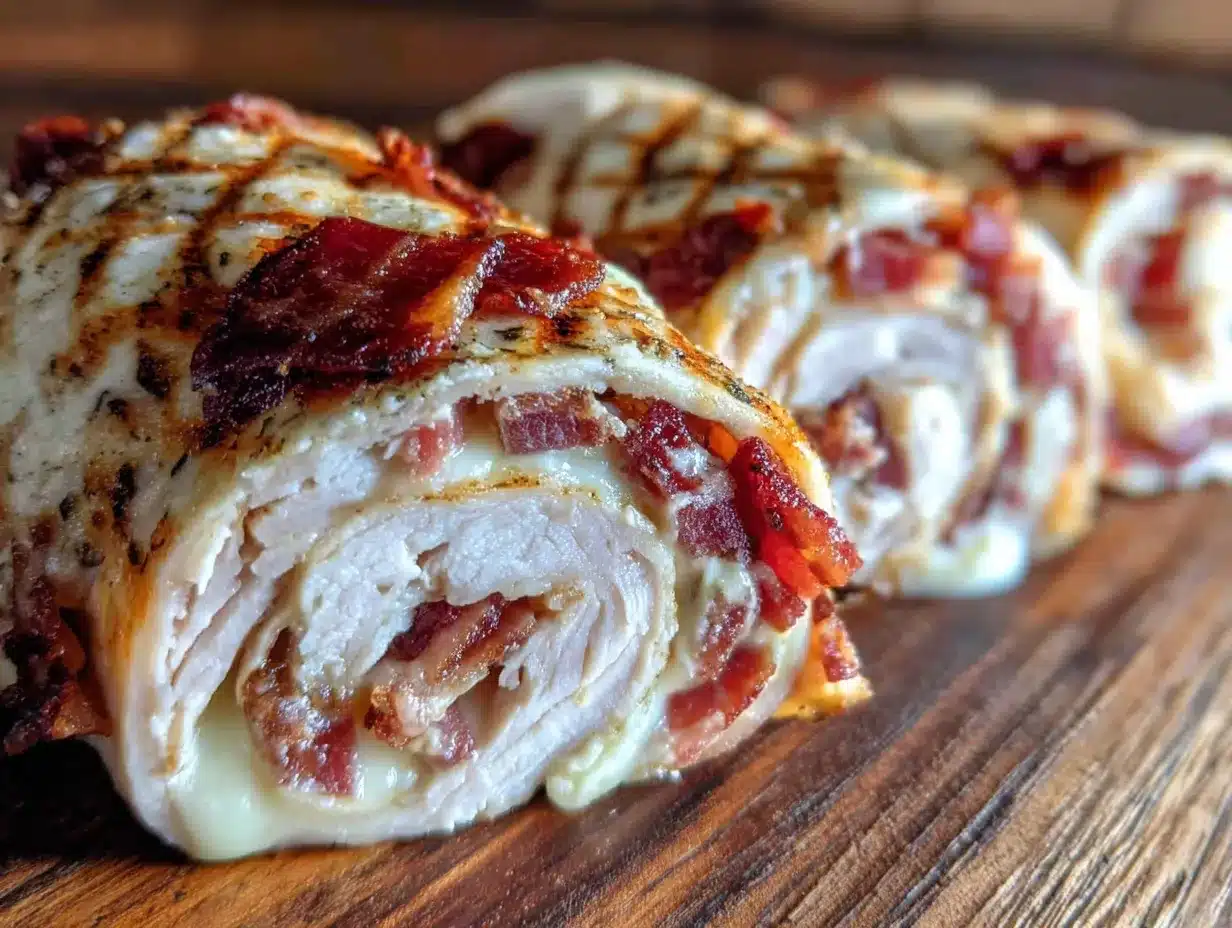
Let me walk you through this step by step. I’ve made these so many times I could do it in my sleep, but I’ll break it down so you get perfect results on your first try.
- Make the cream cheese spread. In your mixing bowl, combine the softened cream cheese, sour cream, garlic powder, onion powder, salt, pepper, and chives. Mix until smooth and well combined. This should take about 2 minutes. The mixture should be spreadable but not runny—think thick frosting consistency. If it’s too stiff, let it sit at room temperature for another 5 minutes.
- Prep your tortillas. Lay your tortillas flat on the cutting board. If they seem dry or stiff, microwave them one at a time for 10 seconds. This makes them much more pliable and less likely to crack when you roll them. Let them cool for about 30 seconds before spreading—you don’t want the cream cheese to melt.
- Spread the cream cheese mixture. Using your rubber spatula, spread an even layer of the cream cheese mixture over each tortilla. Go all the way to the edges—about 1/4 inch thick. Don’t skimp on the edges, or your pinwheels won’t stick together properly. I learned this the hard way after a few rolls that unraveled in lunchboxes.
- Layer the turkey. Place the turkey slices evenly over the cream cheese spread. Overlap them slightly to ensure full coverage. You want about 2 ounces of turkey per tortilla. If you’re using spinach, layer the leaves over the turkey now. Press them down gently so they stick to the cream cheese.
- Add the cheese. Layer the cheddar cheese over the turkey and spinach. If using slices, arrange them in a single layer. If using shredded, sprinkle evenly. The cheese should cover the surface but not be so thick that it makes rolling difficult.
- Roll it up tight. Starting from one edge, roll the tortilla tightly but gently. Use your fingers to keep the filling in place as you roll. Think of it like rolling a sleeping bag—firm but not so tight that the filling squeezes out the ends. Once rolled, place it seam-side down on the cutting board.
- Wrap and chill. Wrap each roll tightly in plastic wrap or parchment paper. Place them on a baking sheet or plate and refrigerate for at least 30 minutes. This step is crucial—chilling helps the cream cheese firm up and holds everything together when you slice. If you’re in a hurry, 15 minutes in the freezer works too, but don’t forget about them!
- Slice into pinwheels. After chilling, unwrap the rolls and place them on your cutting board. Using a sharp serrated knife, slice each roll into 1-inch pieces. Use a gentle sawing motion rather than pressing straight down—this prevents squishing. You should get about 8-10 pinwheels per tortilla, depending on how thick you slice them.
- Arrange and serve. Place the pinwheels on a serving platter or pack them directly into lunchboxes. They’re ready to go! If you’re packing for later, arrange them in a single layer in an airtight container with a paper towel on the bottom to absorb any excess moisture.
Pro tip: When slicing, wipe the knife clean between cuts. This keeps the edges neat and prevents the cream cheese from smearing. I keep a damp paper towel next to my cutting board for exactly this purpose.
Cooking Tips & Techniques
After making these pinwheels more times than I can count, I’ve picked up a few tricks that make a real difference. Let me share what I’ve learned—including the mistakes I’ve made so you don’t have to repeat them.
The biggest mistake people make: Not softening the cream cheese enough. Cold cream cheese doesn’t spread evenly, and you end up with lumps and gaps. Set it out 30 minutes before you start, or microwave it for 10-15 seconds if you’re in a rush. It should feel like soft butter when you press it with your finger.
Another common issue: Overfilling the tortillas. I know it’s tempting to pile on the turkey and cheese, but too much filling makes the pinwheels bulge and fall apart. Stick to the amounts I’ve listed—they’ve been tested to perfection.
My personal failure story: The first time I made these, I skipped the chilling step because I was in a hurry. Big mistake. The pinwheels were a mess—squished, uneven, and falling apart. My kid still ate them (bless her heart), but they looked terrible. Now I never skip the chill time. It’s the difference between “homemade” and “homemade that looks professional.”
Timing strategy: I make the cream cheese spread and assemble the rolls the night before. Then I just slice them in the morning while my coffee is brewing. This saves me about 10 minutes on busy mornings and the pinwheels taste even better after the flavors have melded overnight.
For perfect slices every time: Use a serrated bread knife and a gentle sawing motion. If you press straight down, you’ll squish the roll and the filling will ooze out. Also, make sure your knife is clean and dry—a wet knife makes the tortilla gummy.
Keeping them fresh: If you’re packing these for lunch, put a paper towel in the bottom of the container to absorb moisture. This keeps the pinwheels from getting soggy. I also pack them with an ice pack if they’re going to be out of the fridge for more than 2 hours.
Variations & Adaptations
One of the best things about this recipe is how easy it is to customize. Here are some variations I’ve tried and loved:
Italian Style: Swap the turkey for salami and pepperoni, use provolone instead of cheddar, and add a layer of roasted red peppers. The cream cheese spread stays the same, but you can add a teaspoon of Italian seasoning to it for extra flavor. This version is amazing for parties and game days—it pairs perfectly with crispy Super Bowl chicken nacho crust pizza for a full spread.
Veggie Lover’s Version: Skip the turkey entirely and load up on vegetables. I use roasted zucchini, bell peppers, mushrooms, and caramelized onions. Add some hummus instead of the cream cheese spread for a dairy-free option. This version is surprisingly hearty and works great for meatless Mondays.
Spicy Southwest: Add 1/4 cup of salsa to the cream cheese spread (drain it first so it doesn’t make the mixture too wet). Use pepper jack cheese instead of cheddar, and add some sliced jalapeños if you like heat. The turkey stays the same, but you could also use shredded rotisserie chicken. This version is perfect for those who like a little kick.
Breakfast Pinwheels: Use the same cream cheese spread, but fill with scrambled eggs, crispy bacon, and cheddar cheese. These are amazing for brunch or breakfast on the go. I make a batch on Sunday and grab them throughout the week. They reheat well in the microwave for 20 seconds.
Kid-Friendly Customization: Let your kids build their own! Set out different fillings and let them choose. My daughter loves hers with just turkey and cream cheese—no spinach, no extra cheese. My nephew loads his up with everything. Giving kids control over their lunch makes them more likely to actually eat it.
For a lighter option, use low-fat cream cheese and reduced-fat cheese. The texture is slightly less creamy, but the flavor is still great. You can also use whole wheat or spinach tortillas for added fiber and nutrients.
Serving & Storage Suggestions
These pinwheels are incredibly versatile when it comes to serving. Here’s how I handle them:
Serving temperature: They’re best served cold or at room temperature. If they’ve been in the fridge, let them sit out for 10 minutes before serving. This takes the chill off and lets the flavors come through more.
Presentation ideas: For parties, arrange the pinwheels on a platter in concentric circles, cut-side up. Garnish with fresh herbs or cherry tomatoes for color. They look beautiful on a grazing board alongside fresh Galentine’s berry parfait mini platter for a complete spread.
What to serve with them: These pinwheels pair beautifully with a simple salad, fresh fruit, or veggie sticks. For lunchboxes, I pack them with apple slices, baby carrots, and a yogurt tube. For parties, they’re great with dips like ranch dressing, honey mustard, or even a spicy sriracha mayo.
Storage instructions: Store leftover pinwheels in an airtight container in the refrigerator for up to 3 days. Place a paper towel in the bottom of the container to absorb moisture, and another paper towel on top. Change the paper towels if they get too wet. This keeps the pinwheels from getting soggy.
Freezer instructions: You can freeze the uncut rolls for up to 2 months. Wrap each roll tightly in plastic wrap, then place them in a freezer bag. To use, thaw overnight in the refrigerator, then slice as directed. Don’t freeze them after slicing—the texture gets weird.
Reheating: These are meant to be eaten cold, but if you want them warm, microwave individual pinwheels for 10-15 seconds. The cheese will get melty and delicious. Just don’t overdo it, or the tortilla gets tough.
Flavor development: Honestly, these taste even better the next day. The flavors meld together overnight, and the cream cheese absorbs the flavors of the turkey and seasonings. I actually prefer them on day two. So if you’re making these for a party, making them a day ahead is actually a smart move.
Nutritional Information & Benefits
I’m not a nutritionist, but I’ve done the math on these pinwheels so you know what you’re getting. Per pinwheel (based on 8 per tortilla, 4 tortillas total):
Estimated Nutritional Values (per pinwheel):
- Calories: 120-140
- Protein: 8-10g
- Carbohydrates: 8-10g
- Fat: 7-9g
- Fiber: 1g
- Sugar: 1g
- Sodium: 300-350mg
Health benefits: Turkey is a lean protein source that’s low in fat and high in B vitamins. It’s also a good source of selenium, which supports thyroid function. The cream cheese provides calcium and vitamin A, while the spinach (if you add it) adds iron, vitamin K, and antioxidants. This is a balanced snack that provides protein, carbs, and fat to keep you full and energized.
Dietary considerations: This recipe can be made gluten-free by using gluten-free tortillas. For a lower-carb option, use low-carb tortillas or lettuce wraps. For a dairy-free version, use dairy-free cream cheese and cheese alternatives. For a lower-sodium version, use low-sodium turkey and reduced-sodium cheese.
Potential allergens: This recipe contains dairy (cream cheese, cheddar cheese) and gluten (tortillas). It may also contain traces of other allergens depending on the brands you use. Always check labels if you’re serving someone with allergies.
My personal wellness perspective: I love that these pinwheels are a “real food” option for busy days. They’re not processed junk—they’re made with ingredients I can pronounce and feel good about feeding my family. The protein keeps everyone full until the next meal, and the portion control is built right in. Plus, making them myself means I control what goes in them, which is always a win in my book.
Conclusion
These easy turkey and cheese pinwheels have honestly changed my lunch-packing game. They’re the kind of recipe that makes you feel like you’ve got your life together, even when you’re running on three hours of sleep and cold coffee. They’re simple enough for a busy Tuesday morning but impressive enough for a party platter.
What I love most about this recipe is how forgiving it is. You can swap ingredients, adjust the seasonings, or add your own twist, and they still turn out great. That’s the mark of a truly good recipe—one that works even when you’re not following it perfectly.
I’d love to hear how yours turn out! Did you add something unexpected? Did your kids gobble them up? Drop a comment below and let me know. And if you’re looking for more easy lunchbox ideas, check out my healthy chicken veggie skillet wraps for another quick and wholesome option. Happy rolling, friends!
Frequently Asked Questions
Can I make these pinwheels ahead of time?
Absolutely! In fact, I recommend it. You can assemble the rolls up to 2 days in advance and keep them wrapped in the refrigerator. Slice them just before serving for the best presentation. The flavors actually get better after a day in the fridge.
Why are my pinwheels falling apart?
This usually happens for one of three reasons: the tortillas weren’t rolled tight enough, the cream cheese wasn’t spread all the way to the edges, or you skipped the chilling step. Make sure you roll firmly, spread the cream cheese edge-to-edge, and chill for at least 30 minutes before slicing.
Can I use different types of cheese?
Yes! While cheddar is my go-to, you can use provolone, mozzarella, Swiss, pepper jack, or even cream cheese only. Just make sure whatever cheese you choose is sliced thin enough to roll easily. Hard cheeses like parmesan don’t work as well because they don’t bend.
How do I keep the pinwheels from getting soggy in lunchboxes?
The key is moisture management. Make sure your spinach is thoroughly dried before adding it. Use a paper towel in the bottom of the container and change it if it gets wet. Also, don’t add any wet ingredients like sliced tomatoes or cucumbers—they’ll make everything soggy fast.
Can I freeze these pinwheels?
Yes, but only the uncut rolls. Wrap each roll tightly in plastic wrap, then place in a freezer bag. They’ll keep for up to 2 months. Thaw overnight in the refrigerator, then slice as directed. Don’t freeze them after slicing—the texture becomes watery and unappealing.
Pin This Recipe!
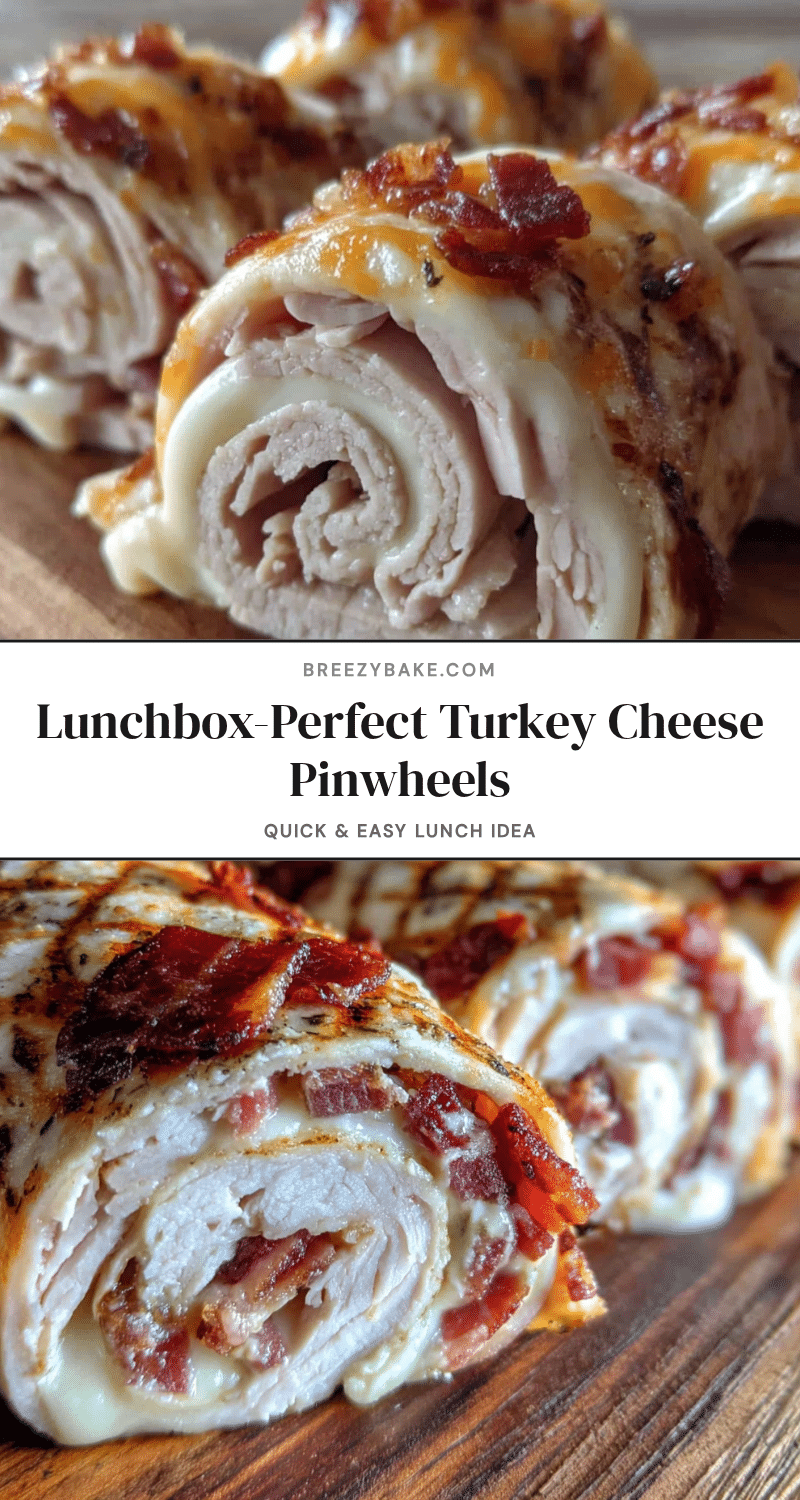
Easy Turkey and Cheese Pinwheels: Best Lunchbox Idea

These easy turkey and cheese pinwheels are the perfect lunchbox solution—quick to make, hold up beautifully without getting soggy, and are a crowd-pleaser for kids and adults alike. Made with simple ingredients like cream cheese, deli turkey, and cheddar, they come together in under 15 minutes and taste even better the next day.
- Prep Time: 15 minutes
- Cook Time: 0 minutes
- Total Time: 45 minutes (includes 30 minutes chilling)
- Yield: 32-40 pinwheels (8-10 per tortilla, 4 tortillas) 1x
- Category: Lunch, Snack, Appetizer
- Cuisine: American
Ingredients
- 8 ounces cream cheese, softened to room temperature
- 1/4 cup sour cream
- 1/2 teaspoon garlic powder
- 1/4 teaspoon onion powder
- 1/4 teaspoon salt
- 1/8 teaspoon black pepper
- 1 tablespoon fresh chives, finely chopped (or 1 teaspoon dried chives)
- 4 large flour tortillas (10-inch size)
- 8 ounces deli turkey breast, thinly sliced
- 8 ounces cheddar cheese, thinly sliced or shredded
- 1 cup fresh spinach leaves, washed and dried (optional)
- 1/4 cup mayonnaise (optional)
Instructions
- Make the cream cheese spread: In a mixing bowl, combine the softened cream cheese, sour cream, garlic powder, onion powder, salt, pepper, and chives. Mix until smooth and well combined, about 2 minutes.
- Prep your tortillas: Lay the tortillas flat on a cutting board. If they seem dry or stiff, microwave them one at a time for 10 seconds. Let them cool for about 30 seconds before spreading.
- Spread the cream cheese mixture: Using a rubber spatula, spread an even layer of the cream cheese mixture over each tortilla, going all the way to the edges, about 1/4 inch thick.
- Layer the turkey: Place the turkey slices evenly over the cream cheese spread, overlapping slightly to ensure full coverage. If using spinach, layer the leaves over the turkey and press down gently.
- Add the cheese: Layer the cheddar cheese over the turkey and spinach. If using slices, arrange in a single layer; if using shredded, sprinkle evenly.
- Roll it up tight: Starting from one edge, roll the tortilla tightly but gently, using your fingers to keep the filling in place. Place seam-side down on the cutting board.
- Wrap and chill: Wrap each roll tightly in plastic wrap or parchment paper. Place on a baking sheet or plate and refrigerate for at least 30 minutes (or 15 minutes in the freezer if in a hurry).
- Slice into pinwheels: After chilling, unwrap the rolls and place on a cutting board. Using a sharp serrated knife, slice each roll into 1-inch pieces using a gentle sawing motion. You should get about 8-10 pinwheels per tortilla.
- Arrange and serve: Place the pinwheels on a serving platter or pack directly into lunchboxes. If packing for later, arrange in a single layer in an airtight container with a paper towel on the bottom.
Notes
For best results, soften cream cheese to room temperature before mixing. Chilling the rolls for at least 30 minutes is crucial for clean slices. Use a serrated knife with a gentle sawing motion to avoid squishing. Wipe the knife clean between cuts for neat edges. These pinwheels taste even better the next day after flavors meld. Store in an airtight container in the refrigerator for up to 3 days. Freeze uncut rolls for up to 2 months.
Nutrition
- Serving Size: 1 pinwheel
- Calories: 130
- Sugar: 1
- Sodium: 325
- Fat: 8
- Saturated Fat: 4
- Carbohydrates: 9
- Fiber: 1
- Protein: 9
Keywords: turkey and cheese pinwheels, lunchbox ideas, easy lunch, kid-friendly, make-ahead, party appetizer, turkey pinwheels, cream cheese pinwheels


