“Mom, can we make the dirt cups with the worms again?” My niece said this before Halloween even started, and honestly, I couldn’t blame her. There I was, standing in the baking aisle at the grocery store, staring at a bag of gummy worms like they were the most serious decision I’d make all week. And maybe they were.
That conversation stuck with me because it wasn’t about the candy or the sugar high. It was about the moment we made them last year — her little hands crushing Oreos in a baggie, the way she giggled when we poked the gummy worms into the chocolate pudding. That’s the thing about these Easy Halloween Dirt Cups with Gummy Worms. They’re not just a treat. They’re a little memory you can eat.
This recipe is the kind of thing you throw together when you need a win. No baking. No fancy equipment. Just chocolate pudding, crushed cookies, and a handful of gummy worms that look like they’re crawling out of the dirt. It takes ten minutes, maybe less if you’re not letting a six-year-old “help” with the Oreos.
I’ve made these for Halloween parties, classroom celebrations, and lazy October afternoons when the only plan was to watch spooky cartoons. They never last long. And honestly? That’s the best part.
Why You’ll Love This Recipe
Let me tell you why these dirt cups are my go-to Halloween treat. I’ve tested this recipe more times than I can count, and every single time, it delivers. Here’s what makes it special:
- Quick & Easy: You can have these ready in under 10 minutes. No oven, no mixer, no complicated steps. Perfect for last-minute Halloween plans or when the kids are bouncing off the walls.
- Simple Ingredients: Chocolate pudding mix, milk, Oreos, and gummy worms. That’s it. You probably have most of this in your pantry right now.
- Perfect for Parties: Whether it’s a classroom celebration, a Halloween bash, or a spooky movie night, these cups are always a hit. Kids and adults alike can’t resist them.
- Crowd-Pleaser: I’ve brought these to multiple gatherings, and they disappear faster than anything else on the table. There’s something about the combination of creamy pudding and crunchy cookie “dirt” that everyone loves.
- Unbelievably Fun: The gummy worms peeking out of the “dirt” are just plain delightful. It’s the kind of treat that makes people smile before they even take a bite.
What makes this recipe different from the rest? It’s the texture. I’ve tried versions where the Oreos are too chunky or the pudding is too runny. But this method — letting the pudding set properly and crushing the Oreos to just the right consistency — gives you that perfect dirt-like texture every time. It’s not just another Halloween dessert. It’s your best version of it.
This recipe is the kind that makes you feel like a hero without any effort. It’s comfort food with a spooky twist — fast, fun, and full of the kind of joy that makes Halloween special.
What Ingredients You Will Need
This recipe uses simple, everyday ingredients to create a treat that looks impressive but takes almost no effort. You’ll find everything at your regular grocery store, and most of these items are probably already in your kitchen.
- Instant Chocolate Pudding Mix: (Two 3.9-ounce boxes) I recommend Jell-O brand for consistent results. The instant version is key here — no cooking required. You just whisk it with milk and it sets in minutes.
- Milk: (3 cups) Whole milk gives the richest, creamiest texture, but 2% works fine too. For a dairy-free version, use oat milk or almond milk — just know the pudding might be slightly less thick.
- Oreo Cookies: (24 cookies) Regular Oreos work best for that dark “dirt” look. You can use Double Stuf if you want, but the extra cream filling makes the crumbs stick together more. I usually scrape off some of the cream before crushing, but it’s not necessary.
- Gummy Worms: (About 24 worms) Look for the colorful, sour or regular kind. I like the Trolli brand because they’re extra wiggly and have that bright, fun look. You’ll need 2-3 worms per cup.
- Clear Plastic Cups: (8-ounce size) The clear cups are important — you want to see the layers of pudding, dirt, and worms. I buy the ones with lids so I can prep them ahead.
- Optional Garnishes: (For extra fun) You can add gummy spiders, candy pumpkins, or even a few chocolate sprinkles on top. Some people like to add a little green food coloring to the pudding for a slime effect, but I keep it classic.
For the best texture, make sure your milk is cold when you mix the pudding. Warm milk won’t let the pudding set properly, and you’ll end up with soup instead of dirt. Trust me, I learned that the hard way.
Equipment Needed
You don’t need much for this recipe, which is part of the beauty. Here’s what you’ll need:
- Large Mixing Bowl: For whisking the pudding. Any big bowl works.
- Whisk: A regular whisk is fine. You could use a hand mixer, but honestly, whisking by hand takes less than two minutes.
- Measuring Cups: For the milk. A liquid measuring cup is easiest.
- Ziploc Bag: For crushing the Oreos. A quart-size bag works perfectly. You can also use a food processor, but the bag method is more fun for kids.
- Rolling Pin or Heavy Cup: To crush the Oreos inside the bag. A wine bottle works in a pinch.
- Clear Plastic Cups: 8-ounce size, preferably with lids. You can find these at any grocery store or party supply shop.
- Spoon or Small Scoop: For layering the pudding and dirt.
I’ve made these with just a bowl and a spoon before, so don’t stress if you don’t have fancy equipment. The only thing I’d recommend investing in is the clear cups with lids — they make serving and storing so much easier.
Preparation Method
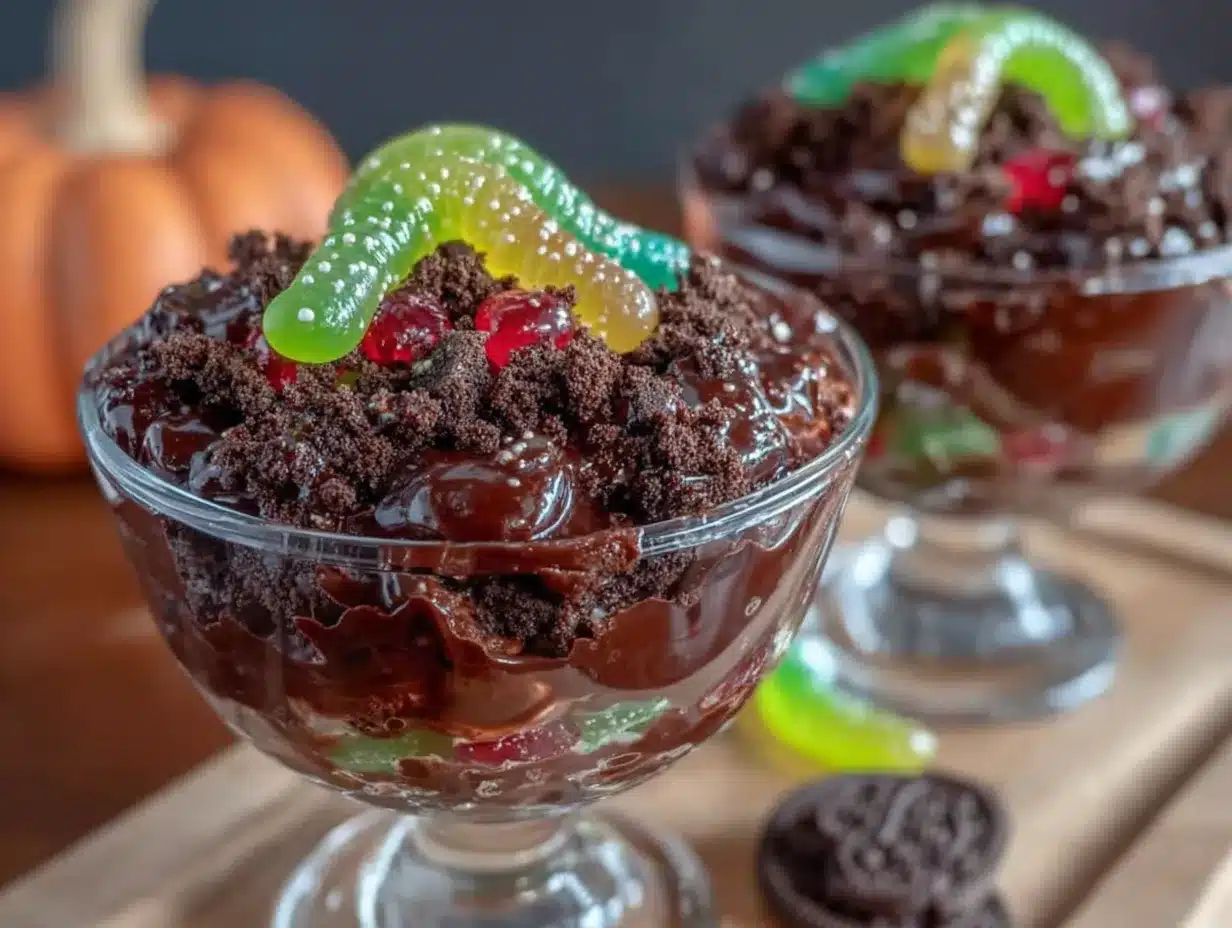
Here’s how to make these Easy Halloween Dirt Cups with Gummy Worms. Follow these steps, and you’ll have a spooky treat in no time.
- Make the Pudding: In a large mixing bowl, combine the two boxes of instant chocolate pudding mix with 3 cups of cold milk. Whisk vigorously for about 2 minutes until the mixture thickens. It should look smooth and glossy. Let it sit for 5 minutes to set completely. (If it’s still runny after 5 minutes, your milk might have been too warm. Pop it in the fridge for 10 minutes.)
- Crush the Oreos: Place 24 Oreo cookies in a large Ziploc bag. Seal it tight — you don’t want crumbs flying everywhere. Use a rolling pin or a heavy cup to crush them into fine crumbs. You want a texture that looks like real dirt — some smaller pieces are fine, but avoid big chunks. (Pro tip: Let the kids do this part. They love it, and it keeps them busy.)
- Layer the Cups: Spoon about 2-3 tablespoons of the chocolate pudding into the bottom of each clear cup. Spread it evenly. Then add a layer of crushed Oreo crumbs — about 2 tablespoons — on top of the pudding. Repeat with another layer of pudding and another layer of Oreo crumbs. Each cup should have two layers of each.
- Add the Worms: Take 2-3 gummy worms per cup and gently poke them into the top layer of Oreo crumbs. Let some of them stick out, like they’re crawling out of the dirt. You can also tuck a few into the middle layers for a surprise when someone eats it.
- Chill: Place the cups in the refrigerator for at least 30 minutes before serving. This helps the pudding set completely and makes the texture perfect. If you’re making them ahead, they’ll keep in the fridge for up to 2 days.
- Garnish and Serve: Right before serving, add any extra garnishes — a gummy spider on top, a few candy pumpkins, or a sprinkle of chocolate shavings. Serve cold and watch them disappear.
A few things to keep in mind: Don’t overmix the pudding or it can get grainy. And when you crush the Oreos, try to get them to a consistent texture — big chunks can make the “dirt” look less realistic. Also, if you’re making these for a party, you can prep the pudding and crushed Oreos separately the night before, then assemble everything in the morning.
Cooking Tips & Techniques
I’ve made these dirt cups more times than I can count, and I’ve learned a few things along the way. Here are my best tips for getting them perfect every time.
Use Cold Milk: This is the most important tip. Cold milk helps the instant pudding set faster and gives it a smoother texture. If your milk is room temperature, the pudding will take longer to thicken and might end up runny. I’ve made this mistake before, and it’s not pretty.
Crush Oreos in Batches: If you’re making a big batch, crush the Oreos in two or three separate bags. A single bag with too many cookies won’t crush evenly, and you’ll end up with uneven crumbs. Trust me on this one — I’ve had to re-crush a bag before because I got lazy.
Let the Pudding Set: Don’t rush this step. Let the pudding sit for the full 5 minutes after whisking. If you layer it too soon, it’ll mix with the Oreo crumbs and turn into a muddy mess. Patience pays off here.
Layer Carefully: When you’re layering the pudding and Oreo crumbs, try to keep them separate. Use a spoon to spread the pudding evenly, then gently sprinkle the crumbs on top. If you press the crumbs down too hard, they’ll sink into the pudding and you’ll lose that distinct dirt layer.
Make Ahead: These cups actually taste better after sitting in the fridge for a few hours. The flavors meld together, and the Oreo crumbs soften slightly, creating a texture that’s almost like a chocolate cookie crust. I often make them the night before a party.
Double the Worms: Kids love pulling the gummy worms out, so don’t be shy with them. I usually put 3 worms per cup — two poking out of the top and one hidden in the middle layer. It’s a fun surprise.
Variations & Adaptations
This recipe is super versatile, and I’ve tried several variations over the years. Here are some of my favorites.
Peanut Butter Dirt Cups: Add 2 tablespoons of creamy peanut butter to the pudding mix before whisking. It gives the pudding a rich, nutty flavor that pairs perfectly with the chocolate. Just make sure to whisk it well so there are no lumps.
Vegan Version: Use dairy-free chocolate pudding mix and oat milk. For the Oreos, regular Oreos are actually vegan! (The cream filling doesn’t contain dairy.) Use vegan gummy worms — some brands use gelatin, so check the label. This version tastes just as good as the original.
Spooky Green Slime: Add a few drops of green food coloring to the pudding before whisking. It turns the “dirt” into something that looks like swamp slime. Perfect for a Halloween party with a spooky theme. Kids go crazy for this one.
Mini Dirt Cups: Use 4-ounce cups instead of 8-ounce ones. These are perfect for little hands or for serving at a party where people want a small treat. Just adjust the layering amounts — about 1-2 tablespoons of pudding and 1 tablespoon of crumbs per layer.
Cookie Dirt: Swap the Oreos for chocolate wafer cookies or even chocolate graham crackers. The texture is slightly different, but it still works great. I’ve also used crushed chocolate chip cookies in a pinch, and it turned out delicious.
Adult Version: Add a splash of coffee liqueur or Irish cream to the pudding before whisking. It gives the dessert a grown-up twist that’s perfect for an adult Halloween party. Just don’t let the kids get into these ones.
Serving & Storage Suggestions
These dirt cups are best served cold, straight from the fridge. The contrast between the creamy pudding and the crunchy Oreo “dirt” is what makes them so satisfying.
Serving Temperature: Serve them chilled. If you’ve made them ahead, take them out of the fridge about 5 minutes before serving so they’re not ice-cold. But don’t let them sit out too long — the pudding can get runny at room temperature.
Presentation: Arrange the cups on a platter or tray with some Halloween decorations around them. I like to add a few fake spiders or plastic skeletons for a spooky touch. You can also put them on a dessert table with other Halloween treats.
Complementary Dishes: These dirt cups go great with other Halloween desserts like mint chocolate cake jar parfaits or rainbow cheesecake pudding cups. For a savory option, pair them with chicken stuffed taco cups for a fun party spread.
Storage: Store the cups in the refrigerator with lids on. They’ll keep for up to 3 days, but the Oreo crumbs will soften over time. If you want to keep them crunchy, store the crushed Oreos separately and add them just before serving.
Freezing: I don’t recommend freezing these. The pudding gets icy and the texture changes. If you need to make them way ahead, prep the pudding and crush the Oreos separately, then assemble the day you’re serving them.
Reheating: These are meant to be served cold, so no reheating needed. If the pudding has been in the fridge for a while and seems too thick, let the cups sit at room temperature for 10 minutes before serving.
Nutritional Information & Benefits
Let’s be honest — these dirt cups are a treat, not a health food. But here’s a rough estimate of what you’re getting per serving (one 8-ounce cup).
| Nutrient | Amount Per Serving |
|---|---|
| Calories | 320 |
| Total Fat | 12g |
| Saturated Fat | 5g |
| Carbohydrates | 50g |
| Sugar | 35g |
| Protein | 6g |
| Calcium | 150mg |
Health Benefits: Okay, let’s find some positives. The milk provides calcium and protein. Dark chocolate has antioxidants (though instant pudding is highly processed, so take that with a grain of salt). The Oreos offer a small amount of iron. And the gummy worms? Well, they’re fun.
Dietary Considerations: This recipe is vegetarian. For a gluten-free version, use gluten-free chocolate cookies and check that your pudding mix is gluten-free (most instant pudding mixes are). For a dairy-free version, use oat milk and dairy-free pudding. The Oreos are vegan-friendly, so that’s a win.
Allergens: This recipe contains milk, wheat (from the Oreos), and possibly soy (check your pudding mix). Gummy worms may contain gelatin, which is not vegetarian. Always check labels if you’re serving people with allergies.
Personal Perspective: Look, I’m not going to pretend these are healthy. But they’re a Halloween treat, and sometimes you just need something fun and delicious. The key is moderation — one cup is plenty, and it’s worth every calorie.
Conclusion
These Easy Halloween Dirt Cups with Gummy Worms are the kind of recipe that makes you look like a hero without any effort. They’re quick, fun, and absolutely perfect for Halloween parties, classroom celebrations, or just a spooky afternoon treat.
I love this recipe because it brings people together. There’s something about watching someone’s face light up when they see the gummy worms crawling out of the “dirt” that just makes my day. And the best part? You can customize them however you want — add different candies, change the pudding flavor, or make them vegan. The possibilities are endless.
So go ahead and give these a try. Make them with your kids, bring them to a party, or just treat yourself. And when you do, I’d love to hear about it. Leave a comment below and let me know how they turned out. Did you add any fun twists? What garnishes did you use? Share your photos and tag me — I can’t wait to see your spooky creations.
Happy Halloween, and happy eating!
Frequently Asked Questions
Can I make these dirt cups ahead of time?
Yes! You can make them up to 2 days in advance. Just keep them covered in the fridge. The Oreo crumbs will soften slightly, but they still taste great. If you want them extra crunchy, add the crushed Oreos just before serving.
Can I use homemade chocolate pudding instead of instant?
Absolutely. If you prefer homemade pudding, go for it. Just make sure it’s fully cooled and set before layering. Homemade pudding might be slightly thinner, so let it chill in the fridge for an extra 30 minutes before assembling.
What if I can’t find gummy worms?
No problem! You can use gummy spiders, gummy bats, or any other gummy candy. Gummy frogs work great too. You could also use candy corn or candy pumpkins for a non-worm option.
Can I use sugar-free pudding mix?
Yes, sugar-free instant pudding works perfectly. Just follow the same instructions. The texture might be slightly different, but it still tastes great. This is a good option if you’re watching your sugar intake.
How do I keep the Oreo crumbs from getting soggy?
The key is to layer carefully. Let the pudding set completely before adding the Oreo crumbs, and don’t press them down. If you’re making them ahead, consider storing the crushed Oreos separately and adding them just before serving for maximum crunch.
Pin This Recipe!
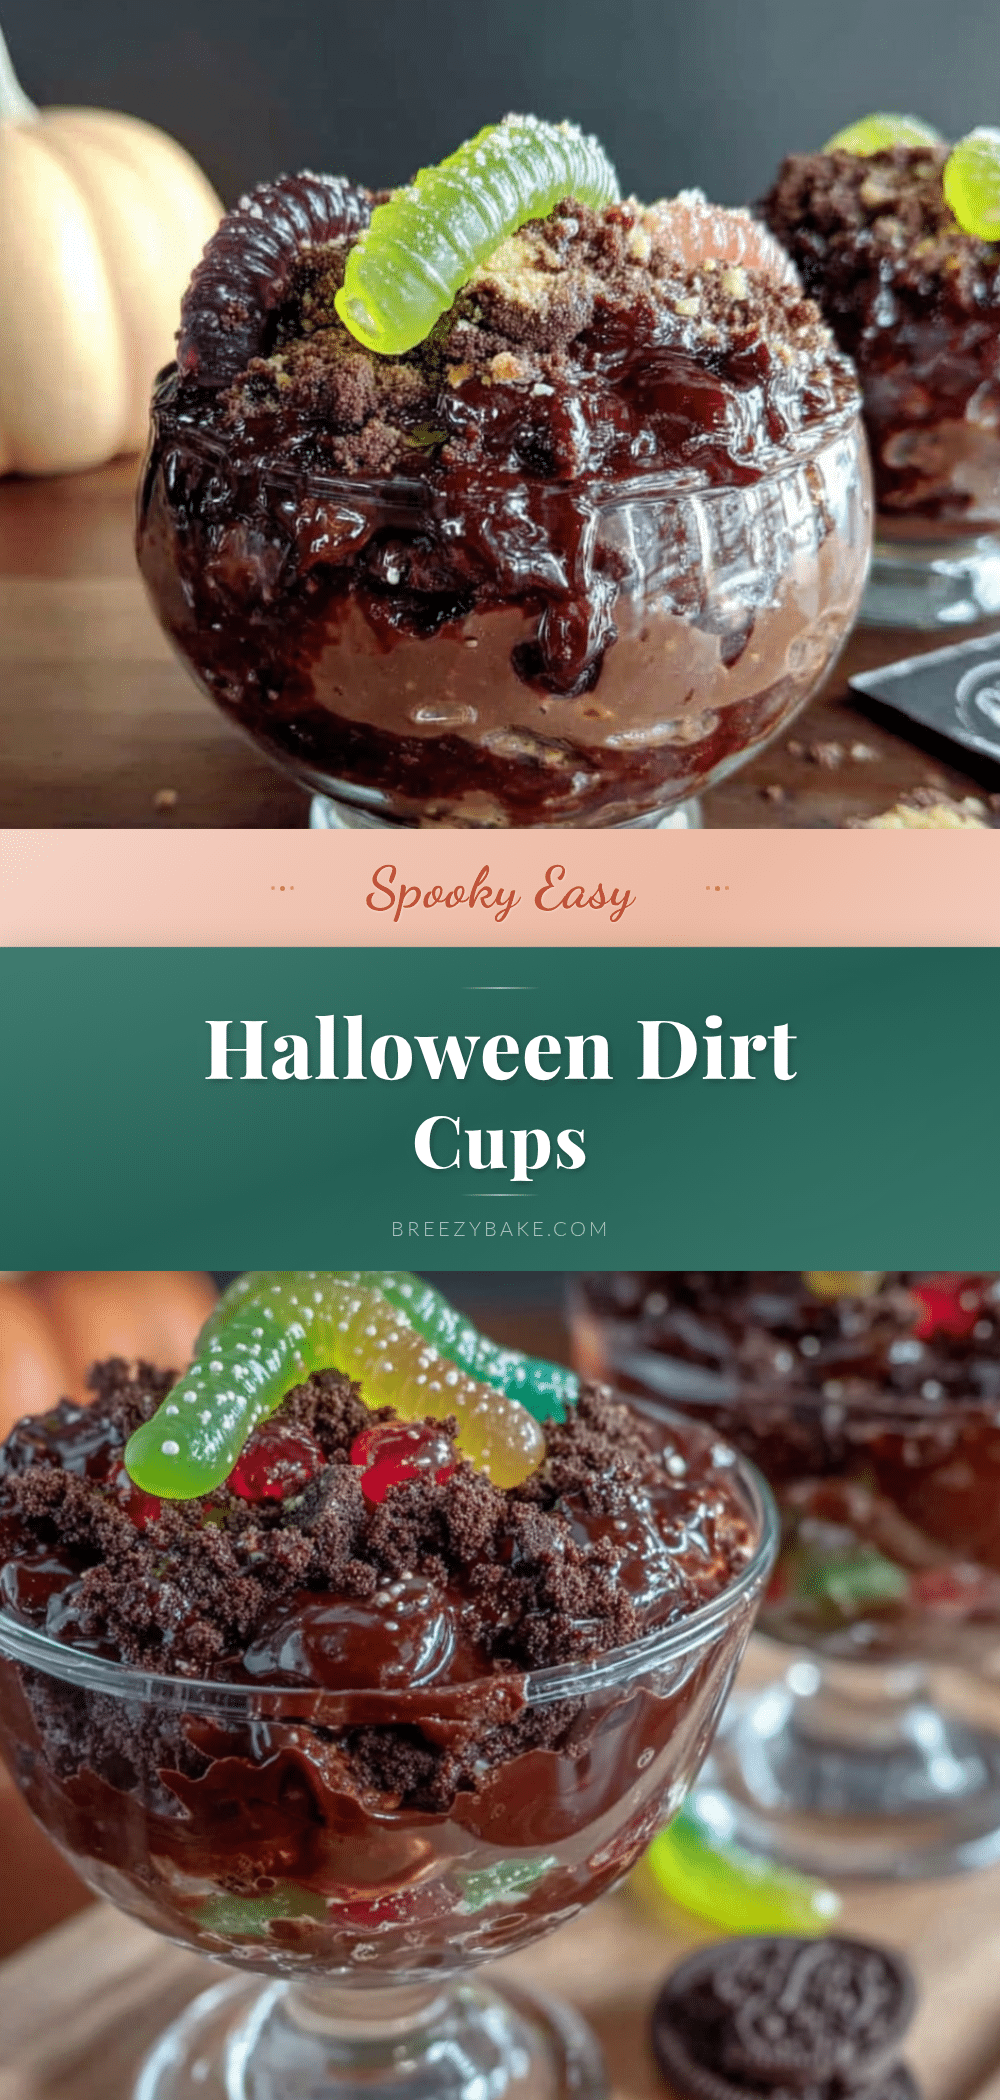
Easy Halloween Dirt Cups with Gummy Worms: 10-Minute Treat
These Easy Halloween Dirt Cups with Gummy Worms are a quick, no-bake treat made with chocolate pudding, crushed Oreos, and gummy worms. Perfect for Halloween parties, classroom celebrations, or a fun spooky snack that comes together in just 10 minutes.
- Prep Time: 10 minutes
- Cook Time: 0 minutes
- Total Time: 40 minutes (includes 30 minutes chilling)
- Yield: 8 servings 1x
- Category: Dessert
- Cuisine: American
Ingredients
- 2 (3.9-ounce) boxes instant chocolate pudding mix
- 3 cups cold milk (whole or 2%)
- 24 Oreo cookies
- About 24 gummy worms
- Optional: gummy spiders, candy pumpkins, chocolate sprinkles, green food coloring
Instructions
- In a large mixing bowl, combine the two boxes of instant chocolate pudding mix with 3 cups of cold milk. Whisk vigorously for about 2 minutes until the mixture thickens and looks smooth and glossy. Let it sit for 5 minutes to set completely.
- Place 24 Oreo cookies in a large Ziploc bag. Seal tightly and crush them with a rolling pin or heavy cup into fine crumbs that resemble dirt.
- Spoon about 2-3 tablespoons of chocolate pudding into the bottom of each clear 8-ounce cup. Spread evenly. Add a layer of crushed Oreo crumbs (about 2 tablespoons) on top. Repeat with another layer of pudding and another layer of Oreo crumbs.
- Gently poke 2-3 gummy worms into the top layer of Oreo crumbs, letting some stick out as if crawling out of the dirt. Optionally, tuck a few into the middle layers for a surprise.
- Refrigerate the cups for at least 30 minutes before serving to allow the pudding to set completely.
- Just before serving, add any optional garnishes like gummy spiders, candy pumpkins, or chocolate sprinkles. Serve cold.
Notes
Use cold milk for best pudding texture. Crush Oreos in batches for even crumbs. Let pudding set fully before layering to avoid muddy layers. Store in fridge for up to 3 days; for crunchier crumbs, add Oreos just before serving. Not recommended for freezing.
Nutrition
- Serving Size: 1 cup (8 ounces)
- Calories: 320
- Sugar: 35
- Sodium: 380
- Fat: 12
- Saturated Fat: 5
- Carbohydrates: 50
- Fiber: 1
- Protein: 6
Keywords: Halloween dirt cups, gummy worms, no-bake dessert, chocolate pudding, Oreo dirt, easy Halloween treat, kids dessert


