My friend Jenna texted me a photo last October. It was a pan of something white, with red drizzles and these dark, staring circles. “Halloween eyeballs,” she wrote. “The kids want me to make them for the school party.” I stared at the picture and honestly, I thought they looked a little… creepy. And not in a good way. I mean, the concept was there, but the execution looked like a science experiment gone wrong. I told her I’d figure out a better way.
I spent the next two days in my kitchen, surrounded by marshmallows and butter, trying to get the texture right. The first batch was too sticky. The second batch crumbled when I tried to shape it. By the third attempt, I had a bowl of perfectly formed, smooth, white balls that actually looked like they belonged on a dessert table. I added the chocolate chip “pupils” and the red gel “veins,” and I knew I had cracked it. (I sent Jenna a picture with the caption “Game over.”) She called me, laughing, and said, “Those are actually scary-good.”
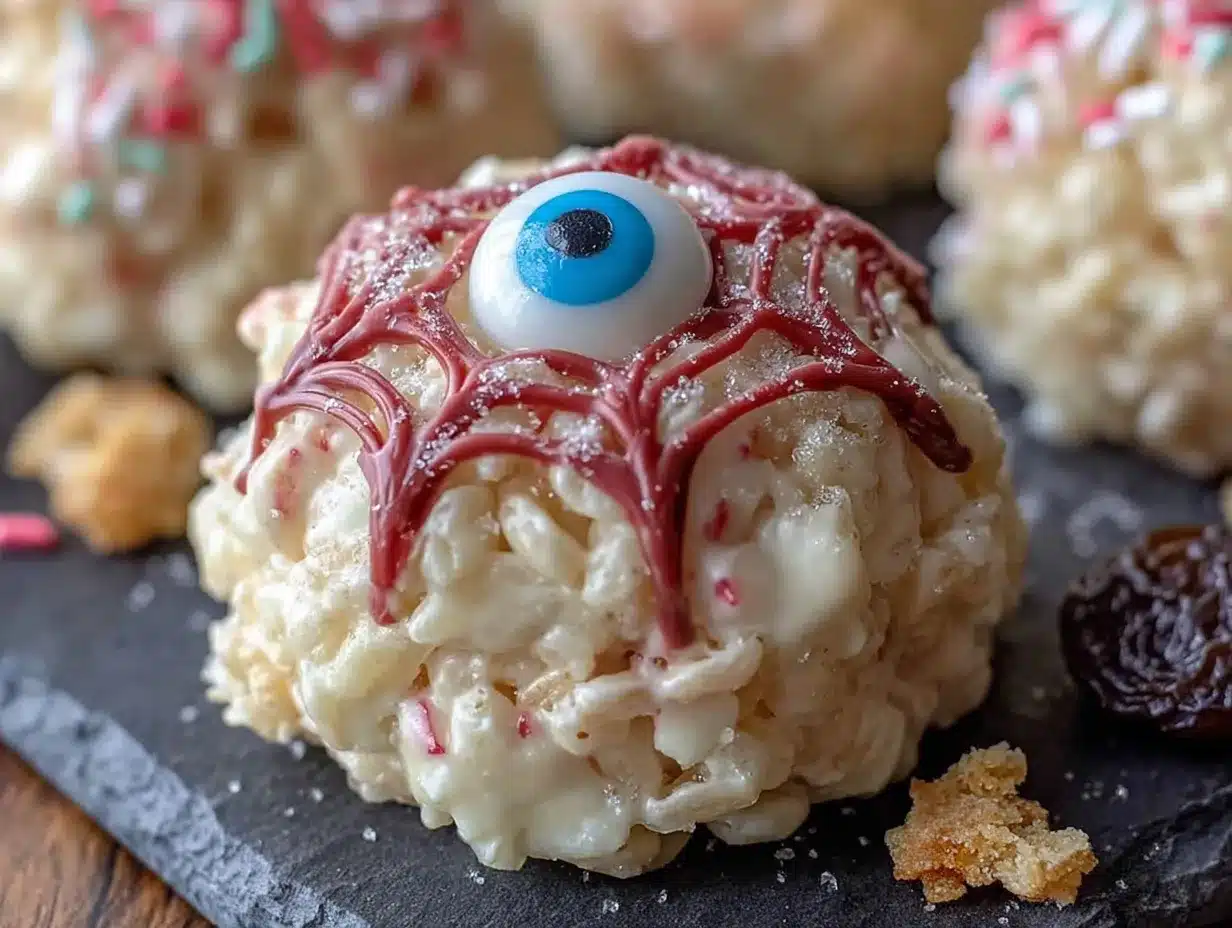
These Easy No-Bake Halloween Rice Krispie Eyeball Treats are the result of that stubborn weekend. They are not just another marshmallow treat. They are dense, chewy, and hold their shape perfectly. The chocolate chips stay put, and the red gel veins look like something out of a monster movie, but in a fun, edible way. They are the kind of treat that makes people do a double-take before they shove the whole thing in their mouth. And honestly, that is the highest compliment a Halloween snack can get.
Why You’ll Love This Recipe
I have tested this recipe more times than I care to admit, and I have learned exactly what makes these eyeballs work. They are not just a fun idea; they are a reliable, crowd-pleasing treat that anyone can pull off.
- No-Bake & Quick: From start to finish, you are looking at about 20 minutes of active time. No oven needed, which is a lifesaver when you are juggling a million other Halloween prep tasks.
- Simple Ingredients: You probably already have butter, marshmallows, and Rice Krispies in your pantry. The “scary” stuff—candy melts and gel food coloring—is easy to find at any grocery store or craft store.
- Perfect for Halloween Parties: These are the star of any spooky spread. They work for classroom parties, office potlucks, or just a fun night in with the kids.
- Kid-Approved & Adult-Loved: There is something about the combination of crispy, chewy, and sweet that appeals to everyone. Plus, the “gross” factor is just plain fun.
- Unbelievably Delicious: The texture is spot-on. Not too hard, not too soft. The chocolate chip adds a little bite, and the candy coating gives it a smooth finish.
This isn’t your average Rice Krispie treat. The trick is in the ratio—using a bit more marshmallow than usual gives you a denser, chewier ball that holds its shape without being rock hard. It is the kind of recipe that makes you look like a Halloween hero with zero effort. I have brought these to two different parties now, and they disappear faster than the candy corn.
What Ingredients You Will Need
This recipe uses simple ingredients that come together to create something genuinely spooky and delicious. Here is everything you need to get started.
For the Eyeball Base
- 6 cups Rice Krispies cereal – The classic, crispy base. I have tried generic brands, and they work fine, but the name-brand cereal holds its crunch a little longer.
- 10 oz mini marshmallows – One standard bag. Do not use jumbo marshmallows; the mini ones melt faster and more evenly.
- 4 tbsp unsalted butter – Salted butter will work too, just reduce any added salt. I use unsalted so I can control the flavor.
- 1 tsp vanilla extract – Pure vanilla is best, but imitation works in a pinch. It adds a subtle warmth that balances the sweetness.
- Pinch of salt – This is non-negotiable. It keeps the treats from tasting cloyingly sweet.
For the Decoration
- 12 oz white candy melts (or white chocolate chips) – I prefer Wilton candy melts because they melt smoothly and harden with a nice, matte finish. White chocolate chips work, but they are a bit softer and can be trickier to dip.
- 1/2 cup semi-sweet chocolate chips – For the pupils. You can also use dark chocolate chips or even mini M&Ms for a pop of color.
- Red gel food coloring – The kind that comes in a squeeze tube, not the liquid drops. The gel is thicker and gives you more control over the “veins.”
- 1 tbsp coconut oil or shortening – This is optional but helps thin out the candy melts for a smoother dip.
I have found that the quality of the candy melts really matters here. Cheap ones can seize up or leave a chalky taste. Stick with a brand you trust. And for the red gel, get a brand like Wilton or Americolor—they have the best consistency for drawing thin lines.
Equipment Needed
- Large microwave-safe bowl – For melting the butter and marshmallows.
- Large mixing bowl – For combining the cereal with the marshmallow mixture.
- Rubber spatula – A silicone one is best for scraping the sides and folding the cereal without crushing it.
- Cookie scoop (1.5 tbsp size) – This is my secret weapon for uniform eyeballs. A melon baller works too.
- Parchment paper or silicone baking mat – For the dipped eyeballs to set on.
- Small microwave-safe bowls – For melting the candy melts and chocolate chips.
- Toothpicks or a small piping tip – For drawing the red veins. A toothpick is actually easier to control than a piping bag.
- Baking sheet – To hold the finished eyeballs while they set.
I have made these with just a bowl and a spoon before, and it works, but the cookie scoop is a game-changer. It makes the balls uniform, which helps them set evenly. If you don’t have one, just roll them with slightly damp hands to prevent sticking.
Preparation Method
- Melt the butter and marshmallows. In a large microwave-safe bowl, combine the butter and mini marshmallows. Microwave in 30-second bursts, stirring after each, until completely smooth and melted. This usually takes about 90 seconds total. Do not overheat, or the mixture will become tough.
- Add the vanilla and salt. Stir in the vanilla extract and a pinch of salt until fully incorporated. The mixture will look glossy and smell amazing.
- Fold in the cereal. Pour the Rice Krispies into the marshmallow mixture. Use a rubber spatula to fold gently until every piece of cereal is coated. Be careful not to crush the cereal—you want those crispy bits intact.
- Let it cool slightly. Let the mixture sit in the bowl for 3-4 minutes. It needs to be cool enough to handle but still warm enough to shape. If it gets too cold, it will become stiff and hard to work with.
- Shape the eyeballs. Using a cookie scoop or your hands (lightly greased with butter or cooking spray), scoop out portions of the mixture and roll them into smooth balls. Place them on a parchment-lined baking sheet. You should get about 20-24 eyeballs. Let them cool completely at room temperature for about 15 minutes.
- Melt the candy coating. In a small microwave-safe bowl, melt the white candy melts with the coconut oil (if using) in 20-second bursts, stirring until smooth. The mixture should be thin enough to coat the back of a spoon.
- Dip the eyeballs. Using a fork or a dipping tool, carefully dip each Rice Krispie ball into the melted candy coating, turning to coat completely. Let the excess drip off, then place it back on the parchment paper. Work quickly, as the coating sets fast.
- Add the pupils. Immediately after dipping, press a semi-sweet chocolate chip into the center of each eyeball, pointed side in. The chocolate chip should stick to the wet coating. Let the coating harden completely, about 10-15 minutes.
- Draw the veins. Once the coating is set, use a toothpick or a small piping tip to draw thin, jagged red lines from the chocolate chip outward. Do not overthink it—scary veins are supposed to look chaotic. A few squiggly lines are perfect.
- Let everything set. Allow the red gel to dry for about 10 minutes. The eyeballs are now ready to serve or store.
One thing I learned the hard way: do not skip the cooling step before dipping. If the balls are still warm, the candy coating will slide right off. You want them to be completely cool and firm.
Cooking Tips & Techniques
I have made a lot of mistakes with these eyeballs so you do not have to. Here are the most important things I have learned.
- Do not overwork the mixture. When you are folding in the cereal, stop as soon as everything is combined. Over-mixing will crush the cereal and make the treats dense and hard.
- Keep your hands greased. If you are rolling the balls by hand, lightly coat your palms with butter or cooking spray. This prevents the sticky marshmallow mixture from clinging to you and ruining the shape.
- Work in batches. Do not try to dip all the eyeballs at once. Melt the candy coating in small batches so it stays warm and fluid. If it starts to thicken, pop it back in the microwave for 10 seconds.
- Use a toothpick for the veins. I tried using a piping bag for the red gel, and it was a mess. A toothpick gives you much more control and creates thinner, more realistic-looking veins.
- Let the coating set fully. Do not rush this step. If you try to move the eyeballs before the coating is hard, you will smudge the chocolate chips and ruin the design.
One time, I forgot to add the vanilla extract. The treats tasted flat and one-dimensional. That little teaspoon makes a huge difference, so do not skip it. Also, if your candy coating seems too thick, add a tiny bit more coconut oil. A thin coating is easier to work with and looks more professional.
Variations & Adaptations
These eyeballs are super flexible. Here are a few ways to customize them for different tastes or occasions.
- Peanut Butter Eyeballs: Add 1/4 cup of creamy peanut butter to the marshmallow mixture before folding in the cereal. It adds a rich, savory note that pairs beautifully with the sweet coating.
- Chocolate Eyeballs: Use chocolate candy melts instead of white for a darker, more sinister look. The red veins will pop even more against a dark background.
- Gluten-Free Version: This recipe is naturally gluten-free if you use certified gluten-free Rice Krispies. The rest of the ingredients are safe. I have made these for a friend with celiac disease, and they were a huge hit.
- Colorful Pupils: Instead of chocolate chips, use mini M&Ms in green, blue, or orange for a more cartoonish, fun look. This is great for younger kids who might find the chocolate chips too “real.”
- Spicy Kick: Add a pinch of cayenne pepper or chili powder to the marshmallow mixture. The heat sneaks up on you and makes the treat surprisingly addictive.
I once tried a version with crushed freeze-dried strawberries mixed into the candy coating. It gave the eyeballs a pink, fleshy look that was honestly a little too realistic. My kids loved it, but I stuck with the classic white. Sometimes simple is best.
Serving & Storage Suggestions
These eyeballs are best served at room temperature. The coating is firm, the chocolate chip is snappy, and the Rice Krispies retain their crunch. I like to arrange them on a black or orange platter for maximum Halloween effect. You can also stick them on lollipop sticks for a more portable treat.
They pair perfectly with other spooky snacks like crispy chicken wing bites for a savory-sweet Halloween spread. For a drink, try them with a glass of cold milk or a warm mug of apple cider.
To store, place the eyeballs in an airtight container at room temperature. They will stay fresh for up to 5 days. Do not refrigerate them, as the moisture in the fridge can make the Rice Krispies soggy. If you need to make them ahead of time, you can freeze the undipped balls for up to 2 months. Just wrap them tightly in plastic wrap and then foil. When you are ready to serve, thaw them at room temperature, then dip and decorate.
The flavors actually develop a bit overnight. The marshmallow and vanilla meld together, and the candy coating firms up perfectly. I often make these a day before a party, and they are always better the next day.
Nutritional Information & Benefits
Let’s be real: these are a treat, not a health food. But here is the estimated breakdown per eyeball (based on 24 servings).
- Calories: 145
- Fat: 6g
- Carbohydrates: 22g
- Sugar: 14g
- Protein: 1g
While they are not packed with nutrients, they do offer a small dose of iron from the fortified Rice Krispies. The butter and marshmallows provide quick energy, which is perfect for a sugar rush before trick-or-treating. If you are looking for a slightly lighter option, you can use a sugar-free marshmallow alternative, but the texture will be a bit different.
These are not suitable for anyone with a dairy allergy (butter, candy melts) or a gluten sensitivity (unless you use certified gluten-free cereal). Always check the labels on your candy melts and chocolate chips to ensure they are free of cross-contaminants.
Conclusion
These Easy No-Bake Halloween Rice Krispie Eyeball Treats are the perfect combination of fun, spooky, and delicious. They take almost no time to put together, they use ingredients you probably already have, and they are guaranteed to get a reaction from everyone who sees them. Whether you are hosting a Halloween party, sending treats to school, or just looking for a fun weekend project with the kids, these eyeballs deliver.
I love that they are not just a one-trick pony. The flavor is genuinely good—crispy, chewy, sweet, with a little bit of salt to balance it out. And the decorating part is where the real fun begins. You can make them as scary or as silly as you want.
So grab a bag of marshmallows and get rolling. I promise you will have a blast. And when you make them, drop a comment below and let me know how they turned out. Did you make them extra creepy? Did your kids love them? I want to hear all about it. Share this recipe with your friends, and let’s make this Halloween the tastiest one yet!
Frequently Asked Questions
Can I use a different cereal instead of Rice Krispies?
Yes, you can use any crispy rice cereal or even a puffed corn cereal. Just keep in mind that different cereals have different densities, so the texture might change slightly. I have used a generic brand before, and it worked fine.
How do I keep the chocolate chips from falling off?
Press the chocolate chip into the candy coating while it is still wet. The coating acts as glue. If you wait too long, the coating will harden, and the chip will not stick. Work quickly after dipping.
Can I make these vegan?
Yes, with a few swaps. Use vegan butter and vegan marshmallows (Dandies is a good brand). For the coating, use a dairy-free white chocolate or candy melts. The rest of the ingredients are naturally vegan.
My candy coating is lumpy. What did I do wrong?
This usually happens if the coating gets too hot or if water gets into the bowl. Always use a dry bowl and melt in short bursts. If it seizes, you can try adding a tiny bit of coconut oil to smooth it out.
How far in advance can I make these?
You can make the undipped balls up to 2 months ahead and freeze them. The fully decorated eyeballs are best within 5 days. I do not recommend refrigerating them, as the moisture can make them soggy.
Pin This Recipe!
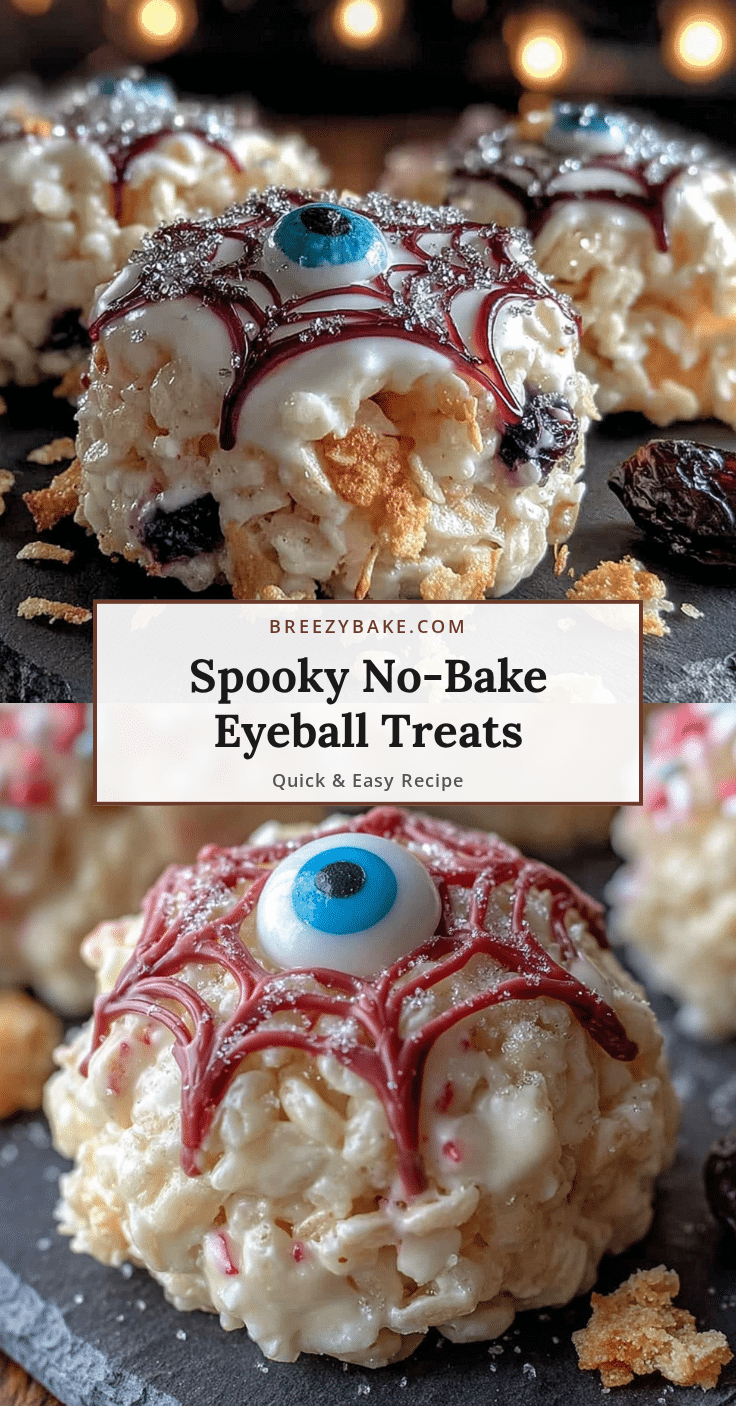
Best No-Bake Halloween Rice Krispie Eyeball Treats Recipe

These Easy No-Bake Halloween Rice Krispie Eyeball Treats are dense, chewy, and hold their shape perfectly. They are the perfect combination of fun, spooky, and delicious, guaranteed to get a reaction from everyone who sees them.
- Prep Time: 20 minutes
- Cook Time: 0 minutes
- Total Time: 20 minutes
- Yield: 20-24 servings 1x
- Category: Dessert
- Cuisine: American
Ingredients
- 6 cups Rice Krispies cereal
- 10 oz mini marshmallows
- 4 tbsp unsalted butter
- 1 tsp vanilla extract
- Pinch of salt
- 12 oz white candy melts (or white chocolate chips)
- 1/2 cup semi-sweet chocolate chips
- Red gel food coloring
- 1 tbsp coconut oil or shortening (optional)
Instructions
- Melt the butter and marshmallows. In a large microwave-safe bowl, combine the butter and mini marshmallows. Microwave in 30-second bursts, stirring after each, until completely smooth and melted. This usually takes about 90 seconds total. Do not overheat, or the mixture will become tough.
- Add the vanilla and salt. Stir in the vanilla extract and a pinch of salt until fully incorporated. The mixture will look glossy and smell amazing.
- Fold in the cereal. Pour the Rice Krispies into the marshmallow mixture. Use a rubber spatula to fold gently until every piece of cereal is coated. Be careful not to crush the cereal—you want those crispy bits intact.
- Let it cool slightly. Let the mixture sit in the bowl for 3-4 minutes. It needs to be cool enough to handle but still warm enough to shape. If it gets too cold, it will become stiff and hard to work with.
- Shape the eyeballs. Using a cookie scoop or your hands (lightly greased with butter or cooking spray), scoop out portions of the mixture and roll them into smooth balls. Place them on a parchment-lined baking sheet. You should get about 20-24 eyeballs. Let them cool completely at room temperature for about 15 minutes.
- Melt the candy coating. In a small microwave-safe bowl, melt the white candy melts with the coconut oil (if using) in 20-second bursts, stirring until smooth. The mixture should be thin enough to coat the back of a spoon.
- Dip the eyeballs. Using a fork or a dipping tool, carefully dip each Rice Krispie ball into the melted candy coating, turning to coat completely. Let the excess drip off, then place it back on the parchment paper. Work quickly, as the coating sets fast.
- Add the pupils. Immediately after dipping, press a semi-sweet chocolate chip into the center of each eyeball, pointed side in. The chocolate chip should stick to the wet coating. Let the coating harden completely, about 10-15 minutes.
- Draw the veins. Once the coating is set, use a toothpick or a small piping tip to draw thin, jagged red lines from the chocolate chip outward. Do not overthink it—scary veins are supposed to look chaotic. A few squiggly lines are perfect.
- Let everything set. Allow the red gel to dry for about 10 minutes. The eyeballs are now ready to serve or store.
Notes
Do not skip the cooling step before dipping. If the balls are still warm, the candy coating will slide right off. You want them to be completely cool and firm. Also, do not overwork the mixture when folding in the cereal; stop as soon as everything is combined.
Nutrition
- Serving Size: 1 eyeball
- Calories: 145
- Sugar: 14
- Fat: 6
- Carbohydrates: 22
- Protein: 1
Keywords: Halloween treats, Rice Krispie treats, no-bake, eyeball treats, spooky snacks, easy Halloween recipe


