Crushed a whole sleeve of gingersnaps into dust with the bottom of a coffee mug—not my finest moment, but desperate times—when I realized I’d forgotten to buy a pre-made pie crust for the mini pumpkin pies I’d promised to bring to a friend’s fall gathering. The kitchen smelled like nutmeg and regret, and I was already late. But there, sitting half-empty in the back of my pantry, was that bag of gingersnap cookies I’d bought on a whim for snacking. And honestly? That happy accident turned into the best thing I’ve made all season.
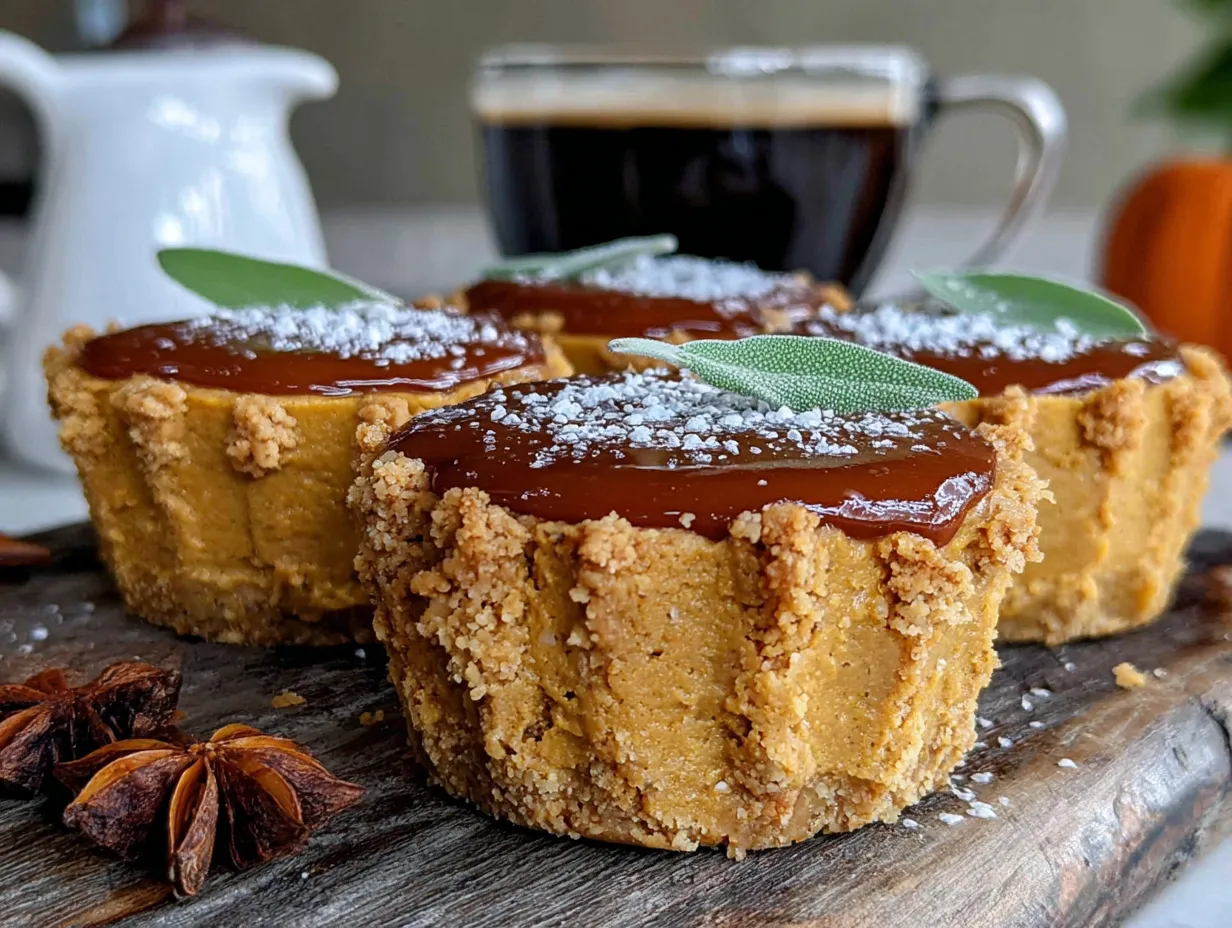
These cozy mini pumpkin pies with gingersnap crust are what happen when necessity meets a little bit of luck. The crust is crunchy, spicy, and buttery—way better than any standard pastry shell—and the filling is that classic, silky pumpkin custard we all crave when the leaves start turning. I’ve made these for Thanksgiving, for random Tuesday cravings, and even for a cozy dessert board night with friends. They disappear fast.
There’s something about a mini pie that feels special, you know? It’s personal-sized, which means no fighting over the last slice. And that gingersnap crust—crunchy, molasses-y, with just a hint of heat—it’s the kind of thing that makes you wonder why you ever bothered with regular pie dough. I’ve made these so many times now that I don’t even measure the crust ingredients anymore. It’s muscle memory. And it’s the recipe I turn to when I want to impress without the stress.
Why You’ll Love These Mini Pumpkin Pies
Let me tell you why these little pies have earned a permanent spot in my fall baking rotation.
- Quick & Easy : These come together in about 35 minutes from start to finish. No chilling dough, no rolling pins, no fuss.
- Simple Ingredients : You likely have everything in your pantry right now—canned pumpkin, spices, eggs, and those gingersnaps you forgot about.
- Perfect for Gatherings : Whether it’s Thanksgiving, Friendsgiving, or just a cozy night in, individual pies are always a hit.
- Crowd-Pleaser : I’ve served these to kids, picky eaters, and pumpkin skeptics. Every single one of them went back for seconds.
- Unbelievably Delicious : That spicy, crunchy crust against the smooth, creamy pumpkin filling? It’s a texture combo that just works.
What makes these different from every other mini pumpkin pie recipe out there is the crust. I’ve tested this with graham crackers, shortbread, and even crushed pretzels. Nothing beats the gingersnap. The molasses and ginger in the cookies complement the pumpkin spice in a way that feels intentional, not accidental. It’s my best version, and I’m not gatekeeping it.
This recipe is the kind that makes you close your eyes after the first bite. It’s comfort food reimagined—faster, easier, but with the same soul-soothing satisfaction. Perfect for impressing guests without breaking a sweat.
What Ingredients You Will Need
This recipe uses simple, wholesome ingredients to deliver bold flavor and satisfying texture without the fuss. Most of these are pantry staples, which is exactly what you want when a pie craving hits.
For the Gingersnap Crust
- Gingersnap cookies – 1 ½ cups finely crushed (about 24 cookies). I prefer Nabisco or Anna’s Ginger Thins for consistent texture. You want a fine, sandy crumb—no chunks.
- Unsalted butter – 5 tablespoons, melted. Salted butter works too, just skip the added salt in the recipe.
- Granulated sugar – 2 tablespoons. Just enough to balance the spice.
- Pinch of salt – Only if using unsalted butter.
For the Pumpkin Filling
- Canned pumpkin puree – 1 cup (not pumpkin pie filling). Libby’s is my go-to for consistent results.
- Sweetened condensed milk – ½ cup. This gives the filling that rich, creamy sweetness without needing extra sugar.
- Large egg – 1, at room temperature. Cold egg can make the filling lumpy.
- Pumpkin pie spice – 1 teaspoon. Or make your own: ½ tsp cinnamon, ¼ tsp ginger, ⅛ tsp nutmeg, ⅛ tsp cloves.
- Vanilla extract – ½ teaspoon. Pure, not imitation, if you can swing it.
- Pinch of salt – Just a tiny pinch to brighten everything.
For Topping (Optional but Recommended)
- Whipped cream – Homemade or store-bought. I won’t judge.
- Extra crushed gingersnaps – For garnish and crunch.
- Caramel drizzle – Because why not?
Substitution note: For a dairy-free version, use melted coconut oil in the crust and full-fat coconut milk in place of sweetened condensed milk (add 2 tablespoons maple syrup). The texture will be slightly different, but still delicious.
Equipment Needed
You don’t need a fancy bakery setup for these, which is part of the charm.
- Muffin tin – Standard 12-cup. I’ve used both non-stick and regular; just grease whichever you use.
- Food processor or zip-top bag + rolling pin – For crushing the gingersnaps. I’ve done it both ways. The food processor is faster, but the bag method is oddly satisfying.
- Mixing bowls – One medium, one small.
- Whisk – For the filling. A fork works in a pinch.
- Measuring cups and spoons – For accuracy.
- Cooling rack – So the bottoms don’t get soggy.
Budget-friendly tip: If you don’t own a food processor, just place the cookies in a sturdy zip-top bag and go to town with a rolling pin. It’s a great arm workout and costs zero dollars.
Preparation Method
Preheat your oven to 350°F (175°C). Grease your muffin tin well—these crusts like to stick if you’re not generous with the spray or butter.
- Make the crust. Crush your gingersnaps into a fine powder. You should have about 1 ½ cups. In a bowl, mix the crumbs with the melted butter, sugar, and salt until it looks like wet sand. It should hold together when you squeeze it.
- Press the crust. Drop about 1 ½ tablespoons of the crust mixture into each muffin cup. Press it firmly into the bottom and a little up the sides. I use the bottom of a shot glass for this—it’s the perfect size. You want the crust to be even and compact.
- Pre-bake the crust. Bake the crusts for 5 minutes. This sets them and prevents sogginess later. Let them cool slightly while you make the filling.
- Make the filling. In a medium bowl, whisk together the pumpkin puree, sweetened condensed milk, egg, pumpkin pie spice, vanilla, and salt. Whisk until completely smooth and uniform. It should be a deep orange color and smell like autumn in a bowl.
- Fill the cups. Spoon the filling into each crust, filling almost to the top. The pies will puff slightly but won’t overflow if you leave a tiny bit of room.
- Bake. Bake for 15-18 minutes. The edges should be set, and the centers should jiggle just slightly when you shake the pan. A toothpick inserted near the center should come out clean.
- Cool completely. Let them cool in the pan for 10 minutes, then transfer to a wire rack. They’ll continue to set as they cool. Don’t rush this step—warm pies are good, but fully cooled pies are perfect.
- Chill (optional but best). Pop them in the fridge for at least an hour before serving. Cold pies slice cleaner and the flavors meld together beautifully.
Sensory cue: When the filling is ready, it should look like a silky, glossy custard—not watery, not too thick. The crust should smell deeply of ginger and molasses, and the baked pies should have a faintly set surface with a slight wobble.
Cooking Tips & Techniques
I’ve made these mini pies at least a dozen times, and I’ve learned a few things the hard way so you don’t have to.
Don’t skip the pre-bake. The first time I made these, I thought, “Eh, it’ll be fine.” It was not fine. The crust turned into a sad, soggy mess. Pre-baking for just 5 minutes makes a world of difference. It seals the crust and gives it that satisfying crunch.
Press the crust firmly. If your crust is too loose, it will crumble when you try to eat it. Use a tamper, a shot glass, or even your thumb to really pack it down. You want it to hold together like a sandcastle.
Don’t overbake. Pumpkin pies continue to set as they cool. If you wait until the center is completely firm in the oven, you’ll end up with dry, cracked pies. Pull them when the edges are set and the center still has a gentle jiggle.
Use room temperature ingredients. Cold egg straight from the fridge can seize up the filling and create lumps. Let everything sit out for 15 minutes before you start. Your filling will be smoother, I promise.
Multitasking strategy: Crush your cookies while the butter melts. Make the filling while the crusts pre-bake. You can have these done in under 40 minutes flat if you stay ahead of the oven.
My biggest failure: I once forgot the egg entirely. The filling never set. It was basically pumpkin soup in a crust. Delicious soup, but not pie. Learn from my mistakes—double-check your ingredients before you pour.
Variations & Adaptations
One of the best things about this recipe is how flexible it is. Here are some ways I’ve tweaked it over the years.
- Gluten-free version: Use gluten-free gingersnaps. Most major brands make them, and the texture is nearly identical. I’ve tested this with Schär brand, and it works beautifully.
- Vegan adaptation: Use melted coconut oil in the crust instead of butter. For the filling, substitute the egg with ¼ cup unsweetened applesauce and use full-fat coconut cream instead of sweetened condensed milk (add 2 tablespoons maple syrup for sweetness). The texture is slightly less creamy but still delicious.
- Spice it up: Add a pinch of cayenne pepper to the crust for a sweet-heat combo that’s unexpectedly amazing. I did this once for a Friendsgiving, and people couldn’t stop talking about it.
- Chocolate twist: Swap ¼ cup of the gingersnap crumbs for crushed chocolate wafer cookies. The chocolate-ginger combo is ridiculously good.
- Mini pie variation: If you want to make one full-size pie instead of minis, press the crust into a 9-inch pie plate, fill, and bake for 35-40 minutes at 350°F. Adjust the timing based on your oven.
I once made a batch with a pecan praline topping—just some chopped pecans, brown sugar, and butter sprinkled on top before the last 5 minutes of baking. It was over-the-top in the best way. No regrets.
Serving & Storage Suggestions
These pies are best served cold or at room temperature. I like to pull them out of the fridge about 15 minutes before serving so they’re not ice-cold, but still firm.
Presentation: Arrange them on a platter with a dollop of whipped cream on each, a sprinkle of extra crushed gingersnaps, and a drizzle of caramel if you’re feeling fancy. They look adorable lined up on a dessert board next to a few other treats.
What to serve with them: A hot cup of coffee or spiced cider is perfect. For a full dessert spread, pair them with something chocolatey, like chocolate-covered strawberry gooey bars for contrast.
Storage: Store in an airtight container in the refrigerator for up to 5 days. The crust will soften slightly over time, but they’re still delicious.
Freezer instructions: These freeze beautifully. Place the cooled pies on a baking sheet and freeze until solid (about 2 hours). Then transfer to a freezer-safe container with parchment between layers. They’ll keep for up to 3 months. Thaw in the fridge overnight before serving.
Reheating: If you prefer warm pies, pop them in a 300°F oven for 5-7 minutes. The microwave works too, but the crust gets softer. I actually prefer them straight from the fridge—the filling is denser and the crust stays snappy.
Flavor development note: These pies actually taste better on day two. The spices mellow and meld together, and the crust absorbs just a hint of moisture from the filling. If you can wait, don’t serve them the same day.
Nutritional Information & Benefits
Here’s the estimated breakdown per mini pie (without toppings):
| Nutrient | Amount |
|---|---|
| Calories | ~185 |
| Total Fat | 9g |
| Saturated Fat | 5g |
| Carbohydrates | 24g |
| Sugar | 16g |
| Protein | 3g |
| Fiber | 1g |
Health highlights: Pumpkin is packed with vitamin A and fiber, which is great for eye health and digestion. Gingersnaps contain actual ginger, which has anti-inflammatory properties—so technically, these are wellness pies. (I’m only half joking.)
Dietary considerations: These are vegetarian. For gluten-free or vegan options, see the variations section above. They do contain dairy and eggs in the standard version.
Potential allergens: Wheat (in the cookies), dairy (butter, condensed milk), and eggs. Always check your cookie labels if you’re serving someone with allergies.
My perspective: I don’t believe in “guilt-free” desserts. But I do believe in eating things that make you feel good. These pies are rich enough to satisfy a sweet tooth without sending you into a sugar coma. They’re a treat, and they should be enjoyed as one.
Conclusion
These cozy mini pumpkin pies with gingersnap crust are the kind of recipe that makes you look like you spent hours in the kitchen when you really didn’t. They’re forgiving, adaptable, and so ridiculously good that you’ll find excuses to make them all year round—not just during pumpkin season.
I love that this recipe came from a mistake. It reminds me that some of the best things in life happen when you’re just trying to make things work with what you’ve got. That crushed-gingersnap moment turned into something I now genuinely look forward to making every fall. And honestly? Even my non-baking friends have made these and texted me photos. They’re that easy.
Play with the spices. Try the vegan version. Top them with way too much whipped cream. These pies are yours now. I’d love to hear how they turn out—drop a comment below and tell me your favorite variation. And if you serve them at a gathering, tag me in your photos. Nothing makes me happier than seeing these little pies out in the wild.
Happy baking, friends. Stay cozy.
Frequently Asked Questions
Can I use fresh pumpkin instead of canned?
Yes, but you’ll need to roast and puree it first, then strain out the excess moisture using a cheesecloth or fine-mesh sieve. Canned pumpkin is more consistent and saves time, which is why I recommend it.
Why did my crust fall apart?
Your crust likely wasn’t pressed firmly enough into the muffin tin, or you may have skipped the pre-bake step. Make sure you pack the crumbs down tight and bake for the full 5 minutes before adding the filling.
Can I make these ahead of time?
Absolutely. In fact, they taste better the next day. Store them in the fridge in an airtight container for up to 5 days, or freeze for up to 3 months.
Can I use a different cookie for the crust?
You can! Graham crackers, vanilla wafers, or shortbread all work. Just note that the flavor will change. The gingersnap brings a spicy warmth that pairs perfectly with pumpkin, but feel free to experiment.
How do I know when the pies are done baking?
The edges should be set and slightly puffed, while the centers still have a gentle jiggle when you shake the pan. A toothpick inserted near the center should come out clean. Don’t wait for the centers to be completely firm—they’ll continue to set as they cool.
Pin This Recipe!
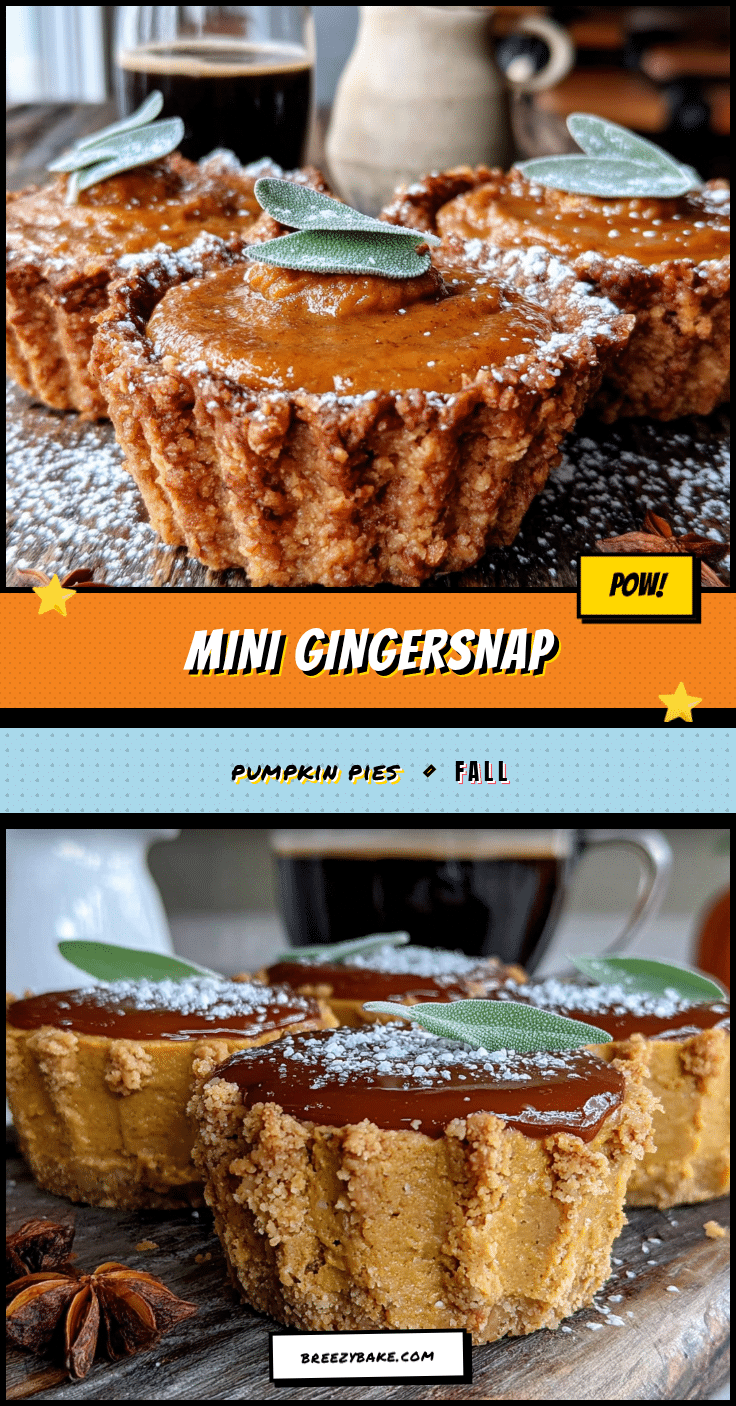
Cozy Mini Pumpkin Pies with Easy Gingersnap Crust
These mini pumpkin pies feature a crunchy, spicy gingersnap crust and a silky pumpkin custard filling. They’re quick, easy, and perfect for fall gatherings.
- Prep Time: 15 minutes
- Cook Time: 20 minutes
- Total Time: 35 minutes
- Yield: 12 mini pies 1x
- Category: Dessert
- Cuisine: American
Ingredients
- 1 ½ cups finely crushed gingersnap cookies (about 24 cookies)
- 5 tablespoons unsalted butter, melted
- 2 tablespoons granulated sugar
- Pinch of salt (if using unsalted butter)
- 1 cup canned pumpkin puree (not pumpkin pie filling)
- ½ cup sweetened condensed milk
- 1 large egg, at room temperature
- 1 teaspoon pumpkin pie spice
- ½ teaspoon vanilla extract
- Pinch of salt
- Whipped cream (for topping, optional)
- Extra crushed gingersnaps (for garnish, optional)
- Caramel drizzle (for topping, optional)
Instructions
- Preheat oven to 350°F (175°C). Grease a 12-cup muffin tin well.
- Make the crust: Crush gingersnaps into a fine powder (about 1 ½ cups). In a bowl, mix crumbs with melted butter, sugar, and salt until it looks like wet sand.
- Press the crust: Drop about 1 ½ tablespoons of crust mixture into each muffin cup. Press firmly into the bottom and up the sides using the bottom of a shot glass or your thumb.
- Pre-bake the crust: Bake for 5 minutes. Let cool slightly while making the filling.
- Make the filling: In a medium bowl, whisk together pumpkin puree, sweetened condensed milk, egg, pumpkin pie spice, vanilla, and salt until smooth.
- Fill the cups: Spoon filling into each crust, filling almost to the top.
- Bake: Bake for 15-18 minutes, until edges are set and centers jiggle slightly. A toothpick inserted near the center should come out clean.
- Cool completely: Cool in the pan for 10 minutes, then transfer to a wire rack.
- Chill (optional but best): Refrigerate for at least 1 hour before serving.
Notes
For a dairy-free version, use melted coconut oil in the crust and full-fat coconut milk with 2 tablespoons maple syrup instead of sweetened condensed milk. For a vegan version, substitute the egg with ¼ cup unsweetened applesauce and use coconut cream with maple syrup. These pies taste even better on day two.
Nutrition
- Serving Size: 1 mini pie
- Calories: 185
- Sugar: 16
- Fat: 9
- Saturated Fat: 5
- Carbohydrates: 24
- Fiber: 1
- Protein: 3
Keywords: mini pumpkin pies, gingersnap crust, fall dessert, Thanksgiving, easy pumpkin pie, individual pies


