My neighbor Karen wasn’t trying to impress anyone. I’d stopped by to return her hedge clippers—the ones I’d borrowed three weeks prior and felt increasingly guilty about—and a sweet, toasty smell hit me before I even got to her screen door. It was late October, and her kitchen counter was covered in little white blobs with the most ridiculous, lopsided chocolate chip eyes I’d ever seen. She was just making meringue cookies, she said, waving her hand like it was nothing. “For the kids’ school thing.” But honestly? Those ghost meringue cookies were the most charming, deliciously spooky things I’d seen all season. I stood there, clippers in hand, completely transfixed by a cookie that looked like it had been dressed by a toddler. Maybe you’ve been there—you walk into someone’s house for a totally mundane reason and stumble upon the recipe that’s going to haunt your kitchen for years. That was my moment. I asked for the recipe, and she shrugged and scribbled it on the back of an envelope. I still have that envelope, splattered with vanilla extract and pure Halloween magic.
These ghost meringue cookies have become my secret weapon for every Halloween party, potluck, and gathering I host. They are impossibly light—they practically dissolve on your tongue—and they look like a parade of adorable little ghosts. The best part? They are deceptively simple to make. You get that big “Wow, you made these?” reaction from guests, and all you did was whip some egg whites and sugar. It’s the kind of recipe that makes you look like a kitchen wizard without any of the stress. Every year, I make a double batch for my annual Halloween bash, and they vanish before the punch bowl gets a second refill. People pick them up, smile, and then go quiet for a second because they’re genuinely surprised by how good they are. It’s a crowd-pleaser that steals the show without trying too hard—just like Karen.
Why You’ll Love This Recipe
I’ve tested this recipe more times than I care to admit. I’ve made them in humid weather, in dry weather, with cheap vanilla and fancy vanilla, and with eggs from my friend’s chickens. After all that trial and error, I can confidently say this is the best version. Here’s why you’ll love it, too:
- Unbelievably Easy: You only need four ingredients. Four. And you probably already have three of them in your pantry right now. No fancy extracts, no specialty flours, no trips to three different stores.
- Totally Impressive: These ghost meringue cookies look like you spent hours piping intricate designs. In reality, you just plop them onto a baking sheet and let the oven do the work. Guests will think you’re a pastry chef.
- Perfect for Halloween Hosting: They are the ideal make-ahead treat. You can bake them three days before your party and store them in an airtight container. One less thing to worry about when you’re trying to get the dip ready and the punch mixed.
- Naturally Gluten-Free & Low-Fat: Meringues are naturally free of gluten and very low in fat. This makes them a great option for guests with dietary restrictions. Everyone can enjoy a spooky little ghost.
- Kid-Approved & Adult-Adored: Kids love the cute ghost shape, and adults love the light, airy texture and subtle sweetness. They disappear fast, I promise you.
What makes this recipe different from all the other meringue recipes out there? It’s the technique. I use a slow-bake method that keeps the cookies perfectly white—no browning—and gives them that signature crisp exterior with a slightly chewy, marshmallow-y center. I also add a tiny pinch of cream of tartar, which is the secret to stable, glossy peaks that don’t deflate. It’s a small step, but it makes a huge difference. This isn’t just another ghost cookie. It’s the ghost cookie that will make you close your eyes after the first bite.
What Ingredients You Will Need
This recipe relies on a few simple, pantry-friendly ingredients to create something truly magical. The key is using them correctly. Let’s break down each one so you understand exactly what role it plays in creating the perfect ghost meringue cookie.
- 4 large egg whites, at room temperature: This is the foundation of your meringue. Room temperature egg whites whip up to a much greater volume than cold ones, giving you a lighter, airier cookie. I recommend separating your eggs when they are cold (it’s easier to keep the yolk intact) and then letting the whites sit on the counter for about 30 minutes before you start whipping. If you’re in a rush, you can place the bowl of egg whites in a warm water bath for a few minutes. I’ve used both store-bought and farm-fresh eggs, and both work beautifully. Just make sure there is absolutely no trace of yolk in the whites—any fat will prevent them from whipping up properly.
- 1 cup (200g) granulated sugar: Standard white granulated sugar is what you want here. It dissolves into the egg whites to create a stable structure. Do not use powdered sugar, brown sugar, or any liquid sweetener—they will change the texture and stability of the meringue. I prefer to use a superfine sugar if I can find it, as it dissolves even faster. If you only have regular granulated sugar, you can blitz it in a food processor for 30 seconds to make it finer. It’s a small trick that makes a big difference.
- 1/2 teaspoon cream of tartar: This is my secret weapon. Cream of tartar is an acid that stabilizes the egg white foam, making it less likely to deflate or weep. It also helps the meringue maintain its bright white color. If you don’t have cream of tartar, you can substitute it with 1 teaspoon of lemon juice or white vinegar. I’ve done it before in a pinch, and it works, but cream of tartar gives the most reliable results.
- 1 teaspoon vanilla extract: Pure vanilla extract adds a warm, sweet flavor that complements the airy meringue perfectly. I recommend using pure vanilla extract, not imitation vanilla, for the best flavor. You can also experiment with other extracts—peppermint for a cool twist, or almond extract for a nutty note. For Halloween, I sometimes add a few drops of orange extract for a fun, citrusy ghost. Just be careful not to add too much liquid extract, as it can deflate the meringue.
- Mini chocolate chips or black decorating gel (for the faces): This is where the ghosts get their personality. I prefer mini chocolate chips because they are easy to place and stay put once the cookies are baked. You can also use black sanding sugar, black nonpareils, or a black food-safe marker to draw faces on the baked cookies. For a truly spooky look, I sometimes use a tiny dab of black gel icing to create different expressions—some ghosts look scared, some look mischievous. It adds a fun, personal touch.
Equipment Needed
You don’t need a professional pastry kitchen to make these ghost meringue cookies. Most of these tools are standard kitchen items. Here’s what you’ll need:
- Electric stand mixer or hand mixer: While you can whip meringue by hand with a whisk, it will take a very long time and your arm will get tired. An electric mixer is highly recommended. I use my trusty KitchenAid stand mixer with the whisk attachment, but a hand mixer works just as well. Just be prepared to hold it for a while.
- Large, clean mixing bowl: Glass, stainless steel, or ceramic all work fine. Avoid plastic bowls, as they can retain a thin film of grease that will ruin your meringue. Make sure your bowl is spotlessly clean and completely dry.
- Baking sheets: Line them with parchment paper or a silicone baking mat. Do not use wax paper or greased foil—the meringues will stick.
- Piping bag with a large round tip (or a zip-top bag): A piping bag gives you more control over the shape of your ghosts. I use a Wilton 1A tip. If you don’t have a piping bag, you can use a sturdy zip-top bag with a corner snipped off. It works in a pinch, but the ghosts won’t be quite as uniform.
- Rubber spatula: For folding in the vanilla and scraping down the bowl.
- Cooling rack: For cooling the cookies completely after baking.
Preparation Method
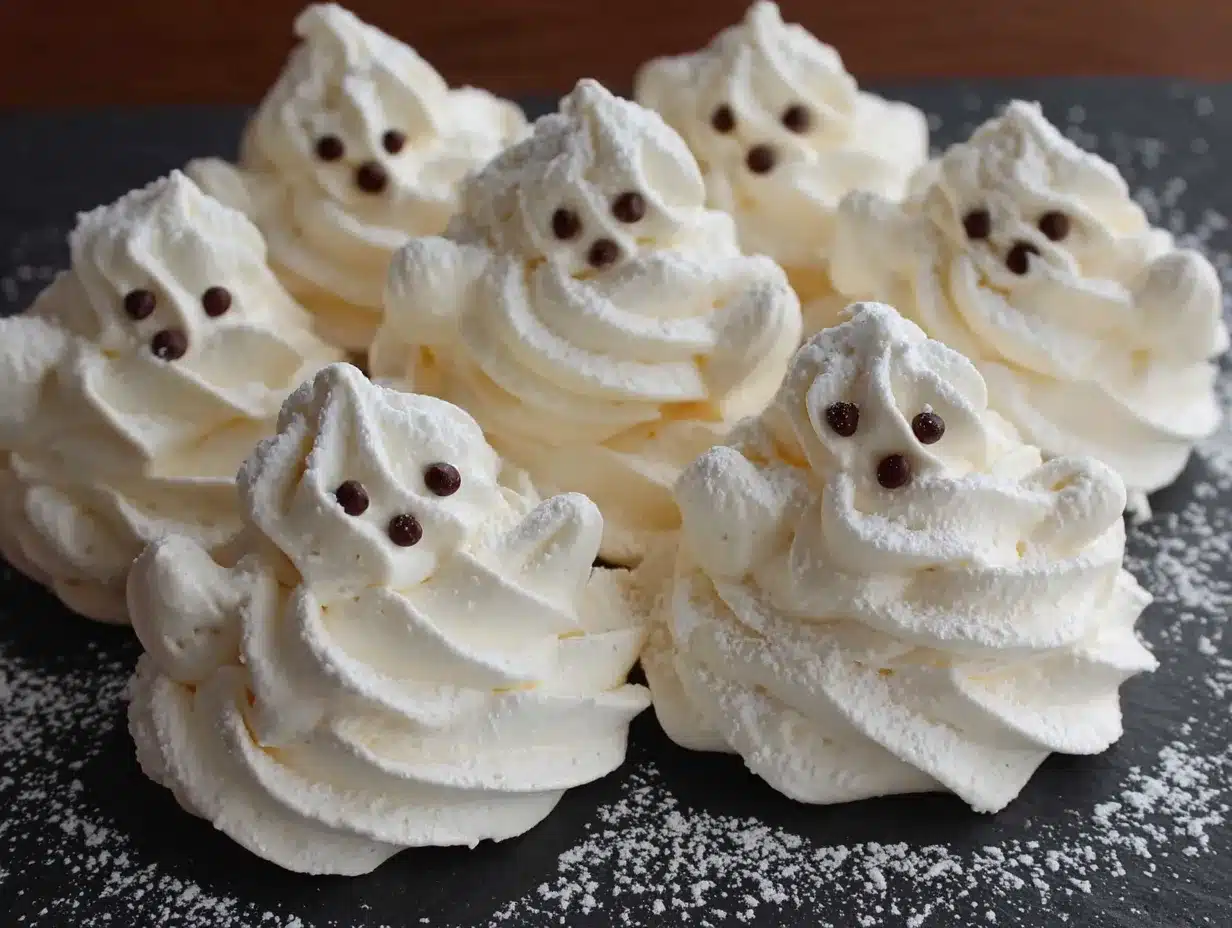
This is where the magic happens. Follow these steps carefully, and you’ll have a sheet pan full of adorable ghosts in no time.
- Preheat your oven and prepare your baking sheets. Preheat your oven to 200°F (93°C). Yes, that’s a very low temperature. We are going to dry the meringues out slowly, not bake them. Line two large baking sheets with parchment paper or silicone baking mats. Set them aside.
- Whip the egg whites and cream of tartar. Place your room-temperature egg whites and the cream of tartar in the bowl of your stand mixer (or a large mixing bowl if using a hand mixer). Begin whipping on medium-low speed. You’ll see the egg whites start to get frothy and bubbly, like a bubble bath. This takes about 1-2 minutes. The cream of tartar is already working its magic, creating a stable base.
- Gradually add the sugar. This is the most important step. With the mixer running on medium speed, start adding the sugar, one tablespoon at a time. I know it feels tedious, but adding the sugar slowly allows it to dissolve completely into the egg whites. If you dump it all in at once, you’ll end up with a gritty meringue. Take your time—about 2-3 minutes to add all the sugar.
- Whip to stiff, glossy peaks. Once all the sugar is added, increase the mixer speed to high. Whip for another 5-7 minutes. The mixture will transform from a liquid foam into a thick, glossy, billowy cloud. You know it’s ready when you lift the whisk attachment and the meringue forms a stiff peak that holds its shape without drooping. Another test: rub a little bit of the meringue between your fingers. If it feels smooth and not gritty, the sugar has dissolved. If it feels grainy, keep whipping for another minute or two.
- Add the vanilla extract. With the mixer on low speed, add the vanilla extract. Mix just until it’s combined—about 10 seconds. Do not overmix at this stage, or you can deflate all that beautiful air you just whipped in. If you want to color your ghosts, now is the time to add a drop of gel food coloring. For Halloween, a very pale orange or purple can be fun, but I prefer to keep them white for the classic ghost look.
- Pipe the ghosts. Transfer the meringue to your piping bag fitted with a large round tip. Hold the bag vertically about 1 inch above the prepared baking sheet. Squeeze out a generous amount of meringue to form a round base. Then, as you pull the bag straight up, release the pressure slightly to create a tall, tapered peak. This is the ghost’s head. For a more traditional ghost shape, you can also pipe a tall dollop and then use a wet finger to gently smooth the top into a rounded dome. Repeat, leaving about 1 inch of space between each ghost.
- Add the faces. Before the meringue starts to form a skin (which happens quickly), gently press two mini chocolate chips into each ghost for eyes. You can also add a third chip for a mouth, or leave it off for a classic, expressionless ghost. If you are using black decorating gel, wait until the cookies are baked and completely cooled to add the faces.
- Bake low and slow. Place the baking sheets in the preheated oven. Bake for 60-75 minutes. The meringues are done when they are firm to the touch and easily peel off the parchment paper. They should be dry on the outside but still slightly soft and marshmallow-y on the inside. They will not be browned at all—if they start to turn golden, your oven is too hot.
- Cool completely. Turn off the oven and leave the meringues inside with the door slightly ajar (propped open with a wooden spoon) for another 30-60 minutes. This helps them dry out completely and prevents them from cracking. After that, transfer them to a wire rack to cool completely. They will continue to crisp up as they cool.
Cooking Tips & Techniques
I’ve made a lot of mistakes with meringue over the years. Here are the lessons I learned the hard way so you don’t have to.
The Number One Mistake: Humidity. Meringue is hygroscopic, meaning it absorbs moisture from the air. Do not make these on a rainy or humid day. They will turn out sticky and chewy instead of light and crisp. I learned this the hard way when I tried to make them for a Halloween party during an unexpected thunderstorm. They never dried out properly. Pick a dry day for best results.
The Bowl Must Be Perfectly Clean. Any trace of fat—from butter, oil, or even egg yolk—will prevent your egg whites from whipping up. I wipe my bowl and whisk attachment with a little lemon juice or white vinegar on a paper towel before I start. It’s an extra step, but it guarantees success.
Don’t Overbake. The low temperature is key. If your oven runs hot, your meringues will brown and crack. Use an oven thermometer to make sure your oven is actually at 200°F. I check mine every time because ovens can be liars.
Multitasking Strategy: While the meringues are baking, you can prepare the rest of your Halloween spread. Make the punch, set out the candy, arrange the cheese board. The meringues are hands-off for over an hour, which is a beautiful thing when you’re hosting.
Variations & Adaptations
Once you master the basic ghost, the possibilities are endless. Here are a few of my favorite twists.
- Chocolate Ghosts: Replace 2 tablespoons of the granulated sugar with 2 tablespoons of unsweetened cocoa powder. Sift the cocoa powder with the sugar before adding it to the egg whites. You’ll get chocolate-flavored ghosts that are pale brown—like ghosts that have been hanging out in a dusty attic.
- Peppermint Ghosts: Substitute the vanilla extract with 1/2 teaspoon of peppermint extract. These are perfect for a Christmas-themed party or a winter gathering. Crush a candy cane and sprinkle the pieces over the ghosts right after piping for a festive crunch.
- Pumpkin Spice Ghosts: Add 1 teaspoon of pumpkin pie spice along with the sugar. The warm spices—cinnamon, nutmeg, ginger, cloves—pair beautifully with the sweet, airy meringue. These are my go-to for a fall harvest party.
- Vegan Meringue Ghosts: You can make meringue without eggs using aquafaba—the liquid from a can of chickpeas. Use 1/2 cup of aquafaba in place of the 4 egg whites. Whip it exactly the same way, with the cream of tartar and sugar. It works surprisingly well, though the texture is slightly different. I’ve made these for a vegan friend’s Halloween party, and they were a hit.
Serving & Storage Suggestions
These ghost meringue cookies are best served at room temperature. They are fragile, so handle them gently. I like to arrange them on a large platter, standing upright, so their little faces are visible. For a spooky presentation, place them on a bed of black sanding sugar or crushed Oreo crumbs (it looks like dirt). You can also stick them into a bowl of chocolate pudding to look like ghosts rising out of a swamp.
What to serve alongside: These pair beautifully with a warm cup of hot apple cider or a mug of creamy hot chocolate. For a Halloween party spread, serve them next to a bowl of caramel apples, some pumpkin-shaped cheese crackers, and a plate of chocolate-dipped pretzel rods.
Storage: Store the cooled meringues in an airtight container at room temperature. Do not refrigerate them—the moisture in the fridge will make them sticky. They will stay fresh for up to 5 days, though they are best within the first 2-3 days. If the air is humid, they may soften. You can re-crisp them in a 200°F oven for 15-20 minutes if that happens.
Freezing: You can freeze baked meringues for up to 2 months. Place them in a single layer in a freezer-safe container, with parchment paper between layers. Thaw them at room temperature for about 30 minutes before serving. Do not thaw them in the refrigerator.
Nutritional Information & Benefits
These ghost meringue cookies are a surprisingly light treat. Each cookie (without the chocolate chips) contains approximately 25-30 calories, 0 grams of fat, and 6 grams of sugar. They are naturally gluten-free and low in fat. The egg whites provide a small amount of protein (about 1 gram per cookie).
Because they are made primarily of egg whites and sugar, they are a good option for those following a low-fat or gluten-free diet. The mini chocolate chips add a small amount of antioxidants from the cocoa. Just keep in mind that they are still a sugary treat, so enjoy them in moderation. I like to think of them as the “healthier” option on the Halloween dessert table—at least compared to a slice of frosted cake!
Conclusion
These ghost meringue cookies have become a non-negotiable part of my Halloween hosting. They are the recipe that makes people stop, smile, and ask for the recipe. They are proof that the simplest things—egg whites, sugar, a little patience—can create something truly magical. I love how they bring a touch of whimsy to a party without any stress. You can make them days ahead, they look adorable on a platter, and they taste like little clouds of vanilla heaven.
I hope you give these a try for your next Halloween gathering. Don’t be afraid to customize them—make them peppermint, make them chocolate, or just leave them plain with those cute little chocolate chip eyes. The best part is seeing your guests’ faces light up when they see them. And if you do make them, I’d love to hear about it. Leave a comment below and tell me how your ghosts turned out. Did you give them different expressions? Did you add a sprinkle of edible glitter? Share your spooky creations! Happy Halloween, and happy baking!
Frequently Asked Questions
Why did my meringue cookies turn out sticky or chewy?
This is almost always due to humidity. Meringue absorbs moisture from the air. Try making them on a dry, sunny day. You can also try baking them for an additional 15-20 minutes at the low temperature to dry them out more thoroughly.
Can I use liquid egg whites from a carton?
I don’t recommend it. Carton egg whites are pasteurized and often contain stabilizers that prevent them from whipping up to the same volume as fresh egg whites. Stick with fresh eggs for the best results.
How do I know when my meringue is whipped enough?
You are looking for stiff, glossy peaks. When you lift the whisk attachment, the meringue should stand up straight without drooping. Another test is to rub a small amount between your fingers—it should feel smooth, not gritty.
Can I make these ghost meringue cookies without a piping bag?
Absolutely! You can use a sturdy zip-top bag with a corner snipped off. Or, you can simply use two spoons to drop dollops of meringue onto the baking sheet and shape them into ghost-like mounds with the back of a spoon. They won’t be as uniform, but they will still be delicious and cute.
My meringue cookies cracked while baking. What went wrong?
Cracking can happen if the temperature changes too quickly. Make sure your oven is at a steady 200°F and avoid opening the oven door while they are baking. The slow cooling process in the oven (with the door propped open) also helps prevent cracking.
Pin This Recipe!
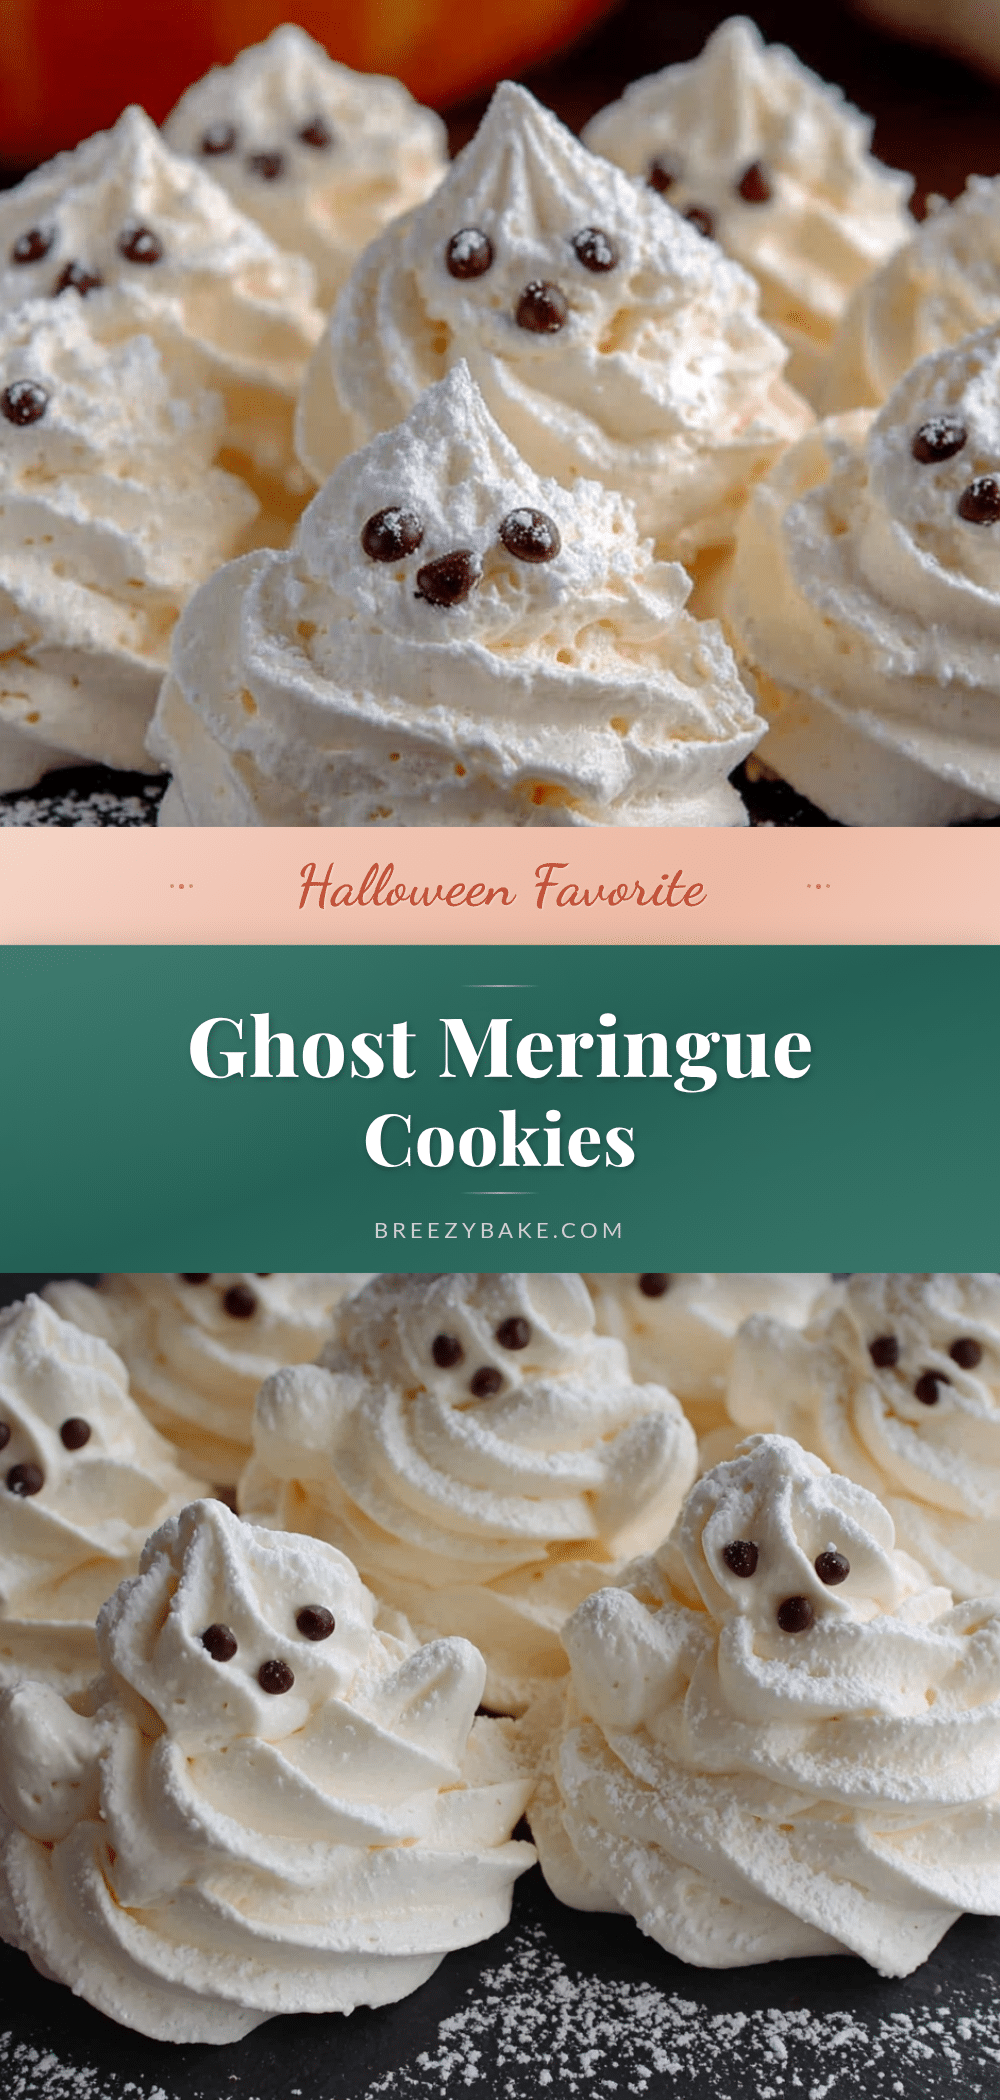
Best Ghost Meringue Cookies – Easy Halloween Treat
These ghost meringue cookies are impossibly light, adorable, and deceptively simple to make. With just four ingredients, they are the perfect make-ahead Halloween treat that will impress guests and vanish from the dessert table.
- Prep Time: 20 minutes
- Cook Time: 60-75 minutes
- Total Time: 1 hour 50 minutes to 2 hours 15 minutes
- Yield: 24 cookies 1x
- Category: Dessert
- Cuisine: American
Ingredients
- 4 large egg whites, at room temperature
- 1 cup (200g) granulated sugar
- 1/2 teaspoon cream of tartar
- 1 teaspoon vanilla extract
- Mini chocolate chips or black decorating gel (for the faces)
Instructions
- Preheat your oven to 200°F (93°C). Line two large baking sheets with parchment paper or silicone baking mats.
- Place the room-temperature egg whites and cream of tartar in the bowl of a stand mixer (or a large mixing bowl if using a hand mixer). Whip on medium-low speed until frothy and bubbly, about 1-2 minutes.
- With the mixer running on medium speed, gradually add the sugar, one tablespoon at a time, taking about 2-3 minutes to add all the sugar.
- Increase the mixer speed to high and whip for 5-7 minutes until stiff, glossy peaks form. The meringue should hold its shape without drooping and feel smooth when rubbed between your fingers.
- With the mixer on low speed, add the vanilla extract and mix just until combined, about 10 seconds.
- Transfer the meringue to a piping bag fitted with a large round tip. Pipe ghosts onto the prepared baking sheets by squeezing out a generous round base, then pulling straight up while releasing pressure to create a tall, tapered peak. Leave about 1 inch of space between each ghost.
- Before the meringue forms a skin, gently press two mini chocolate chips into each ghost for eyes. Optionally, add a third chip for a mouth.
- Bake for 60-75 minutes, until the meringues are firm to the touch and easily peel off the parchment paper. They should be dry on the outside but still slightly soft inside.
- Turn off the oven and leave the meringues inside with the door slightly ajar (propped open with a wooden spoon) for 30-60 minutes to dry completely.
- Transfer to a wire rack to cool completely. The cookies will continue to crisp up as they cool.
Notes
Do not make these on a rainy or humid day, as meringue absorbs moisture and will turn sticky. Ensure your bowl and whisk are completely clean and free of any fat. Use an oven thermometer to verify the oven temperature is exactly 200°F to prevent browning or cracking. Store in an airtight container at room temperature for up to 5 days; do not refrigerate.
Nutrition
- Serving Size: 1 cookie
- Calories: 30
- Sugar: 6
- Sodium: 10
- Carbohydrates: 7
- Protein: 1
Keywords: ghost meringue cookies, Halloween cookies, meringue cookies, easy Halloween treat, gluten-free cookies, low-fat cookies


