My neighbor, a man named Leo who keeps to himself mostly, watched me wrestling with a too-wet loaf of sandwich bread one November afternoon. He didn’t say anything at first, just leaned on the fence separating our yards. Then he walked over, handed me a paper bag with a sourdough boule inside, and said, “For stuffing. It won’t turn to mush.” That was it. No recipe, no instructions—just the bread and the quiet confidence of someone who’d been making holiday meals for decades. I stood there holding that crusty loaf, feeling a little silly for my bag of pre-sliced white bread.
That sourdough changed everything about how I approach stuffing. Honestly, I had always thought stuffing was just… fine. A necessary side dish that soaked up gravy but never really shined on its own. But that first bite of sourdough stuffing? The edges were crispy, the inside was tender, and every single piece held its shape. I mean, I actually stopped mid-chew and stared at the pan. Maybe you’ve been there—when a dish you’ve made a hundred times suddenly shows you what it’s supposed to be.
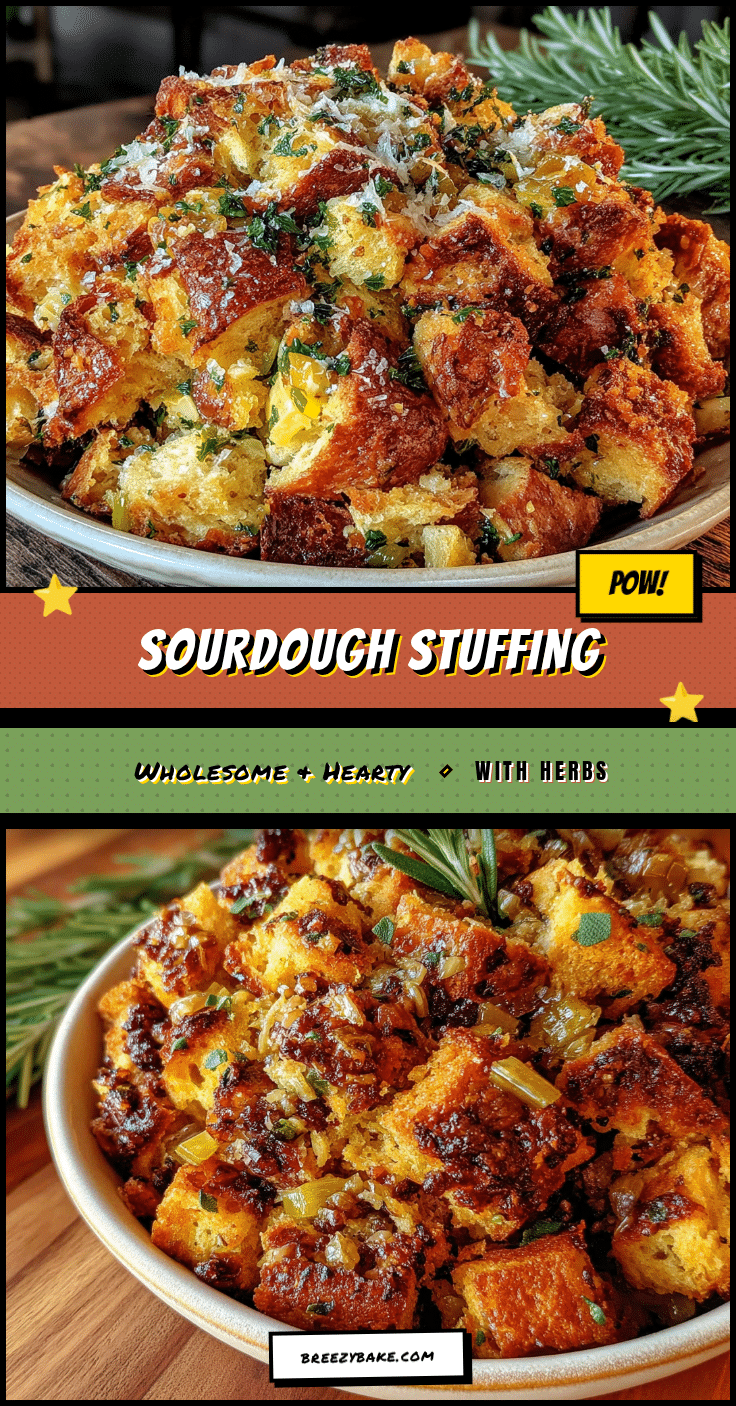
I adapted Leo’s basic idea over the years, testing different herb combinations and figuring out the perfect liquid-to-bread ratio. This version is the one I keep coming back to. It’s wholesome without being heavy, packed with fresh herbs, and it bakes up with those glorious golden corners that everyone fights over. It’s the stuffing that finally made me understand why people look forward to Thanksgiving leftovers.
Why You’ll Love This Recipe
This isn’t just another stuffing recipe—it’s the one that actually works every single time. I’ve tested it with different breads, different ovens, and even different holidays, and it never disappoints. Here’s why it deserves a spot on your table:
- No-Fail Texture: The sourdough holds its structure beautifully. No mushy, sad stuffing here—just perfectly tender cubes with crispy edges.
- Simple Ingredients: You probably have most of these in your kitchen already. No weird processed mixes or hard-to-find specialty items.
- Perfect for Gatherings: This stuffing feeds a crowd and pairs with everything from roast turkey to baked chicken. It’s the side dish that disappears first.
- Crowd-Pleaser: Even people who claim they “don’t like stuffing” change their minds after one bite of this herb-packed version.
- Unbelievably Delicious: The combination of crusty sourdough, fresh sage, and slow-cooked onions creates a flavor that’s deeply comforting without being heavy.
What makes this recipe different from the rest is the technique of toasting the bread cubes before baking. It sounds like an extra step, but trust me—it’s the secret to that perfect texture. The sourdough gets a head start on drying out, so when you add the broth, it absorbs just enough without turning into a soggy mess. It’s comfort food reimagined: healthier, more flavorful, and with the same soul-soothing satisfaction that makes stuffing the star of any holiday meal.
What Ingredients You Will Need
This recipe uses simple, wholesome ingredients to deliver bold flavor and satisfying texture without the fuss. Most of these are pantry staples, and the fresh herbs make all the difference.
- 1 large loaf sourdough bread (about 12 cups when cubed) — Day-old or slightly stale works best. I prefer a rustic boule from a local bakery for the best texture.
- 4 tablespoons unsalted butter — Adds richness. Use vegan butter if needed.
- 2 tablespoons olive oil — Helps the vegetables caramelize without burning.
- 2 medium yellow onions, diced — About 3 cups. Sweet onions also work well here.
- 3 celery stalks, diced — About 1½ cups. The crunchier the better.
- 4 cloves garlic, minced — Fresh garlic is non-negotiable here.
- 2 tablespoons fresh sage, chopped — Dried sage works in a pinch, but fresh is magic.
- 1 tablespoon fresh rosemary, chopped — Strip the leaves from the stem first.
- 1 tablespoon fresh thyme leaves — Or 1 teaspoon dried.
- 2 cups low-sodium vegetable or chicken broth — Homemade is lovely, but boxed works fine. Low-sodium lets you control the salt.
- 2 large eggs, lightly beaten — Helps bind everything together. For vegan, use flax eggs.
- Salt and black pepper to taste — Start with 1 teaspoon salt and ½ teaspoon pepper.
- Optional: ½ cup dried cranberries or chopped apples — Adds a pop of sweetness that balances the herbs beautifully.
I recommend using a crusty, artisan-style sourdough for this. The kind with a thick crust and chewy interior gives the best results. Look for one that’s at least a day old—it should feel firm to the touch, not soft like sandwich bread.
Equipment Needed
You don’t need fancy equipment for this recipe, but a few tools make the process smoother:
- Large baking sheet — For toasting the bread cubes. Rimmed sheets work best to prevent spillage.
- Large skillet or Dutch oven — For sautéing the vegetables. A wide pan gives the onions room to caramelize.
- Large mixing bowl — Big enough to toss everything together without spilling.
- 9×13-inch baking dish — Glass or ceramic works beautifully. Metal pans can cause the edges to brown too quickly.
- Sharp chef’s knife — For dicing onions and celery evenly.
- Wooden spoon or spatula — For stirring without scratching your pans.
If you don’t have a 9×13 dish, a 3-quart casserole dish works perfectly. I’ve even used a cast iron skillet in a pinch—it gives the edges an extra crispy finish that’s honestly amazing.
Preparation Method

Let’s get cooking. This stuffing comes together in a few straightforward steps, and I’ll walk you through each one.
- Preheat your oven to 350°F (175°C). While it’s heating, cut the sourdough into 1-inch cubes. You should end up with about 12 cups. Spread them evenly on a large baking sheet.
- Toast the bread cubes for 15-20 minutes. Toss them halfway through. You want them dry and lightly golden, not browned. They should feel firm and make a hollow sound when you tap them. This step is crucial—don’t skip it.
- While the bread toasts, heat the butter and olive oil in a large skillet over medium heat. Add the diced onions and celery. Cook for 8-10 minutes, stirring occasionally, until the onions turn translucent and the edges start to brown. You’re looking for that sweet spot where they smell fragrant but not burned.
- Add the minced garlic and cook for 1 minute more. Stir constantly—garlic burns fast. Your kitchen should smell amazing at this point.
- Remove the skillet from heat and stir in the fresh herbs. Sage, rosemary, and thyme all go in now. Let the residual heat wake up their flavors. Season with salt and pepper.
- In a large mixing bowl, whisk together the broth and beaten eggs. Make sure they’re well combined. If you’re adding dried cranberries or apples, stir them into the broth mixture now.
- Add the toasted bread cubes and the cooked vegetable mixture to the bowl. Use your hands or a large spatula to gently toss everything together. Be thorough but gentle—you want every cube coated without breaking them apart.
- Let the mixture sit for 10 minutes. This is the hardest part, I know. But giving the bread time to absorb the liquid makes all the difference. The cubes should be moist but not soggy. If they look dry, add a splash more broth.
- Transfer the mixture to your greased 9×13 baking dish. Spread it evenly. Don’t press it down—you want some air pockets for texture.
- Bake uncovered for 35-40 minutes. The top should be golden brown and crispy. The edges will look especially glorious. Let it rest for 5 minutes before serving.
A quick note: If you’re making this ahead of time, stop after step 8 and refrigerate the unbaked stuffing. When you’re ready, bake it straight from the fridge, adding 10-15 minutes to the baking time.
Cooking Tips & Techniques
I’ve made this stuffing more times than I can count, and I’ve learned a few things the hard way. Here are my best tips:
Don’t skip toasting the bread. I know it’s tempting to skip this step, especially when you’re short on time. But untoasted bread soaks up broth unevenly, leaving you with pockets of mush. Toasted cubes absorb liquid like little sponges—evenly and predictably.
Use fresh herbs if you can. Dried herbs work in a pinch, but fresh sage and rosemary bring a brightness that dried just can’t match. I once made this with only dried herbs for a friend’s potluck, and it was good—but not nearly as vibrant. The fresh herbs make it feel alive.
Watch your salt. Sourdough already has salt, and broth adds more. I learned this lesson after making a batch that was borderline inedible. Start with 1 teaspoon of salt, taste the vegetable mixture before adding it to the bread, and adjust from there.
Let it rest after baking. Those 5 minutes aren’t just for show. The stuffing sets up as it cools, making it easier to serve without falling apart. I once rushed this step and ended up with a crumbled mess on the platter. Patience pays off.
Double the recipe for big gatherings. This recipe fits perfectly in a 9×13 dish, but if you’re feeding a crowd, double everything and use a roasting pan. Just add 10-15 minutes to the baking time.
Variations & Adaptations
This stuffing is wonderfully adaptable. Here are some variations I’ve tried and loved:
Gluten-Free Version: Use a good-quality gluten-free sourdough. I’ve tested this with a few brands, and it works beautifully. Just make sure the bread is sturdy enough to hold its shape—some gluten-free loaves are too delicate.
Vegan Adaptation: Swap the butter for vegan butter or olive oil, and use flax eggs (1 tablespoon ground flaxseed mixed with 3 tablespoons water per egg). Use vegetable broth instead of chicken broth. The texture is slightly different but still delicious.
Add Some Protein: Stir in 1 cup of cooked sausage, crumbled bacon, or shredded rotisserie chicken. I’ve done this for a non-traditional Christmas dinner, and it turned the stuffing into a main dish.
Seasonal Twists: In the fall, add diced apples and dried cranberries. In spring, swap the sage for fresh dill and chives. I once made a summer version with zucchini and basil—it was unexpected but wonderful.
Extra Herby: If you’re a herb lover like me, double the fresh herbs. The stuffing can handle it, and the flavor becomes incredibly aromatic.
Serving & Storage Suggestions
This stuffing is best served warm, straight from the oven. The top should be golden and crispy, while the inside stays tender and moist. I love spooning it onto plates alongside roasted turkey or baked chicken, with a generous drizzle of gravy on top.
For presentation, I sometimes sprinkle extra fresh herbs over the top before serving. It adds a pop of green and makes the dish look beautiful. Leftover stuffing is amazing the next day—the flavors meld together overnight, and the texture softens slightly.
Storage: Keep leftovers in an airtight container in the refrigerator for up to 4 days. To reheat, place individual portions in a 350°F oven for 10-15 minutes, or microwave for 1-2 minutes. The oven method preserves the crispy edges better.
Freezing: This stuffing freezes beautifully. Bake it as directed, let it cool completely, then wrap tightly in foil and freeze for up to 3 months. Thaw overnight in the refrigerator and reheat in a 350°F oven until warmed through.
The flavors actually deepen after a day in the fridge. I sometimes make this stuffing two days ahead on purpose—it tastes even better.
Nutritional Information & Benefits
This wholesome sourdough stuffing is a healthier take on a classic. Here’s a rough estimate per serving (based on 10 servings):
- Calories: 210
- Fat: 8g
- Carbohydrates: 28g
- Fiber: 2g
- Protein: 6g
- Sodium: 480mg
The sourdough bread offers gut-friendly probiotics from the fermentation process, and the fresh herbs provide antioxidants that support overall health. Celery and onions add fiber and vitamins, while the olive oil delivers heart-healthy fats. This stuffing is naturally lower in sugar than many traditional recipes, making it a great choice for health-minded eaters who still want food that tastes indulgent.
If you’re watching your sodium, use unsalted butter and low-sodium broth. You can also reduce the salt in the vegetable mixture and rely on the herbs for flavor instead.
Conclusion
This wholesome sourdough stuffing has become my go-to for every holiday and gathering. It’s the recipe that finally made me understand what stuffing should be—not an afterthought, but a dish worth celebrating. The crispy edges, the tender interior, the way the herbs fill your kitchen with warmth—it’s comfort food at its finest.
I hope you give this recipe a try and make it your own. Maybe you’ll add extra herbs like I do, or throw in some dried cranberries for sweetness. However you customize it, I promise it will be the best stuffing you’ve ever made. And if you’re anything like me, you’ll find yourself making it for no reason at all—just because a Tuesday night deserves something special.
If you make this recipe, I’d love to hear how it turned out. Leave a comment below or tag me in your photos. Happy cooking, friends!
Frequently Asked Questions
Can I make this stuffing ahead of time?
Absolutely. Prepare the stuffing through step 8, cover it, and refrigerate for up to 24 hours. When you’re ready, bake it straight from the fridge, adding 10-15 minutes to the baking time.
What if I don’t have sourdough bread?
You can use any sturdy, crusty bread like ciabatta or French bread. The key is to choose a bread that’s dense enough to hold its shape. Avoid soft sandwich bread—it will turn mushy.
Can I use dried herbs instead of fresh?
Yes, but the flavor won’t be as vibrant. Use 1 teaspoon dried sage, ½ teaspoon dried rosemary, and ½ teaspoon dried thyme. Add them with the garlic so they bloom in the heat.
How do I know when the stuffing is done?
The top should be golden brown and crispy, and the internal temperature should reach 165°F if you’re using eggs. The edges will look especially dark and crunchy—that’s the best part.
Can I cook the stuffing inside a turkey?
I don’t recommend it. Cooking stuffing inside a turkey can lead to uneven cooking and food safety issues. This recipe is designed to be baked separately for the best texture and safety.
Pin This Recipe!
The Best Homemade Sourdough Stuffing with Herbs

This wholesome sourdough stuffing features crispy edges, a tender interior, and is packed with fresh herbs. It’s the perfect side dish for any holiday gathering, delivering no-fail texture and deep, comforting flavor.
- Prep Time: 20 minutes
- Cook Time: 40 minutes
- Total Time: 1 hour
- Yield: 10 servings 1x
- Category: Side Dish
- Cuisine: American
Ingredients
- 1 large loaf sourdough bread (about 12 cups when cubed)
- 4 tablespoons unsalted butter
- 2 tablespoons olive oil
- 2 medium yellow onions, diced (about 3 cups)
- 3 celery stalks, diced (about 1½ cups)
- 4 cloves garlic, minced
- 2 tablespoons fresh sage, chopped
- 1 tablespoon fresh rosemary, chopped
- 1 tablespoon fresh thyme leaves
- 2 cups low-sodium vegetable or chicken broth
- 2 large eggs, lightly beaten
- Salt and black pepper to taste (start with 1 teaspoon salt and ½ teaspoon pepper)
- Optional: ½ cup dried cranberries or chopped apples
Instructions
- Preheat your oven to 350°F (175°C). Cut the sourdough into 1-inch cubes (about 12 cups) and spread them evenly on a large baking sheet.
- Toast the bread cubes for 15-20 minutes, tossing halfway through, until dry and lightly golden.
- While the bread toasts, heat the butter and olive oil in a large skillet over medium heat. Add the diced onions and celery. Cook for 8-10 minutes, stirring occasionally, until the onions are translucent and edges start to brown.
- Add the minced garlic and cook for 1 minute more, stirring constantly.
- Remove the skillet from heat and stir in the fresh sage, rosemary, and thyme. Season with salt and pepper.
- In a large mixing bowl, whisk together the broth and beaten eggs. If using dried cranberries or apples, stir them into the broth mixture now.
- Add the toasted bread cubes and the cooked vegetable mixture to the bowl. Gently toss everything together until every cube is coated.
- Let the mixture sit for 10 minutes to allow the bread to absorb the liquid. If it looks dry, add a splash more broth.
- Transfer the mixture to a greased 9×13-inch baking dish. Spread it evenly without pressing down.
- Bake uncovered for 35-40 minutes until the top is golden brown and crispy. Let it rest for 5 minutes before serving.
Notes
For make-ahead: Prepare through step 8, cover, and refrigerate for up to 24 hours. Bake straight from the fridge, adding 10-15 minutes to the baking time. For gluten-free, use gluten-free sourdough. For vegan, use vegan butter, flax eggs, and vegetable broth.
Nutrition
- Serving Size: 1 serving (about 1 c
- Calories: 210
- Sugar: 3
- Sodium: 480
- Fat: 8
- Saturated Fat: 3
- Carbohydrates: 28
- Fiber: 2
- Protein: 6
Keywords: sourdough stuffing, herb stuffing, Thanksgiving stuffing, homemade stuffing, holiday side dish


