I was standing in line at the post office—a Tuesday, I think, with rain streaking the windows and a package I’d been meaning to mail for two weeks—when the woman ahead of me turned around and started talking about bananas. Not the ones she was buying, but the ones going brown on her counter. She was maybe seventy, with a floral raincoat and the kind of no-nonsense voice that made you listen. “My grandmother used to say a black banana is a gift,” she told me, pulling a crumpled recipe card from her coat pocket. “You just need one bowl and your hands. No machines, no fuss.” I scribbled her instructions on the back of my grocery list, right between “eggs” and “stop procrastinating.” Honestly, I almost forgot about it. But three days later, staring at my own sad, spotty bananas, I remembered that card. That loaf came out of the oven smelling like every cozy afternoon I’d ever had, and I knew I couldn’t keep it to myself. Maybe you’ve been there—overripe fruit staring at you from the counter, begging to become something warm and wonderful. This is that recipe.
Why You’ll Love This Recipe
Let me tell you why this banana bread is different from every other recipe you’ve tried. I’ve tested this version more times than I can count, tweaking the flour ratio and the baking time until it was exactly right. Here’s what makes it special:
- No Mixer Needed: You literally use one bowl and a fork. No hauling out the stand mixer, no dirtying extra whisks. It’s the kind of recipe you can make in your pajamas.
- Simple Ingredients: Everything is probably in your kitchen right now. Butter, sugar, eggs, flour, baking soda, salt, and those sad bananas you were about to toss.
- Perfect for Cozy Evenings: This bread is made for cold weather, rainy afternoons, or those days when you just need something warm and sweet. It’s comfort food at its simplest.
- Crowd-Pleaser: I’ve brought this to potlucks and family dinners, and it disappears every single time. Kids love it, adults love it, and nobody believes it came from one bowl.
- Unbelievably Moist: The secret is using really ripe bananas and a little melted butter. The texture is soft, tender, and almost pudding-like in the center. It’s the kind of bread that makes you close your eyes after the first bite.
This isn’t just another banana bread recipe—it’s the one you’ll keep coming back to. I’ve made it for sick friends, for holiday brunches, and for myself on a quiet Sunday when I needed something to soothe my soul. It works every time.
What Ingredients You Will Need
This recipe uses simple, everyday ingredients to create something truly special. The bananas do most of the heavy lifting here, so make sure they’re properly ripe—we’re talking brown spots, maybe even black peels. Here’s what you’ll need:
- 3 large ripe bananas, mashed (about 1 ½ cups / 360 ml) — The riper, the better. They should be soft and sweet, with brown speckles all over. If they’re not quite there, you can roast them in the oven at 300°F for 15 minutes to speed things up.
- ⅓ cup (75 g) unsalted butter, melted — I use salted butter sometimes and just skip the added salt. Either works, but unsalted gives you more control. Let it cool slightly before mixing.
- ¾ cup (150 g) granulated sugar — You can use brown sugar for a deeper, molasses-like flavor. I’ve done half and half before, and it’s lovely.
- 1 large egg, room temperature — Cold egg will seize the butter, so let it sit out for 15 minutes. In a hurry? Place it in a bowl of warm water for 5 minutes.
- 1 teaspoon vanilla extract — Pure vanilla is best, but imitation works in a pinch. I love Nielsen-Massey for its rich flavor.
- 1 ½ cups (190 g) all-purpose flour — Spoon and level it into your measuring cup. Scooping directly can pack in too much flour and make the bread dry.
- 1 teaspoon baking soda — Make sure it’s fresh. Test it by dropping a little into vinegar—if it fizzes, you’re good.
- ¼ teaspoon salt — Just enough to balance the sweetness. If using salted butter, reduce this to a pinch.
- Optional mix-ins: ½ cup (85 g) chocolate chips, ½ cup (60 g) chopped walnuts, or ½ cup (80 g) dried cranberries. I’m partial to chocolate chips, but walnuts add a nice crunch.
That’s it. No weird ingredients, no special flours. Just honest, simple food. I personally recommend using King Arthur Flour for consistent results, but any brand will do. The key is the bananas—don’t skimp on ripeness.
Equipment Needed
You don’t need a fancy kitchen to make this bread. Here’s what you’ll need:
- One large mixing bowl — Any bowl will do. I use a ceramic one because it feels cozy, but glass or metal is fine.
- A fork or potato masher — For mashing the bananas. A fork works perfectly, but a masher is faster.
- A 9×5-inch (23×13 cm) loaf pan — If you don’t have one, an 8×4-inch pan works too—just increase the baking time by 5-10 minutes.
- Parchment paper — Not strictly necessary, but it makes lifting the bread out so much easier. I always line my pan.
- A whisk or wooden spoon — For mixing the batter. A whisk helps incorporate air, but a spoon is fine.
- Measuring cups and spoons — For accuracy. I use stainless steel ones that last forever.
- A cooling rack — Lets the bread cool evenly so the bottom doesn’t get soggy.
If you don’t have parchment paper, just grease the pan well with butter or non-stick spray. I’ve done it both ways, and honestly, the bread turns out great either way. The only thing I’d invest in is a good loaf pan—cheap ones can warp in the oven and give you uneven baking. I love my USA Pan, but any heavy-duty pan will do.
Preparation Method
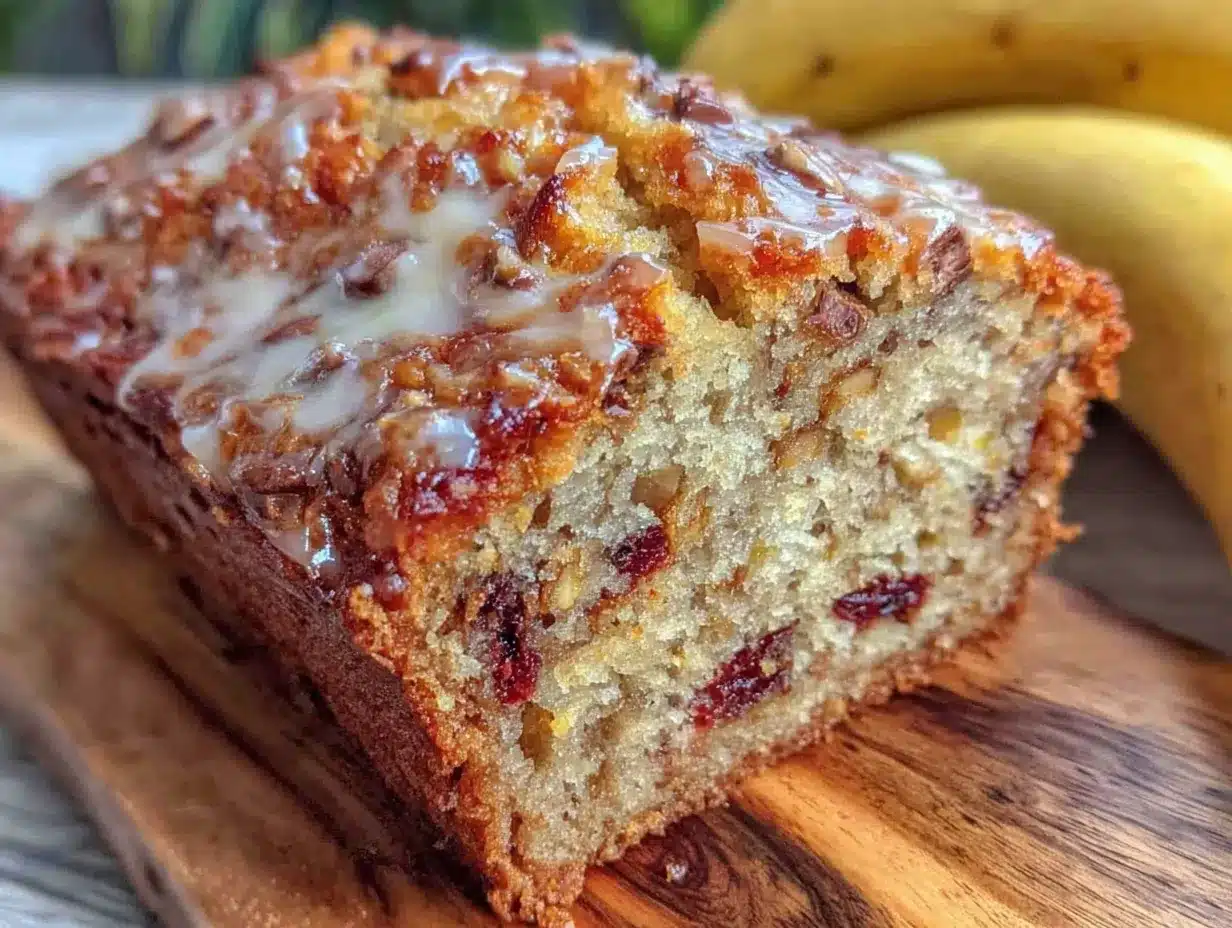
This is where the magic happens. Follow these steps, and you’ll have a perfect loaf every time. I’ve included all the little details I wish someone had told me when I first started baking.
- Preheat your oven to 350°F (175°C). Place the rack in the center position. While the oven heats, line your loaf pan with parchment paper, leaving a little overhang on the long sides—this will be your handles for lifting the bread out later.
- Mash the bananas in your mixing bowl. Use a fork or potato masher until they’re mostly smooth with a few small lumps. You want some texture, not baby food. I usually go for a consistency where there are no chunks bigger than a pea. This should take about 1-2 minutes.
- Add the melted butter and sugar. Pour the slightly cooled melted butter over the bananas, then add the sugar. Stir with your fork or a wooden spoon until everything is combined. It will look a bit grainy—that’s okay. The sugar needs to dissolve into the banana mixture.
- Add the egg and vanilla. Crack the egg into the bowl, add the vanilla, and stir until the egg is fully incorporated. Make sure you scrape the bottom of the bowl—sometimes the egg hides there. The batter should look smooth and glossy at this point.
- Add the flour, baking soda, and salt. Sprinkle the dry ingredients over the wet mixture. Don’t dump them all in one spot—spreading them out helps them incorporate more evenly. Stir gently with a wooden spoon or spatula until just combined. Stop as soon as you don’t see any more white streaks. Overmixing will make the bread tough. I count about 10-12 strokes, then stop. If you’re adding mix-ins like chocolate chips or nuts, fold them in now with a few extra gentle strokes.
- Pour the batter into the prepared loaf pan. Use a spatula to scrape every last bit out of the bowl. Spread the batter evenly, giving the pan a gentle tap on the counter to release any air bubbles. The batter should come about halfway up the sides of the pan.
- Bake for 55-65 minutes. Place the pan in the preheated oven and bake until a toothpick inserted into the center comes out clean or with just a few moist crumbs. The top should be golden brown and cracked beautifully. If the top is browning too quickly after 40 minutes, tent the pan loosely with aluminum foil. Every oven is different, so start checking at 50 minutes. My oven usually takes exactly 58 minutes, but yours might be faster or slower.
- Cool in the pan for 10 minutes. Set the pan on a wire rack and let it sit. This allows the bread to set so it doesn’t fall apart when you remove it.
- Lift the bread out using the parchment paper handles. Transfer it to the wire rack to cool completely. If you’re impatient like me, you can slice it after about 20 minutes, but it will be much easier to cut clean slices once it’s fully cool. The smell alone makes this the hardest part of the whole process.
Cooking Tips & Techniques
After making this bread more times than I can count, I’ve learned a few things the hard way. Here are my best tips:
- Don’t overmix the batter. I cannot stress this enough. Mix just until the flour disappears. Overmixing develops gluten, which makes the bread tough and dense instead of tender and fluffy. I once got distracted and mixed for an extra 30 seconds—the result was a brick. Learn from my mistake.
- Use room temperature ingredients. Cold egg or butter can seize up and create lumps in your batter. Let them sit out for 15-20 minutes before you start. If you forget, place the egg in a bowl of warm water for 5 minutes.
- Check for doneness with a toothpick. Insert it into the center of the loaf. If it comes out clean or with just a few moist crumbs, it’s done. If there’s wet batter on it, give it another 5 minutes. The top should also spring back when lightly pressed.
- Let it cool completely before slicing. I know, I know—the smell is torture. But cutting into hot banana bread will give you a crumbly mess. The bread needs time to set its structure. Patience pays off here.
- Toast leftovers for a treat. A slice of this bread, toasted until golden and spread with a little butter, is absolutely divine. It brings back that fresh-from-the-oven warmth.
- Use really ripe bananas. If your bananas aren’t spotty, the bread won’t be as sweet or moist. You can speed up ripening by placing them in a paper bag with an apple overnight, or roasting them in the oven at 300°F for 15 minutes until the skins turn black.
Variations & Adaptations
This recipe is a blank canvas. Here are some ways to make it your own:
- Chocolate Chip Banana Bread: Fold in ½ cup (85 g) of semi-sweet or dark chocolate chips. I use Ghirardelli 60% cacao chips for a rich, not-too-sweet result. The chocolate melts into little pockets of goodness throughout the loaf.
- Nutty Banana Bread: Add ½ cup (60 g) of chopped walnuts or pecans. Toast them first in a dry skillet for 3-4 minutes to bring out their flavor. I love the crunch against the soft bread.
- Gluten-Free Version: Substitute the all-purpose flour with a 1:1 gluten-free baking flour blend (like Bob’s Red Mill). Add 1 teaspoon of xanthan gum if your blend doesn’t include it. The texture will be slightly more delicate, but still delicious.
- Vegan Adaptation: Replace the egg with a flax egg (1 tablespoon ground flaxseed mixed with 3 tablespoons water, left to sit for 5 minutes) and use coconut oil instead of butter. The bread will be a bit denser but still moist and flavorful.
- Spiced Banana Bread: Add 1 teaspoon of cinnamon, ½ teaspoon of nutmeg, and ¼ teaspoon of ground ginger to the dry ingredients. It gives the bread a warm, holiday-like flavor that’s perfect for fall.
- Banana Muffins: Spoon the batter into a greased muffin tin and bake at 350°F for 18-22 minutes. You’ll get about 12 muffins. Perfect for grab-and-go breakfasts.
I’ve tried the chocolate chip version more times than I can count, and it’s my personal favorite. The way the chocolate melts into the warm bread is pure comfort. But honestly, even plain, this bread is a winner.
Serving & Storage Suggestions
This banana bread is wonderful on its own, but here are some ways to serve and store it:
- Serving Temperature: Serve it warm or at room temperature. A slice with a pat of melting butter is my go-to. For an extra treat, toast a slice and drizzle it with honey or maple syrup.
- Presentation: Slice it thick—about 1-inch slices—and arrange them on a plate. A dusting of powdered sugar or a dollop of whipped cream makes it feel fancy. For brunch, serve it alongside fresh fruit and coffee.
- Storage: Wrap the cooled loaf tightly in plastic wrap or aluminum foil. Store it at room temperature for up to 4 days. Do not refrigerate—it will dry out the bread. If your kitchen is very warm, you can store it in an airtight container.
- Freezing: This bread freezes beautifully. Wrap the cooled loaf (or individual slices) in plastic wrap, then in foil, and place in a freezer bag. It will keep for up to 3 months. Thaw at room temperature for a few hours, or pop a slice in the toaster for a quick treat.
- Reheating: Microwave a slice for 15-20 seconds for instant warmth. For a crispier exterior, toast it in a toaster oven or under the broiler for 1-2 minutes. The flavor actually improves after a day or two—the banana flavor deepens and becomes even more pronounced.
Nutritional Information & Benefits
Here’s an approximate nutritional breakdown per slice (based on 10 slices, without mix-ins):
- Calories: 210
- Fat: 8g
- Carbohydrates: 34g
- Fiber: 1.5g
- Sugar: 18g
- Protein: 3g
This banana bread offers some surprising benefits. Bananas are rich in potassium and vitamin B6, which support heart health and energy levels. The fiber from the bananas and flour helps with digestion, and the egg provides a small protein boost. If you use whole wheat flour instead of all-purpose, you’ll add more fiber and nutrients. For a lower-sugar option, you can reduce the sugar to ½ cup (100 g) and rely on the natural sweetness of very ripe bananas. Just note that the texture will be slightly less tender. This recipe is naturally vegetarian and can be made vegan or gluten-free with the substitutions mentioned earlier. It contains gluten, dairy, and eggs in its standard form.
Conclusion
This cozy one-bowl banana bread is more than just a recipe—it’s a little ritual. It’s the thing I make when I need to slow down, when the world feels too loud, or when I just want to fill my kitchen with something warm and good. It’s forgiving, it’s simple, and it always, always delivers. I hope you’ll give it a try, and I hope it becomes your go-to as much as it’s become mine. Don’t be afraid to make it your own—add chocolate chips, swap in nuts, or keep it plain and perfect. Whatever you do, let me know how it turns out. Leave a comment below, share a photo, or tell me about your favorite banana bread memory. I’d love to hear from you. Now go mash those bananas—you’ve got this.
Frequently Asked Questions
Can I use frozen bananas for this recipe?
Absolutely! Frozen bananas work great. Thaw them completely at room temperature, then drain off any excess liquid before mashing. The texture will be softer, but the flavor is even more concentrated. I often freeze overripe bananas specifically for this bread.
Why did my banana bread turn out dry?
Dry banana bread usually means one of three things: you used too much flour (spoon and level it, don’t scoop), you overbaked it (check at 50 minutes), or your bananas weren’t ripe enough. Make sure your bananas are heavily speckled with brown spots for maximum moisture.
Can I make this recipe without eggs?
Yes, you can replace the egg with a flax egg (1 tablespoon ground flaxseed mixed with 3 tablespoons water, left to sit for 5 minutes) or ¼ cup (60 ml) of unsweetened applesauce. The texture will be slightly denser, but it will still be delicious and moist.
How do I know when the banana bread is fully baked?
Insert a toothpick into the center of the loaf. If it comes out clean or with just a few moist crumbs, it’s done. The top should be golden brown and cracked, and the edges should pull away slightly from the pan. You can also check the internal temperature—it should read about 200°F (93°C).
Can I double this recipe?
Yes, you can easily double the ingredients to make two loaves. Just make sure you have two loaf pans and bake them on separate racks. Rotate the pans halfway through baking for even cooking. You may need to add 5-10 minutes to the baking time since the oven will be fuller.
Pin This Recipe!
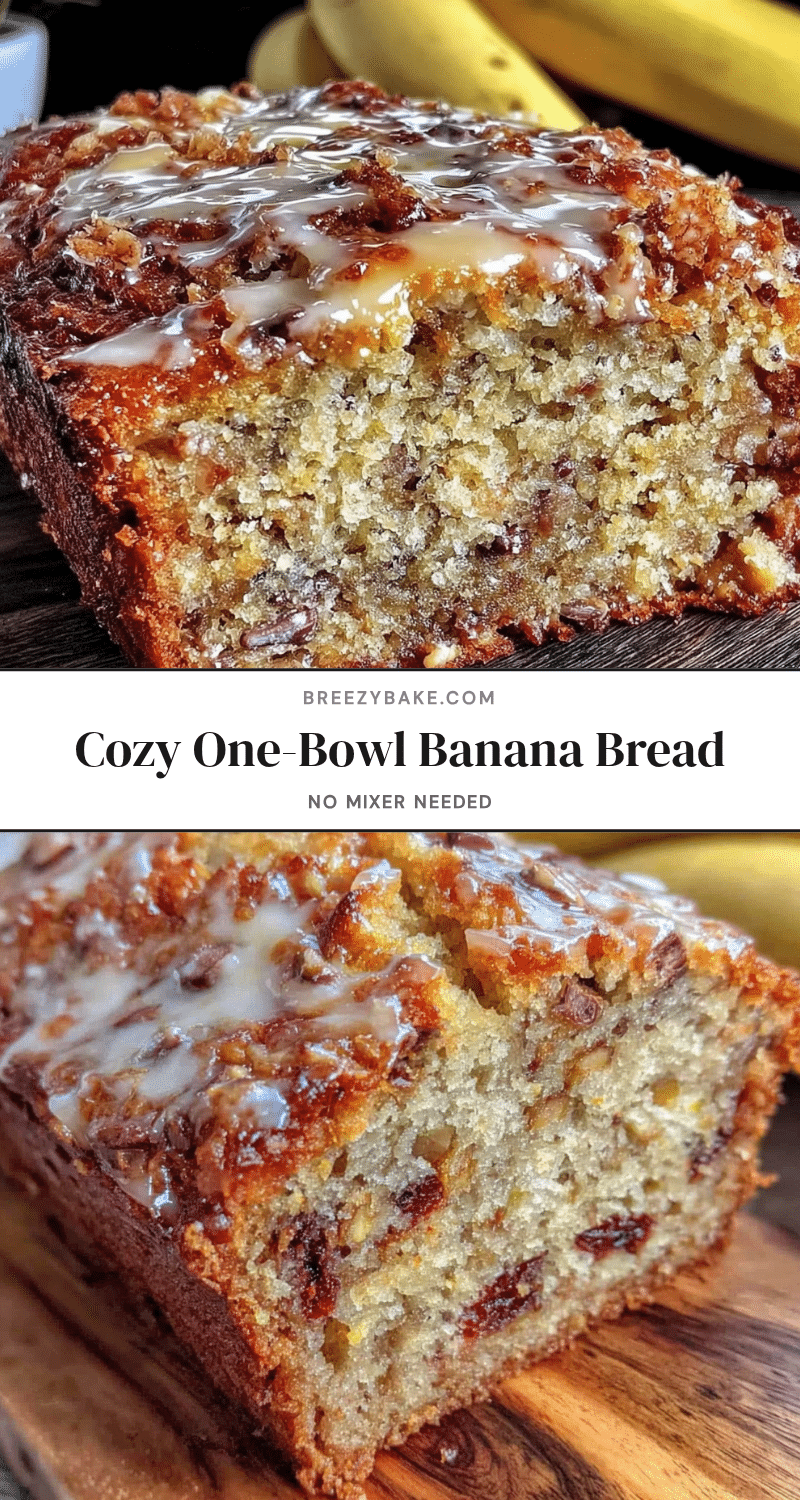
Cozy One-Bowl Banana Bread: Easy No-Mixer Recipe
This easy one-bowl banana bread requires no mixer and uses simple ingredients. It’s incredibly moist, perfect for cozy evenings, and always a crowd-pleaser.
- Prep Time: 15 minutes
- Cook Time: 55-65 minutes
- Total Time: 1 hour 10 minutes - 1 hour 20 minutes
- Yield: 10 servings 1x
- Category: Dessert
- Cuisine: American
Ingredients
- 3 large ripe bananas, mashed (about 1 ½ cups / 360 ml)
- ⅓ cup (75 g) unsalted butter, melted
- ¾ cup (150 g) granulated sugar
- 1 large egg, room temperature
- 1 teaspoon vanilla extract
- 1 ½ cups (190 g) all-purpose flour
- 1 teaspoon baking soda
- ¼ teaspoon salt
- Optional mix-ins: ½ cup (85 g) chocolate chips, ½ cup (60 g) chopped walnuts, or ½ cup (80 g) dried cranberries
Instructions
- Preheat your oven to 350°F (175°C). Place the rack in the center position. Line your loaf pan with parchment paper, leaving overhang on the long sides.
- Mash the bananas in your mixing bowl with a fork or potato masher until mostly smooth with a few small lumps.
- Add the melted butter and sugar. Stir until combined. The mixture will look grainy.
- Add the egg and vanilla. Stir until the egg is fully incorporated and the batter is smooth and glossy.
- Sprinkle the flour, baking soda, and salt over the wet mixture. Stir gently until just combined. Do not overmix. Fold in optional mix-ins if using.
- Pour the batter into the prepared loaf pan. Spread evenly and tap the pan gently on the counter to release air bubbles.
- Bake for 55-65 minutes, until a toothpick inserted into the center comes out clean or with a few moist crumbs. If the top browns too quickly, tent with foil after 40 minutes.
- Cool in the pan for 10 minutes on a wire rack.
- Lift the bread out using the parchment paper handles and transfer to the wire rack to cool completely before slicing.
Notes
Use very ripe bananas (brown spots or black peels) for best moisture and sweetness. Do not overmix the batter. Let the bread cool completely before slicing for clean cuts. Leftovers can be toasted for a treat. Store at room temperature for up to 4 days or freeze for up to 3 months.
Nutrition
- Serving Size: 1 slice (1/10 of loa
- Calories: 210
- Sugar: 18
- Sodium: 200
- Fat: 8
- Saturated Fat: 4.5
- Carbohydrates: 34
- Fiber: 1.5
- Protein: 3
Keywords: banana bread, one-bowl, easy, no-mixer, moist, comfort food, simple ingredients


