I was standing in the grocery store parking lot last October, juggling a pumpkin and a bag of apples, when the wind shifted and carried the smell of someone’s wood-burning fireplace across the asphalt. And just like that—I was eleven years old in my neighbor Mrs. Kowalski’s kitchen, watching her brown butter on the stove while she told me stories about growing up in Poland. That smell, that nutty, almost-toasty aroma, hit me so hard I almost dropped the pumpkin. She’d always say brown butter was the secret to everything, and she’d let me stand on a stool to stir, warning me not to let it burn. She’s been gone seven years now, and I still can’t make brown butter without thinking about her worn wooden spoon and the way she’d tap my hand gently when I got too close to the heat.
This pumpkin bread is my attempt to hold onto that moment. I mean, I’ve made a lot of pumpkin breads over the years—we all have, right? The ones that come out too dense, or too dry, or that taste more like spice than actual pumpkin. But this one? This one is different. I spent three weekends testing batches, burning my fingers on hot pans, and texting my sister photos of every single slice. She finally told me to stop sending pictures and just bring her the loaf. And when she texted back, “This is the one,” I knew I had something special.
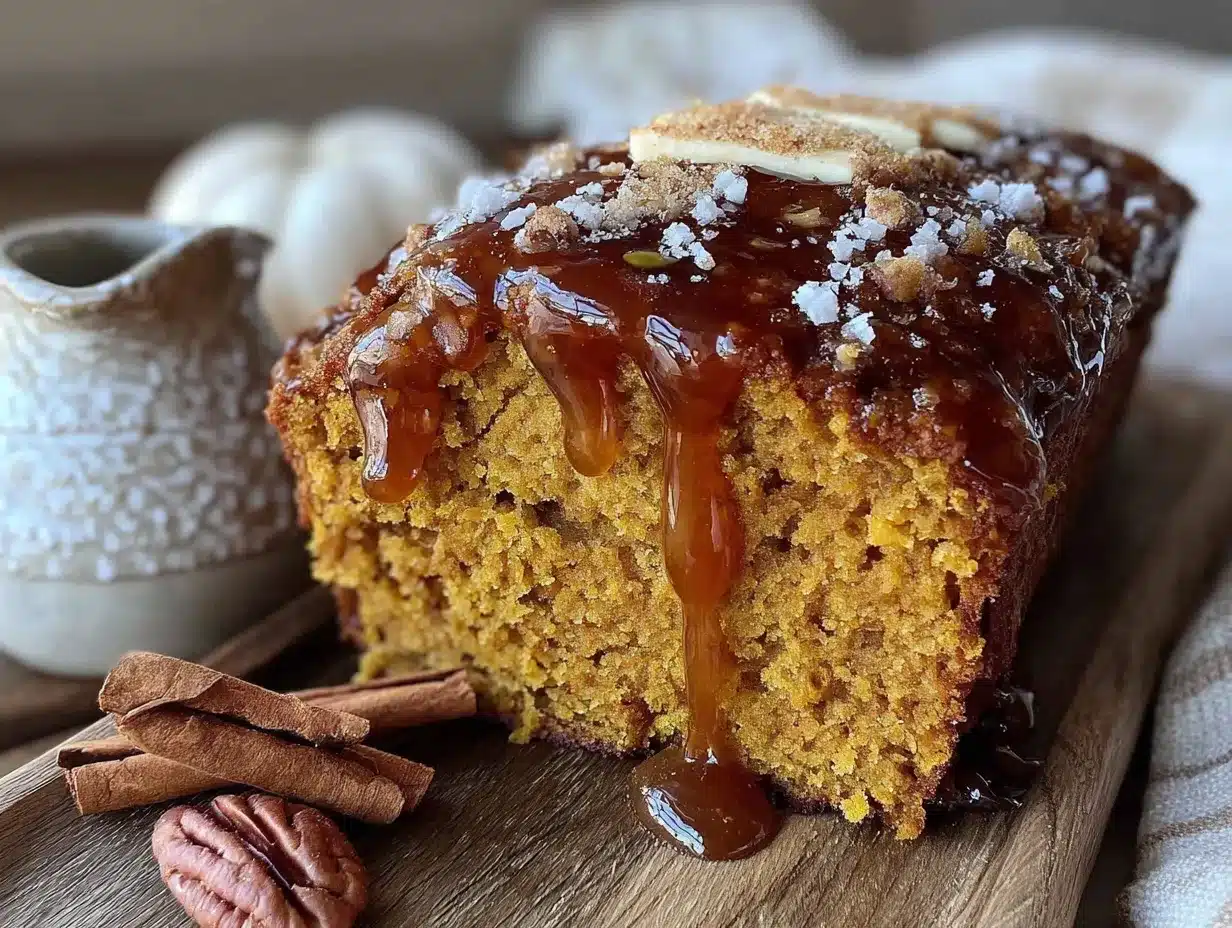
The brown butter does something magical here. It adds this deep, almost caramel-like warmth that regular melted butter just can’t touch. And the maple glaze? Honestly, it’s the kind of topping that makes you lick the fork when you think no one’s watching. The bread itself is tender, moist, and packed with real pumpkin flavor—not just a spice delivery system disguised as bread. It’s the kind of loaf you make when you want to impress people but also want to eat half of it yourself before anyone shows up. Maybe you’ve been there too.
This recipe stayed with me because it’s more than just ingredients. It’s the feeling of standing in a warm kitchen while the world outside gets cold. It’s the smell of butter browning, the steam rising off a fresh glaze, and the first bite that makes you close your eyes. I keep making it because it brings me back to that moment in the parking lot—and because it’s genuinely the best pumpkin bread I’ve ever had.
Why You’ll Love This Recipe
Let me tell you why this pumpkin bread is about to become your new fall obsession. I’ve tested this recipe at least seven times, tweaked the flour ratio, adjusted the baking time, and even convinced my picky neighbor to try a slice. She asked for the recipe before she finished chewing. That’s when I knew I had something worth sharing.
- Rich, Nutty Flavor : Browning the butter adds a depth of flavor that regular butter just can’t match. It’s like the difference between a good cup of coffee and a great one—you’ll taste it immediately.
- Incredibly Moist : No dry, crumbly pumpkin bread here. The combination of oil and brown butter keeps every slice tender for days. I’ve had slices on day three that still felt fresh.
- Perfect for Entertaining : This bread is a showstopper at any fall gathering. It looks impressive with that glossy maple glaze drizzled on top, but it’s surprisingly simple to put together. Your guests will think you spent hours on it.
- Simple Ingredients : You probably have most of these in your pantry right now. No weird specialty items, no trips to three different stores. Just good, honest ingredients.
- Make-Ahead Friendly : You can bake this the night before your gathering and glaze it in the morning. It actually tastes better the next day once the flavors have had time to meld together.
- Crowd-Pleaser : I’ve served this at brunches, potlucks, and casual dinner parties. It disappears every single time. Kids love it, adults love it, and people who claim they don’t like pumpkin bread love it.
What makes this recipe different from all the other pumpkin breads out there is the technique. Most recipes just dump melted butter into the batter and call it a day. But taking those extra five minutes to brown the butter completely changes the game. It adds a nutty, almost toasty complexity that makes this bread feel special without being fussy. And the maple glaze isn’t just sweet—it’s got that real maple flavor that cuts through the richness of the bread perfectly.
This is the kind of recipe that makes you look forward to fall. It’s comfort food that feels a little bit fancy, but still approachable enough for a Tuesday afternoon. The first time I made it for a dinner party, my friend’s husband asked for seconds before he’d even finished his first slice. That’s the kind of reaction this bread gets.
What Ingredients You Will Need
This recipe uses simple, wholesome ingredients to deliver that rich, nutty flavor and perfectly tender crumb. Most of these are pantry staples, but I’ve included some notes on what to look for to get the best results.
For the Pumpkin Bread
- 1 cup unsalted butter (226 grams) — Use good quality butter here since we’re browning it. I prefer Kerrygold or Plugrà for the best flavor. The butter is the star of this recipe, so don’t skimp.
- 1 ¾ cups all-purpose flour (220 grams) — Spoon and level your flour for the most accurate measurement. Scooping directly from the bag can pack in too much flour and make your bread dry.
- 1 teaspoon baking soda — Make sure it’s fresh. Test it by dropping a pinch into vinegar—if it fizzes, you’re good.
- ½ teaspoon baking powder — This gives the bread a little extra lift.
- 1 teaspoon ground cinnamon — I use Vietnamese cinnamon for its stronger, sweeter flavor.
- ½ teaspoon ground nutmeg — Freshly grated if you have it, but pre-ground works fine.
- ½ teaspoon ground ginger — Adds a warm, slightly spicy note.
- ¼ teaspoon ground cloves — Just a pinch, cloves are potent.
- ½ teaspoon salt — Kosher salt is best, but table salt works too.
- 1 ½ cups pumpkin puree (340 grams) — Not pumpkin pie filling! Make sure you’re getting 100% pure pumpkin. I like Libby’s brand for consistent results.
- 1 cup granulated sugar (200 grams) — Regular white sugar works perfectly here.
- ½ cup packed light brown sugar (100 grams) — Adds moisture and a hint of molasses flavor.
- 3 large eggs — Room temperature is important. Cold eggs can seize the batter and make it lumpy.
- 1 teaspoon vanilla extract — Pure vanilla extract, not imitation. It makes a difference.
- ⅓ cup whole milk (80 ml) — You can use buttermilk for an even more tender crumb, or any milk you have on hand.
For the Maple Glaze
- 1 cup powdered sugar (120 grams) — Sift it if it’s lumpy.
- 3 tablespoons pure maple syrup — Not pancake syrup! Look for the real stuff. Grade A dark amber has the strongest maple flavor.
- 1 tablespoon unsalted butter, melted — Adds richness to the glaze.
- 1-2 tablespoons whole milk — Add gradually to reach your desired consistency.
- Pinch of salt — Balances the sweetness.
Ingredient Tips
When it comes to the pumpkin puree, I’ve tested this with both canned and homemade roasted pumpkin. Canned is more consistent and actually gives a smoother texture to the bread. If you’re using homemade, make sure you squeeze out as much moisture as possible—wet pumpkin puree can make the bread dense and gummy.
For the brown sugar, I’ve found that light brown sugar gives the best balance of moisture and flavor. Dark brown sugar will work, but it’ll make the bread a bit darker and more molasses-forward. Both are delicious, just different.
If you’re dairy-free, you can substitute the butter with a good vegan butter for browning—just watch it carefully since vegan butter can burn faster. Use your favorite plant-based milk in place of the whole milk.
Equipment Needed
You don’t need a lot of fancy equipment for this recipe, which is part of why I love it. Here’s what you’ll need:
- 9×5-inch loaf pan — A standard loaf pan works perfectly. If you’re using a dark non-stick pan, reduce the oven temperature by 25°F to prevent over-browning.
- Light-colored saucepan — This is important for browning the butter. A light-colored pan lets you see the butter change color, so you don’t accidentally burn it.
- Large mixing bowl — For the wet ingredients.
- Medium mixing bowl — For the dry ingredients.
- Whisk — A good whisk makes combining ingredients so much easier.
- Rubber spatula — For folding the batter together gently.
- Parchment paper — Lining the pan makes lifting the bread out so much easier. I learned this the hard way after a few stuck loaves.
- Cooling rack — Essential for even cooling. If you don’t have one, you can use the oven rack turned upside down.
- Small bowl — For the glaze.
- Measuring cups and spoons — For accuracy, I really recommend a kitchen scale. It’s more precise and means fewer dishes.
If you don’t have a light-colored saucepan, any saucepan will work—just keep a close eye on the butter. I’ve burned a batch or two because I got distracted. A wooden spoon or silicone spatula for stirring the butter is also helpful.
Preparation Method
Step 1: Brown the Butter
Start by cutting the butter into even pieces. Place them in your light-colored saucepan over medium heat. Stir occasionally with a wooden spoon or silicone spatula. The butter will melt, then foam, then start to crackle and pop. This is the water evaporating, so don’t panic. After about 5-7 minutes, the foam will subside and you’ll see golden brown specks forming at the bottom of the pan. The butter will smell nutty and amazing. As soon as you see those brown specks and smell that nutty aroma, remove the pan from the heat immediately. Pour the brown butter into a heat-safe bowl to stop the cooking process. Let it cool for about 10 minutes while you prep the other ingredients.
Step 2: Preheat and Prep
Preheat your oven to 350°F (175°C). Grease your 9×5-inch loaf pan and line it with parchment paper, leaving some overhang on the sides. This makes lifting the bread out a breeze. If you don’t have parchment, you can just grease the pan well with butter or non-stick spray.
Step 3: Mix the Dry Ingredients
In a medium bowl, whisk together the flour, baking soda, baking powder, cinnamon, nutmeg, ginger, cloves, and salt. Whisk until everything is evenly distributed. This ensures you don’t get pockets of baking soda in your finished bread.
Step 4: Mix the Wet Ingredients
In a large bowl, whisk together the pumpkin puree, granulated sugar, and brown sugar until smooth. Add the eggs one at a time, whisking well after each addition. Stir in the vanilla extract and the cooled brown butter. The brown butter should be warm but not hot—you don’t want to cook the eggs. Finally, whisk in the milk until everything is combined. The mixture should be smooth and glossy.
Step 5: Combine Wet and Dry
Pour the dry ingredients into the wet ingredients. Use a rubber spatula to fold everything together gently. Stir just until you no longer see streaks of flour. A few small lumps are fine—overmixing will make the bread tough. The batter will be thick and slightly glossy.
Step 6: Bake the Bread
Pour the batter into your prepared loaf pan and spread it evenly. Bake for 55-65 minutes, or until a toothpick inserted into the center comes out clean or with just a few moist crumbs. The top should be golden brown and cracked. If the top is browning too quickly, tent the pan loosely with aluminum foil after about 40 minutes.
Let the bread cool in the pan for 15 minutes. Then use the parchment paper to lift it out and transfer it to a cooling rack. Let it cool completely before glazing—about 1-2 hours. I know it’s hard to wait, but if you glaze it while it’s still warm, the glaze will just melt and soak into the bread instead of forming that beautiful glossy layer on top.
Step 7: Make the Glaze
While the bread is cooling, make the glaze. In a small bowl, whisk together the powdered sugar, maple syrup, and melted butter. Add milk one tablespoon at a time until you reach a thick but pourable consistency. You want it to be thick enough that it doesn’t run right off the bread, but thin enough to drizzle. Stir in a pinch of salt.
Step 8: Glaze and Serve
Once the bread is completely cool, drizzle the glaze over the top. Let it set for about 15 minutes before slicing. The glaze will firm up slightly, creating that beautiful, crackly top that makes this bread look so professional.
Cooking Tips & Techniques
Let me save you some of the mistakes I made while developing this recipe. First, don’t walk away from the butter while it’s browning. I cannot stress this enough. I’ve burned at least three batches of butter because I thought, “I’ll just chop this onion real quick.” No. Stand there. Watch it. The difference between perfectly browned butter and burnt butter is about 30 seconds. The butter should smell nutty and look like liquid gold with brown specks. If it smells bitter or looks dark brown, you’ve gone too far.
Second, room temperature eggs matter. I know, I used to roll my eyes at that instruction too. But cold eggs can cause the brown butter to seize up, creating little lumps of solid fat in your batter. If you forget to take your eggs out ahead of time, place them in a bowl of warm water for 5 minutes before using them.
Third, don’t overmix the batter. I know it’s tempting to keep stirring until everything is perfectly smooth, but that develops the gluten and makes the bread tough. Fold just until the flour disappears. A few streaks are okay. The batter should look thick and slightly lumpy.
For the most consistent results, use a kitchen scale for your ingredients. Flour is especially tricky—one cup can weigh anywhere from 120 to 150 grams depending on how you scoop it. Weighing ensures you get the same results every time.
If you want a taller loaf, let the batter rest in the pan for about 15 minutes before baking. This allows the leavening agents to start working and gives you a better rise. I discovered this trick by accident when I got distracted by a phone call, and it worked so well I’ve done it ever since.
Variations & Adaptations
One of the best things about this recipe is how adaptable it is. Here are some variations I’ve tried and loved:
Chocolate Chip Pumpkin Bread
Fold in ¾ cup of semi-sweet chocolate chips right before pouring the batter into the pan. The chocolate pairs beautifully with the brown butter and pumpkin. I made this version for a potluck and it disappeared in fifteen minutes.
Gluten-Free Version
Substitute the all-purpose flour with a good 1:1 gluten-free baking flour. I’ve had great results with King Arthur’s Measure for Measure flour. Don’t use almond flour or coconut flour—they’ll change the texture completely. The gluten-free version is slightly more delicate, so let it cool completely before slicing.
Vegan Adaptation
Use vegan butter for browning, flax eggs (3 tablespoons ground flaxseed mixed with 9 tablespoons water), and your favorite plant-based milk. The texture will be slightly denser but still delicious. I’ve tested this with oat milk and it worked beautifully.
Spiced Maple Walnut
Add ½ cup of toasted, chopped walnuts to the batter and sprinkle another ¼ cup on top before baking. The walnuts add a lovely crunch that contrasts with the soft crumb. Toast the walnuts first for the best flavor—just spread them on a baking sheet and bake at 350°F for 5-7 minutes.
Pumpkin Cream Cheese Swirl
Soften 4 ounces of cream cheese and mix it with 2 tablespoons of sugar and 1 teaspoon of vanilla. Drop spoonfuls of the cream cheese mixture into the batter and swirl it with a knife before baking. This version feels extra decadent and is perfect for a special brunch.
Serving & Storage Suggestions
This pumpkin bread is best served at room temperature. The glaze sets into a beautiful, crackly shell that contrasts with the tender, moist crumb. I love serving it with a hot cup of coffee or a chai latte for the ultimate fall experience.
For a dinner party or brunch, slice the bread and arrange it on a wooden board. You can dust it with a little extra cinnamon or add a pat of salted butter on the side. It’s also wonderful toasted—just pop a slice in the toaster or under the broiler for a minute or two. The heat softens the glaze and warms the spices, making it taste freshly baked.
Storage Instructions
Store the bread in an airtight container at room temperature for up to 4 days. If you’ve already glazed it, place a piece of parchment paper between the bread and the lid to prevent the glaze from sticking. The flavors actually deepen over the first two days, so don’t be surprised if it tastes even better on day two.
For longer storage, you can freeze the unglazed bread for up to 3 months. Wrap it tightly in plastic wrap, then in aluminum foil. When you’re ready to serve it, thaw it overnight in the refrigerator, bring it to room temperature, and then glaze it fresh. The glaze doesn’t freeze well, so always add it after thawing.
To reheat individual slices, microwave for 15-20 seconds or toast in a toaster oven. The texture stays remarkably moist even after reheating.
Nutritional Information & Benefits
Here’s the nutritional breakdown for one slice of this pumpkin bread (based on 10 slices):
| Nutrient | Amount per Slice |
|---|---|
| Calories | 385 |
| Total Fat | 18g |
| Saturated Fat | 11g |
| Cholesterol | 85mg |
| Sodium | 320mg |
| Total Carbohydrates | 52g |
| Dietary Fiber | 2g |
| Sugars | 35g |
| Protein | 5g |
Pumpkin is packed with vitamin A, which supports eye health and immune function. It’s also a good source of fiber and antioxidants. The brown butter adds healthy fats that help your body absorb the fat-soluble vitamins in the pumpkin. This bread is a treat, but it’s one that offers some nutritional benefits too.
If you’re watching your sugar intake, you can reduce the granulated sugar to ¾ cup and the brown sugar to ⅓ cup. The bread will be slightly less sweet but still delicious. For a lower-fat option, replace half the brown butter with unsweetened applesauce.
Conclusion
This brown butter pumpkin bread with maple glaze is more than just a recipe—it’s a moment. It’s the smell of fall filling your kitchen, the warmth of a slice fresh from the oven, and the smile on someone’s face when they take that first bite. I’ve made this bread for family gatherings, friendly get-togethers, and quiet Sunday mornings, and it never fails to bring a little extra joy to the table.
The brown butter adds a depth of flavor that makes this bread feel special, while the maple glaze gives it that perfect finishing touch. But at its heart, this is a simple, honest recipe that anyone can make. You don’t need to be a professional baker to pull this off—just a little patience and a willingness to stand by the stove for five minutes while the butter does its thing.
I’d love to hear how this recipe turns out for you. Did you try any variations? Did you serve it at a gathering? Let me know in the comments below, and don’t forget to share your photos. Happy baking, friends—I hope this bread brings you as much warmth and comfort as it’s brought me.
Frequently Asked Questions
Can I use pumpkin pie filling instead of pumpkin puree?
No, please don’t. Pumpkin pie filling has added sugar and spices that will throw off the balance of this recipe. Always use 100% pure pumpkin puree for the best results.
Why did my brown butter burn?
Brown butter burns easily because the milk solids can go from golden to black in seconds. Always use a light-colored pan so you can see the color change, and remove the pan from the heat as soon as you see golden brown specks and smell a nutty aroma.
Can I make this recipe without a mixer?
Absolutely. This recipe is made entirely by hand with a whisk and a rubber spatula. No electric mixer required. In fact, mixing by hand helps prevent overmixing, which keeps the bread tender.
How do I know when the pumpkin bread is done baking?
Insert a toothpick or a thin knife into the center of the bread. If it comes out clean or with just a few moist crumbs, it’s done. If it comes out with wet batter on it, bake for another 5-10 minutes and test again.
Can I make this into muffins instead of a loaf?
Yes! Grease a 12-cup muffin tin and fill each cup about ¾ full. Bake at 350°F for 18-22 minutes, or until a toothpick comes out clean. Let them cool in the pan for 5 minutes before transferring to a cooling rack. Glaze them once they’re completely cool.
Pin This Recipe!
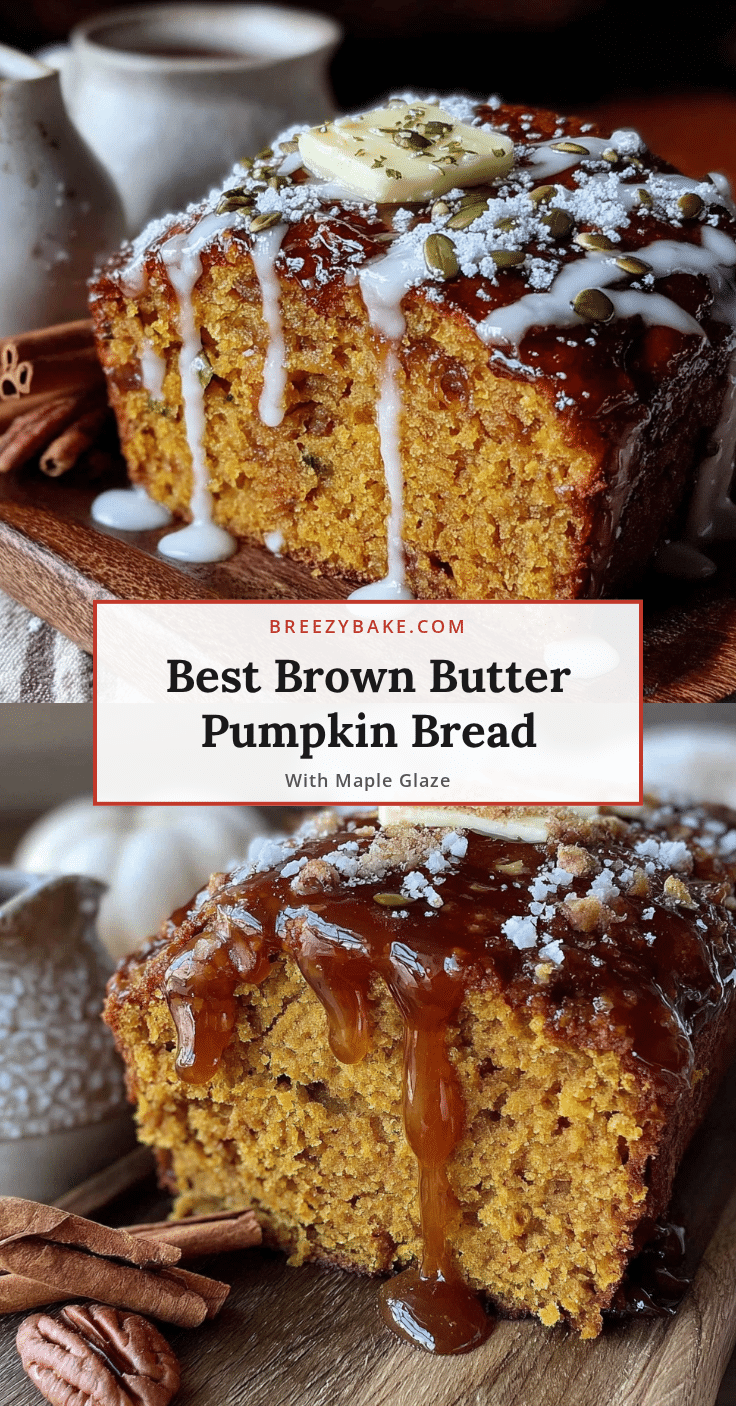
Best Brown Butter Pumpkin Bread with Maple Glaze
This brown butter pumpkin bread is incredibly moist and packed with real pumpkin flavor, topped with a glossy maple glaze. The nutty depth of browned butter elevates this simple loaf into a showstopping fall treat that tastes even better the next day.
- Prep Time: 20 minutes
- Cook Time: 60 minutes
- Total Time: 1 hour 20 minutes (plus cooling time)
- Yield: 10 servings 1x
- Category: Dessert
- Cuisine: American
Ingredients
- 1 cup unsalted butter (226 grams)
- 1 ¾ cups all-purpose flour (220 grams)
- 1 teaspoon baking soda
- ½ teaspoon baking powder
- 1 teaspoon ground cinnamon
- ½ teaspoon ground nutmeg
- ½ teaspoon ground ginger
- ¼ teaspoon ground cloves
- ½ teaspoon salt
- 1 ½ cups pumpkin puree (340 grams)
- 1 cup granulated sugar (200 grams)
- ½ cup packed light brown sugar (100 grams)
- 3 large eggs, room temperature
- 1 teaspoon vanilla extract
- ⅓ cup whole milk (80 ml)
- 1 cup powdered sugar (120 grams)
- 3 tablespoons pure maple syrup
- 1 tablespoon unsalted butter, melted
- 1–2 tablespoons whole milk
- Pinch of salt
Instructions
- Brown the butter: Cut butter into even pieces and place in a light-colored saucepan over medium heat. Stir occasionally. After 5-7 minutes, the butter will foam, then subside, and golden brown specks will form at the bottom. Remove from heat immediately and pour into a heat-safe bowl. Let cool for 10 minutes.
- Preheat oven to 350°F (175°C). Grease a 9×5-inch loaf pan and line with parchment paper, leaving overhang on the sides.
- In a medium bowl, whisk together flour, baking soda, baking powder, cinnamon, nutmeg, ginger, cloves, and salt.
- In a large bowl, whisk together pumpkin puree, granulated sugar, and brown sugar until smooth. Add eggs one at a time, whisking well after each. Stir in vanilla extract and cooled brown butter. Whisk in milk until combined.
- Pour dry ingredients into wet ingredients. Fold gently with a rubber spatula just until no streaks of flour remain. Do not overmix.
- Pour batter into prepared loaf pan and spread evenly. Bake for 55-65 minutes, until a toothpick inserted in the center comes out clean or with a few moist crumbs. If top browns too quickly, tent with foil after 40 minutes.
- Let bread cool in pan for 15 minutes, then lift out using parchment and transfer to a cooling rack. Cool completely (1-2 hours) before glazing.
- Make the glaze: In a small bowl, whisk together powdered sugar, maple syrup, and melted butter. Add milk 1 tablespoon at a time until thick but pourable. Stir in a pinch of salt.
- Once bread is completely cool, drizzle glaze over the top. Let set for 15 minutes before slicing.
Notes
Don’t walk away from the butter while browning—it can burn in seconds. Use room temperature eggs to prevent the brown butter from seizing. Do not overmix the batter. For a taller loaf, let batter rest in pan for 15 minutes before baking. Store in an airtight container at room temperature for up to 4 days. Freeze unglazed bread for up to 3 months.
Nutrition
- Serving Size: 1 slice
- Calories: 385
- Sugar: 35
- Sodium: 320
- Fat: 18
- Saturated Fat: 11
- Carbohydrates: 52
- Fiber: 2
- Protein: 5
Keywords: pumpkin bread, brown butter, maple glaze, fall baking, pumpkin recipe, easy pumpkin bread, moist pumpkin bread


