I was at my accountant’s house for a tax appointment—never a thrilling occasion—when he started talking about pumpkin cheesecake. Not the kind of conversation you expect from a man whose office smells like old paper and coffee. But there he was, shuffling through receipts, casually mentioning how his wife makes the lightest no-bake pumpkin cheesecake bars he’s ever had. “She doesn’t even turn on the oven,” he said, almost annoyed by how simple it was. I scribbled the idea on a sticky note between mortgage interest forms.
Honestly, I was skeptical. A no-bake dessert that actually tastes indulgent? With pumpkin? And it’s light? Let me tell you, I’ve tried my share of “healthy” desserts that leave you staring at the fridge twenty minutes later. But this one stuck with me, probably because it came from the last person I’d expect to have strong opinions about cheesecake.
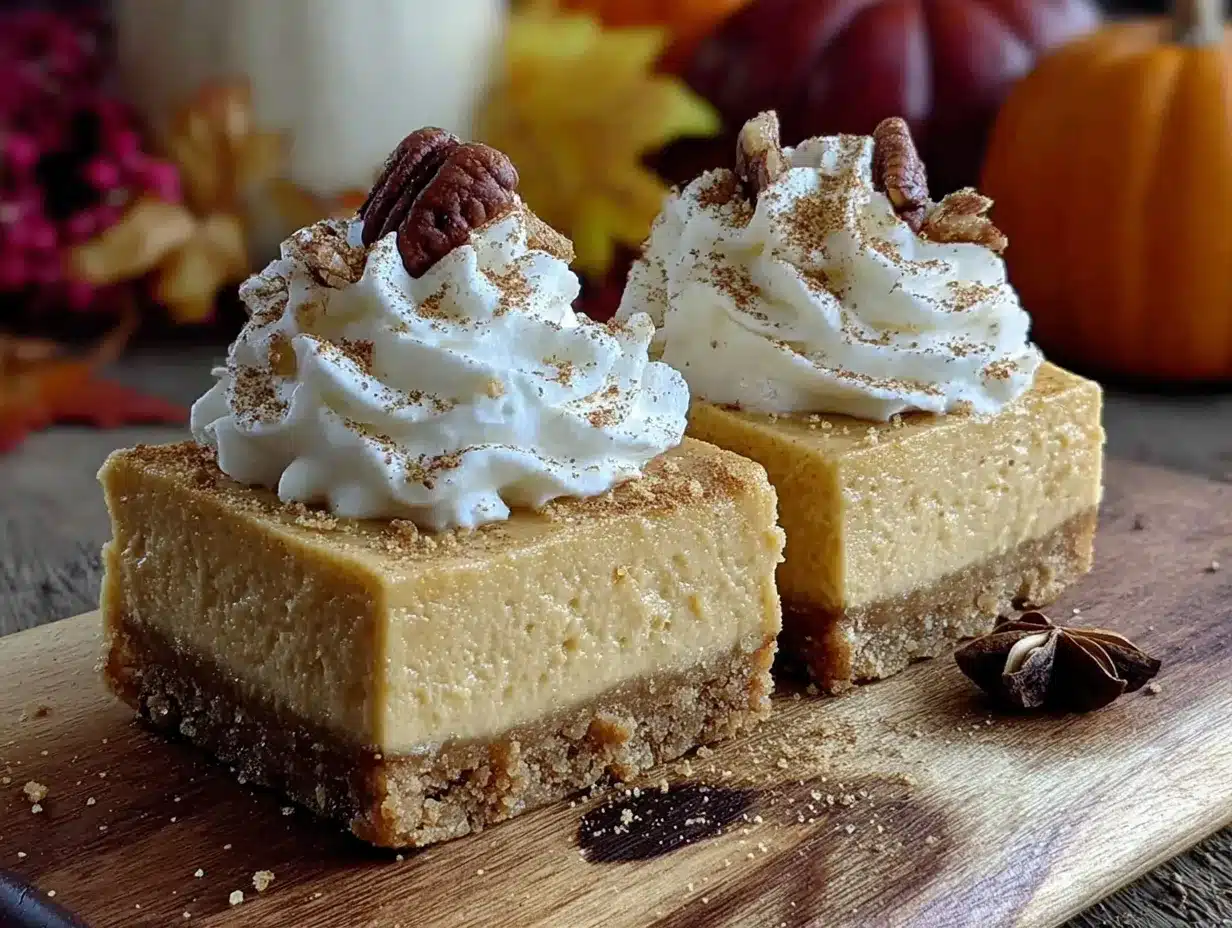
These light no-bake pumpkin cheesecake bars are the kind of thing you make when you want something that feels fancy but takes almost no effort. The filling is creamy without being heavy, the crust is buttery and crisp, and the pumpkin flavor is warm and cozy without being overpowering. I’ve made them for fall gatherings, random Tuesday cravings, and even a Thanksgiving potluck where they disappeared before the pie.
Maybe you’ve been there—wanting a dessert that satisfies without weighing you down. That’s exactly what these bars do. They’re proof that you don’t need an oven, a ton of sugar, or a complicated technique to make something truly delicious.
Why You’ll Love This Recipe
These light no-bake pumpkin cheesecake bars aren’t just another pumpkin dessert—they’re the one you’ll actually want to make again and again. Here’s why they stand out:
- Quick & Easy: Ready in just 10 minutes of active prep. No oven, no baking, no waiting around. Perfect for those moments when you need dessert fast.
- Simple Ingredients: You probably already have most of what you need in your pantry. No fancy grocery store trips required.
- Perfect for Fall Gatherings: Whether it’s a Friendsgiving, a cozy dinner party, or just a quiet night in, these bars fit right in.
- Crowd-Pleaser: I’ve served them to kids, adults, and even my aunt who “doesn’t like pumpkin.” She asked for the recipe.
- Unbelievably Delicious: The texture is what gets everyone. Creamy, light, and just the right amount of tangy from the cream cheese, balanced by warm pumpkin spice.
What makes this recipe different? It’s the method. By using a combination of reduced-fat cream cheese and a touch of Greek yogurt, you get that rich, velvety texture without the heaviness. Plus, the crust is a simple press-in graham cracker base that stays crisp without baking. I’ve tested this more times than I can count, and trust me—this version is the one that works every single time.
These bars are the kind of dessert that makes you close your eyes after the first bite. They’re comfort food reimagined—lighter, faster, but with the same soul-soothing satisfaction. Perfect for impressing guests without stress, or turning a simple evening into something special.
What Ingredients You Will Need
This recipe uses simple, wholesome ingredients to deliver bold flavor and satisfying texture without the fuss. Most are pantry staples, and I’ve included substitution notes where helpful.
For the Crust
- 1 ½ cups graham cracker crumbs (about 12 full sheets, crushed finely) — adds buttery crunch. I prefer Nabisco or store-brand.
- 5 tablespoons unsalted butter, melted — use salted butter if you like a slightly saltier crust.
- 2 tablespoons granulated sugar — just enough to sweeten the base.
For the Filling
- 1 cup (8 oz) reduced-fat cream cheese, softened — this is key for lightness. Full-fat works too, but the texture will be denser.
- ½ cup plain Greek yogurt (2% or full-fat) — adds creaminess and protein without extra calories. Dairy-free coconut yogurt works in a pinch.
- ¾ cup pumpkin puree (not pumpkin pie filling) — I recommend Libby’s for consistent results. Homemade works if you cook and strain it well.
- ½ cup powdered sugar — dissolves easily for a smooth filling.
- 1 teaspoon pumpkin pie spice — or make your own: ½ tsp cinnamon, ¼ tsp ginger, ⅛ tsp nutmeg, ⅛ tsp cloves.
- ½ teaspoon vanilla extract — enhances all the flavors.
- Pinch of salt — balances sweetness.
For the Topping (Optional but Recommended)
- ¼ cup heavy cream, whipped to soft peaks — or use whipped topping for convenience.
- 1 tablespoon powdered sugar — if whipping your own cream.
- ¼ teaspoon pumpkin pie spice — for dusting on top.
Substitution tip: For a dairy-free version, use vegan cream cheese, coconut yogurt, and a vegan butter substitute. The texture will be slightly different but still delicious.
Equipment Needed
You don’t need a fancy kitchen to make these light no-bake pumpkin cheesecake bars. Here’s what you’ll need:
- 8×8-inch baking pan — glass or metal works fine. Line it with parchment paper for easy removal.
- Mixing bowls — one medium for the crust, one large for the filling.
- Electric hand mixer or stand mixer — makes the filling smooth and fluffy. A whisk works if you’re patient, but a mixer is easier.
- Spatula — for scraping down the bowl and spreading the filling evenly.
- Measuring cups and spoons — accuracy matters for the texture.
- Plastic wrap or foil — for chilling.
If you don’t have a food processor for the graham cracker crumbs, just place the crackers in a zip-top bag and crush them with a rolling pin. Works like a charm and costs nothing extra. I’ve done it more times than I can count, especially when I’m too lazy to pull out the food processor.
Preparation Method
Follow these steps carefully, and you’ll have perfect light no-bake pumpkin cheesecake bars every time. I’ve included sensory cues and troubleshooting tips so you know exactly what to look for.
Step 1: Prepare the Crust
- In a medium bowl, combine 1 ½ cups graham cracker crumbs, 2 tablespoons granulated sugar, and 5 tablespoons melted unsalted butter. Stir with a fork until the mixture looks like wet sand and holds together when pressed.
- Transfer the mixture to your parchment-lined 8×8-inch pan. Press it down firmly and evenly using the bottom of a glass or your fingers. Make sure the edges are compact—this prevents crumbling later.
- Place the pan in the refrigerator while you make the filling. No need to bake—the butter will set as it chills.
Personal tip: Don’t skip pressing the crust firmly. I’ve had a few bars where the crust fell apart because I got lazy. Take the extra 30 seconds to really pack it down.
Step 2: Make the Filling
- In a large mixing bowl, beat 1 cup (8 oz) softened reduced-fat cream cheese with an electric mixer on medium speed until smooth and creamy, about 1 minute. Scrape down the sides of the bowl.
- Add ½ cup plain Greek yogurt, ¾ cup pumpkin puree, ½ cup powdered sugar, 1 teaspoon pumpkin pie spice, ½ teaspoon vanilla extract, and a pinch of salt. Beat on low speed until combined, then increase to medium and beat for 2 minutes until the mixture is smooth, fluffy, and pale orange in color.
- Taste the filling—it should be sweet, tangy, and warmly spiced. If you want more spice, add another ¼ teaspoon of pumpkin pie spice. If it tastes too tangy, add an extra tablespoon of powdered sugar.
Sensory cue: The filling should look like a thick, creamy mousse. It should hold its shape when you lift the beaters. If it’s too runny, your cream cheese might not have been softened enough, or your yogurt was too watery. Greek yogurt is best—avoid regular yogurt here.
Step 3: Assemble the Bars
- Remove the crust from the refrigerator. Spoon the filling onto the crust and spread it evenly with a spatula. Take your time to get it smooth—it’s worth it for the presentation.
- Tap the pan gently on the counter a few times to release any air bubbles. This also helps the filling settle evenly.
- Cover the pan with plastic wrap or foil and refrigerate for at least 4 hours, preferably overnight. The longer it chills, the cleaner your slices will be.
Warning: Don’t rush the chilling time. I once tried to cut these after only 2 hours, and they were a mess. The filling needs time to set properly. Overnight is best if you can wait.
Step 4: Add the Topping (Optional)
- Just before serving, whip ¼ cup heavy cream with 1 tablespoon powdered sugar until soft peaks form. This takes about 2-3 minutes with a hand mixer.
- Spread or pipe the whipped cream over the chilled bars. Dust with ¼ teaspoon pumpkin pie spice for a pretty finish.
Pro tip: If you’re making these ahead, wait to add the whipped cream until right before serving. It stays fresher and looks prettier that way.
Cooking Tips & Techniques
After making these light no-bake pumpkin cheesecake bars more times than I can count, I’ve picked up a few tricks that make a real difference.
- Soften your cream cheese properly: Leave it on the counter for 30-60 minutes before starting. Cold cream cheese creates lumps that are hard to beat out. If you’re in a hurry, microwave it in 10-second bursts until soft but not melted.
- Don’t overmix the filling: Once the ingredients are combined, beat for exactly 2 minutes. Overmixing can make the filling too airy, which causes it to deflate as it sets. I learned this the hard way after making a batch that looked like a sad, flat pancake.
- Use a sharp knife for clean slices: Run your knife under hot water, wipe it dry, then cut. Repeat between each slice for picture-perfect bars. This works like magic.
- Chill on a flat surface: Make sure your refrigerator shelf is level. Otherwise, your bars will set at an angle, and nobody wants a lopsided dessert.
- Multitasking tip: While the crust chills, clean your mixing bowls and measure out the filling ingredients. It makes the process feel faster and less chaotic.
One mistake I made early on was using low-fat cream cheese. It has a higher water content, which made the filling runny and never set properly. Stick with reduced-fat or full-fat for the best texture. Trust me on this one.
Variations & Adaptations
These light no-bake pumpkin cheesecake bars are wonderfully versatile. Here are a few ways to switch things up:
- Gluten-Free Option: Use gluten-free graham crackers or crushed gluten-free cookies for the crust. I’ve used gluten-free ginger snaps before, and the extra spice was fantastic.
- Vegan Version: Substitute vegan cream cheese, coconut yogurt, and a plant-based butter. The filling will be slightly softer, so chill for at least 6 hours or overnight. I’ve tested this with Kite Hill cream cheese, and it works beautifully.
- Extra Pumpkin Flavor: Add ½ teaspoon more pumpkin pie spice and 2 tablespoons extra pumpkin puree. This makes the bars taste even more like fall in every bite.
- Chocolate Twist: Drizzle melted dark chocolate over the top after chilling. The bitterness of the chocolate balances the sweet pumpkin filling perfectly. I did this for a Halloween party, and they were gone in minutes.
- Individual Servings: Make these in a muffin tin lined with paper cups for portion-controlled treats. Press the crust into the bottom of each cup, add filling, and chill. Great for parties or lunchboxes.
My personal favorite variation is adding a swirl of salted caramel on top before chilling. It sounds fancy, but it takes just 30 seconds and makes the bars feel extra special.
Serving & Storage Suggestions
These light no-bake pumpkin cheesecake bars are best served cold, straight from the refrigerator. The texture is firm but creamy, and the flavors are most vibrant when chilled.
Serving suggestions:
- Cut into 9 or 16 squares depending on how generous you want the portions. For a dessert table, smaller squares work well.
- Pair with a warm drink like coffee, chai latte, or spiced apple cider. The contrast of hot and cold is lovely.
- Top with a sprinkle of cinnamon or crushed pecans for extra crunch.
Storage instructions:
- Refrigerator: Store in an airtight container for up to 5 days. Place a layer of parchment paper between stacked bars to prevent sticking.
- Freezer: These freeze beautifully. Wrap individual bars tightly in plastic wrap, then place in a freezer-safe bag. Freeze for up to 3 months. Thaw in the refrigerator overnight before serving.
Reheating tip: These are meant to be served cold, but if you prefer a softer texture, let them sit at room temperature for 10 minutes before eating. The flavors actually deepen after a day in the fridge, so they taste even better on day two.
Nutritional Information & Benefits
Per serving (based on 9 servings):
- Calories: 210
- Fat: 12g
- Carbohydrates: 22g
- Protein: 5g
- Fiber: 1g
- Sugar: 14g
These light no-bake pumpkin cheesecake bars are a healthier twist on a classic dessert. The Greek yogurt adds protein and probiotics, while pumpkin puree is packed with vitamin A and fiber. Using reduced-fat cream cheese cuts down on saturated fat without sacrificing creaminess.
This recipe is naturally vegetarian and can be made gluten-free or vegan with simple swaps. It’s also lower in sugar than traditional cheesecake, thanks to the powdered sugar and yogurt combination. I love that I can enjoy a sweet treat without feeling like I’ve derailed my healthy eating habits.
One bar satisfies that dessert craving without the heavy feeling you get from traditional cheesecake. It’s the kind of recipe that makes you feel good about what you’re eating—both in the moment and after.
Conclusion
These light no-bake pumpkin cheesecake bars are proof that you don’t need an oven, a ton of ingredients, or hours of effort to make something truly special. They’re creamy, spiced, and perfectly sweet—everything you want in a fall dessert, but lighter and easier.
I love how versatile they are. You can dress them up for a holiday party or keep them simple for a weeknight treat. They’ve become my go-to for potlucks, family dinners, and those moments when I just need a little something sweet without the guilt.
I’d love to hear how yours turn out! Did you try a variation? Add a topping? Share your experience in the comments below. And if you loved this recipe, don’t forget to pin it for later or share it with a friend who needs a quick, delicious dessert in their life.
Happy cooking—and even happier eating!
Frequently Asked Questions
Can I use pumpkin pie filling instead of pumpkin puree?
No, I wouldn’t recommend it. Pumpkin pie filling already has sugar and spices added, which will throw off the sweetness and texture of these bars. Stick with 100% pumpkin puree for the best results.
How long do these bars need to chill?
At least 4 hours, but overnight is ideal. The longer they chill, the cleaner your slices will be. If you’re in a hurry, you can freeze them for 2 hours, but the texture won’t be quite as smooth.
Can I make these dairy-free?
Yes! Use vegan cream cheese, coconut yogurt, and a plant-based butter substitute. The texture will be slightly softer, so be sure to chill them thoroughly. I’ve had great results with Kite Hill cream cheese.
Why is my filling runny?
This usually happens if your cream cheese wasn’t softened enough, or if you used regular yogurt instead of Greek yogurt. Greek yogurt is thicker and helps the filling set properly. Also, make sure you’re not overmixing the filling.
Can I freeze these bars?
Absolutely. Wrap individual bars tightly in plastic wrap, then place them in a freezer-safe bag. They’ll keep for up to 3 months. Thaw in the refrigerator overnight before serving. They taste just as good as fresh!
Pin This Recipe!
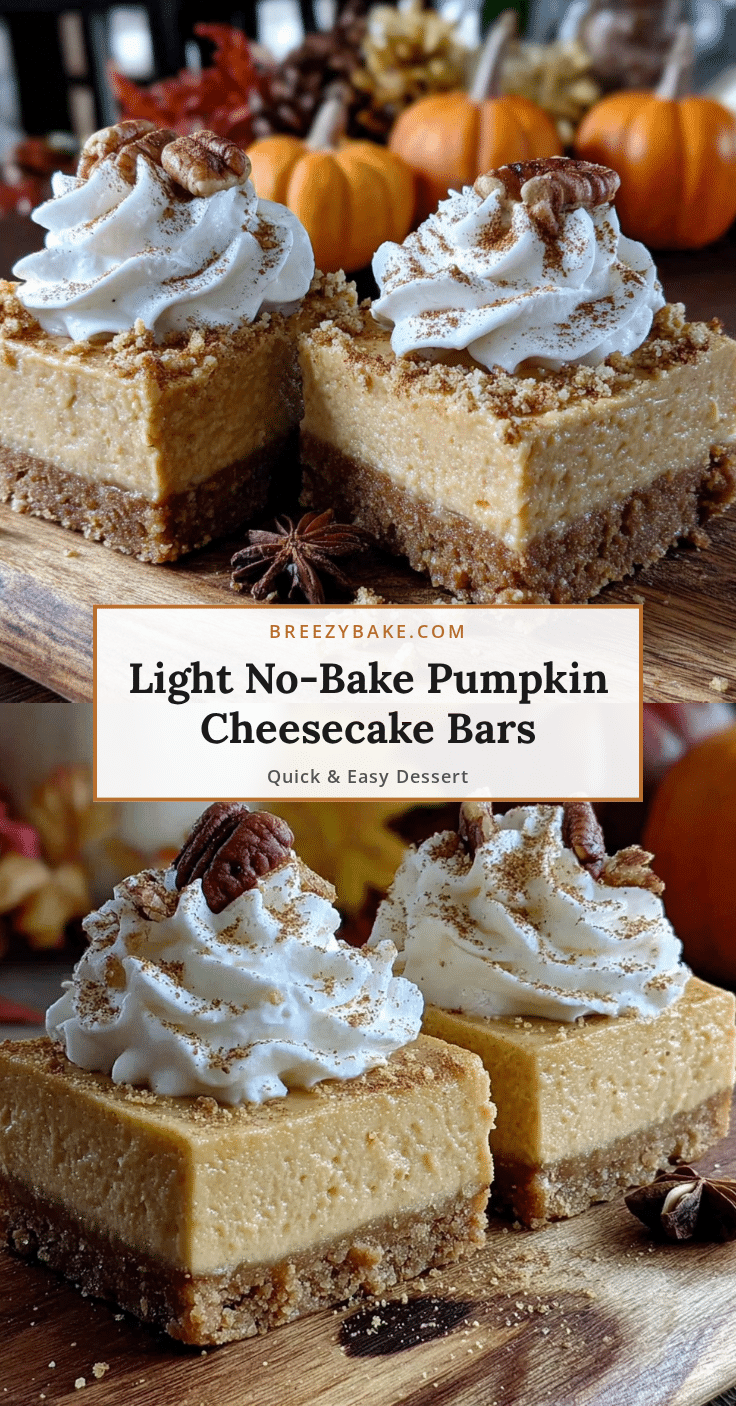
Light No-Bake Pumpkin Cheesecake Bars: Easy 10-Minute Dessert
These light no-bake pumpkin cheesecake bars are creamy, spiced, and perfectly sweet—everything you want in a fall dessert, but lighter and easier. Ready in just 10 minutes of active prep with no oven required.
- Prep Time: 10 minutes
- Cook Time: 0 minutes
- Total Time: 4 hours 10 minutes (includes chilling)
- Yield: 9 servings 1x
- Category: Dessert
- Cuisine: American
Ingredients
- 1 ½ cups graham cracker crumbs (about 12 full sheets, crushed finely)
- 5 tablespoons unsalted butter, melted
- 2 tablespoons granulated sugar
- 1 cup (8 oz) reduced-fat cream cheese, softened
- ½ cup plain Greek yogurt (2% or full-fat)
- ¾ cup pumpkin puree (not pumpkin pie filling)
- ½ cup powdered sugar
- 1 teaspoon pumpkin pie spice
- ½ teaspoon vanilla extract
- Pinch of salt
- ¼ cup heavy cream (for topping, optional)
- 1 tablespoon powdered sugar (for topping, optional)
- ¼ teaspoon pumpkin pie spice (for topping, optional)
Instructions
- Prepare the crust: In a medium bowl, combine graham cracker crumbs, granulated sugar, and melted unsalted butter. Stir with a fork until the mixture looks like wet sand and holds together when pressed.
- Transfer the crust mixture to a parchment-lined 8×8-inch pan. Press it down firmly and evenly using the bottom of a glass or your fingers. Place the pan in the refrigerator while you make the filling.
- Make the filling: In a large mixing bowl, beat softened reduced-fat cream cheese with an electric mixer on medium speed until smooth and creamy, about 1 minute. Scrape down the sides of the bowl.
- Add Greek yogurt, pumpkin puree, powdered sugar, pumpkin pie spice, vanilla extract, and a pinch of salt. Beat on low speed until combined, then increase to medium and beat for 2 minutes until the mixture is smooth, fluffy, and pale orange in color.
- Taste the filling and adjust spice or sweetness if desired.
- Assemble the bars: Remove the crust from the refrigerator. Spoon the filling onto the crust and spread it evenly with a spatula. Tap the pan gently on the counter a few times to release air bubbles.
- Cover the pan with plastic wrap or foil and refrigerate for at least 4 hours, preferably overnight.
- Add the topping (optional): Just before serving, whip heavy cream with 1 tablespoon powdered sugar until soft peaks form. Spread or pipe the whipped cream over the chilled bars. Dust with ¼ teaspoon pumpkin pie spice.
- Cut into squares using a sharp knife (run under hot water and wipe dry between cuts) and serve cold.
Notes
For clean slices, run a sharp knife under hot water and wipe dry between cuts. Chill overnight for best texture. For a dairy-free version, use vegan cream cheese, coconut yogurt, and plant-based butter. The filling will be slightly softer, so chill for at least 6 hours.
Nutrition
- Serving Size: 1 bar (based on 9 se
- Calories: 210
- Sugar: 14
- Sodium: 180
- Fat: 12
- Saturated Fat: 7
- Carbohydrates: 22
- Fiber: 1
- Protein: 5
Keywords: no-bake pumpkin cheesecake bars, light pumpkin dessert, easy fall dessert, no-bake cheesecake, pumpkin bars


