My neighbor, a retired baker named Mrs. Gable, watched me fumbling with a batch of pizza dough one afternoon last October. I was trying to roll it out evenly—honestly, it looked more like a map of a very lumpy country. She didn’t say anything at first. Then she just reached over, dusted her hands with flour, and showed me how to let the dough rest for ten minutes before even touching it. That simple trick changed everything. We ended up talking for an hour on her porch about feeding crowds, about the chaos of Halloween parties, and about the one snack that always disappears first: anything wrapped up like a mummy. That conversation, more than the dough technique, is what stuck with me.
These Mummy Pizza Bites are born from that afternoon. They’re not fancy—I mean, they’re pizza rolls dressed up in a costume. But let me tell you, they steal the show every single time. The first time I made them for my own Halloween gathering, I set the tray down and watched them vanish in under ten minutes. Someone actually asked me if I’d cater their next party. Maybe you’ve been there, standing over a platter of appetizers, hoping you made enough? These little guys solve that problem. They’re fun, they’re filling, and they look like you spent way more effort than you actually did. That’s the kind of magic we all need for hosting, right?
Why You’ll Love This Recipe
I’ve tested this recipe about six times now—through burnt edges, too much cheese, and one batch where the eyes fell off completely. What I’m giving you is the version that actually works. It’s the one I bring to every potluck, every Halloween party, and every time I need to impress a crowd without breaking a sweat.
- Quick & Easy: These come together in about 25 minutes from start to finish. You can prep them while the oven preheats.
- Simple Ingredients: You probably already have pizza dough, cheese, and pepperoni in your fridge. No specialty store runs needed.
- Perfect for Halloween Parties: They’re themed without being complicated. Kids love them, adults love them, and they look adorable on a platter.
- Crowd-Pleaser: I’ve never brought these anywhere without someone asking for the recipe. They’re the first thing to go, every time.
- Unbelievably Delicious: The combination of crispy dough, melted cheese, and savory pepperoni is just… chef’s kiss. It’s comfort food in a tiny, spooky package.
What makes these different from other Halloween snacks? It’s the technique. Most recipes just wrap dough around a filling and call it a day. But I’ve learned that cutting the dough into thin strips, stretching them just a little, and leaving small gaps for the cheese to peek through creates that perfect mummy look. It’s not just about the costume—it’s about the texture. The exposed bits of cheese get golden and bubbly, which makes every bite better.
This recipe isn’t just good—it’s the kind that makes you close your eyes after the first bite. It’s comfort food reimagined for a party: faster, easier, but with the same soul-soothing satisfaction. Perfect for impressing guests without stress, or turning a simple snack into something memorable.
What Ingredients You Will Need
This recipe uses simple, everyday ingredients to deliver bold flavor and that irresistible mummy look. Most of these are pantry staples, so you probably won’t need a special trip to the store.
- Pizza dough, store-bought or homemade (1 lb / 450g) — I prefer Pillsbury refrigerated pizza dough for convenience, but any brand works. If using homemade, let it come to room temperature first so it’s easier to stretch.
- Pepperoni slices (about 24 slices) — Use regular-sized slices, not mini. You’ll need about 3 per mummy bite. I like Hormel or Applegate for cleaner flavor.
- Mozzarella cheese, shredded (1 cup / 120g) — Full-fat mozzarella melts best and gives that gooey pull. Low-moisture, part-skim works great too.
- Marinara sauce (½ cup / 120ml) — For dipping. Use your favorite jarred brand or leftover homemade sauce. Rao’s is my go-to for its rich flavor.
- Olive oil (1 tablespoon / 15ml) — Brushing the dough helps it turn golden and crispy. Extra virgin is fine, but regular works too.
- Garlic powder (½ teaspoon) — Sprinkled on top for extra savory depth. You can skip it if you’re short on time.
- Italian seasoning (½ teaspoon) — Optional, but it adds a nice herby note. Mix of oregano, basil, and thyme is perfect.
- Candy eyes (about 24 pieces) — These are the fun part! Find them in the baking aisle or online. Wilton brand makes good ones. You can also use small dots of black olive or black sesame seeds if you prefer edible eyes.
Substitution Tips: For a vegetarian version, skip the pepperoni and add chopped mushrooms or bell peppers. Use gluten-free pizza dough if needed—just check the package instructions because cooking times may vary. If you’re dairy-free, use vegan mozzarella shreds; they melt a bit differently but still work for the mummy look.
Equipment Needed
You don’t need much for this recipe—that’s part of the beauty. Here’s what I use every time:
- Baking sheet (13×18 inch / 33×46 cm) — A standard half-sheet pan works perfectly. Line it with parchment paper for easy cleanup.
- Parchment paper — Non-negotiable for me. It prevents sticking and makes lifting the mummies off the pan a breeze.
- Pizza cutter or sharp knife — For cutting the dough into strips. A pizza cutter is faster, but a knife works just as well.
- Pastry brush — For brushing olive oil on the dough strips. A silicone brush is easiest to clean.
- Small bowl — For holding the olive oil and seasonings mix.
- Cooling rack — Optional, but it helps the mummies stay crispy if you’re making a big batch.
Budget-Friendly Tip: Don’t have a pastry brush? Use a paper towel dipped in oil and gently dab it on the dough. It’s not fancy, but it works. Also, skip the candy eyes and use small pieces of black olive—cheaper and still cute.
Preparation Method
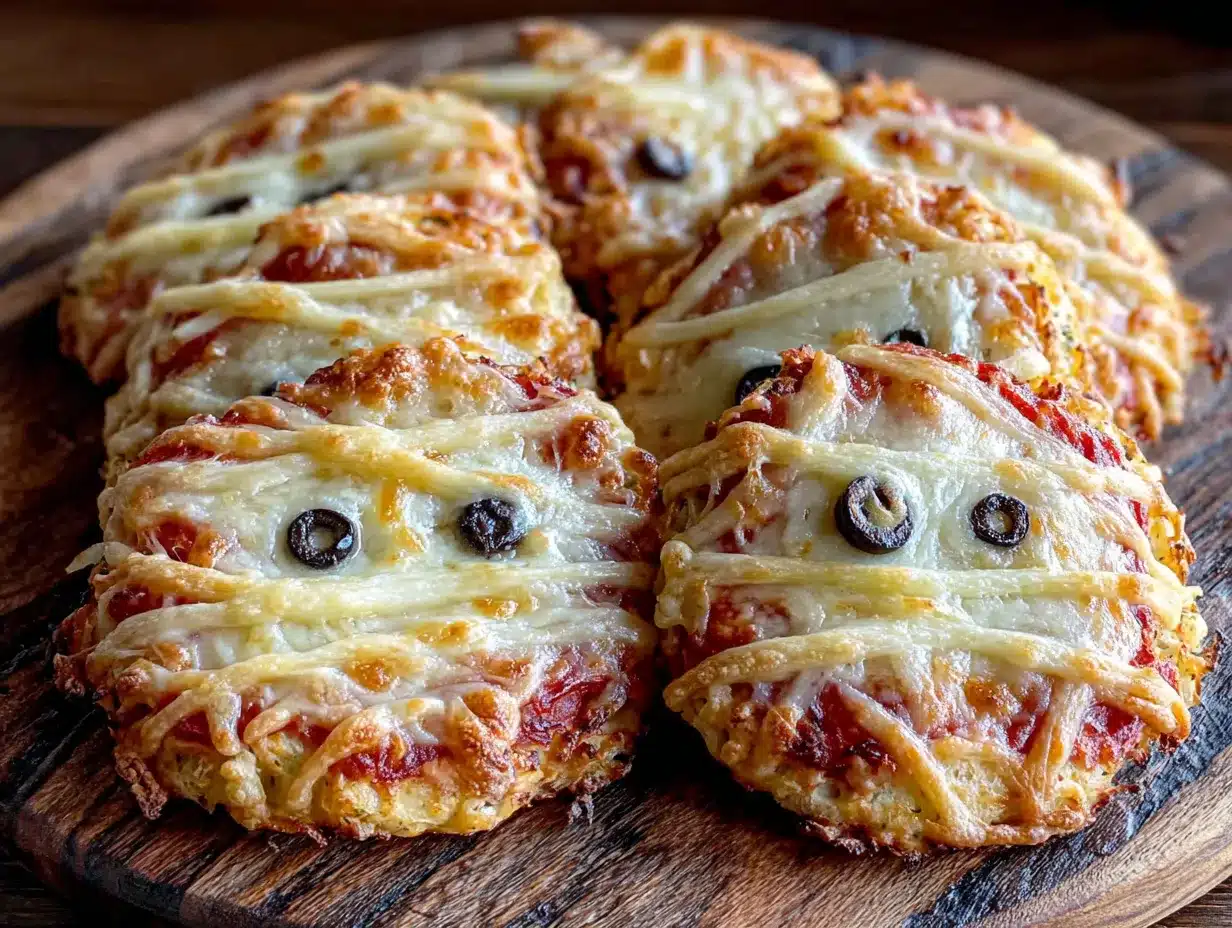
- Preheat your oven to 400°F (200°C). Line a baking sheet with parchment paper. This is important because the cheese will bubble and stick otherwise. Trust me, I learned that the hard way.
- Roll out the pizza dough on a lightly floured surface into a rectangle about 12×8 inches (30×20 cm). If the dough keeps shrinking back, let it rest for 5 minutes—Mrs. Gable’s trick works every time.
- Cut the dough into thin strips, about ½ inch (1.25 cm) wide and 6-8 inches (15-20 cm) long. You’ll need about 3 strips per mummy. A pizza cutter makes this step fast and clean.
- Assemble the filling: Take one strip of dough and place 2-3 pepperoni slices along the center. Top with a generous pinch of shredded mozzarella—about 1 tablespoon (15g) per mummy.
- Wrap the mummy: Fold the dough strip over the filling, then wrap another strip around it crosswise, leaving small gaps for the cheese to peek through. Don’t cover everything—the exposed cheese is what gives it that mummy look. Repeat with remaining strips.
- Place the mummies on the prepared baking sheet, spacing them about 1 inch (2.5 cm) apart. They’ll puff up a bit, but they don’t spread much.
- Brush each mummy with olive oil using a pastry brush. Sprinkle garlic powder and Italian seasoning on top for extra flavor.
- Bake for 12-15 minutes, or until the dough is golden brown and the cheese is bubbly. The edges should be crispy, but the center should still be soft. Watch them closely after 12 minutes—every oven runs a little different.
- Let them cool for 2-3 minutes on the baking sheet. Then gently press a candy eye onto each mummy while they’re still warm. The heat helps the eyes stick. If they fall off later, just dab a tiny bit of marinara sauce as “glue.”
- Serve immediately with warm marinara sauce for dipping. Arrange them on a platter with the sauce in the center—they look like little mummies peeking out of a red pool!
Sensory Cue: When they’re done, the kitchen should smell like a pizzeria mixed with a cozy fall evening. The cheese will be golden in spots, and the dough will feel firm to the touch but give slightly when pressed.
Cooking Tips & Techniques
I’ve made these about a dozen times now, and I’ve collected a few lessons along the way. Here’s what I wish someone had told me:
- Don’t overfill — It’s tempting to stuff them with cheese, but too much filling makes the dough split open. One tablespoon of cheese and 2-3 pepperoni slices is the sweet spot.
- Leave gaps in the wrapping — The mummy look works best when you can see patches of dough and cheese. If you wrap too tightly, it looks like a breadstick. Let some cheese peek through.
- Use room-temperature dough — Cold dough is stiff and tears easily. Let it sit on the counter for 20 minutes before rolling. This was the single biggest improvement in my batches.
- Watch the oven closely — The first time I made these, I walked away for two minutes and came back to burnt edges. Set a timer for 12 minutes and check them. Every oven runs hot or cold.
- Prep ahead for parties — You can assemble the mummies up to 4 hours in advance and keep them in the fridge on the baking sheet. Just add 2-3 minutes to the baking time if they’re cold from the fridge.
My Biggest Failure: One time, I forgot to brush the dough with oil. The mummies came out pale and sad-looking—like they’d been through a snowstorm instead of a mummy costume. The oil is what gives them that golden, appetizing color. Don’t skip it.
Variations & Adaptations
These mummies are surprisingly versatile. Here are a few ways I’ve adapted them for different crowds:
- Vegetarian Mummies: Skip the pepperoni and use sliced mushrooms or roasted red peppers instead. I tried this for a friend who doesn’t eat meat, and they were just as popular. The mushrooms add a nice earthy flavor.
- Spicy Mummies: Add a pinch of red pepper flakes to the cheese filling, or use spicy pepperoni. My husband loves these—he says they have a little kick without being overwhelming.
- Cheese-Only Mummies: Use a mix of mozzarella and cheddar for a different flavor profile. The cheddar melts into a deeper orange color, which looks great against the pale dough.
- Breakfast Mummies: Fill them with scrambled eggs and cooked sausage, then bake as usual. I made these for a Halloween brunch once, and they were a hit. Just reduce the baking time to 10 minutes since the filling is already cooked.
- Gluten-Free Option: Use store-bought gluten-free pizza dough. The texture is a bit more delicate, so handle the strips gently. I’ve used the Schar brand and it worked well.
Personal Favorite: My go-to variation is adding a tiny piece of fresh basil inside each mummy before wrapping. It adds a pop of freshness that cuts through the richness. I started doing this after a farmers’ market trip last fall, and now I can’t go back.
Serving & Storage Suggestions
These mummies are best served warm, right out of the oven. The cheese is stretchy, the dough is crispy, and the eyes are still firmly attached. Arrange them on a large platter in a circle around a bowl of warm marinara sauce. For a Halloween party, I like to add some black and orange sprinkles around the edges of the platter—it’s a small touch that makes the table look festive.
What to Serve Alongside: These pair beautifully with a simple green salad for a light meal, or with other finger foods like spooky stuffed mushrooms or Halloween veggie platter for a full spread. For drinks, a crisp cider or a light beer works well. Kids love them with apple juice.
Storage Tips: Leftover mummies keep in an airtight container in the fridge for up to 3 days. To reheat, pop them in a 350°F (175°C) oven for 5-7 minutes—this brings back the crispiness. The microwave works in a pinch, but the dough gets soft. I don’t recommend freezing them because the texture changes, but if you must, freeze them before baking and add 5 minutes to the cooking time.
Flavor Development: Honestly, these are best fresh. The dough stays crispy for about an hour after baking, then starts to soften. If you’re serving them at a party, bake them just before guests arrive. They’ll hold up well for about 30 minutes on the table.
Nutritional Information & Benefits
Per serving (about 3 mummy bites):
| Nutrient | Amount |
|---|---|
| Calories | 290 |
| Protein | 14g |
| Carbohydrates | 28g |
| Fat | 14g |
| Saturated Fat | 6g |
| Fiber | 2g |
| Sodium | 680mg |
These mummy bites offer a decent amount of protein from the cheese and pepperoni, which helps keep you full during a party. The pizza dough provides energy from carbohydrates, and the marinara sauce adds a serving of vegetables (yes, tomatoes count!). For a lighter version, use turkey pepperoni and low-fat mozzarella—this cuts the fat by about 30%. If you’re watching sodium, opt for low-sodium marinara sauce and reduced-sodium pepperoni.
Allergen Note: This recipe contains gluten and dairy. For gluten-free and dairy-free versions, see the variations section above. The candy eyes typically contain sugar and cornstarch, so check the package if you have sensitivities.
Conclusion
These Mummy Pizza Bites are the kind of recipe that makes hosting feel effortless. They’re fun, they’re delicious, and they look like you spent hours on them—when really, they come together in under 30 minutes. Every time I make them, I think of Mrs. Gable and that afternoon on her porch, and I smile. Food has a way of connecting us, doesn’t it?
I’d love to hear how yours turn out. Did you add any fun variations? Did the kids help wrap the mummies? Drop a comment below and let me know—I read every single one. And if you try them, tag me in your photos. There’s nothing better than seeing these little guys come to life in your kitchen. Happy Halloween, and happy cooking!
Frequently Asked Questions
Can I make these ahead of time for a party?
Absolutely! Assemble the mummies up to 4 hours in advance and keep them on the baking sheet in the fridge. Bake them just before serving for the best texture. If baking from cold, add 2-3 minutes to the cooking time.
Can I use crescent roll dough instead of pizza dough?
Yes, you can! Crescent roll dough works well and has a slightly flakier texture. Just cut it into strips the same way. Note that it bakes a bit faster—check them at 10 minutes instead of 12.
What can I use instead of candy eyes?
If you don’t have candy eyes, use small pieces of black olive, black sesame seeds, or even dots of black food coloring on a toothpick. The olive version looks especially spooky!
How do I keep the cheese from leaking out?
Make sure you don’t overfill the mummies. Stick to about 1 tablespoon of cheese per mummy. Also, pinch the ends of the dough strips gently to seal them. If some cheese leaks anyway, that’s okay—it just adds to the mummy look.
Can I freeze these for later?
Yes, but with a caveat. Freeze the unbaked mummies on a baking sheet, then transfer them to a freezer bag. Bake from frozen at 400°F (200°C) for 15-18 minutes. The texture won’t be quite as crispy as fresh, but they’re still delicious.
Pin This Recipe!
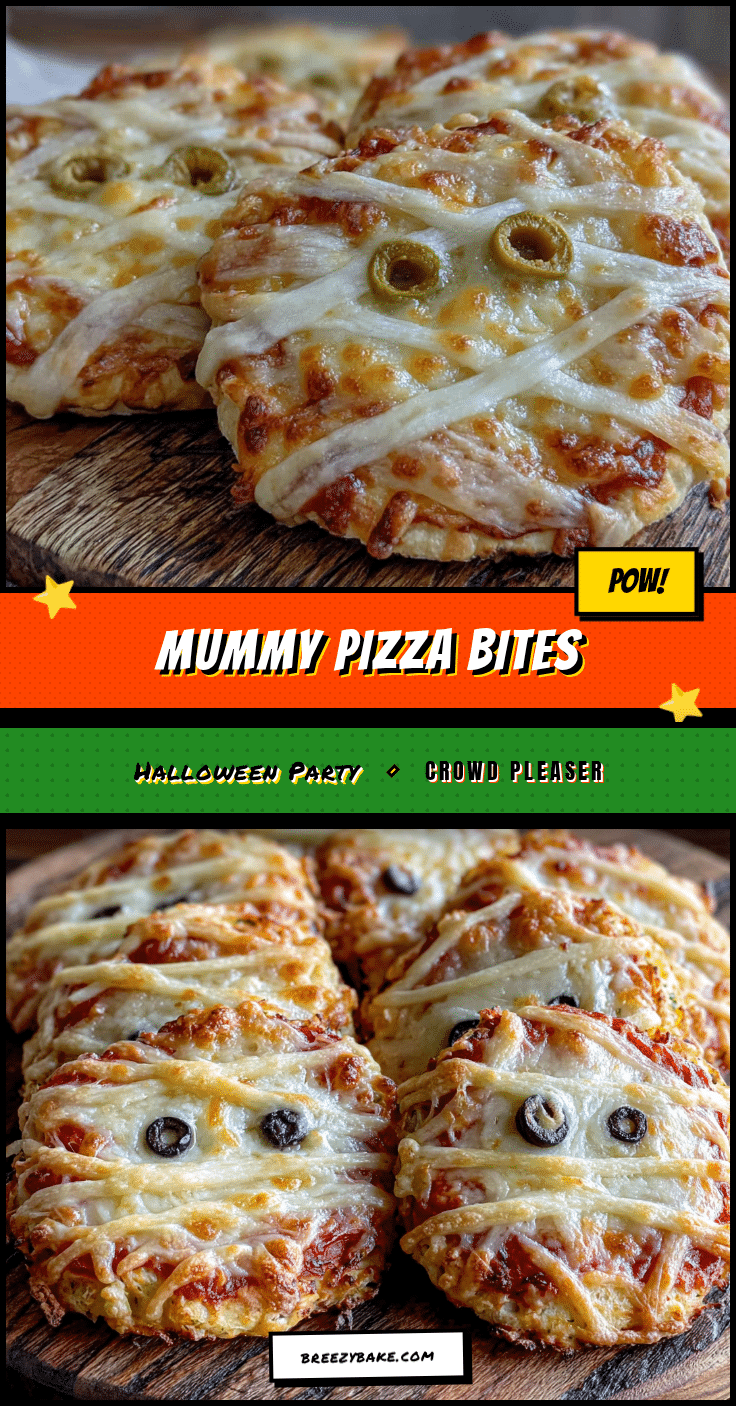
Easy Mummy Pizza Bites: Best Halloween Party Appetizer
These Mummy Pizza Bites are fun, filling, and look like you spent hours on them—but they come together in under 30 minutes. Perfect for Halloween parties, they’re a crowd-pleaser that disappears fast.
- Prep Time: 10 minutes
- Cook Time: 15 minutes
- Total Time: 25 minutes
- Yield: 8 servings (about 24 mummy bites) 1x
- Category: Appetizer
- Cuisine: American
Ingredients
- 1 lb (450g) pizza dough, store-bought or homemade
- 24 slices pepperoni (about 3 per mummy)
- 1 cup (120g) shredded mozzarella cheese
- ½ cup (120ml) marinara sauce, for dipping
- 1 tablespoon (15ml) olive oil
- ½ teaspoon garlic powder
- ½ teaspoon Italian seasoning
- 24 candy eyes (or small pieces of black olive)
Instructions
- Preheat your oven to 400°F (200°C). Line a baking sheet with parchment paper.
- Roll out the pizza dough on a lightly floured surface into a rectangle about 12×8 inches (30×20 cm). If the dough keeps shrinking, let it rest for 5 minutes.
- Cut the dough into thin strips, about ½ inch (1.25 cm) wide and 6-8 inches (15-20 cm) long. You’ll need about 3 strips per mummy.
- Assemble the filling: Take one strip of dough and place 2-3 pepperoni slices along the center. Top with a generous pinch of shredded mozzarella (about 1 tablespoon per mummy).
- Wrap the mummy: Fold the dough strip over the filling, then wrap another strip around it crosswise, leaving small gaps for the cheese to peek through. Repeat with remaining strips.
- Place the mummies on the prepared baking sheet, spacing them about 1 inch (2.5 cm) apart.
- Brush each mummy with olive oil using a pastry brush. Sprinkle garlic powder and Italian seasoning on top.
- Bake for 12-15 minutes, or until the dough is golden brown and the cheese is bubbly.
- Let them cool for 2-3 minutes on the baking sheet. Then gently press a candy eye onto each mummy while they’re still warm.
- Serve immediately with warm marinara sauce for dipping.
Notes
Don’t overfill the mummies—1 tablespoon of cheese and 2-3 pepperoni slices is the sweet spot. Leave gaps in the wrapping for the mummy look. Use room-temperature dough for easier handling. Watch the oven closely to avoid burning. Assemble up to 4 hours ahead and refrigerate; add 2-3 minutes to baking time if cold.
Nutrition
- Serving Size: 3 mummy bites
- Calories: 290
- Sodium: 680
- Fat: 14
- Saturated Fat: 6
- Carbohydrates: 28
- Fiber: 2
- Protein: 14
Keywords: Halloween appetizer, mummy pizza bites, easy party snack, kid-friendly, pizza rolls, spooky snack


