It was 11:47 PM on a random Tuesday, and I was wide awake with a pumpkin-shaped hole in my soul. I didn’t have the energy for a full-blown layer cake or even my usual go-to pumpkin loaf, but I had a can of pumpkin puree leftover from a forgotten project and a weird, nagging idea. What if I browned the butter first? What if I made it *extra*? I mean, the house was quiet, the dog was asleep, and honestly, there was no one around to judge my late-night baking experiments. So I grabbed my heaviest pan and let the butter bubble away, watching it turn into liquid gold.
That first bite—still warm, with a drizzle of maple glaze that had pooled in the cracks—was a moment of pure, tired vindication. The nutty, toasty flavor from the brown butter made the pumpkin taste deeper, richer, almost caramelized. I forgot to set a timer for the glaze and had to guess the consistency by eye (it worked out, thankfully). Maybe you’ve been there—staring into the fridge at 11 PM, convinced that a specific, unnamed baked good is the only thing that will fix your week. This bread was that fix. It’s the kind of recipe that makes you feel like a kitchen genius, even when you’re wearing pajamas and operating on three hours of sleep.
This is the bread I now make for every single gathering. It’s the one that gets the “wait, what’s in this?” reaction, followed by a quiet, determined reach for a second slice. It’s not just pumpkin bread; it’s the brown butter that makes it unforgettable, and the maple glaze that makes it a showstopper. Let me tell you, this is the recipe that will steal the show at your next dinner party.
Why You’ll Love This Recipe
This isn’t just another pumpkin bread recipe floating around the internet. After testing this recipe for a solid month (my neighbors were very happy, my jeans less so), I can confidently say this is the one you need. It’s the perfect balance of cozy, impressive, and surprisingly easy.
- Unbelievably Delicious: The brown butter adds a nutty, toasty depth that regular melted butter just can’t touch. It transforms the humble pumpkin bread into something that tastes like you spent hours in a fancy bakery.
- Simple Ingredients: You likely have everything in your pantry right now. No weird extracts or hard-to-find flours. Just good, honest ingredients that come together beautifully.
- Perfect for Hosting: This bread is a crowd-pleaser that makes you look like a hero. It’s the dish that disappears first at potlucks and gets asked for by name at family gatherings. It’s impressive without being stressful.
- Foolproof Method: I’ve streamlined the steps so you get a perfectly moist, tender crumb every single time. The brown butter step is simple, and the glaze is a no-fuss pour-over situation.
- Make-Ahead Magic: You can bake this a day ahead of time. In fact, the flavors get even better overnight as the brown butter and pumpkin meld together. One less thing to worry about when your guests arrive.
This recipe is my best version—the one that makes you close your eyes after the first bite. It’s comfort food reimagined: richer, nuttier, and with a glossy maple finish that feels like a warm hug on a cool autumn evening. Perfect for impressing guests without breaking a sweat, or turning a simple Tuesday into something a little more special.
What Ingredients You Will Need
This recipe uses simple, wholesome ingredients to deliver that bold, nutty flavor and satisfyingly moist texture. Here’s what you’ll need to grab, along with a few tips I’ve picked up along the way.
For the Brown Butter Pumpkin Bread
- 1 cup (2 sticks / 226g) unsalted butter: This is the star. I recommend using a good-quality European-style butter like Kerrygold for a richer flavor, but any unsalted butter will work. The browning process is key, so don’t skip it.
- 1 ¾ cups (350g) granulated sugar: Regular white sugar is perfect. It helps create that tender, delicate crumb. You can swap in coconut sugar for a deeper, more molasses-like flavor, but the texture will be slightly denser.
- 1 (15-ounce / 425g) can pure pumpkin puree: Make sure you’re getting pure pumpkin, not pumpkin pie filling. Libby’s is my go-to brand for consistent results. It’s thick, smooth, and not watery.
- 3 large eggs, at room temperature: Room temperature eggs emulsify into the batter much better, creating a lighter loaf. If you forgot to take them out, just place them in a bowl of warm water for 5 minutes.
- 1 teaspoon vanilla extract: A good quality pure vanilla extract rounds out the flavors.
- 2 cups (250g) all-purpose flour: Spoon and level your flour for the most accurate measurement. Scooping directly from the bag can pack in too much flour, leading to a dry bread.
- 1 teaspoon baking soda: This helps the bread rise and gives it a nice dome.
- ½ teaspoon baking powder: Adds a little extra lift.
- ½ teaspoon salt: Don’t skip it! Salt balances the sweetness and enhances all the other flavors.
- 2 teaspoons ground cinnamon: The backbone of the warm spice blend.
- ½ teaspoon ground nutmeg: Freshly grated is best if you have it, but pre-ground works great.
- ¼ teaspoon ground ginger: Adds a subtle warmth and bite.
- ⅛ teaspoon ground cloves: A little goes a long way; it adds that classic “pumpkin spice” depth.
For the Maple Glaze
- 1 cup (120g) powdered sugar, sifted: Sifting removes lumps and ensures a silky smooth glaze.
- 3 tablespoons pure maple syrup: Please use the real stuff, not pancake syrup. It makes a world of difference in flavor. Grade A dark amber is my favorite for its robust taste.
- 1-2 tablespoons milk or heavy cream: Whole milk or heavy cream will give you a richer, creamier glaze. Start with 1 tablespoon and add more until you reach your desired consistency.
- Pinch of salt: To balance the sweetness of the glaze.
Equipment Needed
You don’t need a ton of fancy gear for this recipe, which is part of its charm. Here’s what you’ll need to have on hand.
- 9×5-inch Loaf Pan: This is the standard size for a classic loaf. I love my USA Pan loaf pan for its even baking and non-stick surface. A metal pan is better than glass for this recipe, as it conducts heat more evenly.
- Light-Colored Saucepan: A light-colored pan is crucial for browning butter. It lets you see the milk solids turn that perfect golden-brown color without burning them. A dark pan makes it too easy to overcook.
- Large Mixing Bowls: You’ll need one for the wet ingredients and one for the dry.
- Whisk and Rubber Spatula: A whisk for the dry ingredients and a spatula for folding everything together.
- Parchment Paper: Lining your loaf pan with parchment paper makes for easy removal and clean-up. I always leave a little overhang on the sides for handles.
- Cooling Rack: Essential for letting the bread cool evenly so the glaze doesn’t just melt right off.
- Small Bowl for Glaze: For whisking together the simple maple glaze.
Preparation Method
Alright, let’s get to the good part. Follow these steps, and you’ll have a show-stopping loaf that will have everyone asking for the recipe.
- Preheat and Prep: Preheat your oven to 350°F (175°C). Grease a 9×5-inch loaf pan and line it with a strip of parchment paper, leaving overhang on the two long sides. This will be your best friend later.
- Brown the Butter: Place the 1 cup of unsalted butter in your light-colored saucepan over medium heat. Let it melt, swirling the pan occasionally. It will start to foam and crackle. Keep a close eye on it. After a few minutes, the crackling will subside, and you’ll see little brown specks forming at the bottom of the pan. The butter will smell nutty and amazing. Once it’s a deep golden amber color, immediately remove it from the heat and pour it into a heat-safe bowl (including all those brown bits!). Let it cool for about 10 minutes. Don’t walk away from the stove—it can go from perfect to burnt in seconds.
- Mix the Wet Ingredients: In a large bowl, whisk together the cooled brown butter and the 1 ¾ cups of granulated sugar until well combined. It will look a little grainy, and that’s okay. Add the can of pumpkin puree, 3 room-temperature eggs, and 1 teaspoon of vanilla extract. Whisk until everything is smooth and fully incorporated. The batter will be a beautiful, rich orange color.
- Combine the Dry Ingredients: In a separate medium bowl, whisk together the 2 cups of all-purpose flour, 1 teaspoon of baking soda, ½ teaspoon of baking powder, ½ teaspoon of salt, and all the spices (2 tsp cinnamon, ½ tsp nutmeg, ¼ tsp ginger, ⅛ tsp cloves). Whisking ensures the baking soda and spices are evenly distributed.
- Fold it Together: Pour the dry ingredients into the wet ingredients. Using a rubber spatula, gently fold the mixture together. Fold just until you see the last streak of flour disappear. A few lumps are totally fine. Over-mixing will develop the gluten and make your bread tough and dense. We want it tender!
- Bake the Loaf: Pour the batter into your prepared loaf pan and spread it into an even layer. Bake for 55-65 minutes. The bread is done when a toothpick inserted into the center comes out clean or with just a few moist crumbs attached. If the top is browning too quickly (after about 40 minutes), tent it loosely with a piece of aluminum foil.
- Cool Completely: Let the bread cool in the pan on a wire rack for about 15 minutes. Then, use the parchment paper overhang to lift the loaf out of the pan and transfer it directly to the wire rack to cool completely. This is the hardest part—the waiting—but it is essential. If you glaze it while it’s still warm, the glaze will just melt into a puddle.
- Make the Maple Glaze: While the bread is cooling, make the glaze. In a small bowl, whisk together the sifted powdered sugar, 3 tablespoons of pure maple syrup, and a pinch of salt. Add 1 tablespoon of milk or cream and whisk. If it’s too thick, add another teaspoon of milk until it’s pourable but still thick enough to coat the back of a spoon.
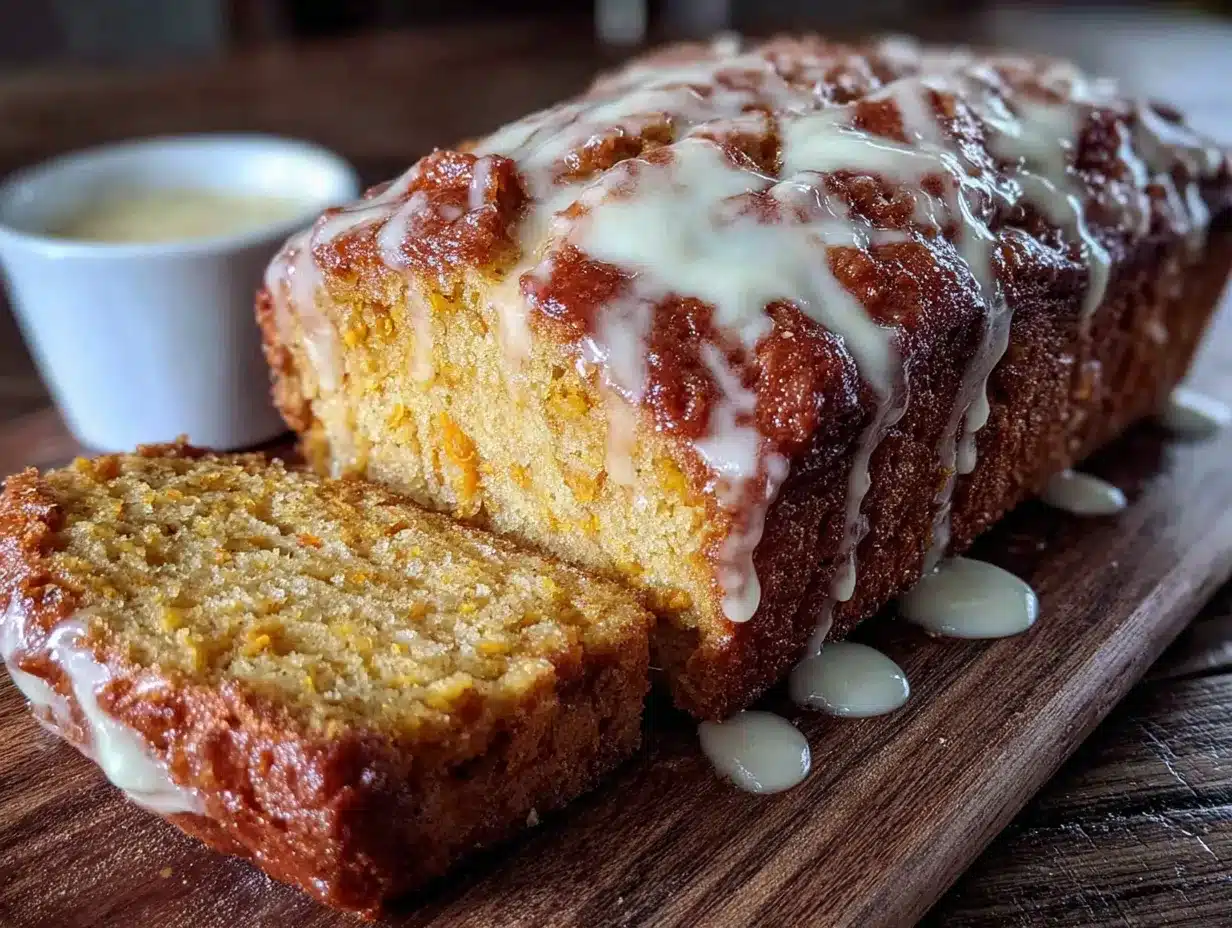
- Glaze and Serve: Once the loaf is completely cool, drizzle the maple glaze over the top. Let it set for about 10 minutes before slicing. For a dinner party, I like to do this right before my guests arrive for the most stunning presentation.
Cooking Tips & Techniques
I’ve made this pumpkin bread more times than I can count, and I’ve learned a few things the hard way so you don’t have to. Here are my best tips for perfect results every single time.
- Don’t Rush the Brown Butter: This is the most important step. Use a light-colored pan and keep the heat at medium. Swirl the pan often. The moment you see the milk solids turn a deep amber and smell that nutty aroma, pull it off the heat. I once got distracted by a phone call and ended up with black, burnt butter. It was a sad day. The brown bits are flavor gold—don’t strain them out!
- Room Temperature Ingredients Matter: I know it’s a pain, but using room temperature eggs and even room temperature pumpkin puree (just let the can sit out for 30 minutes) helps the batter emulsify properly. This leads to a more even, tender crumb. Cold eggs can seize the brown butter and make the batter lumpy.
- The “Tent” Trick: Every oven is different. If you notice the top of your loaf getting dark around the 40-minute mark, just loosely lay a piece of aluminum foil over the top. It will protect the crust from burning while the inside continues to bake perfectly.
- Check for Doneness Correctly: A toothpick test is your best friend. But don’t just poke it in the very center. Insert it in a few places near the center. If you see wet batter, it needs more time. A few moist crumbs are perfect. If it comes out clean, you’re good to go.
- Patience with Cooling: I get it, the smell is intoxicating. But glazing a warm loaf is a recipe for a sticky, glazy mess. The glaze needs a solid surface to set on. Let it cool for at least an hour on the wire rack. Your patience will be rewarded with beautiful, defined glaze stripes.
Variations & Adaptations
This recipe is a fantastic base, and I love playing around with it depending on the season or who I’m feeding. Here are a few of my favorite twists.
- Chocolate Chip Pumpkin Bread: Fold in 1 cup of semi-sweet or dark chocolate chips along with the dry ingredients. The rich, bitter chocolate is a perfect match for the nutty brown butter and sweet pumpkin. This is my personal favorite for a more decadent treat.
- Gluten-Free Adaptation: You can substitute the all-purpose flour with a high-quality 1:1 gluten-free baking flour blend, like Bob’s Red Mill or King Arthur. No other changes are needed! The pumpkin puree helps keep it incredibly moist. I’ve tested this for a gluten-sensitive friend, and she couldn’t tell the difference.
- Vegan Pumpkin Bread: To make this vegan, use a plant-based butter (like Miyoko’s) for the browning step. Replace the eggs with 3 flax eggs (3 tablespoons ground flaxseed + 9 tablespoons water, let sit for 5 minutes). The texture will be a little denser and more tender, but the flavor is still incredible.
- Spiced-Up Glaze: Add a pinch of cinnamon or a tiny pinch of cayenne pepper to the maple glaze for an extra layer of warmth. The cayenne gives a wonderful, unexpected little kick that cuts through the sweetness.
- Nutty Crunch: After glazing, sprinkle the top with ½ cup of toasted, chopped pecans or walnuts. The crunch adds a wonderful textural contrast to the soft, moist bread. It also makes it look incredibly fancy for a brunch spread.
Serving & Storage Suggestions
This bread is a star at any gathering, and how you serve and store it makes all the difference. Here’s my tried-and-true advice.
Serving: This pumpkin bread is best served at room temperature or slightly warm. For a dinner party, I like to slice it and arrange the pieces on a beautiful wooden board. It’s wonderful on its own, but for an extra-special touch, serve it with a dollop of lightly sweetened whipped cream or a scoop of vanilla bean ice cream. It also pairs beautifully with a hot cup of coffee, a chai latte, or a glass of cold milk.
Storage: Store the cooled, glazed bread in an airtight container at room temperature for up to 4 days. The flavors actually deepen and meld together overnight, making it even better the next day. If you live in a very humid climate, you might want to store it in the refrigerator to prevent the glaze from getting sticky, but let it come to room temperature before serving.
Freezing: This bread freezes like a dream! For best results, do not glaze it. Wrap the completely cooled loaf tightly in a layer of plastic wrap, then a layer of aluminum foil. Freeze for up to 3 months. When you’re ready to serve, thaw it overnight in the refrigerator, then bring it to room temperature. Once it’s fully thawed, make the fresh maple glaze and drizzle it over the top. It will taste just-baked.
Nutritional Information & Benefits
While this is definitely a treat, it does have a few redeeming qualities, especially compared to a standard white-flour loaf. Here’s a quick look at what you’re getting per slice (based on 12 slices).
| Nutrient | Amount Per Slice (approx.) |
|---|---|
| Calories | 380 |
| Fat | 18g |
| Saturated Fat | 11g |
| Carbohydrates | 52g |
| Sugar | 35g |
| Fiber | 2g |
| Protein | 5g |
| Vitamin A | 120% DV |
Health Highlights: The star ingredient, pumpkin puree, is packed with Vitamin A, which is excellent for your vision and immune system. It also provides a good dose of fiber, which helps with digestion and keeps you feeling full. The brown butter, while rich, adds a depth of flavor that allows you to use less sugar overall than a typical dessert. This is a feel-good indulgence that balances comfort with a little bit of nutritional virtue.
Conclusion
This Brown Butter Pumpkin Bread with Maple Glaze is more than just a recipe; it’s a feeling. It’s the warmth of a fall kitchen, the joy of sharing something delicious with the people you love, and the quiet satisfaction of pulling off a dish that looks and tastes like a million bucks with surprisingly little effort. It’s the bread that will have your guests hovering by the kitchen counter, asking for “just one more sliver.”
I honestly believe this is the best pumpkin bread you will ever make. The nutty brown butter, the perfectly spiced crumb, the glossy maple finish—it’s a combination that’s hard to beat. I encourage you to make it your own. Add chocolate chips, throw in some toasted pecans, or double the glaze. Whatever you do, just make it. You won’t regret it.
I’d love to hear how it turns out for you! Leave a comment below and let me know what you think, or tag me in your photos on social media. Your kitchen is waiting. Happy baking!
Frequently Asked Questions
Can I use salted butter instead of unsalted?
Yes, you can! Just reduce the added salt in the recipe to ¼ teaspoon. The salted butter will add a touch of saltiness that actually complements the sweet glaze nicely.
My brown butter didn’t get brown. What did I do wrong?
It’s possible you didn’t cook it long enough, or the heat was too low. Make sure you use a light-colored pan and medium heat. Don’t rush it—the process takes about 5-8 minutes. You’re looking for the milk solids to turn a deep amber color and smell nutty.
Can I make this into muffins instead of a loaf?
Absolutely! This batter makes about 18 standard muffins. Bake them in a lined muffin tin at 350°F (175°C) for 18-22 minutes, or until a toothpick inserted into the center comes out clean. The glaze is perfect for drizzling over the tops.
How do I know when the bread is fully baked?
Use the toothpick test! Insert a wooden toothpick into the center of the loaf. If it comes out clean or with just a few moist crumbs attached, it’s done. If it comes out with wet batter, it needs another 5-10 minutes.
Can I skip the maple glaze?
You can, but I wouldn’t recommend it! The glaze adds a beautiful sweetness and a glossy finish that makes this bread truly special. If you want a less sweet version, you could dust the top with a little powdered sugar instead.
Pin This Recipe!
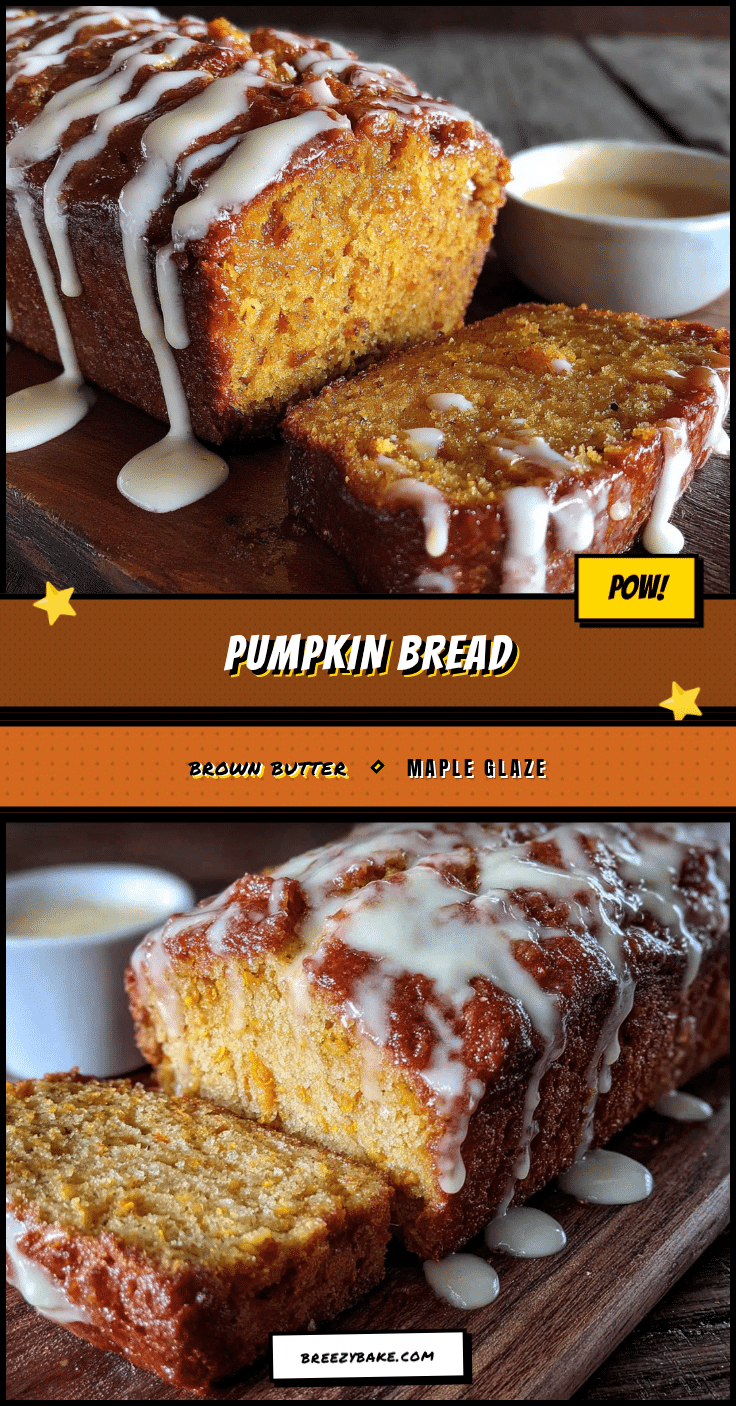
Best Brown Butter Pumpkin Bread with Maple Glaze Recipe
This Brown Butter Pumpkin Bread with Maple Glaze is the ultimate fall treat. The nutty, toasty flavor from the brown butter makes the pumpkin taste deeper and richer, while the glossy maple glaze adds a perfect sweet finish. It’s a crowd-pleaser that makes you look like a kitchen hero.
- Prep Time: 15 minutes
- Cook Time: 55-65 minutes
- Total Time: 1 hour 20 minutes
- Yield: 12 servings 1x
- Category: Dessert
- Cuisine: American
Ingredients
- 1 cup (2 sticks / 226g) unsalted butter
- 1 ¾ cups (350g) granulated sugar
- 1 (15-ounce / 425g) can pure pumpkin puree
- 3 large eggs, at room temperature
- 1 teaspoon vanilla extract
- 2 cups (250g) all-purpose flour
- 1 teaspoon baking soda
- ½ teaspoon baking powder
- ½ teaspoon salt
- 2 teaspoons ground cinnamon
- ½ teaspoon ground nutmeg
- ¼ teaspoon ground ginger
- ⅛ teaspoon ground cloves
- 1 cup (120g) powdered sugar, sifted
- 3 tablespoons pure maple syrup
- 1–2 tablespoons milk or heavy cream
- Pinch of salt
Instructions
- Preheat your oven to 350°F (175°C). Grease a 9×5-inch loaf pan and line it with a strip of parchment paper, leaving overhang on the two long sides.
- Brown the butter: Place the 1 cup of unsalted butter in a light-colored saucepan over medium heat. Let it melt, swirling the pan occasionally. It will foam and crackle. After a few minutes, the crackling will subside, and you’ll see little brown specks forming at the bottom. Once it’s a deep golden amber color and smells nutty, immediately remove from heat and pour into a heat-safe bowl (including all brown bits). Let cool for about 10 minutes.
- Mix the wet ingredients: In a large bowl, whisk together the cooled brown butter and 1 ¾ cups granulated sugar until well combined. Add the pumpkin puree, 3 room-temperature eggs, and 1 teaspoon vanilla extract. Whisk until smooth and fully incorporated.
- Combine the dry ingredients: In a separate medium bowl, whisk together 2 cups all-purpose flour, 1 teaspoon baking soda, ½ teaspoon baking powder, ½ teaspoon salt, 2 teaspoons cinnamon, ½ teaspoon nutmeg, ¼ teaspoon ginger, and ⅛ teaspoon cloves.
- Fold it together: Pour the dry ingredients into the wet ingredients. Using a rubber spatula, gently fold just until the last streak of flour disappears. A few lumps are fine. Do not over-mix.
- Bake the loaf: Pour the batter into the prepared loaf pan and spread evenly. Bake for 55-65 minutes, until a toothpick inserted into the center comes out clean or with a few moist crumbs. If the top browns too quickly (after about 40 minutes), tent loosely with aluminum foil.
- Cool completely: Let the bread cool in the pan on a wire rack for 15 minutes. Then use the parchment overhang to lift the loaf out and transfer to the wire rack to cool completely.
- Make the maple glaze: In a small bowl, whisk together the sifted powdered sugar, 3 tablespoons pure maple syrup, and a pinch of salt. Add 1 tablespoon of milk or cream and whisk. If too thick, add another teaspoon of milk until pourable but still thick enough to coat a spoon.
- Glaze and serve: Once the loaf is completely cool, drizzle the maple glaze over the top. Let set for about 10 minutes before slicing.
Notes
Don’t rush the brown butter step; use a light-colored pan to monitor color. Room temperature ingredients help the batter emulsify. Tent with foil if top browns too quickly. Cool completely before glazing. Store in an airtight container at room temperature for up to 4 days. Freeze unglazed for up to 3 months.
Nutrition
- Serving Size: 1 slice
- Calories: 380
- Sugar: 35
- Sodium: 280
- Fat: 18
- Saturated Fat: 11
- Carbohydrates: 52
- Fiber: 2
- Protein: 5
Keywords: pumpkin bread, brown butter, maple glaze, fall baking, pumpkin recipe, easy pumpkin bread, brown butter pumpkin bread


