My nephew asked why I couldn’t just crush up some Oreos and call it dirt. I started to explain that real dirt cups needed pudding from scratch and layers and patience — then stopped. He was eight. He didn’t care about my culinary standards. He wanted chocolate pudding and gummy worms in a cup, and he wanted it before his mom came to pick him up.
So I let him take over. He crushed cookies in a bag with a rolling pin (honestly, he made a mess on my counter). He dumped instant pudding mix into a bowl and stirred it with way too much enthusiasm. He layered everything like he was building a tiny construction site. And you know what? It was perfect. Better than any elaborate version I’d spent hours on before. That day, I learned that dirt cups aren’t about technique — they’re about fun.
Maybe you’ve been there, overcomplicating a kids’ recipe when the simple version is what everyone actually wants. These Kid-Approved No-Bake Halloween Dirt Cups with Gummy Worms are that lesson in a cup. They’re fast, they’re forgiving, and they make kids feel like kitchen heroes. I’ve made them every Halloween since, and honestly? I don’t think I’ll ever go back to the complicated way.
Why You’ll Love This Recipe
These dirt cups aren’t just another Halloween treat. They’re the kind of recipe that saves your sanity while making you look like a rockstar parent. I’ve tested this version with my own picky eaters and a classroom full of sugar-crazed second graders, and it passed every test.
- No Baking Required: Zero oven time. No hot kitchen. Just mix, layer, and chill. Perfect for those chaotic October afternoons when you’re already juggling costume fittings and pumpkin carving.
- Pantry-Friendly Ingredients: You probably have everything already. Instant pudding, milk, Oreos, and gummy worms. No special trips to the fancy grocery store.
- Budget-Friendly Fun: This whole recipe costs under $10 and makes 8 generous servings. Compare that to store-bought Halloween treats that cost triple and don’t let kids get their hands dirty.
- Kid-Approved and Parent-Tested: My kids devour these. Their friends devour these. Even my sister-in-law who “doesn’t do dessert” ate two. The gummy worms are the hook, but the creamy pudding and crunchy cookie layers keep everyone coming back.
- Make-Ahead Magic: Assemble these the day before your Halloween party. They actually get better as the cookies soften into the pudding. One less thing to stress about on the big day.
What makes this recipe different from every other dirt cup out there? It’s the ratio. I spent three batches figuring out the perfect balance of pudding to cookie crumbles so every spoonful has that creamy-meets-crunchy texture. Plus, I’ll show you a trick to keep your gummy worms from sinking to the bottom. Because nobody wants a dirt cup where all the worms are hiding.
This is the kind of recipe that makes you close your eyes after the first bite. Not because it’s fancy — it’s not — but because it’s exactly what a Halloween treat should be. Fun, messy, and absolutely delicious.
What Ingredients You Will Need
This recipe uses simple, everyday ingredients to create something that feels special without the fuss. Most of these are pantry staples, which means you can whip up a batch whenever the Halloween craving hits.
- 1 (3.9 oz) box instant chocolate pudding mix (I prefer Jell-O brand for the smoothest texture, but store brands work fine too. Don’t use cook-and-serve — it won’t set properly for this recipe.)
- 2 cups cold whole milk (Whole milk gives the richest, creamiest pudding. You can use 2% in a pinch, but avoid skim — the pudding won’t set as firmly. For a dairy-free version, use unsweetened oat milk or full-fat coconut milk.)
- 1 (14.3 oz) package Oreo cookies (About 24 cookies. You’ll use the whole package, cream filling and all. The filling helps the “dirt” stick together. Regular Oreos work best — double-stuff makes the crumbles too greasy.)
- 1 (4.5 oz) bag gummy worms (Get the sour ones if you want a tangy contrast to the sweet pudding. My kids love the classic rainbow worms. Look for worms that are firm enough to stand up in the pudding without dissolving.)
- Optional: 8 small Halloween-themed plastic cups or mason jars (Clear cups let you see the layers. I got a pack of 12 at the dollar store for $2. You can also use small glass bowls or even paper cups.)
- Optional: 1 cup whipped topping (Like Cool Whip. This isn’t traditional, but my sister swears by adding a dollop between the pudding and cookie layers for extra creaminess. I’ll include this as a variation.)
- Optional: Green food coloring (A drop or two makes the pudding look like swampy dirt. Totally optional, but my kids think it’s hilarious.)
Ingredient Selection Tips: For the gummy worms, check the texture by squeezing one gently. If it’s too soft, it’ll dissolve into the pudding. You want worms that hold their shape. I’ve had good luck with the Albanese brand — they’re softer than some but still firm enough for this recipe. For the Oreos, make sure they’re fresh. Stale cookies won’t crush properly and can taste musty.
Substitution Guidance: If you’re gluten-free, use gluten-free chocolate sandwich cookies (like Glutino or Kinnikinnick) and ensure your pudding mix is certified gluten-free. For a vegan version, use plant-based milk, vegan chocolate sandwich cookies, and check that your gummy worms don’t contain gelatin — many brands now offer pectin-based options. The texture will be slightly different but still delicious.
Equipment Needed
You don’t need fancy tools for this recipe. That’s the beauty of it. Here’s what you’ll need:
- Large mixing bowl (For the pudding. Any bowl works, but a glass one lets you see if the pudding is fully mixed.)
- Whisk (A wire whisk works best. A fork in a pinch, but you’ll be whisking longer.)
- Ziplock bag or large resealable bag (For crushing the Oreos. A bag is way less messy than a bowl.)
- Rolling pin or heavy-bottomed pan (To crush the cookies. A wine bottle works too. I’ve used a cast iron skillet in a pinch.)
- 8 small cups or jars (Clear plastic cups show off the layers. Mason jars are cute but glass can be heavy for kids.)
- Spatula or spoon (For layering. A small offset spatula is nice but not necessary.)
- Measuring cups and spoons (For the milk. Eyeballing it works, but accurate measurements give consistent pudding.)
- Refrigerator space (You need room for the cups to chill for at least 30 minutes. Clear a shelf beforehand.)
Budget-Friendly Options: Skip the fancy mason jars and use clear plastic cups from the dollar store. They’re cheaper, lighter, and kids can’t break them. If you don’t have a rolling pin, let kids crush the cookies with their hands — it’s messy but they love it. I’ve also used a clean coffee mug as a makeshift rolling pin. Works perfectly.
Preparation Method
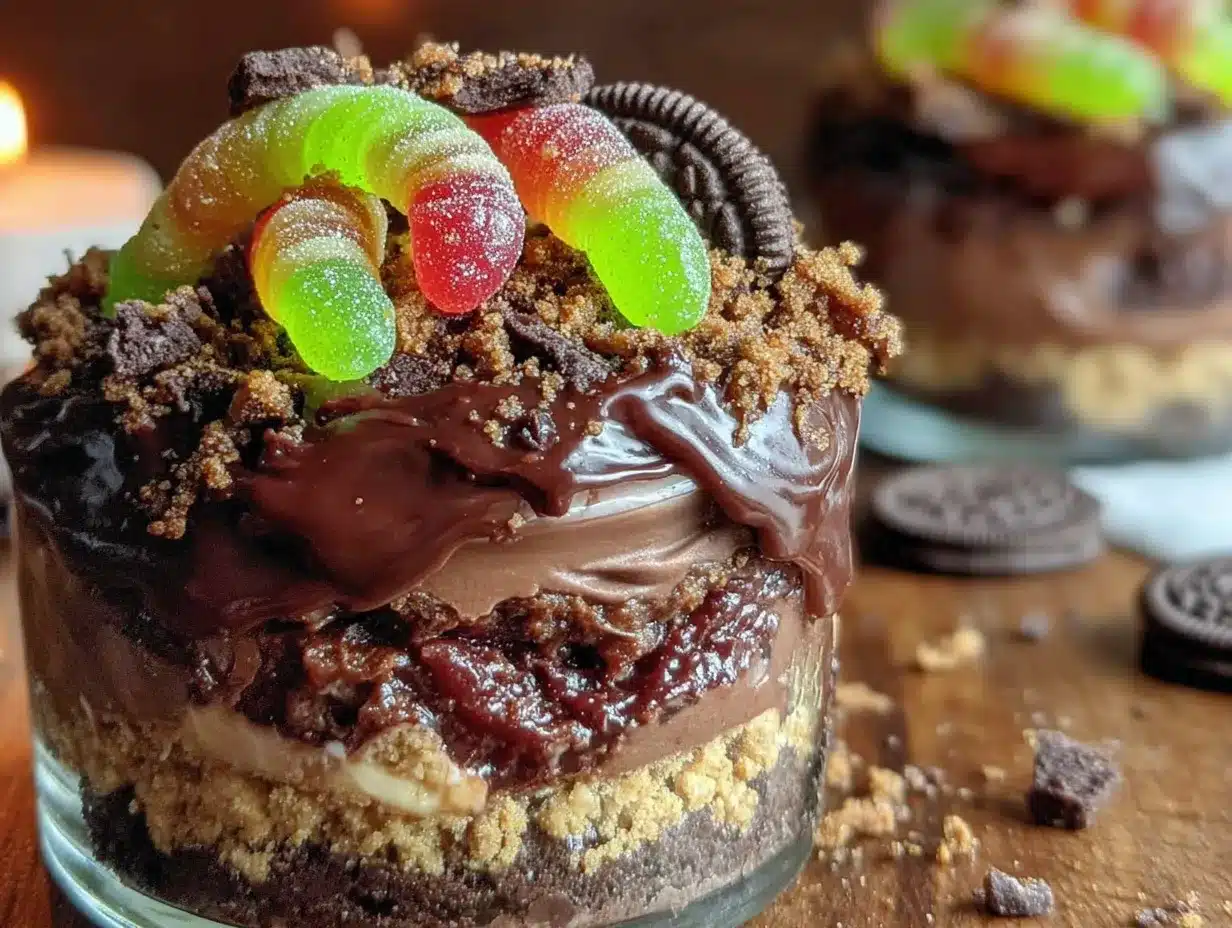
This comes together in about 20 minutes of active time. The hardest part is waiting for the pudding to set. Trust me, it’s worth it.
- Make the pudding: In your large mixing bowl, whisk together the instant chocolate pudding mix and 2 cups cold milk. Whisk vigorously for about 2 minutes until the pudding starts to thicken. It should look glossy and smooth. If you see lumps, keep whisking — they’ll dissolve. Let the pudding sit for 5 minutes to set up slightly. It won’t be fully firm yet, but it should be thicker than heavy cream.
- Crush the Oreos: While the pudding rests, place the entire package of Oreos (cream filling and all) into a large Ziplock bag. Seal it, squeezing out as much air as possible. Use your rolling pin to crush the cookies into fine crumbs. You want a mix of fine “dirt” and slightly larger pieces for texture. Don’t pulverize them into powder — some pea-sized chunks add nice crunch. This takes about 3-4 minutes of steady crushing. Let the kids help if they’re around — just be prepared for a few escaped crumbs.
- Layer the cups: Spoon about 2 tablespoons of cookie crumbs into the bottom of each cup. Press down gently with the back of a spoon to create an even base layer. This prevents the pudding from seeping through and making everything muddy. Next, spoon about 3 tablespoons of pudding over the crumbs. Use the back of your spoon to spread it evenly. You want the pudding to reach about halfway up the cup.
- Add the gummy worms: Here’s the trick to keep them from sinking. Take 2-3 gummy worms and gently press them into the pudding layer, leaving their heads sticking out. The pudding should be thick enough to hold them in place. If your pudding is too runny, chill it for 10 minutes first. Arrange the worms so they look like they’re crawling out of the dirt. My daughter likes to make one worm “escape” over the edge of the cup.
- Finish layering: Add another 2 tablespoons of cookie crumbs on top of the pudding. Then spoon the remaining pudding over that. Leave about half an inch of space at the top of each cup. Finally, top with the remaining cookie crumbs — about 2 tablespoons per cup. This is your “dirt” layer. Don’t press down this time; leave it loose for that realistic soil look.
- Decorate: Place 1-2 more gummy worms on top of each cup, arranging them to look like they’re crawling out of the dirt. You can also add a small plastic spider or candy pumpkin for extra Halloween flair. My kids love adding a tiny tombstone made from a graham cracker square.
- Chill: Refrigerate the cups for at least 30 minutes, preferably 1-2 hours. This allows the pudding to fully set and the cookie crumbs to soften slightly into the pudding. The texture is best after about 2 hours — the cookies are still crunchy but have absorbed some pudding moisture. Don’t chill longer than 24 hours or the cookies can get mushy.
Troubleshooting Tips: If your pudding isn’t setting, you might have used too much milk or the wrong type of pudding mix. Check the box — it should say “instant” not “cook and serve.” If it’s still runny after 10 minutes, add another tablespoon of pudding mix and whisk again. If your cookie crumbs are too fine, you crushed them too hard. Next time, stop when you see pea-sized pieces. And if your gummy worms keep sinking, your pudding isn’t thick enough — pop it in the fridge for 15 minutes before layering.
Cooking Tips & Techniques
I’ve made these dirt cups more times than I can count, and I’ve learned a few things the hard way. Let me save you some trouble.
The Cookie Crushing Secret: Don’t remove the cream filling from the Oreos. I know some recipes tell you to, but the filling helps the crumbs stick together and creates a more realistic “dirt” texture. The first time I made these, I meticulously scraped out every bit of cream. The result? Dry, dusty crumbs that refused to stay put. Never again.
The Perfect Pudding Consistency: Instant pudding needs exactly 2 minutes of whisking. Set a timer. I once got distracted by a phone call and whisked for maybe 30 seconds. The pudding never set properly, and I ended up with chocolate soup with floating worms. Not my finest moment. Whisk until you see it visibly thicken, then let it rest for the full 5 minutes.
Multitasking Like a Pro: While the pudding rests, crush your cookies. While the cups chill, clean up your kitchen. This recipe is forgiving enough that you can work at your own pace. I usually make the pudding, crush cookies while it sets, then assemble everything while my kids are doing homework. The whole process takes about 20 minutes of hands-on time.
The Gummy Worm Placement Trick: I mentioned this before, but it’s worth repeating. Press the worms into the pudding gently but firmly. If you push too hard, they’ll disappear into the pudding. If you barely touch them, they’ll fall over. Aim for about halfway submerged. And always leave the heads poking out — that’s what makes them look like they’re crawling.
Consistency Tips: For the best texture, use cold milk straight from the fridge. Room temperature milk won’t help the pudding set as firmly. Also, make sure your Oreos are at room temperature — cold cookies from the fridge crush unevenly. And here’s a weird one: don’t overmix the pudding. Overmixing can break down the starches and make the pudding gummy. Just whisk until smooth and stop.
Variations & Adaptations
These dirt cups are endlessly customizable. Here are some variations I’ve tried and loved:
- Chocolate Peanut Butter Dirt Cups: Add 2 tablespoons of peanut butter to the pudding mix before adding milk. Whisk until smooth. The peanut butter adds richness and protein. My husband’s favorite version. Just check for peanut allergies if serving to a group.
- Vegan Dirt Cups: Use plant-based milk (oat or coconut work best), vegan chocolate sandwich cookies, and pectin-based gummy worms. The texture is slightly different but still delicious. I made these for a school party with vegan kids, and nobody knew the difference.
- Low-Sugar Version: Use sugar-free instant pudding mix and sugar-free cookies. The gummy worms are harder to find in sugar-free, but they exist. This version works well for diabetic family members or anyone watching their sugar intake.
- Pumpkin Spice Dirt Cups: Add 1 teaspoon of pumpkin pie spice to the pudding mix before adding milk. Top with a dollop of whipped cream and a sprinkle of cinnamon. Perfect for fall parties that aren’t specifically Halloween.
- Funfetti Dirt Cups: Stir 2 tablespoons of rainbow sprinkles into the pudding before layering. The sprinkles add color and crunch. My niece’s birthday party favorite. Just don’t tell the kids there’s no actual dirt involved.
Dietary Adaptations: For gluten-free, use certified gluten-free cookies and pudding mix. For nut-free, skip the peanut butter variation and check your gummy worms for nut contamination. For egg-free, you’re in luck — this recipe is naturally egg-free as long as your cookies and pudding don’t contain eggs (most don’t).
Serving & Storage Suggestions
These dirt cups are best served cold, straight from the fridge. The contrast between the cool pudding and the slightly softened cookie crumbs is pure magic.
Serving Temperature: Serve chilled, not frozen. If you’ve made them ahead, let them sit at room temperature for 5 minutes before serving to take the chill off. The pudding should be firm but not cold enough to numb your taste buds.
Presentation Ideas: Arrange the cups on a platter with extra gummy worms scattered around. Add a few plastic spiders or skeleton hands for spooky effect. For a party, label each cup with a tiny flag or sticker. My kids love when I add a “graveyard” of small cookies standing up in the dirt.
Complementary Dishes: Serve these alongside other Halloween treats like pumpkin-shaped cookies, caramel apples, or popcorn balls. For a full Halloween menu, pair with mummy hot dogs or spider web pizza. The sweetness of the dirt cups balances well with savory snacks.
Storage Instructions: Store leftover dirt cups covered in the refrigerator for up to 3 days. The texture is best within the first 24 hours. After that, the cookies start to get soft and the gummy worms can dissolve slightly. Don’t leave them at room temperature for more than 2 hours — the dairy in the pudding can spoil.
Reheating: Don’t. These are meant to be eaten cold. If you want a warm dessert, make a different recipe. The whole point of dirt cups is the cold, creamy, crunchy contrast.
Flavor Development: The flavors actually meld together after a few hours in the fridge. The cookies absorb some pudding moisture, creating a cake-like texture in places. The gummy worms soften slightly, becoming chewier. If you can wait, these taste even better the next day.
Nutritional Information & Benefits
Let’s be honest — these are a treat, not a health food. But here’s what you’re getting per serving (one cup, assuming 8 servings):
- Calories: Approximately 320 per serving
- Fat: 12g (mostly from the cookie cream filling)
- Carbohydrates: 52g
- Protein: 4g
- Sugar: 36g
- Fiber: 1g
Health Benefits of Key Ingredients: The milk provides calcium and vitamin D for strong bones. The cocoa in the pudding and cookies contains antioxidants called flavonoids, which may support heart health. Gummy worms… well, they’re mostly sugar, but they make kids smile, and that counts for something.
Dietary Considerations: This recipe is naturally egg-free and can be made gluten-free, dairy-free, or vegan with simple substitutions. It’s not suitable for low-carb or keto diets due to the sugar content. For lower sugar, use sugar-free pudding and cookies.
Potential Allergens: Contains dairy (milk), wheat (cookies), and soy (often in cookies and pudding). Gummy worms may contain gelatin (animal product) and corn syrup. Always check labels if serving to someone with allergies.
Personal Wellness Perspective: I believe in balance. These dirt cups are a once-a-year treat for my family, not an everyday snack. They’re part of making Halloween special, and that’s valuable in its own way. Plus, the act of making them together — crushing cookies, layering cups, arranging worms — is quality time that feeds the soul, not just the stomach.
Conclusion
These Kid-Approved No-Bake Halloween Dirt Cups with Gummy Worms are the Halloween dessert you’ve been looking for. They’re quick, cheap, and so much fun to make with kids. The best part? They actually taste amazing, not just “good for a kids’ recipe.”
I love that this recipe lets kids take the lead. My nephew taught me that sometimes the simplest version is the best. Now every Halloween, we make these together, and he’s so proud of “his” recipe. That’s what cooking should be — sharing joy, making memories, and eating something delicious.
Customize these however you like. Add different candies, change the pudding flavor, or let your kids go wild with decorations. The recipe is just a starting point. What matters is the fun you have making them.
I’d love to hear how yours turn out! Leave a comment below and tell me about your Halloween traditions. Did your kids come up with any creative variations? Share a photo on Pinterest and tag me — I love seeing your creations. Happy Halloween, and happy eating!
Frequently Asked Questions
Can I make these dirt cups ahead of time?
Yes! You can assemble them up to 24 hours in advance. Store them covered in the refrigerator. The texture is actually better after a few hours as the cookies soften slightly. Just don’t add the top gummy worms until right before serving so they stay firm.
Can I use homemade pudding instead of instant?
You can, but the texture will be different. Homemade pudding is thinner and may not hold the gummy worms as well. If you want to use homemade, cook it until it’s very thick, then chill it for at least 2 hours before layering. Instant pudding is faster and more reliable for this recipe.
How do I keep the gummy worms from sinking?
Make sure your pudding is thick enough before layering. Let it set for the full 5 minutes after whisking. If it’s still runny, chill it for 10-15 minutes. When placing the worms, press them gently into the pudding — don’t push too hard or they’ll disappear. Leaving their heads poking out helps them stay visible.
Can I use different cookies instead of Oreos?
Absolutely! Chocolate wafer cookies, gluten-free sandwich cookies, or even chocolate graham crackers work well. Avoid cookies with cream filling that’s too soft or greasy. The cookie crumbs should be dry enough to create a “dirt” texture. I’ve used chocolate shortbread cookies with great results.
How long do these keep in the fridge?
These dirt cups are best within 24 hours of assembly. They’ll keep for up to 3 days covered in the refrigerator, but the texture changes. The cookies get softer and the gummy worms can start to dissolve. If you want to make them ahead, assemble without the top gummy worms and add those just before serving.
Pin This Recipe!
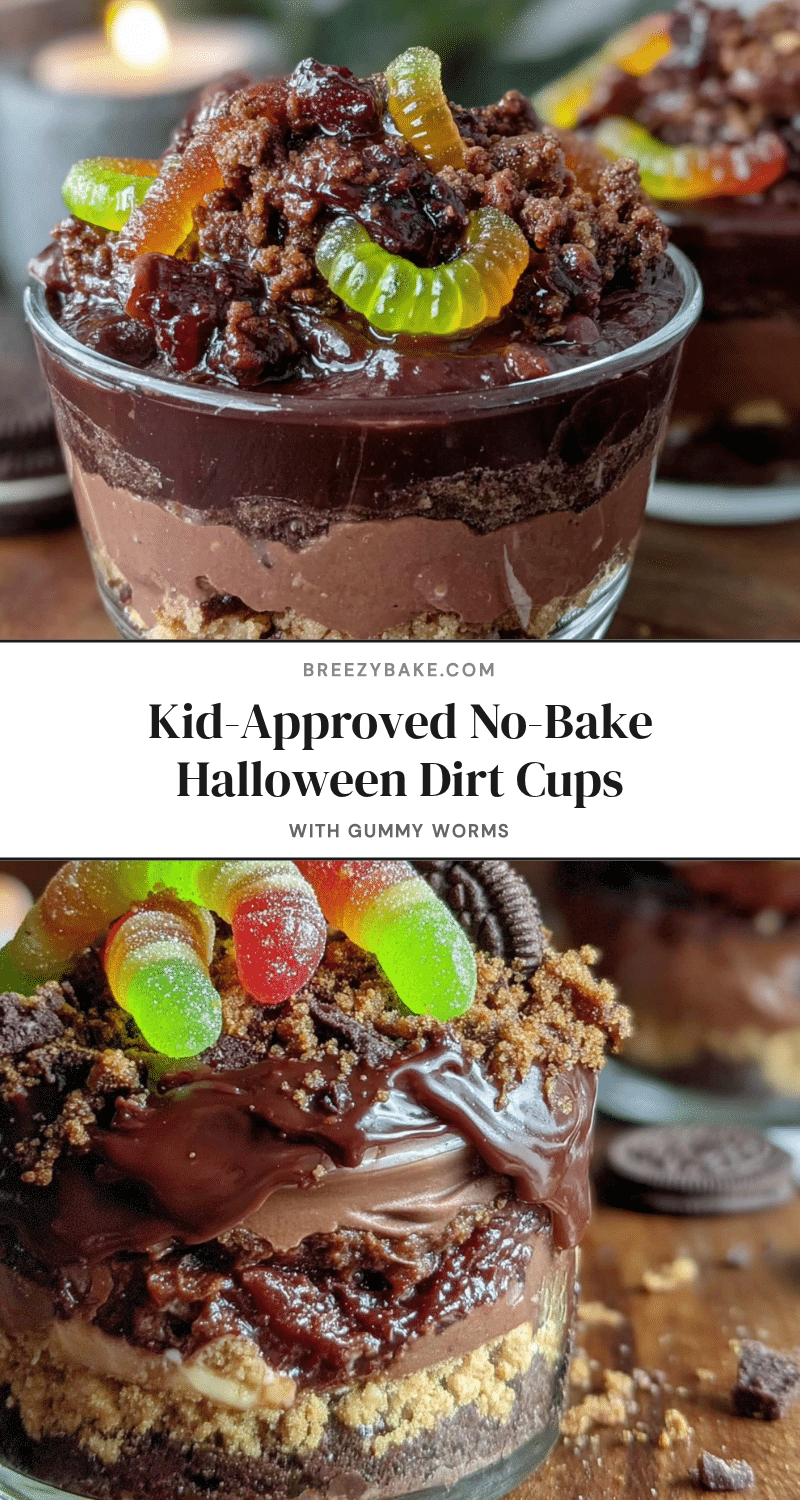
Best No-Bake Halloween Dirt Cups with Gummy Worms

These Kid-Approved No-Bake Halloween Dirt Cups with Gummy Worms are a quick, fun, and budget-friendly Halloween treat. With layers of creamy chocolate pudding, crunchy Oreo crumbs, and gummy worms, they’re perfect for making with kids and require no baking.
- Prep Time: 20 minutes
- Cook Time: 0 minutes
- Total Time: 50 minutes (including chilling)
- Yield: 8 servings 1x
- Category: Dessert
- Cuisine: American
Ingredients
- 1 (3.9 oz) box instant chocolate pudding mix
- 2 cups cold whole milk
- 1 (14.3 oz) package Oreo cookies (about 24 cookies)
- 1 (4.5 oz) bag gummy worms
- Optional: 8 small Halloween-themed plastic cups or mason jars
- Optional: 1 cup whipped topping (like Cool Whip)
- Optional: Green food coloring
Instructions
- In a large mixing bowl, whisk together the instant chocolate pudding mix and 2 cups cold milk. Whisk vigorously for about 2 minutes until the pudding starts to thicken. Let it sit for 5 minutes to set up slightly.
- While the pudding rests, place the entire package of Oreos into a large Ziplock bag. Seal it, squeezing out as much air as possible. Use a rolling pin to crush the cookies into fine crumbs with some pea-sized pieces for texture.
- Spoon about 2 tablespoons of cookie crumbs into the bottom of each cup. Press down gently with the back of a spoon to create an even base layer.
- Spoon about 3 tablespoons of pudding over the crumbs. Use the back of a spoon to spread it evenly, reaching about halfway up the cup.
- Take 2-3 gummy worms and gently press them into the pudding layer, leaving their heads sticking out.
- Add another 2 tablespoons of cookie crumbs on top of the pudding. Then spoon the remaining pudding over that, leaving about half an inch of space at the top. Top with the remaining cookie crumbs (about 2 tablespoons per cup). Do not press down.
- Place 1-2 more gummy worms on top of each cup, arranging them to look like they’re crawling out of the dirt. Optionally, add a small plastic spider or candy pumpkin.
- Refrigerate the cups for at least 30 minutes, preferably 1-2 hours, before serving.
Notes
For best results, use cold milk straight from the fridge. Don’t remove the cream filling from the Oreos—it helps the crumbs stick together. If your pudding is too runny, chill it for 10-15 minutes before layering. These are best within 24 hours of assembly.
Nutrition
- Serving Size: 1 cup
- Calories: 320
- Sugar: 36
- Fat: 12
- Carbohydrates: 52
- Fiber: 1
- Protein: 4
Keywords: Halloween, dirt cups, no-bake, gummy worms, Oreo, chocolate pudding, kid-friendly, easy dessert


