My neighbor Jen asked me last week why I couldn’t just use maple syrup instead of corn syrup in pecan pie bars. I started to explain why that wouldn’t work—the texture would be off, the sweetness profile would change, the filling might not set properly. Then I stopped. Honestly? I had never actually tried it. I’d just assumed, the way you do when you’ve been making something the same way for years and years. So I told her I’d give it a shot, fully expecting to call her back with an “I told you so.”
Well, let me tell you—I was wrong. Really wrong. And I’m not embarrassed to admit it, because the result was so much better than what I’d been making. The maple syrup brought this deep, almost woodsy sweetness that played off the bourbon in a way corn syrup never could. And by swapping out some of the butter and sugar, I ended up with a bar that felt indulgent but didn’t leave me with that heavy, sugar-crash feeling afterward. I mean, I actually ate two of them without feeling like I needed a nap.
The funny thing is, Jen doesn’t even cook much. She’s more of a “let’s order pizza” kind of person. But she had this instinct that sounded completely wrong to me—and it turned out to be exactly right. Maybe you’ve been there, where someone who doesn’t spend much time in the kitchen suggests something that seems ridiculous, and you have to swallow your pride when it works. That was me. And now I’m making these lighter maple bourbon pecan pie bars for every gathering I go to. They’re that good.
Why You’ll Love This Recipe
These lighter maple bourbon pecan pie bars aren’t just another dessert recipe—they’re the kind of thing that makes people ask for the recipe before they’ve even finished their first bite. I’ve tested this version at least six times to get the balance right, and I can honestly say it’s my best work yet.
- Quick & Easy : Comes together in under 45 minutes, with only 15 minutes of active prep time. Perfect for when you need a showstopper dessert without spending all day in the kitchen.
- Simple Ingredients : No weird specialty items here. You probably have most of these in your pantry right now—maple syrup, pecans, butter, eggs. The bourbon is optional but highly recommended.
- Perfect for Holiday Gatherings : These bars are ideal for Thanksgiving, Christmas, or any fall celebration. They travel well, slice cleanly, and look gorgeous on a dessert table.
- Crowd-Pleaser : I’ve served these to everyone from my picky nephew to my health-conscious sister-in-law, and they’ve disappeared every single time. Kids love the sweetness, adults appreciate the bourbon kick.
- Unbelievably Delicious : The combination of buttery shortbread crust, rich maple-bourbon filling, and toasted pecans is next-level comfort food. You won’t believe they’re lighter than the original.
What makes this recipe different is the technique—using a combination of maple syrup and a touch of brown sugar instead of the usual corn syrup, and cutting back on butter without sacrificing any of that rich, gooey texture. It’s comfort food reimagined—healthier, faster, but with the same soul-soothing satisfaction. Perfect for impressing guests without stress, or turning a simple Tuesday into something memorable.
What Ingredients You Will Need
This recipe uses simple, wholesome ingredients to deliver that classic pecan pie flavor without the heavy sugar load. Most of these are pantry staples, which makes this recipe perfect for spontaneous baking sessions.
For the Shortbread Crust
- All-purpose flour, 1 ½ cups (180g) – gives the crust that perfect crumbly texture
- Unsalted butter, cold and cubed, ½ cup (113g) – I prefer Kerrygold for its richness, but any good-quality butter works
- Powdered sugar, ¼ cup (30g) – dissolves easily into the crust for a tender texture
- Vanilla extract, 1 teaspoon – adds warmth to the base layer
- Salt, ¼ teaspoon – balances the sweetness
For the Filling
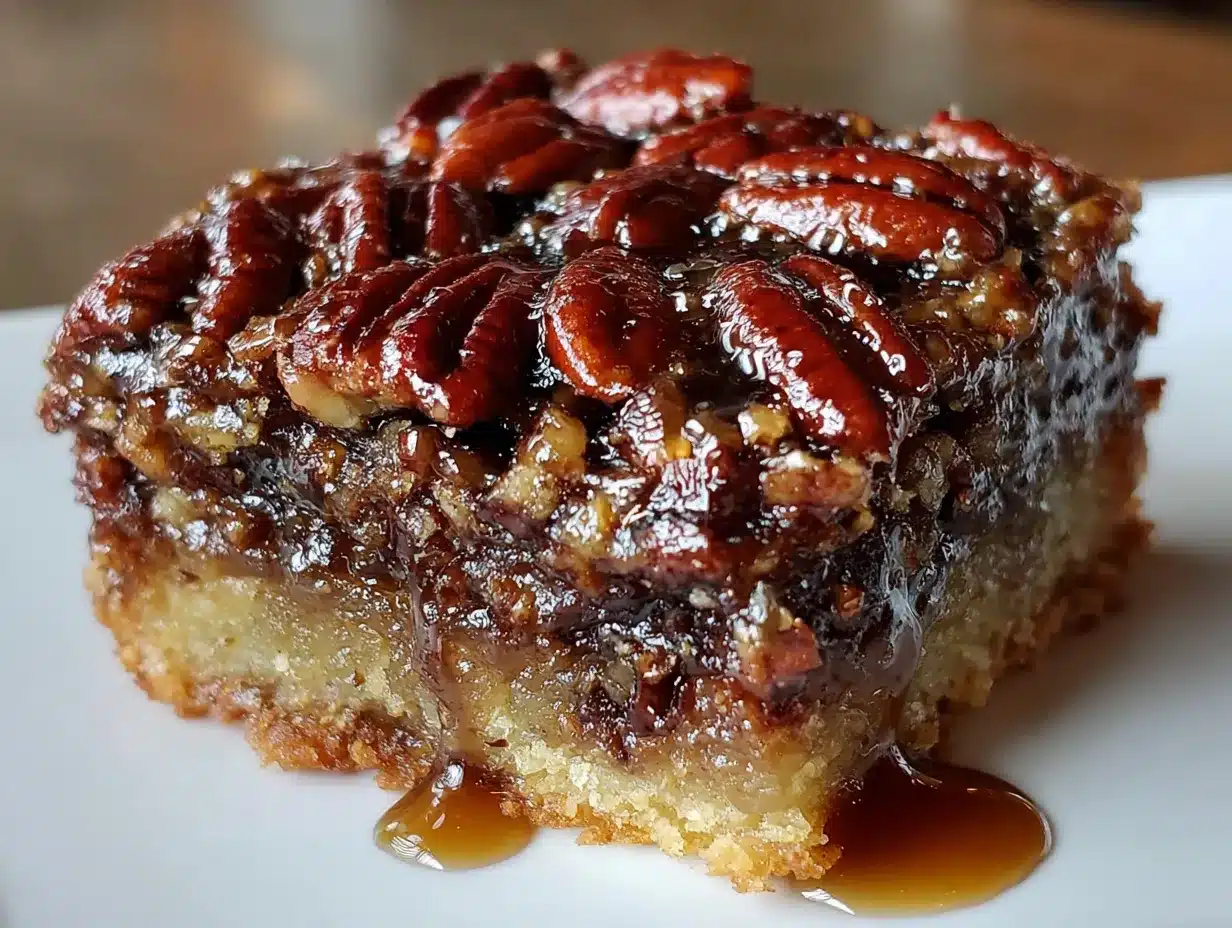
- Pure maple syrup, ¾ cup (180ml) – use the real stuff, not pancake syrup. Grade A dark amber gives the best flavor
- Light brown sugar, ¼ cup (50g), packed – adds depth without going overboard on sugar
- Large eggs, 2, room temperature – helps the filling set properly
- Bourbon, 2 tablespoons (30ml) – I use Bulleit or Maker’s Mark, but any bourbon you like to drink will work
- Unsalted butter, melted, 2 tablespoons (28g) – just enough for richness
- Vanilla extract, 1 teaspoon
- Salt, ¼ teaspoon
- Pecan halves, 1 ½ cups (170g) – roughly chopped if you prefer smaller pieces, but I like keeping them whole for that classic look
Ingredient Tips: Look for pecans that are fresh and crisp—stale pecans can ruin the whole batch. Store them in the freezer if you don’t use them often. For the maple syrup, I recommend checking the label to make sure it’s 100% pure maple syrup with no additives. If you want to skip the bourbon, you can substitute with 1 teaspoon of vanilla extract plus 1 tablespoon of water, but honestly, the bourbon adds a warmth that’s hard to replicate.
Equipment Needed
- 9×9-inch baking pan – glass or metal both work, but glass gives you a better view of the crust browning
- Parchment paper – essential for easy removal. Leave overhang on two sides for handles
- Food processor – makes the crust come together in seconds. A pastry cutter or fork works too, but takes longer
- Mixing bowls – one medium, one small
- Whisk – for combining the filling ingredients smoothly
- Measuring cups and spoons – accuracy matters here
- Cooling rack – helps the bars cool evenly without getting soggy on the bottom
If you don’t have a food processor, you can make the crust by cutting the cold butter into the flour mixture using a pastry blender or two forks. It takes a few extra minutes but works just as well. I’ve done it both ways, and honestly, the texture is identical—the food processor just saves you some elbow grease.
Preparation Method
- Preheat your oven to 350°F (175°C). Line your 9×9-inch baking pan with parchment paper, leaving about 2 inches of overhang on two opposite sides. This will be your “handles” for lifting the bars out later. Lightly spray the parchment with non-stick cooking spray.
- Make the shortbread crust. In a food processor, combine the flour, powdered sugar, and salt. Pulse a few times to mix. Add the cold, cubed butter and vanilla extract. Pulse until the mixture looks like coarse sand and holds together when you squeeze it—about 15-20 pulses. Don’t overprocess, or the crust will be tough. If you’re doing this by hand, cut the butter into the flour mixture until it resembles coarse crumbs.
- Press the crust into the pan. Transfer the crust mixture to your prepared pan. Press it evenly into the bottom, using your fingers or the bottom of a measuring cup. Make sure it’s compact and even—any thin spots will burn. Prick the crust all over with a fork to prevent bubbling. Bake for 15-18 minutes, until the edges are just starting to turn golden. Set aside to cool slightly while you make the filling.
- Prepare the filling. In a medium bowl, whisk together the maple syrup, brown sugar, eggs, bourbon, melted butter, vanilla extract, and salt. Whisk until smooth and well combined—about 30 seconds. Don’t overwhisk, or you’ll incorporate too much air. The mixture should look glossy and uniform.
- Add the pecans. Spread the pecan halves evenly over the warm crust. Pour the filling mixture over the pecans, making sure it seeps down around them. Gently shake the pan to distribute the filling evenly. Some pecans will float to the top—that’s perfect for that classic pecan pie look.
- Bake the bars. Place the pan in the oven and bake for 25-30 minutes. The filling should be set around the edges but still slightly jiggly in the center—it will continue to set as it cools. If the top is browning too quickly, tent loosely with foil for the last 10 minutes. You’ll know it’s done when the filling is bubbling gently around the edges and the pecans are toasted.
- Cool completely. This is the hardest part. Let the bars cool in the pan on a wire rack for at least 2 hours. The filling needs this time to fully set. If you cut them too early, they’ll be a runny mess—trust me, I learned this the hard way. Once completely cool, use the parchment handles to lift the entire block out of the pan. Place on a cutting board.
- Slice and serve. Use a sharp knife to cut into 16 squares (4 rows by 4 rows). For clean cuts, wipe the knife clean between each slice. If the bars are sticking to the knife, chill them in the refrigerator for 15 minutes first.
Cooking Tips & Techniques
Let me share some hard-won wisdom from my many batches of these bars. The first time I made them, I was in a hurry and didn’t let the crust cool before adding the filling. The result? A soggy bottom that made me want to cry. Now I always let the crust cool for at least 10 minutes—just enough time to whisk together the filling.
Another mistake I made was using cheap maple syrup. You know, the stuff that’s really just corn syrup with maple flavoring? It made the filling taste artificial and thin. Spend the extra few dollars on real maple syrup—it makes a world of difference. I keep a bottle of Grade A dark amber specifically for baking, and it’s worth every penny.
Temperature matters more than you’d think. Your eggs should be at room temperature, or they’ll seize up when you add them to the warm maple syrup mixture. I take mine out of the fridge about 30 minutes before I start baking. If I forget, I put them in a bowl of warm water for 5 minutes—works like a charm.
For the cleanest slices, use a long, sharp knife and wipe it clean between each cut. I learned this trick from a pastry chef friend, and it makes the bars look like they came from a bakery. If you’re serving these at a party, you can even cut them into smaller bite-sized pieces for a dessert platter.
Variations & Adaptations
One of the best things about this recipe is how adaptable it is. I’ve played around with quite a few variations, and these are my favorites:
Gluten-Free Version: Substitute the all-purpose flour with a 1:1 gluten-free baking flour blend. I’ve used King Arthur’s Measure for Measure blend with great results—the crust comes out slightly more crumbly but still delicious. Just make sure your blend contains xanthan gum for structure.
Bourbon-Free Option: Not a fan of bourbon? No problem. Replace it with 1 teaspoon of vanilla extract plus 1 tablespoon of apple cider or water. You’ll lose that warm, boozy note, but the maple flavor will shine through even more. I’ve also tried it with dark rum, and that’s a fantastic alternative.
Chocolate-Pecan Version: For the chocoholics out there, melt ¼ cup of dark chocolate chips and drizzle it over the cooled bars. Or, add ½ cup of chocolate chips to the pecan layer before pouring in the filling. The chocolate melts into little pockets of richness—absolutely divine.
Vegan Adaptation: Use a flax egg (1 tablespoon ground flaxseed mixed with 3 tablespoons water, let sit for 5 minutes) and replace the butter with vegan butter. I’ve tried this with Miyoko’s European-style cultured vegan butter, and while the texture is slightly different—a bit less firm—the flavor is still fantastic.
My personal favorite variation? Adding a teaspoon of orange zest to the filling. The citrus cuts through the sweetness and makes the maple flavor pop. I discovered this by accident when I was making a batch and my orange fell into the bowl—best mistake I ever made.
Serving & Storage Suggestions
These bars are best served at room temperature, which lets the filling relax into that perfect gooey texture. If you’ve refrigerated them, let them sit out for about 30 minutes before serving. I like to cut them into squares and arrange them on a wooden board with a dusting of powdered sugar and a few extra pecan halves for garnish.
For a truly indulgent experience, serve them warm with a scoop of vanilla bean ice cream or a dollop of lightly sweetened whipped cream. The contrast between the warm, sticky filling and the cold, creamy ice cream is absolutely irresistible. I’ve also drizzled them with a little extra maple syrup and a sprinkle of flaky sea salt—the salt really brings out the sweetness.
Storage: Store leftover bars in an airtight container at room temperature for up to 3 days. If your kitchen is warm, refrigerate them—they’ll keep for up to a week. The bars actually get better after a day or two as the flavors meld together. I once made a batch on Wednesday for a Saturday party, and they were the best I’d ever made.
Freezing: These bars freeze beautifully. Wrap individual squares tightly in plastic wrap, then place them in a freezer-safe bag. They’ll keep for up to 3 months. To thaw, just leave them at room temperature for about an hour. I always keep a stash in my freezer for unexpected guests or late-night cravings.
Reheating: Pop a frozen or refrigerated bar in a 300°F (150°C) oven for 5-7 minutes, or microwave for 15-20 seconds. The microwave is faster, but the oven gives you that slightly crisp edge on the crust.
Nutritional Information & Benefits
Here’s the estimated nutritional breakdown for one bar (based on 16 servings):
| Nutrient | Amount per Bar |
|---|---|
| Calories | 215 |
| Total Fat | 13g |
| Saturated Fat | 5g |
| Cholesterol | 45mg |
| Sodium | 85mg |
| Total Carbohydrates | 24g |
| Dietary Fiber | 1g |
| Sugars | 16g |
| Protein | 3g |
Compared to traditional pecan pie bars, these lighter versions save you about 80 calories and 6 grams of sugar per serving. The maple syrup provides trace amounts of manganese and zinc, while pecans are packed with healthy monounsaturated fats and antioxidants. Plus, using less butter and sugar means you can enjoy two without the guilt—not that you need an excuse.
These bars are vegetarian and can easily be made gluten-free or vegan with the substitutions mentioned above. They do contain nuts, eggs, and dairy, so keep that in mind for allergies.
Conclusion
These lighter maple bourbon pecan pie bars have become my go-to dessert for every occasion—from casual weeknight treats to holiday feasts. They’ve got that nostalgic pecan pie flavor we all love, but with less sugar and a whole lot more personality. The maple and bourbon combo is just perfect, and that buttery shortbread crust? Absolute perfection.
I love that this recipe proves you don’t have to choose between healthy and delicious. You can have your pie and eat it too—and feel good about it. Whether you’re making them for a crowd or just for yourself (no judgment here), I promise they’ll become a staple in your kitchen.
Now I want to hear from you! Have you tried these bars? Did you make any fun variations? Drop a comment below and let me know—I love seeing what you come up with. And if you share them on social media, tag me so I can cheer you on. Happy baking, friends!
Frequently Asked Questions
Can I make these bars ahead of time?
Absolutely! In fact, they taste even better the next day. You can make them up to 3 days ahead and store them at room temperature in an airtight container. The flavors have time to meld together, making every bite even more delicious.
Can I use honey instead of maple syrup?
You can, but the flavor will be different. Honey is sweeter than maple syrup, so you might want to reduce the amount slightly. The texture will also be a bit different—honey tends to make the filling slightly firmer. I’d recommend sticking with maple syrup for the best results, but if you’re in a pinch, honey works.
Why did my filling turn out runny?
This usually happens for one of three reasons: the bars weren’t baked long enough, they were cut before they cooled completely, or the eggs were too large. Make sure you’re using large eggs (not extra-large) and let the bars cool for at least 2 hours before slicing. The center should still jiggle slightly when you take them out—they’ll set as they cool.
Can I use a different nut instead of pecans?
Sure! Walnuts work beautifully—they have a slightly more bitter edge that balances the sweetness. I’ve also made these with a mix of pecans and almonds for extra crunch. Just keep in mind that different nuts have different fat contents, so the texture might vary slightly.
How do I know when the bars are done baking?
The edges should be set and slightly puffed, while the center will still have a slight jiggle—like Jell-O. The filling should be bubbling gently around the edges, and the pecans should look toasted. If you insert a toothpick near the center, it should come out with a little bit of sticky filling attached, but not liquid. When in doubt, err on the side of slightly underbaked—they’ll continue to set as they cool.
Pin This Recipe!
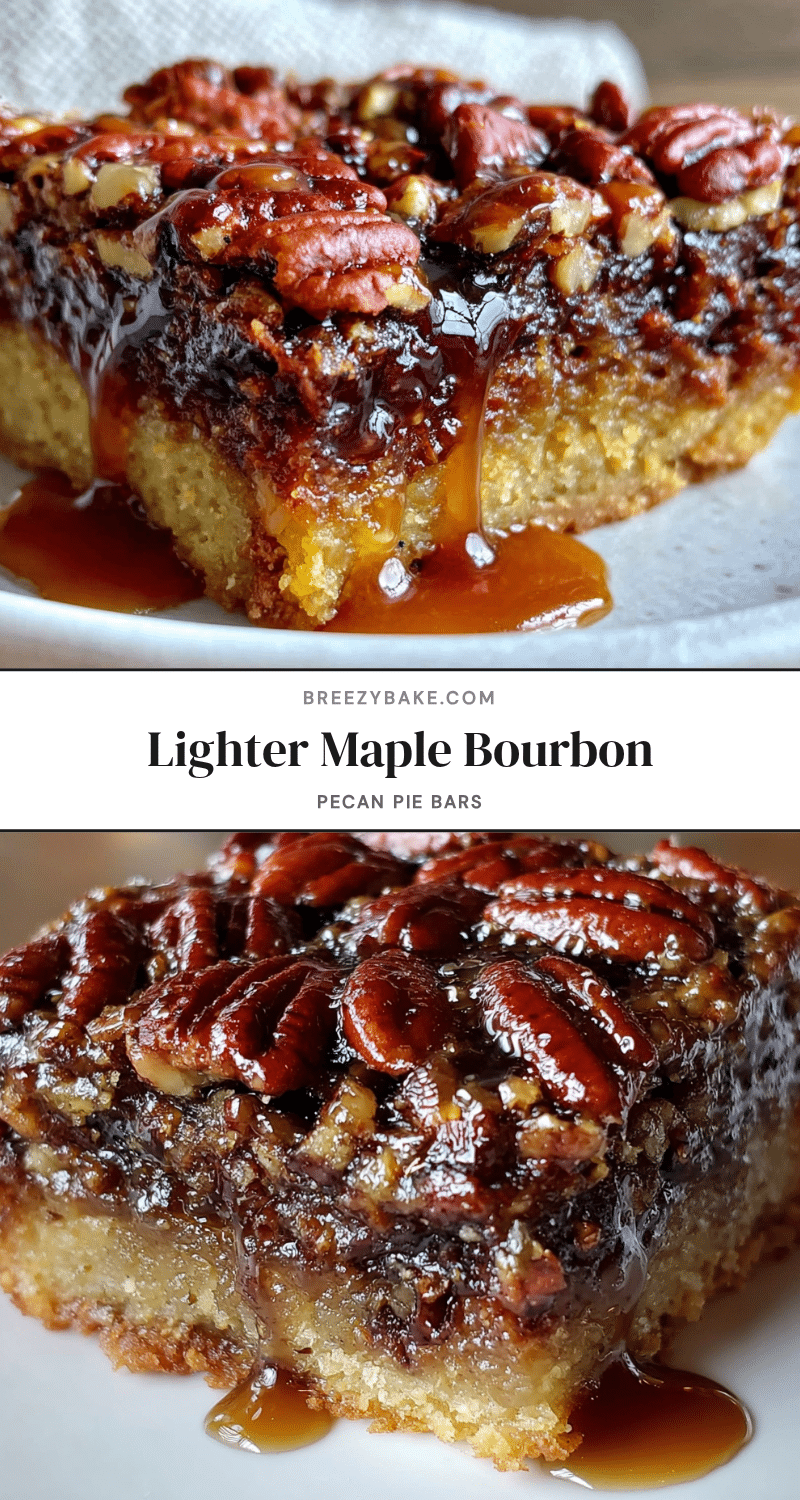
Lighter Maple Bourbon Pecan Pie Bars (Easy Recipe)
These lighter maple bourbon pecan pie bars feature a buttery shortbread crust, rich maple-bourbon filling, and toasted pecans. They’re quick to make, perfect for holiday gatherings, and a crowd-pleaser that feels indulgent without the heavy sugar crash.
- Prep Time: 15 minutes
- Cook Time: 30 minutes
- Total Time: 45 minutes
- Yield: 16 servings
- Category: Dessert
- Cuisine: American
Ingredients
- All-purpose flour, 1 ½ cups (180g)
- Unsalted butter, cold and cubed, ½ cup (113g)
- Powdered sugar, ¼ cup (30g)
- Vanilla extract, 1 teaspoon
- Salt, ¼ teaspoon
- Pure maple syrup, ¾ cup (180ml)
- Light brown sugar, ¼ cup (50g), packed
- Large eggs, 2, room temperature
- Bourbon, 2 tablespoons (30ml)
- Unsalted butter, melted, 2 tablespoons (28g)
- Vanilla extract, 1 teaspoon
- Salt, ¼ teaspoon
- Pecan halves, 1 ½ cups (170g)
Instructions
- Preheat your oven to 350°F (175°C). Line your 9×9-inch baking pan with parchment paper, leaving about 2 inches of overhang on two opposite sides. Lightly spray the parchment with non-stick cooking spray.
- Make the shortbread crust. In a food processor, combine the flour, powdered sugar, and salt. Pulse a few times to mix. Add the cold, cubed butter and vanilla extract. Pulse until the mixture looks like coarse sand and holds together when you squeeze it—about 15-20 pulses. Don’t overprocess.
- Press the crust into the pan. Transfer the crust mixture to your prepared pan. Press it evenly into the bottom, using your fingers or the bottom of a measuring cup. Prick the crust all over with a fork to prevent bubbling. Bake for 15-18 minutes, until the edges are just starting to turn golden. Set aside to cool slightly.
- Prepare the filling. In a medium bowl, whisk together the maple syrup, brown sugar, eggs, bourbon, melted butter, vanilla extract, and salt. Whisk until smooth and well combined—about 30 seconds.
- Add the pecans. Spread the pecan halves evenly over the warm crust. Pour the filling mixture over the pecans, making sure it seeps down around them. Gently shake the pan to distribute the filling evenly.
- Bake the bars. Place the pan in the oven and bake for 25-30 minutes. The filling should be set around the edges but still slightly jiggly in the center. If the top is browning too quickly, tent loosely with foil for the last 10 minutes.
- Cool completely. Let the bars cool in the pan on a wire rack for at least 2 hours. Once completely cool, use the parchment handles to lift the entire block out of the pan. Place on a cutting board.
- Slice and serve. Use a sharp knife to cut into 16 squares (4 rows by 4 rows). For clean cuts, wipe the knife clean between each slice.
Notes
Let the crust cool for at least 10 minutes before adding the filling to avoid a soggy bottom. Use real maple syrup (Grade A dark amber) for best flavor. Eggs should be at room temperature. For clean slices, chill bars for 15 minutes before cutting and wipe knife clean between cuts. Bars can be stored at room temperature for up to 3 days or refrigerated for up to a week. Freeze individual bars for up to 3 months.
Nutrition
- Serving Size: 1 bar
- Calories: 215
- Sugar: 16
- Sodium: 85
- Fat: 13
- Saturated Fat: 5
- Carbohydrates: 24
- Fiber: 1
- Protein: 3
Keywords: pecan pie bars, maple bourbon, lighter dessert, holiday dessert, shortbread crust, easy recipe


