The woman at the farmers’ market stall watched me pick up and put down the same pack of chicken thighs three times. She didn’t say anything at first, just kept arranging her herbs. Then she walked over and said, “You’re overthinking it. Those are the ones. They’ll cook faster than you think.” She was right, of course. I bought the thighs, and she tossed in a handful of rosemary sprigs with a wink. That was two years ago, and I swear I haven’t cooked a dry, sad chicken breast since. That chance encounter—and her no-nonsense advice—completely changed how I approach weeknight dinners. I mean, honestly, how many of us have stood in the grocery store aisle, tired from work, just trying to figure out what’s for dinner? Maybe you’ve been there. You want something that tastes like you spent an hour in the kitchen, but you’ve only got twenty minutes. These quick crispy air fryer chicken thighs are my answer to that very problem. They’re the recipe I lean on when I’m exhausted, when the kids are hungry, and when I just need dinner to work. The original idea came from that market lady’s simple wisdom—good ingredients, high heat, don’t fuss. I’ve adapted it for the air fryer because, let’s face it, that machine is a lifesaver on busy nights. I’ve burned a few batches learning the timing, and I’ve definitely forgotten to preheat the air fryer more times than I’ll admit. But this version? It’s foolproof. And it’s the one I keep coming back to, week after week.
Why You’ll Love This Recipe
Let me tell you why these quick crispy air fryer chicken thighs have become my weeknight superhero. I’ve tested this recipe at least a dozen times, tweaking temperatures and seasonings until it was just right. My family has been my official taste-testing committee, and they’ve never complained once. Here’s what makes this one stand out:
- Ready in under 30 minutes: No marinating overnight, no complicated steps. From fridge to table in about 25 minutes flat. That’s faster than ordering takeout.
- Simple ingredients you already have: Chicken thighs, olive oil, salt, pepper, garlic powder, and paprika. That’s it. No fancy grocery trips required.
- Crispy skin without the grease: The air fryer works magic here. You get that satisfying crunch without standing over a splattering pan of hot oil.
- Perfect for busy weeknights: Whether you’re juggling homework, late meetings, or just want to collapse on the couch, this recipe respects your time.
- Always juicy, never dry: Chicken thighs are naturally more forgiving than breasts, but the air fryer seals in moisture perfectly. Every single time.
- Crowd-pleaser guaranteed: My picky eaters devour these. Even my friend who “doesn’t like dark meat” asked for seconds. True story.
What makes this recipe different from the dozens of others out there? It’s the technique. I dry-brine the skin for just ten minutes while the air fryer preheats. That little step draws out moisture and guarantees that shatteringly crisp skin. No complicated flour coatings or sprays needed. It’s comfort food reimagined—faster, healthier, but with the same soul-soothing satisfaction. Perfect for impressing guests without stress, or turning a simple Tuesday dinner into something memorable.
What Ingredients You Will Need
This recipe uses simple, wholesome ingredients to deliver bold flavor and satisfying texture without the fuss. Most of these are pantry staples, and you probably have them right now. Let me walk you through each one.
- Bone-in, skin-on chicken thighs (4 to 6 thighs, about 1.5 to 2 pounds total): This is non-negotiable for that crispy skin. The bone keeps the meat juicy during cooking. I prefer thighs that are roughly the same size so they cook evenly. Look for thighs with the skin still attached and intact.
- Olive oil (1 tablespoon): Just enough to help the seasoning stick and encourage browning. You can use avocado oil if you prefer a higher smoke point. Don’t skip it—the oil is key for that golden color.
- Kosher salt (1 teaspoon): I use Diamond Crystal brand because it’s less salty by volume, giving me more control. If you’re using table salt, reduce to ¾ teaspoon. The salt draws moisture out of the skin, which is the first step to crispiness.
- Black pepper (½ teaspoon, freshly ground): Freshly ground pepper makes a difference here. Pre-ground pepper works in a pinch, but you’ll miss that subtle heat.
- Garlic powder (1 teaspoon): Not garlic salt—garlic powder. It distributes evenly and doesn’t burn as easily as fresh garlic in the air fryer. I use Spice World brand for consistent flavor.
- Paprika (1 teaspoon): Sweet or smoked, your choice. Smoked paprika adds a deeper, almost bacon-like flavor that’s incredible. Sweet paprika gives a milder, slightly sweet note. I switch between both depending on my mood.
- Optional: Onion powder (½ teaspoon): Adds another layer of savory flavor. Totally optional, but I rarely skip it.
- Optional: Cayenne pepper (¼ teaspoon): For a little heat. My husband loves it; I leave it out when cooking for the kids. You do you.
Substitution guidance: If you only have boneless, skinless thighs, reduce cooking time to 12-14 minutes and check for doneness earlier. They won’t get as crispy, but they’ll still be tasty. For a gluten-free option, this recipe is naturally gluten-free—no substitutions needed. For a dairy-free version, you’re already there since this recipe contains no dairy.
Equipment Needed
You don’t need a professional kitchen to make these quick crispy air fryer chicken thighs. Here’s what you’ll need:
- Air fryer (any size): I use a 5.8-quart Cosori model, and it fits 4 to 6 thighs comfortably. If yours is smaller, cook in batches. Don’t overcrowd—that’s the number one mistake that leads to soggy skin.
- Tongs: For flipping the chicken halfway through. Silicone-tipped tongs won’t scratch your air fryer basket. I’ve learned this the hard way.
- Paper towels: Essential for patting the chicken dry. This step cannot be skipped. Wet skin equals steamed skin, not crispy skin.
- Small bowl: For mixing your seasoning blend. Any small dish will do.
- Instant-read thermometer: This is your best friend for perfectly cooked chicken. I recommend the ThermoPro TP19—it’s affordable and accurate. Chicken thighs are safe at 165°F, but I pull them at 175°F for the most tender texture.
- Cutting board and knife: For trimming excess skin or fat if needed. A sharp chef’s knife makes quick work of it.
Budget-friendly alternatives: No air fryer? You can bake these in a 425°F oven on a wire rack set over a baking sheet. Add 5-10 minutes to the cooking time. No instant-read thermometer? Pierce the thickest part of the thigh—if the juices run clear, it’s done. But honestly, the thermometer is worth the investment.
Preparation Method
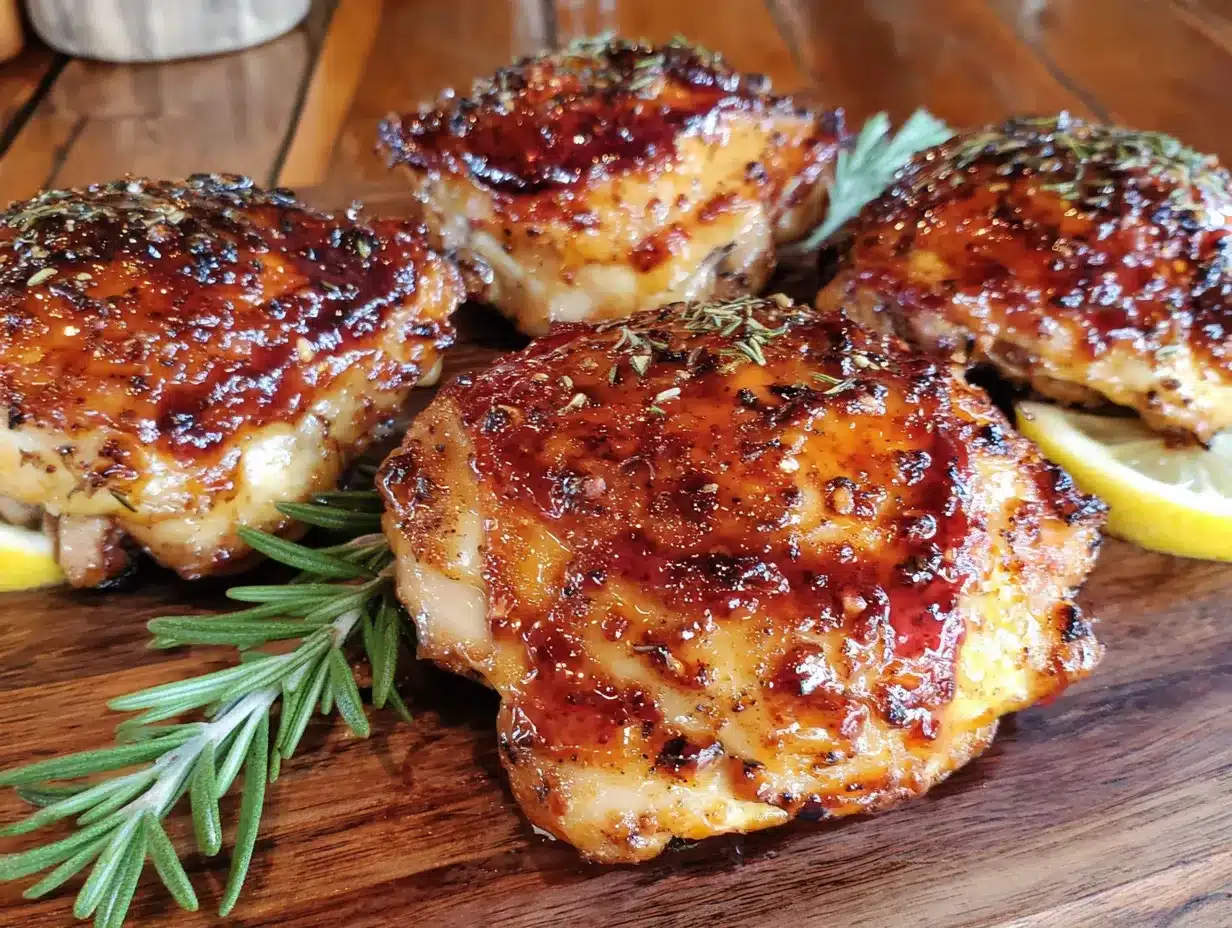
Follow these steps carefully, and you’ll have the crispiest, juiciest chicken thighs of your life. I’ve organized this to save you time and cleanup.
- Preheat your air fryer to 400°F (200°C). Most air fryers need 3-5 minutes to preheat. Do this first so it’s ready when you are. While it’s heating, move on to step two.
- Pat the chicken thighs completely dry with paper towels. This is the most important step. I mean it. Get every bit of moisture off the skin. If you skip this, you’ll never get that crispy texture. I usually use three or four paper towels per batch.
- Season the chicken. In your small bowl, mix together 1 teaspoon kosher salt, ½ teaspoon black pepper, 1 teaspoon garlic powder, and 1 teaspoon paprika. Sprinkle this mixture evenly over both sides of the chicken thighs. Don’t rub it in—just let it sit on the surface. Drizzle with 1 tablespoon olive oil and use your hands to coat each thigh lightly.
- Let the seasoned chicken rest for 10 minutes. This is my secret step. The salt starts drawing out moisture from the skin, which then evaporates during cooking, leaving you with ultra-crispy skin. Place the thighs skin-side up on a plate while they rest. Your air fryer should be preheated by now.
- Place the chicken thighs in the air fryer basket skin-side down. Arrange them in a single layer with space between each piece. Don’t let them touch. If they’re crowded, the steam can’t escape and you’ll lose crispiness. I can fit 4 to 5 thighs in my 5.8-quart basket.
- Cook at 400°F for 12 minutes. Set your timer. Don’t open the basket during this time—you want that heat to stay consistent. The skin will start to brown and render fat.
- Flip the chicken thighs using tongs. Carefully turn each piece over so the skin side is now facing up. Be gentle so you don’t tear the skin. If some skin sticks to the basket, it’s okay—just nudge it loose.
- Cook for another 8-12 minutes. The exact time depends on the size of your thighs and your air fryer model. At the 8-minute mark, start checking internal temperature. Insert your instant-read thermometer into the thickest part of the thigh, avoiding the bone. You’re looking for 175°F to 185°F for the most tender, juicy meat. The skin should be deep golden brown and crispy.
- Let the chicken rest for 5 minutes before serving. This allows the juices to redistribute throughout the meat. If you cut into them immediately, all those delicious juices will run out onto your cutting board instead of staying in the chicken. I know it’s hard to wait, but trust me on this one.
Sensory cues: During cooking, you should hear a gentle sizzle. The kitchen will smell like roasted garlic and paprika. When you flip the thighs, the skin should look golden and slightly blistered. If it looks pale, give it more time. The finished chicken should feel firm but give slightly when pressed. The skin should crackle when you tap it with a fork.
Cooking Tips & Techniques
I’ve made every mistake in the book with air fryer chicken, so you don’t have to. Here’s what I’ve learned the hard way.
Don’t overcrowd the basket. I know it’s tempting to cram in as many thighs as possible to save time, but overcrowding traps steam. Steam is the enemy of crispiness. Cook in batches if you need to. The extra 10 minutes is worth it for that perfect crunch.
Patience with the preheat. I once forgot to preheat my air fryer and threw the chicken in cold. The skin came out rubbery and sad. Preheating ensures the high heat hits the skin immediately, starting the crisping process from the first second. Don’t skip it.
Flip halfway through, not earlier. I used to flip my chicken every 5 minutes because I thought I was being thorough. Actually, I was just letting out all the hot air. Opening the basket frequently drops the temperature and extends cooking time. Stick to flipping once at the halfway mark.
Use a meat thermometer. I burned a batch of chicken thighs last year because I relied on “looks done” as my guide. The skin was perfect, but the meat near the bone was undercooked. A thermometer takes the guesswork out. It’s the single best investment for your kitchen.
Let the chicken come to room temperature. If your chicken thighs are straight from the fridge, they’ll take longer to cook and the skin might burn before the inside is done. Let them sit on the counter for 15 minutes before seasoning. This small step makes a big difference in even cooking.
Spray the basket lightly with oil. Even if your air fryer has a non-stick coating, a quick spritz of cooking spray helps prevent sticking. I use avocado oil spray because it has a high smoke point. Olive oil spray works too, but it can smoke a bit at 400°F.
Variations & Adaptations
One of the best things about this recipe is how easily it adapts to different tastes and dietary needs. Here are some variations I’ve tried and loved.
Spicy Honey Garlic: After cooking, brush the thighs with a mixture of 2 tablespoons honey, 1 tablespoon soy sauce, and ½ teaspoon red pepper flakes. Return to the air fryer for 2 minutes. The honey caramelizes and creates a sticky, sweet-spicy glaze. My kids love this version, though I reduce the red pepper flakes for them.
Lemon Herb: Add 1 teaspoon dried oregano and ½ teaspoon dried thyme to the seasoning mix. Squeeze fresh lemon juice over the cooked thighs before serving. This bright, Mediterranean-inspired version pairs beautifully with a simple Greek salad. I make this when I want something lighter.
BBQ Style: Skip the paprika and garlic powder. Instead, use 1 tablespoon of your favorite BBQ rub. After cooking, brush with ¼ cup BBQ sauce and air fry for another 2-3 minutes. The sauce gets sticky and caramelized. Perfect for game day or casual summer dinners.
Keto/Low-Carb: This recipe is already keto-friendly as written. The thighs are high in healthy fats and protein with zero carbs. Serve with roasted broccoli or cauliflower rice for a complete low-carb meal.
Dairy-Free: No changes needed—this recipe contains no dairy. It’s naturally dairy-free, which makes it a great option for those with sensitivities.
Air Fryer vs. Oven: If you don’t have an air fryer, bake these at 425°F on a wire rack set over a baking sheet. The wire rack allows air to circulate around the chicken, mimicking the air fryer effect. Bake for 25-30 minutes, flipping halfway through. The skin won’t be quite as crispy, but it’ll still be delicious.
My personal favorite variation: I add a teaspoon of za’atar spice blend to the seasoning mix. The tangy sumac and earthy sesame seeds complement the chicken beautifully. It’s a little unexpected, and everyone always asks what that secret ingredient is.
Serving & Storage Suggestions
Serving temperature: These chicken thighs are best served hot, straight from the air fryer. The skin is at its crispiest within the first 10 minutes. If you need to hold them, keep them in a warm oven (200°F) on a wire rack—not covered, or the steam will soften the skin.
Presentation ideas: Arrange the thighs on a platter with fresh herbs like parsley or rosemary sprigs. A squeeze of lemon juice right before serving brightens everything up. For a casual weeknight, just pile them on a plate next to your sides. No need to get fancy.
What to serve with them: These thighs pair beautifully with roasted vegetables (broccoli, asparagus, or Brussels sprouts), a simple green salad, rice pilaf, or mashed potatoes. For a complete meal, try them with a side of garlic green beans and roasted sweet potatoes. The possibilities are endless.
Storage instructions: Store leftover chicken thighs in an airtight container in the refrigerator for up to 4 days. Remove the skin before storing if you want to reheat it later—the skin will soften in the fridge anyway. I usually store the meat and skin separately.
Reheating methods: The air fryer is your best bet for reviving crispiness. Reheat at 375°F for 3-4 minutes. An oven at 400°F for 5-7 minutes works too. Avoid the microwave—it will turn the skin rubbery. I learned this the hard way when I tried to reheat leftovers for lunch and ended up with sad, chewy chicken.
Freezer instructions: Cooked chicken thighs freeze well for up to 3 months. Wrap each thigh individually in plastic wrap, then place in a freezer bag. Thaw overnight in the refrigerator before reheating. The skin won’t be as crispy after freezing, but the meat stays juicy and flavorful.
How flavors develop: These chicken thighs are actually fantastic cold, straight from the fridge. The seasoning melds with the meat overnight, creating an even deeper flavor. I often make extra just for cold lunch leftovers the next day. Slice them over a salad or eat them with your fingers—no judgment here.
Nutritional Information & Benefits
Here’s the approximate nutritional breakdown for one chicken thigh (based on 4 servings):
| Nutrient | Amount per serving |
|---|---|
| Calories | 290 |
| Protein | 24g |
| Fat | 21g |
| Saturated Fat | 6g |
| Carbohydrates | 1g |
| Fiber | 0g |
| Sugar | 0g |
| Sodium | 620mg |
Health benefits: Chicken thighs are an excellent source of high-quality protein, which supports muscle growth and repair. They’re also rich in B vitamins, particularly niacin and vitamin B6, which help convert food into energy. The skin contains healthy fats that aid in vitamin absorption. Plus, this cooking method uses minimal oil compared to traditional frying, making it a lighter option.
Dietary considerations: This recipe is naturally gluten-free, dairy-free, low-carb, and keto-friendly. It contains no added sugars. The only potential allergen is the chicken itself, which is a common protein source. For those watching sodium intake, reduce the salt to ¾ teaspoon.
My personal perspective: I love that this recipe fits into a balanced lifestyle. It’s indulgent enough to feel like a treat—crispy, savory, satisfying—but it’s made with whole ingredients and a cooking method that doesn’t leave me feeling heavy. It’s the kind of meal that nourishes both body and soul after a long day.
Conclusion
These quick crispy air fryer chicken thighs have honestly changed my weeknight dinner game. They’re fast, they’re foolproof, and they deliver that crispy, juicy perfection we all crave without the mess of deep frying. Whether you’re a seasoned cook or someone who’s just trying to get dinner on the table without a meltdown, this recipe works. I’ve made it for busy weeknights, lazy Sundays, and even for company—and it never disappoints.
I really hope you give these a try. Play around with the seasonings, make them your own, and let me know how they turn out. Did you add extra spice? Try a new herb combo? I’d love to hear about your version. Drop a comment below, share your photos, and tag me on social media. Your kitchen adventures inspire me just as much as that farmers’ market lady inspired me all those years ago. Happy cooking, friends!
Frequently Asked Questions
Can I use boneless, skinless chicken thighs for this recipe?
Yes, but the cooking time will be shorter—about 12-14 minutes total. The skin won’t be crispy since there’s no skin, so consider adding a light coating of cornstarch or almond flour for texture. The meat will still be juicy and flavorful.
Why is my air fryer chicken skin not getting crispy?
This usually happens for one of three reasons: the chicken wasn’t patted dry enough, the basket was overcrowded, or the temperature was too low. Make sure your chicken is very dry, leave space between pieces, and always preheat to 400°F. A little patience goes a long way.
Can I marinate the chicken overnight?
Absolutely. If you want to marinate, do it before seasoning. Use a simple marinade of olive oil, lemon juice, garlic, and herbs. Just pat the chicken dry before adding the dry seasoning and cooking. The marinade will add flavor, but it may slightly reduce crispiness—still delicious though.
How do I know when the chicken is fully cooked?
Use an instant-read thermometer. Insert it into the thickest part of the thigh, avoiding the bone. The USDA says 165°F is safe, but I prefer 175°F to 185°F for the most tender, fall-apart texture. If you don’t have a thermometer, pierce the thigh—if the juices run clear, it’s done.
Can I cook frozen chicken thighs in the air fryer?
Yes, but you’ll need to adjust the time. Cook frozen thighs at 380°F for 20-25 minutes, flipping halfway through. The skin won’t get as crispy, and you won’t be able to season them as evenly. For best results, thaw them first. I’ve done both, and fresh is definitely better.
PrintQuick Crispy Air Fryer Chicken Thighs – Best Easy Dinner

These quick crispy air fryer chicken thighs are ready in under 30 minutes, using simple ingredients for juicy meat and shatteringly crisp skin. Perfect for busy weeknights, this foolproof recipe delivers comfort food faster than takeout.
- Prep Time: 10 minutes
- Cook Time: 20 minutes
- Total Time: 30 minutes
- Yield: 4 servings 1x
- Category: Main Course
- Cuisine: American
Ingredients
- 4 to 6 bone-in, skin-on chicken thighs (about 1.5 to 2 pounds total)
- 1 tablespoon olive oil
- 1 teaspoon kosher salt (Diamond Crystal preferred; reduce to ¾ teaspoon if using table salt)
- ½ teaspoon freshly ground black pepper
- 1 teaspoon garlic powder
- 1 teaspoon paprika (sweet or smoked)
- ½ teaspoon onion powder (optional)
- ¼ teaspoon cayenne pepper (optional)
Instructions
- Preheat your air fryer to 400°F (200°C).
- Pat the chicken thighs completely dry with paper towels.
- In a small bowl, mix together salt, pepper, garlic powder, and paprika. Sprinkle evenly over both sides of the chicken. Drizzle with olive oil and coat lightly.
- Let the seasoned chicken rest for 10 minutes (skin-side up) while the air fryer preheats.
- Place the chicken thighs in the air fryer basket skin-side down in a single layer, not touching.
- Cook at 400°F for 12 minutes.
- Flip the chicken thighs using tongs so the skin side is facing up.
- Cook for another 8-12 minutes, until internal temperature reaches 175°F to 185°F and skin is deep golden brown and crispy.
- Let the chicken rest for 5 minutes before serving.
Notes
For best crispiness, pat chicken very dry and do not overcrowd the basket. Let chicken come to room temperature for 15 minutes before seasoning for even cooking. If using boneless, skinless thighs, reduce cooking time to 12-14 minutes. For oven method, bake at 425°F on a wire rack for 25-30 minutes, flipping halfway.
Nutrition
- Serving Size: 1 chicken thigh
- Calories: 290
- Sodium: 620
- Fat: 21
- Saturated Fat: 6
- Carbohydrates: 1
- Protein: 24
Keywords: air fryer chicken thighs, crispy chicken thighs, quick chicken dinner, easy weeknight dinner, gluten-free chicken, keto chicken


