This was supposed to be a batch of perfectly round, elegant butter cookies for a Halloween party. I had everything measured out, the butter was perfectly softened, and I was feeling pretty smug about my organizational skills for once. Then my phone rang—my sister, panicking about her costume—and I grabbed the almond extract instead of the vanilla. By the time I noticed, the dough was already mixed, and I was already running late. I stared at the bowl, muttered a few choice words, and figured I’d just bake them anyway and call them “mystery cookies.” What came out of that oven was nothing like the plan—and better. Those misshapen little logs, with their accidental almond flavor, looked exactly like gnarled witch fingers. I pressed a slivered almond on the tip of each one, and honestly, it was the best kitchen accident I’ve ever had. Maybe you’ve been there—the moment when a mistake turns into something you can’t stop making. These spooky witch finger cookies are now a Halloween tradition in my house, and I keep buying almond extract on purpose.
Why You’ll Love This Recipe
Let me tell you, these spooky witch finger cookies are the kind of recipe that makes people do a double-take. They look gross in the best possible way, but they taste like a buttery, almond-infused dream. I’ve made these for Halloween parties, school bake sales, and even just for a fun night in, and they never fail to get a reaction. Here’s why you’ll love them too:
- Quick & Easy: Comes together in under 45 minutes, including chilling time. Perfect for last-minute Halloween prep.
- Simple Ingredients: You probably have most of these in your pantry right now. No fancy grocery trips needed.
- Perfect for Halloween Night: These are the star of any spooky spread, from costume parties to movie marathons.
- Crowd-Pleaser: Kids and adults alike get a kick out of the creepy factor, and then they go back for seconds because they’re genuinely delicious.
- Unbelievably Delicious: The combination of buttery shortbread and almond flavor is next-level comfort food, disguised as something terrifying.
What makes these different from other spooky cookies? It’s the texture. These aren’t cakey or soft—they’re crisp and sandy, just like a classic shortbread, which makes them look even more like real, dried-out witch fingers. The almond extract is the secret weapon. It gives them that authentic marzipan-like flavor that makes you think of old-world bakeries, not a Halloween candy bowl. This recipe isn’t just good—it’s the kind that makes you close your eyes after the first bite, even while you’re pretending to be horrified by the look of it. It’s Halloween fun reimagined—creepy, but with the same soul-soothing satisfaction as a warm cookie and a glass of milk.
What Ingredients You Will Need
This recipe uses simple, wholesome ingredients to deliver that perfect spooky look and buttery taste. Most of these are pantry staples, which makes this a great last-minute Halloween project.
For the Cookie Dough
- 1 cup (226g) unsalted butter, softened (I use Kerrygold for the best flavor, but any good quality butter works)
- 1/2 cup (100g) granulated sugar (adds just the right amount of sweetness)
- 1 large egg (room temperature for easier mixing)
- 1 teaspoon almond extract (this is non-negotiable for that authentic witch finger flavor—trust me on this)
- 1/2 teaspoon vanilla extract (rounds out the almond flavor beautifully)
- 2 1/4 cups (280g) all-purpose flour (spoon and level for the best texture)
- 1/2 teaspoon salt (balances the sweetness)
For the Decoration
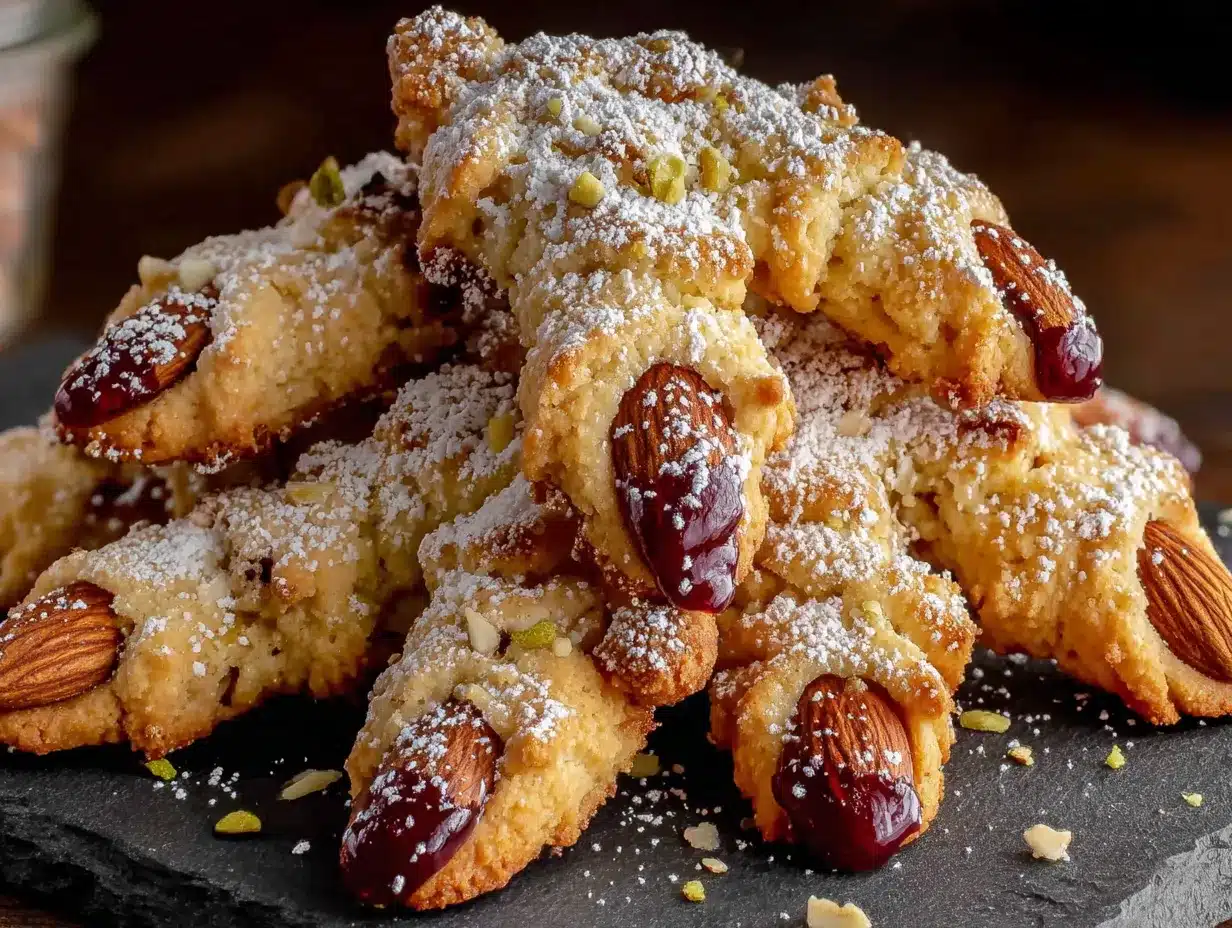
- 1/2 cup (about 60g) whole blanched almonds (one per cookie, for the fingernails)
- Red food coloring or strawberry jam (for the “blood” at the cuticle—I prefer jam for a natural look)
- Optional: A few drops of green food coloring (if you want a slightly greenish, undead tint to the dough)
Ingredient Selection Tips: For the almonds, look for whole blanched almonds—they’re the ones without the brown skin, so they look more like a real fingernail. If you only have unblanched, you can quickly blanch them yourself by boiling them for one minute and slipping off the skins. For the “blood,” I’ve found that a good quality strawberry jam gives a more realistic, congealed look than liquid food coloring. Smucker’s works great, but any seedless jam will do.
Substitution Guidance: If you need a dairy-free option, you can use a high-quality vegan butter stick (I like Miyoko’s). For a gluten-free version, swap the all-purpose flour with a 1:1 gluten-free baking flour blend. Just be aware the texture will be slightly more delicate. And if you’re out of almond extract, you can use all vanilla, but the cookies won’t have that signature “witch finger” flavor.
Equipment Needed
You don’t need anything fancy for these spooky witch finger cookies, which is part of their charm. Here’s what you’ll need:
- Electric mixer (handheld or stand mixer with paddle attachment—I’ve used both, and a stand mixer is easier for the final dough, but a hand mixer works just fine)
- Large mixing bowl
- Measuring cups and spoons
- Baking sheets (two, if you have them, to avoid overcrowding)
- Parchment paper or silicone baking mats (parchment is cheaper and works perfectly)
- Sharp knife or bench scraper (for creating the knuckle lines)
- Small offset spatula or butter knife (for applying the jam)
- Wire cooling rack
Budget-Friendly Options: If you don’t have a bench scraper, a regular butter knife works just as well for shaping the knuckles. No offset spatula? Use a clean finger to dab the jam on. And if you’re really in a pinch, you can skip the electric mixer and cream the butter and sugar by hand with a wooden spoon—it’s a good arm workout!
Personal Experience: I’ve made these with both a stand mixer and a hand mixer, and honestly, the hand mixer is easier for scraping down the sides of the bowl. The stand mixer’s paddle tends to push the dough up the sides, so you have to stop and scrape more often. Just a little tip from someone who’s made these more times than I can count.
Preparation Method
Alright, let’s get creepy! Follow these steps carefully, and you’ll have a batch of spooky witch finger cookies that will haunt your kitchen in the best way.
- Cream the butter and sugar. In your large mixing bowl, beat the softened butter and granulated sugar together on medium speed until light and fluffy, about 3-4 minutes. Scrape down the sides of the bowl halfway through. You’re looking for a pale, airy mixture that looks like it wants to be a cloud.
- Add the wet ingredients. Beat in the egg, almond extract, and vanilla extract until fully combined. The mixture might look a little curdled at this point—don’t panic, that’s normal. It will come together once you add the flour.
- Mix in the dry ingredients. In a separate small bowl, whisk together the all-purpose flour and salt. Gradually add this to the wet mixture, mixing on low speed until just combined. The dough should be soft but not sticky. If it feels too sticky, add a tablespoon more flour. If it’s too dry, add a teaspoon of milk.
- Chill the dough. This is a crucial step! Wrap the dough in plastic wrap and refrigerate for at least 30 minutes. Chilling makes the dough firm enough to shape into those creepy fingers without it sticking to your hands. I’ve skipped this step in a rush before, and let me tell you, it was a sticky, frustrating mess. Don’t be like me.
- Preheat and prepare. Preheat your oven to 325°F (165°C). Line your baking sheets with parchment paper or silicone mats.
- Shape the fingers. Working with about a tablespoon of dough at a time (roughly 20g), roll it into a log shape about 3-4 inches long. Then, using your fingers, gently taper one end to be slightly narrower and round the other end to look like the base of a finger. Place each shaped piece on the prepared baking sheet, leaving about 2 inches between them. Press down gently to flatten them slightly—real fingers aren’t perfectly round.
- Create the knuckles. Using the back of a butter knife or a bench scraper, gently press lines into the dough to create knuckle creases. Make 2-3 lines per finger, pressing deeply enough to leave a visible indent but not so deep that you cut through the dough. This is where the magic happens—they start looking real!
- Add the fingernails. Press one whole blanched almond onto the tapered end of each finger. Press firmly so it sticks, but not so hard that you flatten the finger shape. The almond should look like it’s growing out of the dough.
- Add the “blood.” Using a small brush or your finger, dab a tiny amount of red food coloring or strawberry jam around the base of the almond “fingernail.” This creates the illusion of a bloody cuticle. Don’t overdo it—a little goes a long way for maximum creepiness.
- Bake. Bake for 12-15 minutes, or until the cookies are set and the bottoms are just barely golden. The tops should still be pale. They will firm up as they cool. Overbaking will make them too hard, so watch them carefully.
- Cool completely. Let the cookies cool on the baking sheet for 5 minutes, then transfer them to a wire rack to cool completely. They will be fragile when warm, so handle them gently.
Sensory Cues: When you take them out of the oven, you should smell that amazing almond-butter aroma. The cookies should feel firm to the touch but not hard. The “fingernails” will look slightly glossy from the heat, which actually makes them look more realistic!
Cooking Tips & Techniques
After making these spooky witch finger cookies more times than I care to admit, I’ve picked up a few tricks that make the process smoother and the results creepier.
Don’t overwork the dough. This is the number one mistake I see people make. Once you add the flour, mix only until it’s combined. Overmixing develops the gluten and makes the cookies tough, not tender. You want that melt-in-your-mouth shortbread texture, not a jaw workout.
The chilling is non-negotiable. I learned this the hard way. I was in a hurry for a Halloween party once and skipped the chilling step. The dough was so sticky that I couldn’t shape it without coating my hands in flour, and the cookies spread into weird, blobby shapes in the oven. They still tasted fine, but they looked more like alien blobs than witch fingers. Chill the dough—your sanity will thank you.
Vary the finger shapes. Real fingers aren’t all the same size and shape. Make some longer, some shorter, some a little thicker, some with more pronounced knuckles. This variety makes the final platter look much more realistic and unsettling. I like to make a few that look like they have arthritis—bent knuckles and all.
Use the right almond placement. The almond should be pressed into the dough at a slight angle, not straight on. Real fingernails grow at an angle, and this small detail makes a huge difference in the realism. Also, make sure the pointed end of the almond is facing outward, away from the finger.
Timing is everything. These cookies bake quickly. Start checking them at the 12-minute mark. The bottoms should be just barely golden, and the tops should still be pale. If they’re browning on the sides, they’re overdone. Remember, they continue to cook on the hot baking sheet for a few minutes after you take them out.
Variations & Adaptations
One of the best things about this recipe is how easy it is to customize. Here are a few variations I’ve tried and loved:
Chocolate Witch Fingers
Replace 1/4 cup (30g) of the all-purpose flour with unsweetened cocoa powder. The chocolate version looks even more gruesome—like dirt-caked fingers dug up from a grave. The almond extract still works beautifully with the chocolate. I made these for a friend’s “Haunted Bakery” party, and they were the first thing to disappear.
Vegan Witch Fingers
Use a high-quality vegan butter (like Miyoko’s) and replace the egg with a flax egg (1 tablespoon ground flaxseed mixed with 3 tablespoons water, let sit for 5 minutes). The texture will be slightly more crumbly, but they still look and taste fantastic. My vegan sister-in-law was thrilled to have a spooky treat she could enjoy.
Gluten-Free Witch Fingers
Swap the all-purpose flour with a 1:1 gluten-free baking flour blend (I like Bob’s Red Mill). Add an extra tablespoon of the blend if the dough feels too sticky. The cookies will be a bit more delicate, so handle them carefully when transferring to the baking sheet.
Spice-Infused Witch Fingers
Add 1/2 teaspoon of ground cinnamon and 1/4 teaspoon of ground nutmeg to the flour mixture. This gives the cookies a warm, autumnal flavor that pairs perfectly with the almond extract. I made these for a Halloween bonfire, and they smelled incredible baking.
Matcha Witch Fingers
Add 1 tablespoon of matcha powder to the flour mixture. The green color is perfect for a witchy, undead look, and the earthy matcha flavor is a nice contrast to the sweet almond. This is a more sophisticated version that adults tend to love.
Serving & Storage Suggestions
These spooky witch finger cookies are best served at room temperature, arranged on a dark platter or a black cake stand for maximum creepy effect. I like to scatter a few loose almonds around the platter to look like “clipped fingernails”—it’s a disgusting touch that always gets a laugh.
Complementary Dishes: These pair beautifully with a glass of cold milk, a warm cup of apple cider, or a mug of hot chocolate. For a Halloween party spread, serve them alongside other spooky treats like ghost-shaped meringues, pumpkin patch dirt cups, or a bowl of “eyeball” punch (lychee fruits with blueberry centers).
Storage Instructions: Store the cookies in an airtight container at room temperature for up to 5 days. Layer them between sheets of parchment paper to prevent the “fingernails” from breaking off. Do not refrigerate them, as the moisture will make them soft and less realistic.
Freezer Instructions: You can freeze the unbaked, shaped cookies (without the almonds and jam) for up to 3 months. Place them on a baking sheet and freeze until solid, then transfer to a freezer-safe bag. When ready to bake, add the almonds and jam directly from frozen, and add 2-3 minutes to the baking time. Baked cookies can also be frozen for up to 1 month, but the texture will be slightly less crisp after thawing.
Reheating Tips: If you want to refresh the cookies, pop them in a 300°F (150°C) oven for 3-5 minutes. Let them cool completely before serving. The flavor actually improves after a day—the almond extract mellows and blends with the butter for a more complex taste.
Nutritional Information & Benefits
Let’s be real—these spooky witch finger cookies are a treat, not a health food. But here’s the breakdown for one cookie (based on a batch of 24):
- Calories: Approximately 140
- Fat: 9g
- Carbohydrates: 14g
- Protein: 2g
- Sugar: 5g
Health Benefits of Key Ingredients: Almonds are a good source of vitamin E, magnesium, and healthy monounsaturated fats. They’re also rich in antioxidants, which help protect your cells from oxidative stress. The butter provides vitamin A and healthy fats that support brain function. And hey, the act of baking itself is a form of stress relief—so there’s a mental health benefit too!
Dietary Considerations: This recipe is vegetarian and can be made vegan and gluten-free with the substitutions mentioned above. It contains dairy, eggs, gluten, and tree nuts (almonds). If you have a nut allergy, you can use a whole cashew or a piece of sliced dried apple for the fingernails instead.
Personal Wellness Perspective: I believe in balance. These cookies are a once-a-year treat for Halloween, and they bring so much joy and laughter that they’re worth every calorie. Life is too short to skip the spooky fun. Just don’t eat the whole batch in one sitting—trust me, I’ve been there, and your stomach will not thank you.
Conclusion
These spooky witch finger cookies are more than just a Halloween treat—they’re a conversation starter, a memory maker, and proof that the best recipes often come from happy accidents. I love how they bring people together, whether it’s the shrieks of delight when someone sees them for the first time or the satisfied hums after that first buttery bite. They’re the kind of cookie that makes Halloween feel magical, even if you’re just staying in with a scary movie and a cup of tea.
I encourage you to make these your own. Add a little extra almond extract if you love that flavor. Experiment with different “blood” colors. Make them extra gnarled and creepy. The beauty of this recipe is that it’s forgiving and fun. So go ahead, get your hands dirty, and create something delightfully disgusting.
I’d love to hear how your witch fingers turn out! Drop a comment below with your spookiest creation, share a photo on social media, or tell me about your own kitchen accident that turned into a tradition. Happy Halloween, and happy baking!
Frequently Asked Questions
Can I make these spooky witch finger cookies ahead of time?
Absolutely! You can make the dough up to 3 days in advance and keep it wrapped in the refrigerator. You can also shape the cookies and freeze them unbaked for up to 3 months. Just add the almonds and jam right before baking.
Why did my cookies spread too much?
This usually happens if the dough wasn’t chilled enough or if the butter was too soft. Make sure you chill the dough for at least 30 minutes, and if your kitchen is warm, pop the shaped cookies back in the fridge for 10 minutes before baking.
Can I use a different extract instead of almond?
You can, but the almond extract is what gives these cookies their authentic “witch finger” flavor. If you must substitute, use all vanilla extract or try a combination of vanilla and a tiny bit of lemon zest for a different but still delicious cookie.
How do I get the “fingernails” to stay on?
Press the almond firmly into the dough before baking. The dough will puff up slightly around it, holding it in place. If an almond falls off after baking, just press it back on with a tiny dab of jam or frosting as “glue.”
Can I make these without the red “blood” for a less gory version?
Of course! The cookies are still wonderfully creepy without the red coloring. You can leave the almonds plain for a more subtle, mummified look, or use green food coloring for a swamp witch vibe. The taste is the same either way.
Pin This Recipe!
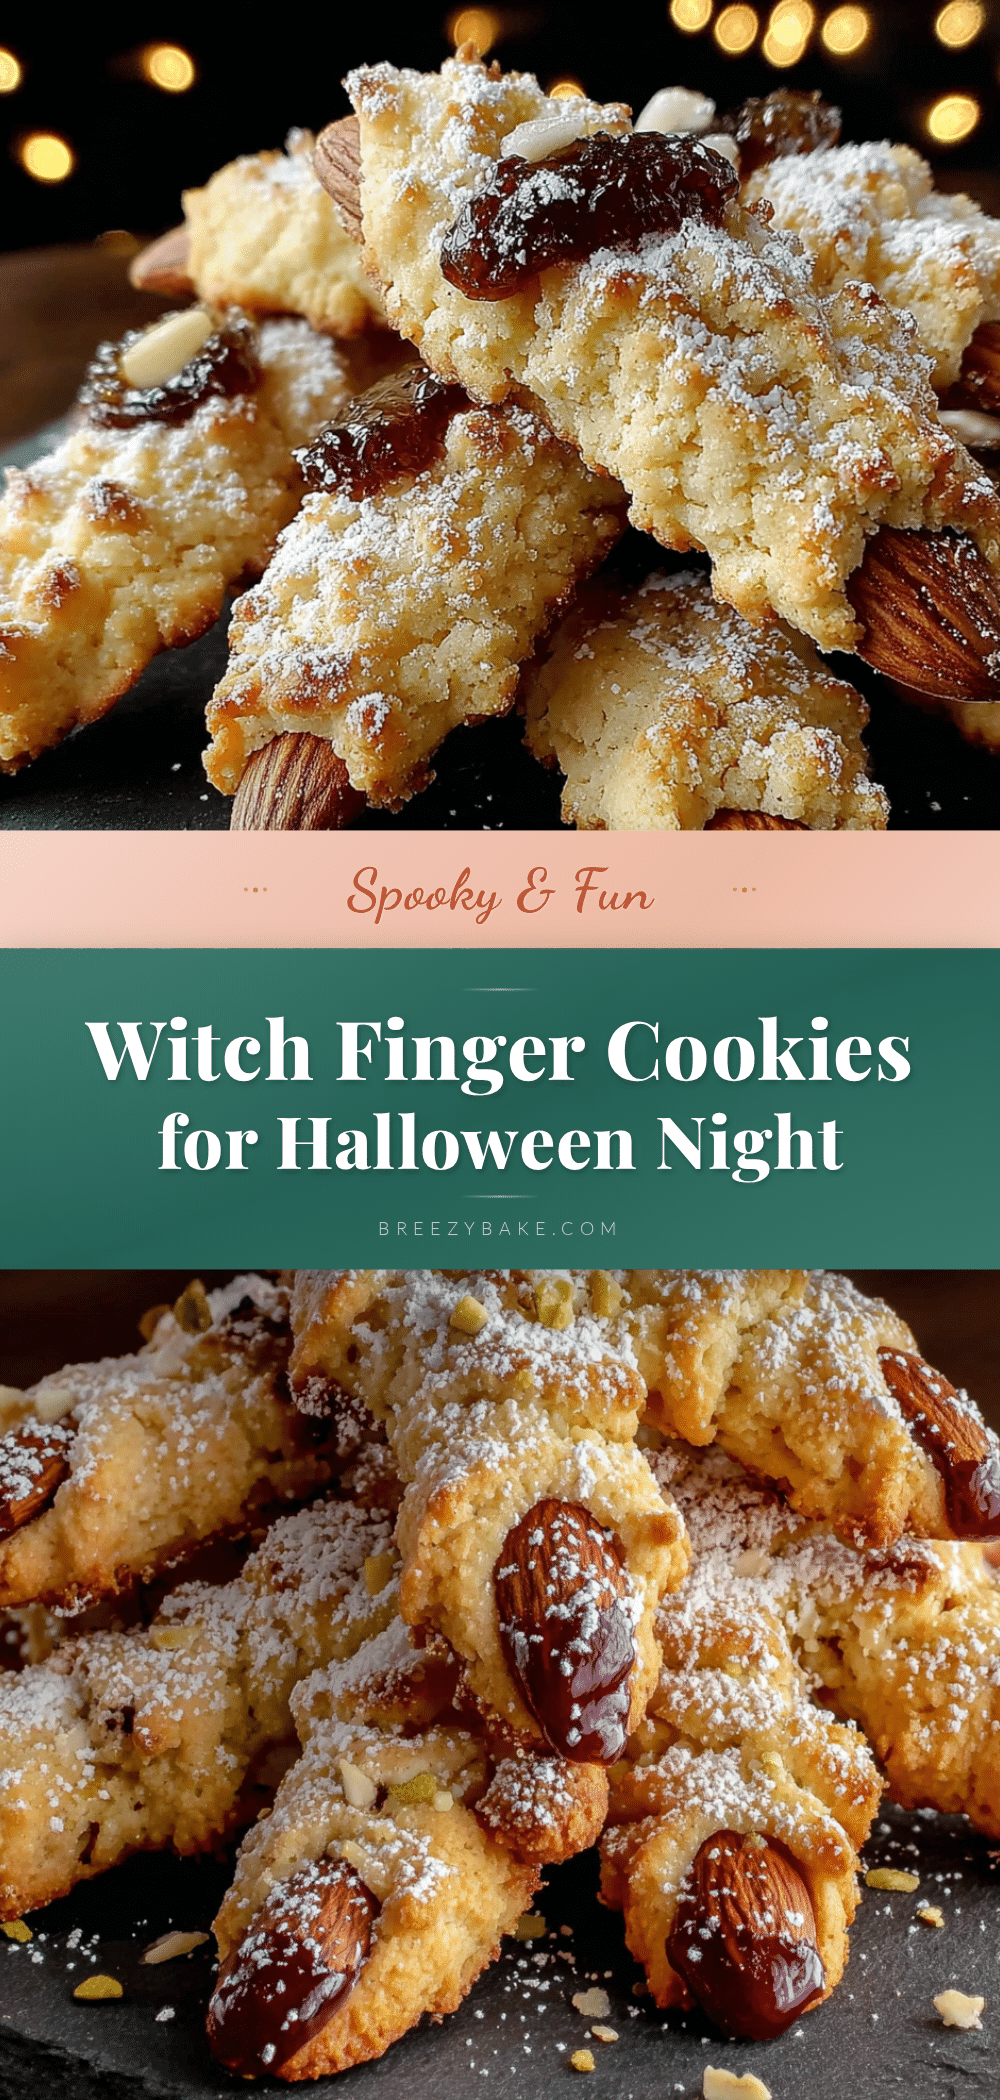
Spooky Witch Finger Cookies: Easy Halloween Recipe

These spooky witch finger cookies are a Halloween tradition, born from a happy kitchen accident. They look delightfully gross but taste like buttery, almond-infused shortbread, making them a perfect creepy treat for parties and gatherings.
- Prep Time: 15 minutes
- Cook Time: 15 minutes
- Total Time: 45 minutes
- Yield: 24 servings 1x
- Category: Dessert
- Cuisine: American
Ingredients
- 1 cup (226g) unsalted butter, softened
- 1/2 cup (100g) granulated sugar
- 1 large egg, room temperature
- 1 teaspoon almond extract
- 1/2 teaspoon vanilla extract
- 2 1/4 cups (280g) all-purpose flour
- 1/2 teaspoon salt
- 1/2 cup (about 60g) whole blanched almonds
- Red food coloring or strawberry jam (for the ‘blood’)
- Optional: a few drops of green food coloring
Instructions
- Cream the butter and sugar. In a large mixing bowl, beat the softened butter and granulated sugar together on medium speed until light and fluffy, about 3-4 minutes. Scrape down the sides of the bowl halfway through.
- Add the wet ingredients. Beat in the egg, almond extract, and vanilla extract until fully combined. The mixture might look a little curdled—this is normal.
- Mix in the dry ingredients. In a separate small bowl, whisk together the all-purpose flour and salt. Gradually add this to the wet mixture, mixing on low speed until just combined. The dough should be soft but not sticky. If too sticky, add a tablespoon more flour; if too dry, add a teaspoon of milk.
- Chill the dough. Wrap the dough in plastic wrap and refrigerate for at least 30 minutes.
- Preheat and prepare. Preheat your oven to 325°F (165°C). Line your baking sheets with parchment paper or silicone mats.
- Shape the fingers. Working with about a tablespoon of dough at a time (roughly 20g), roll it into a log shape about 3-4 inches long. Gently taper one end to be slightly narrower and round the other end. Place each shaped piece on the prepared baking sheet, leaving about 2 inches between them. Press down gently to flatten slightly.
- Create the knuckles. Using the back of a butter knife or a bench scraper, gently press lines into the dough to create knuckle creases. Make 2-3 lines per finger, pressing deeply enough to leave a visible indent but not so deep that you cut through the dough.
- Add the fingernails. Press one whole blanched almond onto the tapered end of each finger. Press firmly so it sticks, but not so hard that you flatten the finger shape.
- Add the ‘blood.’ Using a small brush or your finger, dab a tiny amount of red food coloring or strawberry jam around the base of the almond ‘fingernail.’
- Bake. Bake for 12-15 minutes, or until the cookies are set and the bottoms are just barely golden. The tops should still be pale. They will firm up as they cool.
- Cool completely. Let the cookies cool on the baking sheet for 5 minutes, then transfer them to a wire rack to cool completely.
Notes
Chilling the dough is crucial to prevent spreading and stickiness. For a more realistic look, vary the finger shapes and press the almond at a slight angle. Overbaking will make cookies too hard; start checking at 12 minutes. Store in an airtight container at room temperature for up to 5 days.
Nutrition
- Serving Size: 1 cookie
- Calories: 140
- Sugar: 5
- Sodium: 75
- Fat: 9
- Saturated Fat: 5
- Carbohydrates: 14
- Protein: 2
Keywords: Halloween cookies, witch finger cookies, spooky cookies, almond shortbread, easy Halloween recipe


