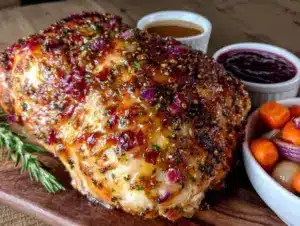
This was supposed to be a simple weeknight pan sauce. I had a single chicken breast, some leftover thyme, and a vague memory of my grandmother doing something magical with a whisk and a hot pan. I was tired, honestly—it had been one of those Tuesdays where the grocery list felt like a novel and the sink was full of dishes from breakfast. I grabbed the wrong container of stock from the freezer—it was turkey stock, not chicken—and I was already regretting not just ordering takeout. The pan was too hot, the butter started browning faster than I expected, and I thought, well, this is going to be a mess. What came out of that pan was nothing like the plan. It was richer, deeper, and had this silky, almost velvety texture that made me stop mid-bite. It tasted like Thanksgiving, but better. That happy accident—that moment of grabbing the wrong thing and not having the time to fix it—became the backbone of my homemade Thanksgiving turkey gravy from scratch. I mean, who knew a mistake could taste so right?
You know that feeling when you’re standing over a hot stove, the turkey is resting, and suddenly the pressure is on to make the gravy perfect? Maybe you’ve been there, staring at a packet of mix and wondering if anyone would notice. I’ve been there too, and let me tell you, this homemade turkey gravy recipe is the one that finally made me throw the packets away for good. It’s forgiving, it’s foolproof, and it starts with the drippings from your roasted bird—the real star of the show. The first time I made it for a big family dinner, my uncle, who never compliments anything, asked for seconds. That moment, right there, is why this recipe stayed with me. It’s not just about the gravy; it’s about the quiet satisfaction of turning a near-disaster into something you’re proud to serve.
Why You’ll Love This Recipe
After years of testing—and yes, a few lumpy, salty disasters—I can confidently say this is the best homemade Thanksgiving turkey gravy recipe you’ll find. It’s built on real experience, not guesswork. I’ve burned roux, I’ve over-salted, and I’ve learned exactly how to fix each mistake. Here’s why this version stands out:
- Quick & Easy: Comes together in under 20 minutes after your turkey is out of the oven. No stress, no complicated steps—just a whisk and a hot pan.
- Simple Ingredients: You already have butter, flour, stock, and the turkey drippings. No fancy grocery trips needed.
- Perfect for Thanksgiving: It’s the ultimate side for your roasted turkey, mashed potatoes, and stuffing. It ties the whole plate together.
- Crowd-Pleaser: This gravy is smooth, rich, and deeply savory. Kids and adults alike will ask for more.
- Unbelievably Delicious: The texture is silky, not gloopy. The flavor is complex—thanks to the browned bits in the pan—but still tastes like home.
What makes this recipe different from the rest? It’s the technique of deglazing the roasting pan properly. Most recipes skip the step of scraping up all those caramelized bits (called fond), but that’s where the real flavor lives. This isn’t just another version of turkey gravy—it’s the one that makes you close your eyes after the first bite. It’s comfort food at its finest: warm, nostalgic, and deeply satisfying. Perfect for impressing guests without breaking a sweat, or turning a simple meal into something memorable.
What Ingredients You Will Need
This homemade Thanksgiving turkey gravy uses simple, wholesome ingredients to deliver bold flavor and a silky texture without the fuss. Most of these are pantry staples, especially if you’ve just roasted a turkey. Let’s break down what you’ll need and why each ingredient matters.
- Turkey drippings (about 1/4 cup fat and 1/4 cup browned bits): This is the liquid left in the roasting pan after your turkey is done. It’s packed with flavor from the roasted meat and vegetables. Strain it to remove any solids, then separate the fat from the juices. You’ll use both.
- Unsalted butter (4 tablespoons / 56 grams): I prefer unsalted so I can control the salt level. Butter adds richness and helps create the roux. I recommend using a good-quality brand like Kerrygold for the best flavor.
- All-purpose flour (1/4 cup / 30 grams): This thickens the gravy. For a gluten-free option, you can swap in a 1:1 gluten-free flour blend or cornstarch (use 2 tablespoons cornstarch mixed with 1/4 cup cold water as a slurry).
- Turkey or chicken stock (3 cups / 710 ml): Use low-sodium stock to avoid over-salting. Homemade stock is ideal, but store-bought works well too. I like Kitchen Basics or Swanson. If using chicken stock, the flavor will be slightly lighter but still delicious.
- Salt and black pepper (to taste): Start with 1/2 teaspoon of salt and 1/4 teaspoon of pepper, then adjust. Remember, the drippings are already seasoned.
- Fresh thyme or sage (optional, 1 teaspoon chopped): Adds a subtle herbal note that pairs beautifully with turkey. I usually add this when I’m feeling fancy, but it’s not essential.
Ingredient Selection Tips: Look for a turkey that has been brined or well-seasoned—this means your drippings will be more flavorful. If your drippings are too salty, use unsalted butter and unsalted stock to balance it out. For a richer gravy, you can substitute half the stock with the reserved turkey juices from the drippings.
Equipment Needed
You don’t need a lot of fancy tools to make this homemade turkey gravy, but a few key pieces will make the process smoother. Here’s what I use and recommend:
- Roasting pan with a flat bottom: This is where the magic happens. A heavy-duty pan (like a stainless steel or enameled cast iron) helps the drippings brown evenly. I’ve used a cheap aluminum pan before, and it worked, but the fond didn’t develop as well.
- Fat separator (or a glass measuring cup): This tool makes separating the fat from the juices a breeze. If you don’t have one, pour the drippings into a glass measuring cup and let it sit for a few minutes—the fat will rise to the top. Spoon it off carefully.
- Fine-mesh strainer: Use this to strain the drippings and remove any burnt bits or solids. It ensures a smooth gravy. A cheesecloth-lined colander works in a pinch.
- Whisk: A good whisk is non-negotiable. It helps you incorporate the flour into the fat without lumps. I prefer a silicone-coated whisk to avoid scratching my pan.
- Wooden spoon or spatula: For scraping up the browned bits from the pan. A flat-edged wooden spoon works best.
- Saucepan (optional): If your roasting pan is too large to handle on the stovetop, transfer the drippings and fond to a smaller saucepan. I’ve done this many times—it’s a lifesaver.
Budget-Friendly Tip: You don’t need a fancy fat separator. A simple glass measuring cup and a spoon do the job just fine. I used one for years before finally buying a separator.
Preparation Method

Making homemade turkey gravy from scratch is easier than you think. Follow these steps, and you’ll have a smooth, rich gravy that’s the star of the table. Remember, the key is patience—don’t rush the roux.
- Prepare the drippings: Once your turkey is out of the oven and resting, pour the drippings from the roasting pan through a fine-mesh strainer into a fat separator or a glass measuring cup. Let it sit for 5 minutes to allow the fat to rise to the top. You should have about 1/2 cup of fat and 1/2 cup of juices. Set aside the juices. Measure out 1/4 cup of the fat (discard the rest or save it for roasting potatoes).
- Deglaze the pan: Place the roasting pan over two burners on medium heat. Add 1/2 cup of the turkey or chicken stock to the pan. Using a wooden spoon, scrape up all the browned bits from the bottom. This is where the flavor lives—don’t skip this step! The liquid will darken and smell incredible. Pour this mixture into a bowl and set aside.
- Make the roux: In the same roasting pan (or a medium saucepan), melt the 4 tablespoons of butter over medium heat. Once it’s fully melted and bubbling, whisk in the 1/4 cup of flour. Cook, whisking constantly, for 1 to 2 minutes. The roux should turn a light golden brown—like the color of a sandy beach. If it smells nutty, you’re doing it right. Don’t let it burn; if it turns dark brown, start over.
- Add the stock and drippings: Slowly pour in the remaining 2 1/2 cups of stock while whisking vigorously. Then add the reserved deglazing liquid and the reserved turkey juices from the drippings. Whisk until the mixture is smooth and no lumps remain. Increase the heat to medium-high and bring the gravy to a gentle simmer. This should take about 3 to 4 minutes.
- Simmer and thicken: Reduce the heat to low and let the gravy simmer for 5 to 7 minutes, stirring occasionally with the whisk. It will thicken as it cooks. If you want a thicker gravy, simmer for a few more minutes. For a thinner gravy, add a splash of stock. The texture should coat the back of a spoon—like heavy cream.
- Season and finish: Taste the gravy and add salt and pepper as needed. Remember, the drippings are already seasoned, so go easy on the salt. If using fresh herbs, stir in the chopped thyme or sage at the end. Strain the gravy through a fine-mesh strainer one more time if you want it extra smooth. Serve immediately.
Troubleshooting Tip: If your gravy is lumpy, don’t panic. Whisk it vigorously, then strain it through a sieve. If it’s too thin, mix 1 tablespoon of cornstarch with 2 tablespoons of cold water and whisk it into the simmering gravy. If it’s too thick, whisk in a little warm stock or water until it reaches your desired consistency.
Cooking Tips & Techniques
Over the years, I’ve made every mistake in the book when it comes to gravy. I’ve burned the roux, added too much salt, and ended up with a lumpy mess that looked more like wallpaper paste than gravy. Here are the lessons I’ve learned so you don’t have to repeat them.
- Don’t rush the roux: The roux is the foundation of your gravy. Cooking the flour in butter for at least a minute removes the raw flour taste and adds a subtle nuttiness. I once tried to save time by skipping this step, and the gravy tasted like paste. Never again.
- Use warm stock: Adding cold stock to a hot roux can cause lumps. I always warm the stock in the microwave for 30 seconds before adding it. It’s a small step that makes a big difference.
- Whisk constantly: When you add the liquid to the roux, whisk like your life depends on it. This prevents lumps from forming. I use a figure-eight motion—it’s oddly satisfying.
- Season at the end: The drippings are already salty, so wait until the gravy has simmered before adding any salt. I learned this the hard way after ruining a batch with too much salt. Pepper, on the other hand, you can add earlier to let it bloom.
- Make it ahead: You can make this gravy up to 3 days in advance. Cool it completely, then store it in an airtight container in the fridge. Reheat it gently on the stovetop, whisking in a splash of stock to loosen it up. The flavors actually get better over time.
Variations & Adaptations
This homemade turkey gravy is versatile, and I’ve tried several variations over the years. Here are a few of my favorites, depending on your mood or dietary needs.
- Herb-infused gravy: Add 1 sprig of fresh rosemary and 2 sprigs of fresh thyme to the stock while it simmers. Remove the herbs before serving. The aromatic flavor is perfect for a traditional Thanksgiving table.
- Mushroom gravy: Sauté 1 cup of sliced cremini mushrooms in the butter before adding the flour. Cook until the mushrooms are golden and have released their liquid. Proceed with the recipe as written. This adds an earthy, umami depth that’s incredible over mashed potatoes.
- Gluten-free gravy: Swap the all-purpose flour with a 1:1 gluten-free flour blend or use 2 tablespoons of cornstarch mixed with 1/4 cup of cold water as a slurry. Add the slurry at the end of cooking, whisking until thickened. It’s just as smooth and delicious.
- Dairy-free gravy: Replace the butter with a high-quality vegan butter or 1/4 cup of olive oil. The flavor will be slightly different, but still rich and savory. I’ve made this for friends with dairy allergies, and they loved it.
Serving & Storage Suggestions
This gravy is best served hot, right after you’ve made it. Pour it into a warmed gravy boat or a small pitcher for easy serving. It’s the perfect companion for your roasted turkey, creamy mashed potatoes, stuffing, and even biscuits. I also love drizzling it over open-faced turkey sandwiches the next day—it’s a whole new meal.
Storage Instructions: Let the gravy cool to room temperature (no more than 2 hours). Transfer it to an airtight container and refrigerate for up to 4 days. The gravy will thicken as it chills, so don’t be alarmed. To reheat, place it in a saucepan over low heat, whisking in a splash of stock or water until it reaches your desired consistency. You can also reheat it in the microwave in 30-second bursts, stirring in between.
Freezer Instructions: This gravy freezes beautifully. Pour it into a freezer-safe container or a zip-top bag, leaving some room for expansion. Freeze for up to 3 months. Thaw overnight in the fridge, then reheat gently on the stovetop. The flavors will still be vibrant.
Nutritional Information & Benefits
While gravy isn’t exactly a health food, it does have some redeeming qualities. Here’s a rough estimate per 1/4 cup serving (based on the recipe as written):
- Calories: 110
- Fat: 9g (5g saturated)
- Carbohydrates: 6g
- Protein: 2g
- Sodium: 280mg (varies based on stock and drippings)
The turkey drippings contain some minerals like zinc and B vitamins from the roasted meat. Using homemade stock can also add collagen and gelatin, which are great for joint health. If you’re watching your sodium, use unsalted stock and go easy on the added salt. For a lighter option, you can reduce the butter to 2 tablespoons and use a cornstarch slurry to thicken—this cuts the fat and calories in half.
Conclusion
This homemade Thanksgiving turkey gravy from scratch is more than just a recipe—it’s a lesson in trusting the process. That first accidental batch, born from a wrong container of stock and a too-hot pan, taught me that the best dishes often come from happy mistakes. Now, it’s the gravy I look forward to making every year. It’s forgiving, it’s deeply flavorful, and it turns a simple plate of turkey and potatoes into something that feels like a hug. I encourage you to make it your own—add more herbs, swap the stock, or double the batch for leftovers. And when you do, I’d love to hear about it. Leave a comment below, share your version on Pinterest, or tag me in your photos. Let’s make this the year you never go back to a packet again.
Frequently Asked Questions
Can I make this gravy without turkey drippings?
Absolutely. If you don’t have drippings, use 1/4 cup of butter and 1/4 cup of turkey or chicken stock as the base. Add a teaspoon of Worcestershire sauce or a splash of soy sauce to mimic the savory depth of drippings. It won’t be exactly the same, but it’s still delicious.
Why is my gravy lumpy?
Lumpy gravy usually happens when the flour isn’t fully incorporated into the fat, or when cold stock is added to a hot roux. To fix it, whisk vigorously and strain the gravy through a fine-mesh sieve. Next time, warm your stock before adding it.
Can I use cornstarch instead of flour?
Yes. Mix 2 tablespoons of cornstarch with 1/4 cup of cold water to create a slurry. Add it to the simmering gravy at the end of cooking, whisking until thickened. Cornstarch gives a glossier finish and is naturally gluten-free.
How do I make the gravy less salty?
If your gravy is too salty, add a splash of unsalted stock or water to dilute it. You can also add a peeled raw potato to the simmering gravy—it will absorb some of the salt. Remove the potato before serving.
Can I double this recipe?
Yes, this recipe doubles easily. Just use a larger pan and increase the cooking time slightly. Make sure to whisk well to incorporate all the flour. Leftover gravy freezes well, so don’t be afraid to make extra.
Pin This Recipe!

Homemade Thanksgiving Turkey Gravy Easy Best Recipe

This homemade turkey gravy is rich, silky, and deeply savory, made from scratch with turkey drippings, butter, flour, and stock. It’s forgiving, foolproof, and perfect for Thanksgiving or any roasted turkey meal.
- Prep Time: 5 minutes
- Cook Time: 15 minutes
- Total Time: 20 minutes
- Yield: 8 servings 1x
- Category: Side Dish
- Cuisine: American
Ingredients
- Turkey drippings (about 1/4 cup fat and 1/4 cup browned bits)
- 4 tablespoons (56 grams) unsalted butter
- 1/4 cup (30 grams) all-purpose flour
- 3 cups (710 ml) turkey or chicken stock, low-sodium, divided
- Salt and black pepper to taste
- 1 teaspoon fresh thyme or sage, chopped (optional)
Instructions
- Prepare the drippings: Once your turkey is out of the oven and resting, pour the drippings from the roasting pan through a fine-mesh strainer into a fat separator or a glass measuring cup. Let it sit for 5 minutes to allow the fat to rise to the top. You should have about 1/2 cup of fat and 1/2 cup of juices. Set aside the juices. Measure out 1/4 cup of the fat (discard the rest or save it for roasting potatoes).
- Deglaze the pan: Place the roasting pan over two burners on medium heat. Add 1/2 cup of the turkey or chicken stock to the pan. Using a wooden spoon, scrape up all the browned bits from the bottom. Pour this mixture into a bowl and set aside.
- Make the roux: In the same roasting pan (or a medium saucepan), melt the 4 tablespoons of butter over medium heat. Once it’s fully melted and bubbling, whisk in the 1/4 cup of flour. Cook, whisking constantly, for 1 to 2 minutes. The roux should turn a light golden brown—like the color of a sandy beach.
- Add the stock and drippings: Slowly pour in the remaining 2 1/2 cups of stock while whisking vigorously. Then add the reserved deglazing liquid and the reserved turkey juices from the drippings. Whisk until the mixture is smooth and no lumps remain. Increase the heat to medium-high and bring the gravy to a gentle simmer, about 3 to 4 minutes.
- Simmer and thicken: Reduce the heat to low and let the gravy simmer for 5 to 7 minutes, stirring occasionally with the whisk. It will thicken as it cooks. The texture should coat the back of a spoon—like heavy cream.
- Season and finish: Taste the gravy and add salt and pepper as needed. If using fresh herbs, stir in the chopped thyme or sage at the end. Strain the gravy through a fine-mesh strainer one more time if you want it extra smooth. Serve immediately.
Notes
For a gluten-free version, use a 1:1 gluten-free flour blend or 2 tablespoons cornstarch mixed with 1/4 cup cold water as a slurry. For a dairy-free version, replace butter with vegan butter or olive oil. The gravy can be made up to 3 days ahead and reheated gently. If too salty, add a splash of unsalted stock or a peeled raw potato to absorb excess salt.
Nutrition
- Serving Size: 1/4 cup
- Calories: 110
- Sodium: 280
- Fat: 9
- Saturated Fat: 5
- Carbohydrates: 6
- Protein: 2
Keywords: turkey gravy, homemade gravy, Thanksgiving gravy, easy gravy, from scratch, pan gravy