My neighbor, Clara, is eighty-three and has this way of appearing in your kitchen doorway without you ever hearing her knock. I was elbow-deep in flour last November, wrestling with a full-sized pie crust that kept cracking at the edges, muttering things I won’t repeat here. She just stood there for a moment, watching me struggle, then said, “You’re fighting the wrong pie.” She pulled up a stool and told me about the little tart pans her mother used to keep on a hook by the stove. “Everything tastes better when it’s your own size,” she said with a shrug. That conversation—right there in my messy kitchen with flour on the light fixtures—is where these mini pumpkin pies were really born. I didn’t know it then, but she was handing me more than a tip. She was handing me the solution to Friendsgiving chaos.
I kept making big pies for years because that’s what you’re supposed to do, right? But honestly, there’s something stressful about cutting that first slice and watching everyone pretend they’re happy with the sliver they got. Mini pies fix that. Everyone gets their own little golden dome of spiced pumpkin custard, and nobody has to negotiate for the corner piece with extra crust. Clara was right. I mean, she’s always right, but this time it really stuck.
The first batch I made for our Friendsgiving that year disappeared in about twelve minutes. People stood around the kitchen island holding these warm little pies in their hands, and nobody said a word about the turkey still resting in the oven. That’s when I knew this was the recipe I’d keep making. Maybe you’ve been there—the stress of hosting, the fear of running out of dessert, the awkward moment when someone asks for a second slice and there’s barely enough for the first round. These mini pies solve all of that. They’re personal, they’re forgiving, and they taste like the best kind of comfort on a cold November evening.
Why You’ll Love This Recipe
I’ve tested this recipe six times over the past two years, and I can tell you with confidence that it’s the one you want for your Friendsgiving table. It started as a simple adaptation of Clara’s mother’s tart method, but I’ve tweaked the filling ratios, the blind-baking technique, and the spice blend until every single mini pie came out with that perfect custard-like center and flaky, buttery crust. Here’s why this version stands out from the dozens of pumpkin pie recipes you’ll find online:
- Perfect for a Crowd: Each mini pie serves one person, which means no awkward slicing and no fighting over the last piece. Make a dozen and watch them vanish.
- Less Stress, More Fun: You don’t need to worry about a cracked crust or a soggy bottom. If one mini pie doesn’t turn out perfectly, you’ve got eleven others that will. The pressure is off.
- Simple Ingredients: Butter, flour, pumpkin puree, eggs, cream, and a handful of spices. You probably have most of this in your pantry right now.
- Make-Ahead Friendly: You can prep the crusts and filling a day ahead, then bake them fresh on the day of your gathering. Your future self will thank you.
- Unbelievably Delicious: The texture is what gets people. The filling is silky and rich without being heavy, and the crust stays crisp because the mini size lets it bake evenly. It’s the kind of dessert that makes people close their eyes after the first bite.
This isn’t just another pumpkin pie recipe scaled down. The ratio of filling to crust changes when you go mini, and I’ve adjusted the baking time, temperature, and spice quantities to make sure each little pie delivers the same satisfaction as a full-sized one—maybe even more. There’s something about having your own personal pie that feels special, you know?
What Ingredients You Will Need
This recipe uses simple, honest ingredients that come together to create something genuinely comforting. The beauty of these mini pies is that nothing here is fussy or hard to find. Let me walk you through what you’ll need and why each ingredient matters.
For the Crust
- 2 ½ cups all-purpose flour (315 grams) – I use King Arthur Flour for consistent results, but any brand works. Don’t substitute whole wheat here unless you want a denser, tougher crust.
- 1 teaspoon salt – Fine sea salt dissolves better than coarse salt in dough.
- 1 tablespoon granulated sugar – Just a touch of sweetness to balance the savory butter.
- 1 cup cold unsalted butter (226 grams), cut into small cubes – Cold butter is non-negotiable. If your butter softens, pop it back in the fridge for ten minutes.
- ¼ to ½ cup ice water (60–120 ml) – Start with the smaller amount and add more only if needed. The dough should just hold together when squeezed.
For the Pumpkin Filling
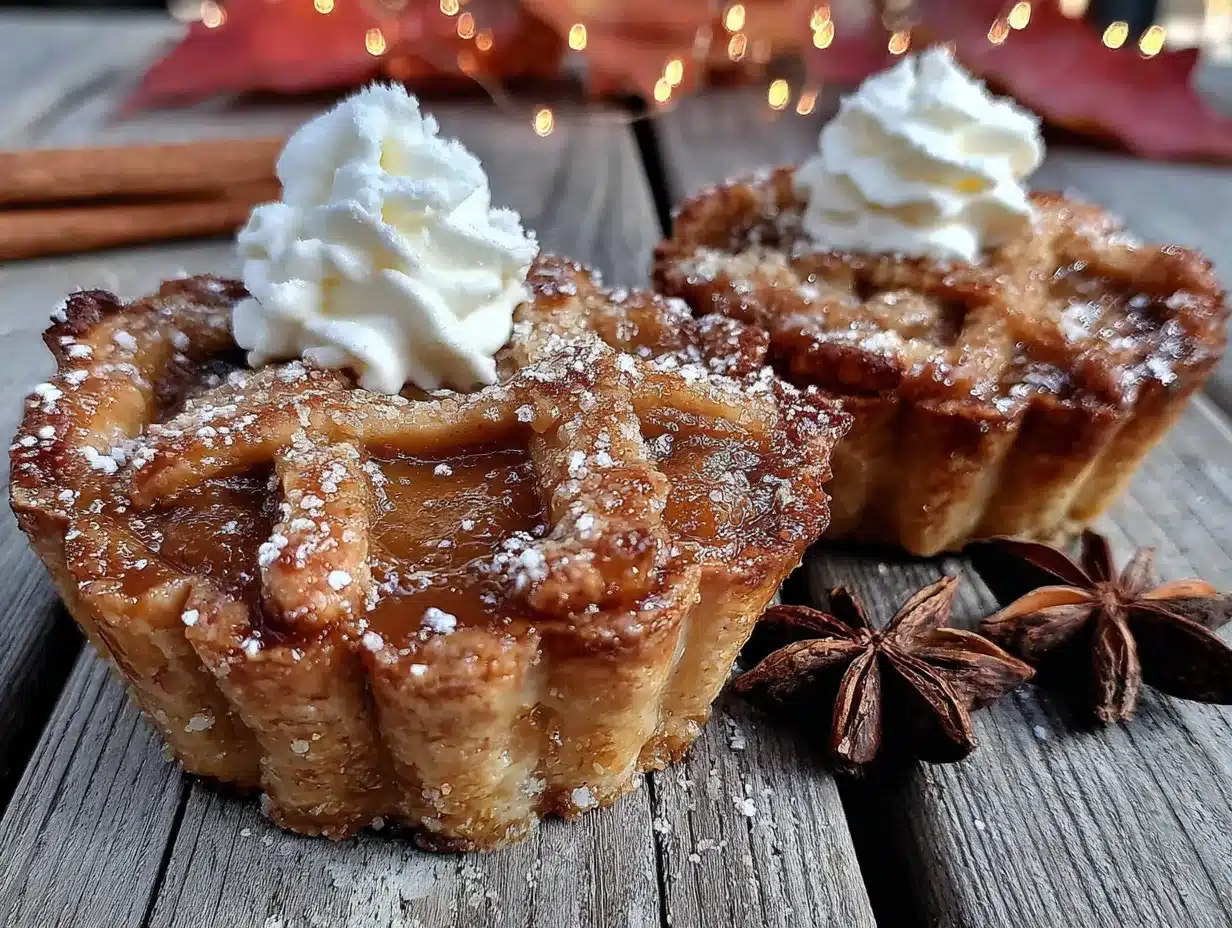
- 1 can (15 oz) pure pumpkin puree (425 grams) – Not pumpkin pie filling. Make sure the label says “100% pumpkin.” Libby’s is my go-to brand because it’s consistently thick and not watery.
- ¾ cup packed light brown sugar (165 grams) – Brown sugar adds moisture and a deeper flavor than white sugar alone.
- 2 large eggs, room temperature – Cold eggs can seize the filling and make it lumpy. Let them sit on the counter for 30 minutes before starting.
- 1 cup heavy cream (240 ml) – Don’t use milk here. Heavy cream gives the filling that luxurious, silky texture that makes these pies so satisfying.
- 1 teaspoon vanilla extract – Pure vanilla, not imitation. It makes a difference in the warmth of the flavor.
- 1 ½ teaspoons ground cinnamon – The backbone of the spice blend.
- ½ teaspoon ground ginger – Adds a gentle warmth without being spicy.
- ½ teaspoon ground nutmeg – Freshly grated if you have it, but pre-ground works fine.
- ¼ teaspoon ground cloves – A little goes a long way. Cloves are potent, so measure carefully.
- ¼ teaspoon salt – Salt balances the sweetness and brings out the pumpkin’s natural flavor.
For Topping (Optional but Recommended)
- Whipped cream – Homemade or store-bought, it’s the classic finishing touch.
- Ground cinnamon or nutmeg – For dusting over the whipped cream.
If you’re looking to save time, you can use store-bought pie crust. I won’t judge you—honestly, I’ve done it myself on busy weeks. But if you have thirty minutes to spare, the homemade crust is worth it. The flakiness you get from cold butter and a light hand is something you just can’t replicate with pre-made dough.
Equipment Needed
You don’t need a fancy kitchen to pull these off. Here’s what I use every time I make these mini pies:
- 12-cup standard muffin tin – This is essential. Mini pie tins work too, but a muffin tin is what most people have, and it gives the pies a nice, tall shape.
- Rolling pin – Any rolling pin will do. If you don’t have one, a smooth wine bottle works in a pinch. I’ve done it.
- 3-inch round cookie cutter – Or a glass with a 3-inch diameter rim. You need this to cut uniform circles for the crust.
- Mixing bowls – One large for the crust, one medium for the filling.
- Pastry cutter or two forks – For cutting butter into the flour. Your hands work too, but they warm the butter faster.
- Whisk – For blending the filling until smooth.
- Measuring cups and spoons – Accuracy matters in baking.
- Parchment paper and pie weights – Or dried beans, which I use because I always forget to buy pie weights.
- Cooling rack – Lets air circulate under the pies so the bottoms stay crisp.
I picked up my muffin tin at a thrift store for three dollars, and it’s still going strong. You don’t need expensive equipment—just things that work.
Preparation Method
Let me walk you through this step by step. I’ve included all the little details I wish someone had told me the first time I made these.
Step 1: Make the Crust Dough
In a large bowl, whisk together the flour, salt, and sugar. Add the cold butter cubes and use a pastry cutter or two forks to cut the butter into the flour until the mixture looks like coarse meal with some pea-sized butter pieces remaining. This takes about 3 to 4 minutes. The little butter chunks are what create flaky layers, so don’t overwork it.
Sprinkle ¼ cup of ice water over the mixture and stir with a fork until the dough starts coming together. If it seems dry, add more water one tablespoon at a time. You want the dough to hold together when you squeeze a handful. Turn it out onto a lightly floured surface, shape it into a disc, wrap it in plastic wrap, and refrigerate for at least 1 hour. This rest is crucial—it relaxes the gluten and keeps the crust tender.
Step 2: Prepare the Filling
While the dough chills, make the filling. In a medium bowl, whisk together the pumpkin puree and brown sugar until smooth. Add the eggs one at a time, whisking well after each addition. Pour in the heavy cream and vanilla, then whisk until everything is combined and silky. In a small bowl, mix the cinnamon, ginger, nutmeg, cloves, and salt, then whisk these spices into the pumpkin mixture. Set the filling aside. It will thicken slightly as it sits, which is normal.
Step 3: Roll and Cut the Crust
Preheat your oven to 375°F (190°C). Remove the dough from the fridge and let it sit at room temperature for about 5 minutes so it’s easier to roll. On a lightly floured surface, roll the dough out to about ⅛-inch thickness. Use your 3-inch cutter to cut out circles. You should get about 12 circles from the dough, maybe 13 if you’re efficient with re-rolling the scraps.
Press each circle gently into a muffin cup, making sure the dough comes up the sides evenly. Don’t stretch the dough or it will shrink during baking. If a circle tears, just press the dough back together—it’s forgiving. Prick the bottom of each crust a few times with a fork to prevent bubbles.
Step 4: Blind Bake the Crusts
Line each crust with a small piece of parchment paper and fill with pie weights or dried beans. Bake for 10 minutes, then remove the parchment and weights and bake for another 5 minutes. The crusts should be lightly golden and set. Let them cool for 5 minutes in the pan. This blind-baking step is what keeps your crusts from getting soggy. Trust me on this—I skipped it once and ended up with sad, wet bottoms.
Step 5: Fill and Bake
Reduce the oven temperature to 350°F (175°C). Spoon the pumpkin filling into each pre-baked crust, filling them almost to the top—about 3 tablespoons per pie. The filling will puff up slightly as it bakes, but it won’t overflow if you don’t overfill.
Bake for 18 to 22 minutes, until the edges of the filling are set and the centers jiggle just slightly when you gently shake the pan. A toothpick inserted near the center should come out mostly clean with a few moist crumbs. Let the pies cool in the pan for 10 minutes, then transfer them to a cooling rack. They need to cool completely before serving, about 1 hour. The filling continues to set as it cools.
Cooking Tips & Techniques
I’ve made these mini pumpkin pies more times than I can count, and I’ve learned a few things the hard way. Here are the tips that make the biggest difference.
Keep everything cold. The secret to a flaky crust is cold butter. If at any point your dough feels warm or sticky, pop it back in the fridge for 15 minutes. I once tried to rush the process on a warm afternoon, and my crust turned out tough and greasy. Not my finest moment.
Don’t overmix the filling. Whisk until everything is just combined. Overmixing incorporates too much air, which can cause the filling to puff up and crack as it cools. You want a smooth, dense custard, not a soufflé.
Watch the edges. If the crust edges start browning too quickly, loosely tent the muffin tin with foil for the last 5 minutes of baking. Every oven runs a little differently, so check at the 18-minute mark.
Use a cookie scoop for the filling. A 2-tablespoon cookie scoop makes filling the crusts so much neater and faster than using a spoon. Less mess, less stress.
Let them cool completely. I know it’s hard to wait, especially when your kitchen smells like cinnamon and nutmeg. But warm pumpkin pie filling is loose and runny. If you try to eat these too soon, you’ll end up with a mess and a burnt tongue. Give them the full hour on the cooling rack.
Variations & Adaptations
One of the best things about this recipe is how easy it is to adapt. Here are some variations I’ve tried and loved.
Gluten-Free Version: Use a gluten-free all-purpose flour blend in the crust. I’ve had good results with Bob’s Red Mill 1-to-1 Baking Flour. The dough will be a bit more fragile, so press it into the muffin cups gently. The filling is naturally gluten-free, so you’re only swapping the crust.
Dairy-Free Option: Substitute the butter in the crust with cold coconut oil or a plant-based butter stick. Use full-fat coconut cream instead of heavy cream in the filling. The texture will be slightly different—a touch less creamy—but still delicious.
Spice It Up: Add ¼ teaspoon of cardamom or allspice to the spice blend for a more complex flavor. I did this last Thanksgiving and my friend Mark, who claims he doesn’t like pumpkin pie, ate three of them.
Maple Pumpkin Mini Pies: Replace the brown sugar with ½ cup pure maple syrup and reduce the heavy cream to ¾ cup. The filling will be a bit softer, so bake for an extra 2 to 3 minutes. The maple flavor pairs beautifully with the warm spices.
Savory Twist: Skip the sugar in the crust and the brown sugar in the filling. Add ½ teaspoon of black pepper and a pinch of cayenne to the spice blend. Serve these with a dollop of sour cream and chives for a completely different take on pumpkin pie. It sounds weird, but it works.
Serving & Storage Suggestions
These mini pies are best served at room temperature, which makes them perfect for a Friendsgiving buffet. Arrange them on a large platter and let guests grab their own. Top each one with a generous swirl of whipped cream and a light dusting of cinnamon. If you want to get fancy, add a tiny sage leaf or a candied pecan on top.
For drinks, these pies pair beautifully with hot apple cider, spiced chai, or a bold cup of coffee. If you’re serving alcohol, a dark rum or bourbon on the rocks complements the warm spices nicely.
Storage: Baked mini pies will keep in an airtight container in the refrigerator for up to 4 days. The crust will soften slightly over time, so if you’re making them ahead, I recommend storing them uncovered in the fridge for the first hour to let the crust stay crisp, then covering them.
Freezing: You can freeze the baked pies for up to 2 months. Cool them completely, then wrap each pie individually in plastic wrap and place them in a freezer bag. To serve, thaw them in the refrigerator overnight and bring to room temperature before adding whipped cream.
Reheating: If you prefer warm pies, reheat them in a 300°F (150°C) oven for 5 to 7 minutes. Don’t use the microwave—it will make the crust soggy and the filling rubbery.
The flavors actually deepen after a day in the fridge, so these are a great make-ahead dessert for your gathering. I often bake them on Wednesday for a Thursday Friendsgiving, and they taste even better the next day.
Nutritional Information & Benefits
Here’s the approximate nutritional breakdown for one mini pumpkin pie (without whipped cream):
- Calories: 280
- Fat: 18g
- Carbohydrates: 28g
- Fiber: 2g
- Sugar: 14g
- Protein: 4g
These numbers will vary based on your specific ingredients and crust thickness. The good news is that pumpkin is packed with vitamin A, fiber, and antioxidants. The spices—cinnamon, ginger, nutmeg, and cloves—all have anti-inflammatory properties. So while this is definitely a dessert, it’s not without some redeeming qualities.
If you’re watching your sugar intake, you can reduce the brown sugar to ½ cup without significantly affecting the texture. The pies will be less sweet but still delicious. For a lower-fat option, you can substitute half the heavy cream with whole milk, but the filling won’t be as luxuriously smooth.
Conclusion
These mini pumpkin pies have become my signature Friendsgiving contribution, and I don’t see that changing anytime soon. They’re everything I want in a dessert—warm, spiced, personal, and completely unfussy. Clara was right, as usual. When you give each person their own little pie, something shifts. The meal feels more intimate, more generous, more like a real celebration of friendship.
I hope you make these for your next gathering, whether it’s a formal Friendsgiving or just a Tuesday night when you need a little comfort. Play with the spices, try a variation, and don’t stress about perfection. The beauty of mini pies is that they’re forgiving. If one cracks or sinks, it still tastes amazing.
When you make them, I’d love to hear how they turned out. Drop a comment below and let me know your favorite spice combination or any creative twists you tried. And if you share a photo on social media, tag me—I want to see your beautiful mini pies on their platter, ready to be devoured by the people you love.
Happy Friendsgiving, friend. You’ve got this.
Frequently Asked Questions
Can I use canned pumpkin pie filling instead of pure pumpkin puree?
I wouldn’t recommend it. Canned pumpkin pie filling already has sugar and spices added, which will throw off the balance of this recipe. Stick with 100% pure pumpkin puree so you control the sweetness and spice levels yourself.
Why did my crust shrink during baking?
This usually happens when the dough is stretched too much when you press it into the muffin cups. Be gentle and let the dough fall into place naturally. Chilling the shaped crusts for 10 minutes before baking also helps prevent shrinkage.
Can I make these mini pies without a muffin tin?
Yes, you can use mini tart pans with removable bottoms if you have them. The baking time will be similar. If you don’t have either, you can shape the crusts in a regular pie dish and make one large pie instead—just increase the baking time to 45 to 50 minutes.
How do I know when the mini pies are done baking?
The edges of the filling should be set and slightly puffed, while the centers should jiggle just a little when you gently shake the pan. A toothpick inserted near the center should come out mostly clean with a few moist crumbs. They’ll continue setting as they cool.
Can I freeze the unbaked crusts for later use?
Absolutely. After pressing the dough into the muffin cups, freeze them on a baking sheet until solid, then transfer the frozen crusts to a freezer bag. When you’re ready to bake, you can blind bake them straight from frozen—just add 2 to 3 minutes to the blind baking time.
Pin This Recipe!
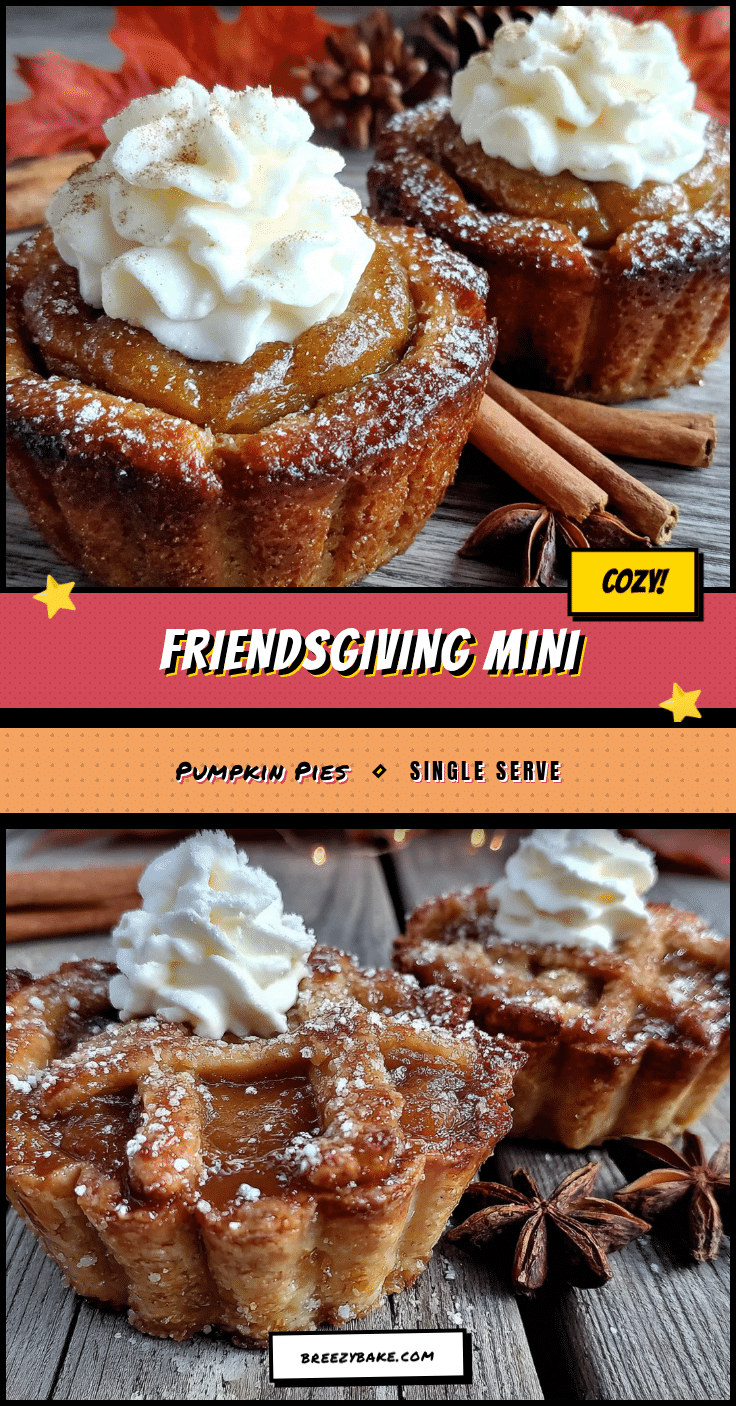
Perfect Mini Pumpkin Pies for Cozy Friendsgiving
These mini pumpkin pies are the perfect solution for Friendsgiving chaos. Each guest gets their own personal golden dome of spiced pumpkin custard with a flaky, buttery crust, eliminating the stress of slicing and serving.
- Prep Time: 30 minutes
- Cook Time: 22 minutes
- Total Time: 1 hour 52 minutes
- Yield: 12 servings 1x
- Category: Dessert
- Cuisine: American
Ingredients
- 2 ½ cups all-purpose flour (315 grams)
- 1 teaspoon salt
- 1 tablespoon granulated sugar
- 1 cup cold unsalted butter (226 grams), cut into small cubes
- ¼ to ½ cup ice water (60–120 ml)
- 1 can (15 oz) pure pumpkin puree (425 grams)
- ¾ cup packed light brown sugar (165 grams)
- 2 large eggs, room temperature
- 1 cup heavy cream (240 ml)
- 1 teaspoon vanilla extract
- 1 ½ teaspoons ground cinnamon
- ½ teaspoon ground ginger
- ½ teaspoon ground nutmeg
- ¼ teaspoon ground cloves
- ¼ teaspoon salt
- Whipped cream (optional, for topping)
- Ground cinnamon or nutmeg (optional, for dusting)
Instructions
- Make the Crust Dough: In a large bowl, whisk together the flour, salt, and sugar. Add the cold butter cubes and use a pastry cutter or two forks to cut the butter into the flour until the mixture looks like coarse meal with some pea-sized butter pieces remaining. Sprinkle ¼ cup of ice water over the mixture and stir with a fork until the dough starts coming together. If it seems dry, add more water one tablespoon at a time. Turn it out onto a lightly floured surface, shape it into a disc, wrap i…
- Prepare the Filling: In a medium bowl, whisk together the pumpkin puree and brown sugar until smooth. Add the eggs one at a time, whisking well after each addition. Pour in the heavy cream and vanilla, then whisk until everything is combined and silky. In a small bowl, mix the cinnamon, ginger, nutmeg, cloves, and salt, then whisk these spices into the pumpkin mixture. Set aside.
- Roll and Cut the Crust: Preheat your oven to 375°F (190°C). Remove the dough from the fridge and let it sit at room temperature for about 5 minutes. On a lightly floured surface, roll the dough out to about ⅛-inch thickness. Use a 3-inch cutter to cut out circles. Press each circle gently into a muffin cup, making sure the dough comes up the sides evenly. Prick the bottom of each crust a few times with a fork.
- Blind Bake the Crusts: Line each crust with a small piece of parchment paper and fill with pie weights or dried beans. Bake for 10 minutes, then remove the parchment and weights and bake for another 5 minutes. Let them cool for 5 minutes in the pan.
- Fill and Bake: Reduce the oven temperature to 350°F (175°C). Spoon the pumpkin filling into each pre-baked crust, filling them almost to the top—about 3 tablespoons per pie. Bake for 18 to 22 minutes, until the edges of the filling are set and the centers jiggle just slightly when you gently shake the pan. Let the pies cool in the pan for 10 minutes, then transfer them to a cooling rack. Cool completely before serving, about 1 hour.
Notes
Keep everything cold for a flaky crust. Don’t overmix the filling. Watch the edges and tent with foil if browning too quickly. Use a cookie scoop for neat filling. Let pies cool completely before serving. Store in an airtight container in the refrigerator for up to 4 days. Freeze for up to 2 months.
Nutrition
- Serving Size: 1 mini pie
- Calories: 280
- Sugar: 14
- Sodium: 220
- Fat: 18
- Saturated Fat: 11
- Carbohydrates: 28
- Fiber: 2
- Protein: 4
Keywords: mini pumpkin pies, Friendsgiving, pumpkin pie, mini pies, Thanksgiving dessert, personal pies


