There used to be a tiny scoop shop tucked between a laundromat and a used bookstore on the corner of Maple and 3rd in my old neighborhood. They made a strawberry shortcake ice cream that had me walking twenty minutes out of my way every single Friday after work, even in the dead of winter. When they closed suddenly two summers ago—a “For Lease” sign taped to the window where the chalkboard menu used to be—I honestly felt a little lost. That specific combination of creamy vanilla, tart berry swirls, and those soft, cakey bits that somehow stayed chewy even when frozen? I couldn’t find it anywhere else. After seven attempts—some too icy, some where the cake bits turned to mush, one that I accidentally left out overnight and had to toss—I finally cracked it. And let me tell you, this no-churn strawberry shortcake ice cream is it. It’s the exact memory I was chasing, and now I don’t have to walk twenty minutes to get it. Maybe you’ve been there with a lost recipe too.
Why You’ll Love This Recipe
This isn’t just another ice cream recipe you’ll find floating around the internet. I’ve tested this thing six ways from Sunday—with different cream ratios, with homemade shortcake versus store-bought, with fresh berries versus jam. What I’m giving you here is the version that works every single time, no ice cream maker required. It’s the kind of recipe that makes you look like a kitchen hero with almost zero effort.
- Only 3 Main Ingredients: Heavy cream, sweetened condensed milk, and strawberry jam (plus a few shortcake cookies). That’s it. No eggs, no custard-making, no special equipment.
- No Ice Cream Maker Needed: Seriously. A hand mixer or a strong arm and a whisk is all you need. The sweetened condensed milk does all the heavy lifting for texture.
- Perfect for Hot Days or Slow Evenings: This is the kind of dessert you make when the air conditioner can’t keep up, or when you need something that tastes like a hug in a bowl after a long week.
- Crowd-Pleaser Status: I brought this to a family barbecue last month and my uncle—who “doesn’t do fruity desserts”—asked for the recipe before he finished his bowl.
- Better Than Store-Bought: Most commercial strawberry shortcake ice creams use artificial flavoring or those weird, soggy sponge pieces. You control every bit of texture and flavor here.
What makes this recipe different is the technique of toasting the shortcake cookies before folding them in. That little extra step—which I learned after my third failed batch—keeps them from turning into a sad, mushy paste. The contrast between the silky, creamy base and those crunchy, buttery cake bits is what makes you close your eyes after the first bite. It’s comfort food, reimagined as a frozen treat.
What Ingredients You Will Need
This recipe uses simple, honest ingredients to build something that tastes way more complex than it is. Most of these are pantry staples or a quick trip to the grocery store away. The magic is in how they come together.
For the Ice Cream Base
- 2 cups (480 ml) heavy whipping cream (cold from the fridge—this is important for whipping properly)
- 1 can (14 oz / 397 g) sweetened condensed milk (I prefer Eagle Brand for consistency, but any brand works fine)
- 1 teaspoon vanilla extract (pure, not imitation, if you can swing it—it makes a difference in the depth of flavor)
- Pinch of fine sea salt (just a tiny one—it balances the sweetness without making it salty)
For the Strawberry Swirl
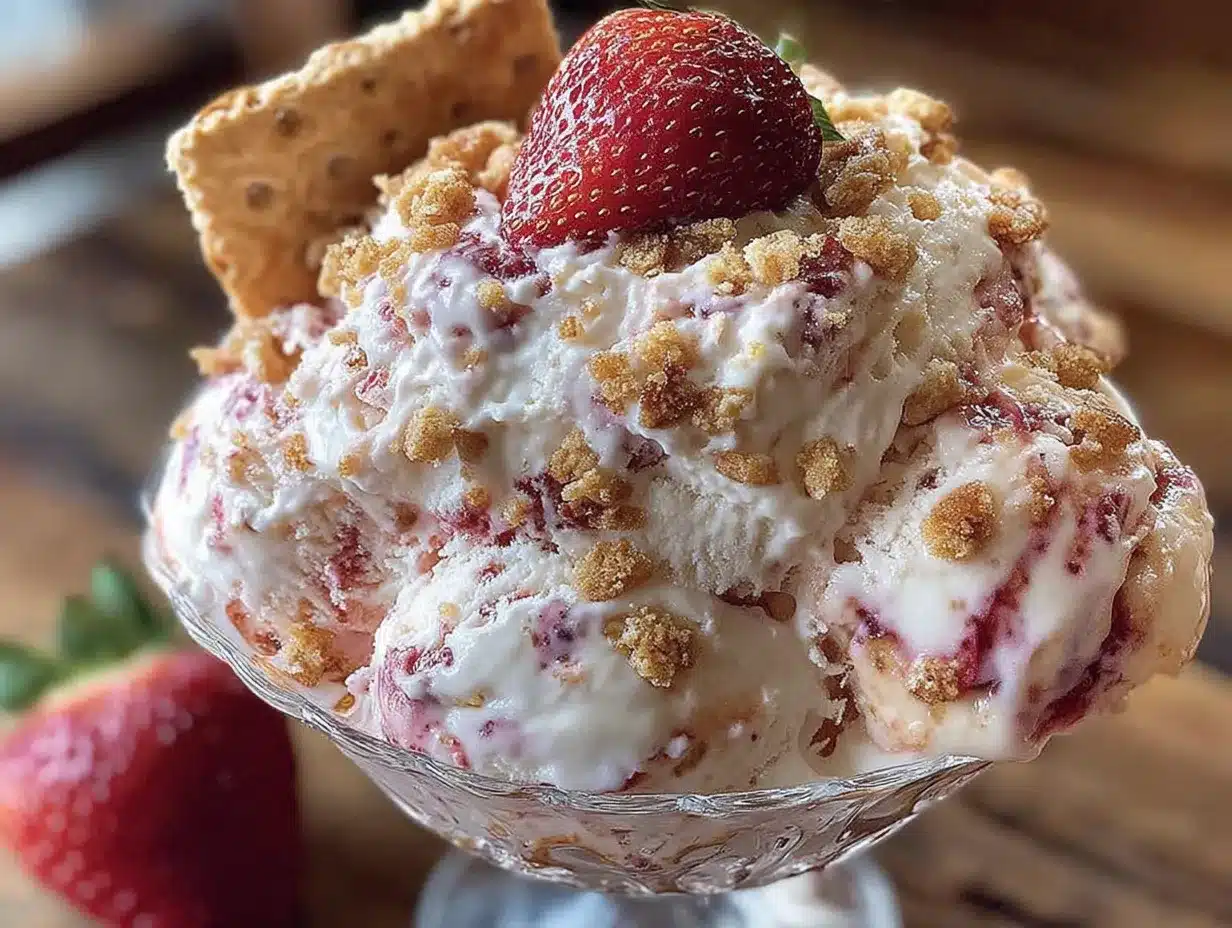
- 1/2 cup (160 g) strawberry jam or preserves (use a good-quality one with visible fruit pieces—I like Bonne Maman or a local farmers’ market brand)
- 1 tablespoon water (helps thin the jam for swirling)
For the Shortcake Bits
- 6 to 8 shortcake cookies or sponge cake fingers (store-bought is totally fine—I use those little golden ones from the bakery aisle)
- 1 tablespoon unsalted butter, melted (for toasting the cookies—this step is non-negotiable for the texture)
Ingredient Tips & Substitutions
If you’re dairy-sensitive, you can swap the heavy cream for full-fat coconut cream (chilled overnight) and use a dairy-free sweetened condensed milk—there are a few good brands out now. For the shortcake bits, you can use crushed vanilla wafers or even crumbled pound cake if that’s what you have. Just don’t skip the toasting step, whatever you use. And if you’re using fresh strawberries instead of jam, you’ll need to cook them down with a little sugar first—about 1 cup chopped berries with 2 tablespoons sugar, simmered for 10 minutes until syrupy. But honestly? The jam version is easier and gives a more consistent swirl.
Equipment Needed
You don’t need a lot of fancy gear for this one, which is honestly my favorite part. Here’s what you’ll need:
- Large mixing bowl (metal or glass—metal chills faster if you pop it in the freezer for 10 minutes before whipping)
- Hand mixer or stand mixer (you can whisk by hand, but your arm will definitely feel it—I’ve done both and the mixer wins every time)
- Rubber spatula (for folding—get a good one that won’t break halfway through)
- Loaf pan or 9×5-inch metal pan (metal freezes faster than glass, which means smaller ice crystals)
- Small skillet (for toasting the shortcake bits)
- Parchment paper or plastic wrap (for covering the surface of the ice cream)
- Sharp knife (for cutting the shortcake cookies into chunks)
If you don’t have a loaf pan, a round cake pan or even a freezer-safe bowl works. Just make sure whatever you use is shallow enough that the ice cream freezes within 6 hours. I learned that lesson the hard way with a deep ceramic bowl—the edges froze but the middle stayed soupy overnight.
Preparation Method
Alright, let’s make some ice cream. This process is surprisingly quick—active time is maybe 20 minutes—but you need to plan ahead for the freezing time.
Step 1: Toast the Shortcake Bits
Preheat your oven to 350°F (175°C) or heat a small skillet over medium heat. Cut your shortcake cookies into rough 1/2-inch chunks—don’t stress about uniformity here, some bigger pieces are actually nice for texture. Toss them with the melted butter until lightly coated. Spread them on a small baking sheet or in the skillet and toast for 5-7 minutes, shaking halfway through, until they’re golden and smell like warm butter and vanilla. Let them cool completely on the pan. This step is where the magic happens—the toasting dries them out just enough that they won’t turn to mush when folded into the cream.
Step 2: Whip the Cream
Pour the cold heavy cream into your chilled mixing bowl. Using your hand mixer or stand mixer with the whisk attachment, beat the cream on medium-high speed until stiff peaks form. You’re looking for peaks that stand up straight when you lift the beaters—not so stiff that they look curdled, but firm enough that the cream holds its shape. This usually takes about 3-4 minutes. Be careful not to over-whip, or you’ll end up with butter. I’ve done that exactly once and it was a sad, greasy mess.
Step 3: Make the Base
In a separate small bowl, stir together the sweetened condensed milk, vanilla extract, and the pinch of salt until smooth. Take about a cup of your whipped cream and fold it into the condensed milk mixture to lighten it up—this makes combining everything easier. Then pour this mixture back into the bowl with the remaining whipped cream. Gently fold everything together with your rubber spatula until no white streaks remain. Be patient here—you want it homogenous, but you don’t want to deflate all that air you just whipped in. Fold, don’t stir.
Step 4: Thin the Jam
In a small microwave-safe bowl or a saucepan, warm the strawberry jam with 1 tablespoon of water. Microwave for 15-20 seconds, or heat on the stove for about a minute, until it’s loose and runny. Let it cool slightly—you don’t want hot jam hitting your cold cream base. You’re looking for a consistency that will drizzle easily but isn’t watery.
Step 5: Layer and Swirl
Spread about one-third of the cream base into your loaf pan. Drizzle with about one-third of the thinned jam, then scatter about one-third of the toasted shortcake bits on top. Repeat this layering two more times. Once all three layers are in, take a butter knife or a skewer and gently swirl it through the layers in a figure-eight pattern. Don’t over-swirl—you want distinct ribbons of jam and pockets of shortcake, not a pink, muddy mess. A few turns is plenty.
Step 6: Freeze
Press a piece of parchment paper or plastic wrap directly onto the surface of the ice cream—this prevents ice crystals from forming on top. Cover the pan with another layer of foil or a lid and place it in the coldest part of your freezer. Freeze for at least 6 hours, but overnight is better. The texture really sets beautifully after a full 8-12 hours.
Cooking Tips & Techniques
I’ve made this recipe more times than I care to count, and I’ve made every mistake in the book so you don’t have to. Here’s what I’ve learned:
Don’t skip chilling your bowl. I know it’s an extra step, but popping your mixing bowl and beaters in the freezer for 10-15 minutes before you start whipping the cream makes a noticeable difference. The cream whips up faster and holds its structure better. On a hot summer day, this can be the difference between perfect stiff peaks and sad, droopy cream.
Toast the cookies even if you’re using store-bought. I cannot stress this enough. My first batch used untoasted shortcake pieces and they turned into a soggy paste within hours. The toasting step creates a barrier that keeps them crunchy even after freezing. It’s the single most important technique in this whole recipe.
Don’t over-whip the cream. This is the most common mistake. You want stiff peaks, but stop the second they form. If you keep going, the cream will start to separate and turn grainy. When in doubt, stop a little early—you can always whip a few more seconds, but you can’t un-whip.
Let the jam cool before swirling. Warm jam will melt the cream base and ruin the texture of your swirl. I usually thin the jam right before I start whipping the cream, so by the time I’m layering, it’s cooled to room temperature.
Plan for the freeze time. This is not a “make in an hour” dessert. The 6-hour minimum freeze is non-negotiable for the right texture. I usually make it the night before I plan to serve it, so it’s perfectly set by the next afternoon.
Variations & Adaptations
One of the best things about this no-churn base is how adaptable it is. Here are a few variations I’ve tried and loved:
Classic Strawberry Cheesecake
Add 4 ounces of softened cream cheese to the sweetened condensed milk mixture and beat until smooth before folding into the whipped cream. Use graham cracker pieces instead of shortcake cookies (toast them the same way). It’s like a frozen cheesecake in a bowl—decadent and perfectly tangy.
Mixed Berry Shortcake
Use a mixed berry jam instead of strawberry, or make your own by simmering equal parts strawberries, blueberries, and raspberries with a little sugar. The tartness of the raspberries cuts through the sweetness of the condensed milk beautifully.
Vegan Coconut Version
Swap the heavy cream for two cans of full-fat coconut cream (chilled overnight, scoop off the solid part). Use a dairy-free sweetened condensed coconut milk. Toast coconut flakes instead of shortcake cookies for a tropical twist. It’s lighter but still incredibly creamy.
Chocolate-Dipped Strawberry
Drizzle melted dark chocolate over the layers along with the jam and shortcake bits. The chocolate hardens into little shards that crack when you bite into them. I made this for Valentine’s Day last year and it was a huge hit.
Serving & Storage Suggestions
This ice cream is best served straight from the freezer, but let it sit at room temperature for 5-10 minutes before scooping. It softens just enough to get that perfect, scoopable texture without being melty. I like to serve it in chilled bowls with a few fresh strawberry slices on top and maybe a drizzle of extra jam.
For storage, keep the ice cream in the loaf pan with the parchment paper pressed directly onto the surface. Cover tightly with foil or a lid. It will keep well for up to two weeks, though honestly, it never lasts that long in my house. The shortcake bits will soften slightly over time, but the toasting helps them stay crunchier longer than you’d expect.
If you’re making this ahead for a party, I recommend making it no more than 3-4 days in advance for the best texture. After about a week, the shortcake pieces start to lose their crunch completely. Not that it’s bad—it just becomes a different texture experience.
Nutritional Information & Benefits
Let’s be real: this is a treat, not a health food. But there are a few bright spots worth mentioning. The strawberries in the jam provide a decent dose of vitamin C and antioxidants. Heavy cream contains fat-soluble vitamins A, D, E, and K, plus it’s surprisingly satisfying—a small scoop goes a long way. And hey, you’re making it from scratch with real ingredients, which means no artificial stabilizers, high-fructose corn syrup, or weird preservatives.
Here are the approximate nutritional values per serving (based on 8 servings):
| Nutrient | Amount per Serving |
|---|---|
| Calories | ~380 |
| Total Fat | 24g |
| Saturated Fat | 15g |
| Carbohydrates | 38g |
| Sugar | 32g |
| Protein | 4g |
| Calcium | 15% DV |
If you’re watching your sugar intake, you can use a no-sugar-added strawberry jam and a low-sugar sweetened condensed milk alternative. The texture will be slightly less creamy, but it still works.
Conclusion
This no-churn strawberry shortcake ice cream is the kind of recipe that makes you wonder why you ever bought the store-bought stuff. It’s creamy, it’s packed with real strawberry flavor, and those crunchy shortcake bits are just pure joy. Every time I make it, I think about that little shop on Maple Street and how something so simple can hold so much memory. But now I’ve got my own version—one I can make any time the craving hits, no twenty-minute walk required.
I’d love to hear how yours turns out. Did you try a variation? Did you use a different jam? Drop a comment below and let me know—I read every single one and I love seeing what you all come up with. And if you’re looking for another no-churn treat to try, my no-churn vanilla bean ice cream is a great next step. Happy scooping, friends!
Frequently Asked Questions
Can I use fresh strawberries instead of jam?
Yes, but you’ll need to cook them down first. Fresh strawberries contain a lot of water, which can make your ice cream icy instead of creamy. Simmer 1 cup of chopped strawberries with 2 tablespoons of sugar for about 10 minutes until syrupy, then cool completely before using.
Why did my ice cream turn out icy?
This usually happens for one of two reasons: either the cream wasn’t whipped to stiff peaks (it needs that air structure to stay creamy), or the ice cream wasn’t covered properly while freezing. Always press plastic wrap directly onto the surface to prevent ice crystals.
Can I make this without a hand mixer?
Absolutely. You can whip the cream by hand with a whisk, but it will take about 8-10 minutes of steady whisking. Make sure your cream is very cold, and take breaks if your arm gets tired. The result is the same—it just takes a little more elbow grease.
How long does this ice cream last in the freezer?
It’s best within the first two weeks. After that, the shortcake bits will soften significantly and the texture may become a bit icy. For the best experience, enjoy it within the first 3-4 days.
Can I double this recipe?
Yes, but you’ll need to whip the cream in batches unless you have a very large mixer. Overcrowding the bowl makes it harder to get stiff peaks. Just divide the ingredients and whip in two batches, then fold everything together in a large bowl before layering into your pans.
Pin This Recipe!
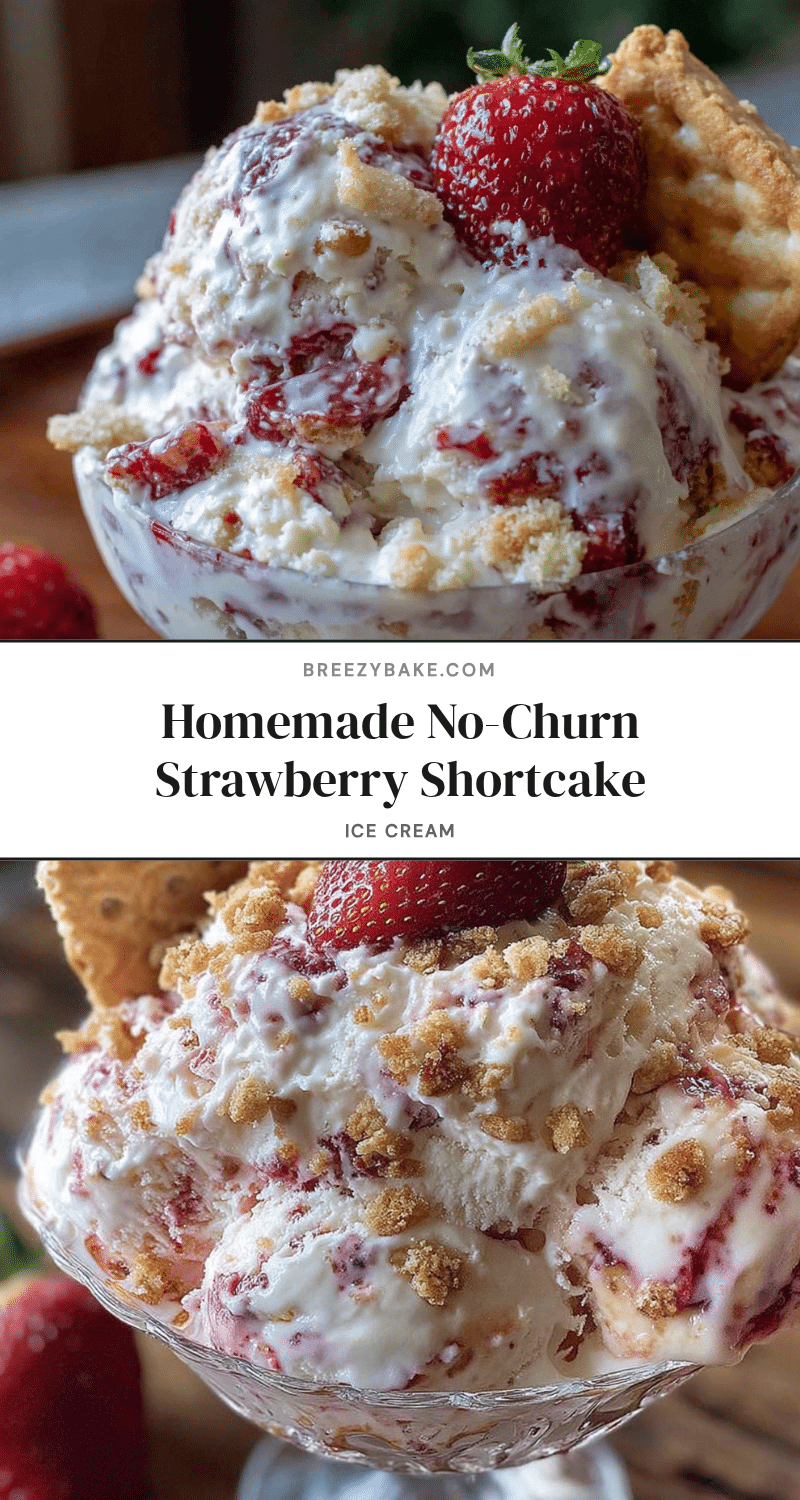
No-Churn Strawberry Shortcake Ice Cream: Easy 3-Ingredient Recipe
This no-churn strawberry shortcake ice cream is creamy, packed with real strawberry flavor, and features crunchy shortcake bits. It requires only 3 main ingredients and no ice cream maker, making it a perfect summer treat.
- Prep Time: 20 minutes
- Cook Time: 5-7 minutes
- Total Time: 6 hours 25 minutes (including freezing)
- Yield: 8 servings 1x
- Category: Dessert
- Cuisine: American
Ingredients
- 2 cups (480 ml) heavy whipping cream, cold
- 1 can (14 oz / 397 g) sweetened condensed milk
- 1 teaspoon vanilla extract (pure preferred)
- Pinch of fine sea salt
- 1/2 cup (160 g) strawberry jam or preserves
- 1 tablespoon water
- 6 to 8 shortcake cookies or sponge cake fingers
- 1 tablespoon unsalted butter, melted
Instructions
- Preheat oven to 350°F (175°C) or heat a small skillet over medium heat. Cut shortcake cookies into rough 1/2-inch chunks. Toss with melted butter until lightly coated. Spread on a baking sheet or in skillet and toast for 5-7 minutes, shaking halfway, until golden and fragrant. Let cool completely.
- Pour cold heavy cream into a chilled mixing bowl. Beat on medium-high speed until stiff peaks form, about 3-4 minutes. Do not over-whip.
- In a small bowl, stir together sweetened condensed milk, vanilla extract, and salt until smooth. Fold about 1 cup of whipped cream into the condensed milk mixture to lighten it. Then pour this mixture back into the remaining whipped cream and gently fold until no white streaks remain.
- In a small microwave-safe bowl or saucepan, warm strawberry jam with 1 tablespoon water until loose and runny (microwave 15-20 seconds or stove about 1 minute). Let cool slightly.
- Spread about one-third of the cream base into a loaf pan. Drizzle with one-third of the thinned jam, then scatter one-third of the toasted shortcake bits. Repeat layering two more times. Use a butter knife or skewer to gently swirl in a figure-eight pattern, being careful not to over-swirl.
- Press parchment paper or plastic wrap directly onto the surface of the ice cream. Cover pan with foil or lid. Freeze for at least 6 hours, preferably overnight (8-12 hours).
Notes
Toast the shortcake cookies to keep them crunchy. Chill the mixing bowl before whipping cream. Do not over-whip cream. Let jam cool before swirling. Freeze for at least 6 hours, preferably overnight. For best texture, enjoy within 3-4 days.
Nutrition
- Serving Size: 1 serving (about 1/2
- Calories: 380
- Sugar: 32
- Sodium: 120
- Fat: 24
- Saturated Fat: 15
- Carbohydrates: 38
- Protein: 4
Keywords: no-churn ice cream, strawberry shortcake, easy ice cream, 3-ingredient ice cream, summer dessert, no ice cream maker


