The woman at the farmers market stall watched me staring at her basket of eggs for a good minute before she spoke. “You look like someone trying to solve a puzzle,” she said, not unkindly. I laughed and admitted I was hunting for the perfect ones to make a birthday cake for my niece’s spring party. She nodded slowly, then reached under her table and pulled out a carton. “These are from my neighbor’s hens. They’re happy eggs. They make a happy cake.” She didn’t give me a recipe, just that carton of eggs and a knowing smile. But honestly, that conversation stuck with me more than any cooking class I’d ever taken. It reminded me that the best cakes aren’t about fancy techniques—they’re about starting with good ingredients and making something that feels like a celebration.
So here we are, making a classic birthday cake with rainbow sprinkles for spring celebrations. This is the cake that shows up at every party I throw, the one people request for their own birthdays, the one that makes kids’ eyes go wide and adults smile like they’re seven again. I mean, is there anything better than that first slice, with its tender crumb and those cheerful little sprinkles dotting the frosting like confetti? Maybe you’ve been there, standing in the baking aisle overwhelmed by a dozen sprinkles options, wondering if it really matters which ones you pick. (It does, and I’ll tell you why later.)
This cake isn’t complicated, and that’s the whole point. It’s the kind of recipe you can make on a Thursday night for a Saturday party, the kind that doesn’t stress you out. The power went out halfway through testing this once—true story—and I finished mixing the batter by hand with a whisk and a flashlight clamped between my teeth. It still turned out perfect. That’s when I knew this was the one. It stayed with me because it’s forgiving, it’s joyful, and it tastes like everything good about spring.
Why You’ll Love This Recipe
Let me tell you why this classic birthday cake with rainbow sprinkles deserves a permanent spot in your baking rotation. I’ve tested this recipe more times than I can count, tweaking the ratios, adjusting the baking time, and even accidentally swapping ingredients when I ran out of things. Every single time, it delivered.
- Simple Ingredients: You probably have most of these in your pantry right now. No weird extracts, no specialty flours, no hunting down obscure items. Butter, sugar, eggs, flour—the basics done right.
- Perfect for Spring Celebrations: Whether it’s an Easter brunch, a graduation party, or just a random Tuesday that feels like it deserves confetti, this cake fits. The rainbow sprinkles scream spring without being too on-the-nose.
- Crowd-Pleaser: I’ve served this to kids, grandparents, picky eaters, and professional bakers. Everyone loves it. The texture is that perfect balance of light and moist, and the frosting is sweet without being cloying.
- Unbelievably Delicious: The secret is in the method—creaming the butter and sugar until it’s actually fluffy, not just mixed. That extra minute of beating makes all the difference in the crumb.
- Forgiving for Beginners: Messed up the measurements? Overmixed slightly? This cake still works. It’s not precious or fussy. It just wants to be baked and loved.
What makes this recipe different from every other birthday cake out there? It’s the balance. The cake itself is sturdy enough to hold layers and frosting, but tender enough to melt on your tongue. The sprinkles don’t bleed their color into the batter (more on that in the tips section). And the frosting? It’s the kind that makes you scrape the bowl clean with your finger when no one’s looking. This isn’t just another version—it’s your best version.
Honestly, this is the kind of cake that makes you close your eyes after the first bite. It’s comfort food reimagined—familiar but somehow better than you remembered. Perfect for impressing guests without stress, or turning a simple spring afternoon into something memorable.
What Ingredients You Will Need
This recipe uses simple, wholesome ingredients to deliver bold flavor and satisfying texture without the fuss. Most of these are pantry staples, but I’ll point out a few things worth paying attention to.
For the Cake
- Unsalted butter, softened (1 cup / 226g) – I recommend Land O’Lakes or Kerrygold for the best flavor. Make sure it’s truly softened, not melted. You want it to give slightly when you press it.
- Granulated sugar (2 cups / 400g) – Regular white sugar works perfectly. Don’t substitute with brown sugar here; it changes the texture.
- Large eggs, room temperature (4 eggs) – This matters more than you think. Cold eggs don’t emulsify properly. Leave them on the counter for 30 minutes, or place them in warm water for 5 minutes.
- All-purpose flour (3 cups / 360g) – Spoon and level your flour. Scooping directly from the bag packs it down and gives you too much flour, which makes a dry cake.
- Baking powder (1 tablespoon / 14g) – Make sure it’s fresh. Test it by dropping a bit in hot water—if it fizzes, it’s good.
- Salt (1 teaspoon / 6g) – Fine sea salt or table salt. Don’t skip it; it balances the sweetness.
- Whole milk, room temperature (1 cup / 240ml) – Whole milk gives the best texture, but 2% works in a pinch. Avoid skim milk—it makes the cake denser.
- Vanilla extract (2 teaspoons / 10ml) – Pure vanilla, not imitation. I’ve tried both, and the real stuff makes a noticeable difference.
- Rainbow sprinkles (1/2 cup / 80g) – Here’s the thing: use jimmies, not nonpareils. Jimmies are the long, cylinder-shaped sprinkles. They hold their color and shape in the batter. Nonpareils (the tiny round ones) bleed and turn your cake gray. I learned this the hard way.
For the Vanilla Buttercream Frosting
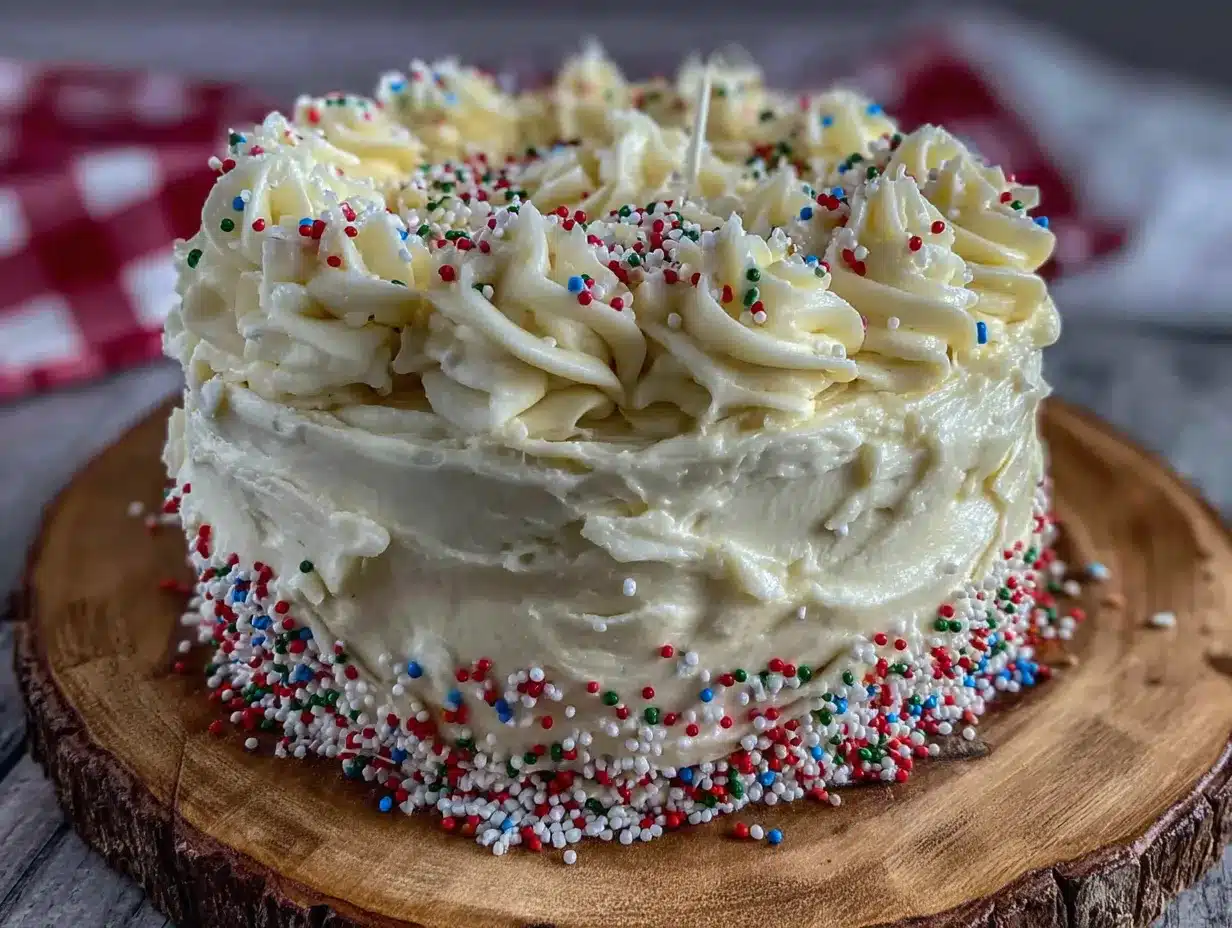
- Unsalted butter, softened (1 1/2 cups / 340g) – Again, good quality butter makes a difference. This is the star of the frosting.
- Powdered sugar (4 cups / 480g) – Sift it if you can. Lumps in powdered sugar mean lumps in your frosting.
- Heavy cream (3-4 tablespoons / 45-60ml) – Heavy cream makes the frosting light and spreadable. Milk works but gives a thinner consistency.
- Vanilla extract (2 teaspoons / 10ml) – Same as above—pure vanilla.
- Salt (1/4 teaspoon / 1.5g) – A tiny pinch balances the sweetness and makes the vanilla pop.
- Extra rainbow sprinkles (1/4 cup / 40g) – For decorating the outside of the cake.
For seasonal substitutions: In spring, I sometimes add a teaspoon of lemon zest to the cake batter. It brightens everything up and pairs beautifully with the vanilla. If you’re dairy-free, you can substitute the butter with a good plant-based butter (I like Miyoko’s) and the milk with oat milk. The texture will be slightly different but still delicious.
Equipment Needed
Nothing fancy here—this is a classic birthday cake with rainbow sprinkles, not a molecular gastronomy project. Here’s what you’ll need:
- Two 9-inch round cake pans – Light-colored metal pans work best. Dark pans absorb more heat and can over-brown your cake. Glass or ceramic pans bake unevenly for cakes.
- Stand mixer or hand mixer – You can make this by hand with a whisk and some elbow grease, but your arm will thank you for using a mixer. I’ve done both, and the mixer gives a fluffier result.
- Mixing bowls – At least two large ones.
- Measuring cups and spoons – Dry measuring cups for flour and sugar, liquid measuring cup for milk.
- Kitchen scale – Optional but recommended. Weighing your ingredients is more accurate and gives consistent results every time.
- Rubber spatula – For scraping the bowl and folding in sprinkles.
- Cooling rack – Wire rack for cooling the cakes completely before frosting.
- Offset spatula – For spreading frosting. A butter knife works too, but an offset spatula makes it look professional.
- Parchment paper – Cut circles to line the bottom of your pans. This guarantees your cakes won’t stick.
- Turntable – Nice to have for frosting, but not essential. A plate works fine.
Budget-friendly tip: You don’t need a fancy stand mixer. A $20 hand mixer from the grocery store works perfectly. I used one for years before upgrading. And if you don’t have parchment paper, grease the pans well with butter and dust with flour—it works almost as well.
Preparation Method
Let’s make this classic birthday cake with rainbow sprinkles. Take your time, read through the steps once before starting, and remember: it’s just cake. If something goes wrong, it’ll still taste good.
Step 1: Preheat and Prep
Preheat your oven to 350°F (175°C). Position the rack in the center of the oven. Grease two 9-inch round cake pans with butter or non-stick spray, then line the bottoms with parchment paper circles. Grease the parchment too. This double-layer protection means zero sticking.
Step 2: Cream the Butter and Sugar
In a large mixing bowl, beat the softened butter and granulated sugar together on medium-high speed until light and fluffy. This takes about 3-4 minutes with a stand mixer, or 5 minutes with a hand mixer. You’re looking for a pale, almost white color and a texture that looks like soft sand. Scrape the bowl down halfway through. Don’t rush this step—proper creaming is what gives the cake its tender crumb.
Step 3: Add the Eggs
Add the eggs one at a time, beating well after each addition (about 30 seconds per egg). The mixture should look smooth and glossy. If it looks curdled, don’t panic—that just means your eggs were a little cold. Keep beating and it will come together. Add the vanilla extract with the last egg.
Step 4: Combine Dry Ingredients
In a separate bowl, whisk together the flour, baking powder, and salt. Whisking aerates the flour and distributes the leavening agents evenly. No need to sift unless your flour is very lumpy.
Step 5: Alternate Adding Dry Ingredients and Milk
With the mixer on low speed, add about one-third of the flour mixture to the butter mixture. Mix until just combined. Add half of the milk, mix briefly. Add another third of the flour, then the remaining milk, then the final third of flour. Mix after each addition just until you don’t see dry flour anymore. Overmixing at this stage develops gluten and makes the cake tough. Stop the mixer and finish with a rubber spatula, folding gently from the bottom up.
Step 6: Fold in the Sprinkles
This is the fun part. Gently fold in the rainbow sprinkles with your spatula. Use a light hand—you want the sprinkles distributed evenly without overmixing the batter. About 10-12 folds should do it. The batter will be thick and luscious.
Step 7: Divide and Bake
Divide the batter evenly between the two prepared pans. Use a kitchen scale for accuracy if you have one (about 680g per pan). Smooth the tops with a spatula. Bake for 25-30 minutes, or until a toothpick inserted in the center comes out clean or with a few moist crumbs. The cakes should be golden on top and pulling away slightly from the edges of the pan.
Pro tip: Rotate the pans halfway through baking for even browning. I set a timer for 13 minutes, rotate, then check for doneness at 25 minutes.
Step 8: Cool Completely
Let the cakes cool in the pans for 10 minutes. Then run a knife around the edges and turn them out onto a wire rack. Peel off the parchment paper. Let them cool completely before frosting—this takes about 1-2 hours. If you frost a warm cake, the frosting will melt into a sad puddle. Trust me, I’ve done it.
Step 9: Make the Frosting
While the cakes cool, make the buttercream. Beat the softened butter on medium-high speed until smooth and creamy, about 2 minutes. Gradually add the powdered sugar, one cup at a time, beating on low speed to avoid a sugar cloud. Add the vanilla and salt. Then add the heavy cream, one tablespoon at a time, beating on medium-high until the frosting is light, fluffy, and spreadable. If it’s too thick, add more cream. Too thin, add more sugar.
Step 10: Assemble and Frost
Place one cake layer on your serving plate. Spread about 1 cup of frosting evenly on top. Place the second layer on top, upside down (flat side up) for a perfectly level top. Apply a thin layer of frosting all over the cake—this is the crumb coat. Refrigerate for 20 minutes to set the crumb coat. Then apply the final layer of frosting, using your offset spatula to create swirls or smooth sides. Decorate the top and sides with the extra rainbow sprinkles while the frosting is still soft.
Cooking Tips & Techniques
After making this classic birthday cake with rainbow sprinkles dozens of times, I’ve collected some hard-won wisdom. Let me save you from my mistakes.
Room temperature ingredients are non-negotiable. I know, I know, you’re in a hurry. But cold butter doesn’t cream properly, and cold milk can make your batter curdle. Leave everything on the counter for 30-60 minutes before starting. Set a timer. Your cake will thank you.
Don’t overmix the batter. Once you add the flour, mix just until combined. Overmixing develops gluten, which makes the cake dense and rubbery. I once got distracted by a phone call and overmixed by about 30 seconds. The cake was edible but definitely tougher. Learn from my shame.
Use jimmies, not nonpareils. I mentioned this earlier, but it bears repeating. Jimmies (the long, cylinder-shaped sprinkles) hold their shape and color in the batter. Nonpareils (the tiny round ones) dissolve and turn your batter gray. I made this mistake for a friend’s birthday cake and ended up with a sad, murky-colored cake. The sprinkles I used on top saved it, but the inside looked like a storm cloud.
Weigh your flour. If you don’t have a kitchen scale, spoon the flour into your measuring cup and level it with a knife. Scooping directly from the bag can add 20-30% more flour, which makes a dry cake. I’ve tested this side by side, and the difference is dramatic.
Let the cakes cool completely. I know it’s tempting to rush, but warm cake + cold frosting = disaster. The frosting melts, slides off, and looks like a mess. Give it the full 2 hours. Use that time to clean up your kitchen or make a cup of tea.
Crumb coat is your friend. That thin layer of frosting you apply before the final coat traps all the loose crumbs. Refrigerate it for 20 minutes, and your final layer will be smooth and crumb-free. It takes an extra step, but it makes the difference between a homemade-looking cake and a bakery-looking cake.
Variations & Adaptations
This classic birthday cake with rainbow sprinkles is endlessly adaptable. Here are some variations I’ve tried and loved.
Lemon Birthday Cake: Add the zest of 2 lemons to the sugar and rub it in with your fingers before creaming with the butter. Replace 2 tablespoons of milk with fresh lemon juice. The lemon brightens the cake beautifully for spring. I made this for an Easter brunch and it was gone in 15 minutes.
Chocolate Sprinkle Cake: Replace 1/2 cup of the all-purpose flour with 1/2 cup of unsweetened cocoa powder. Sift it with the other dry ingredients to avoid lumps. Use rainbow sprinkles or chocolate sprinkles—both work. This version is richer and feels more decadent.
Gluten-Free Version: Substitute the all-purpose flour with a 1:1 gluten-free baking flour blend (I like Bob’s Red Mill). Add 1/4 teaspoon of xanthan gum if your blend doesn’t include it. The texture will be slightly more delicate, so handle the cakes gently. Let them cool completely in the pan before turning out.
Vegan Adaptation: Use plant-based butter (Miyoko’s is my favorite) and replace each egg with a flax egg (1 tablespoon ground flaxseed + 3 tablespoons water, let sit for 5 minutes). Use oat milk instead of whole milk. The cake will be a bit denser but still delicious. For the frosting, use vegan butter and oat milk.
Cupcake Version: This batter makes about 24 cupcakes. Bake at 350°F (175°C) for 18-20 minutes. The frosting recipe above will generously frost all of them. I’ve done this for classroom parties and bake sales—always a hit.
Berry Swirl Cake: Swirl 1/2 cup of strawberry or raspberry jam into the batter after adding the sprinkles. Use a knife to create gentle swirls. The jam adds pockets of fruity sweetness that are gorgeous when you cut into the cake.
Serving & Storage Suggestions
This classic birthday cake with rainbow sprinkles is best served at room temperature. Take it out of the refrigerator about 30 minutes before serving to let the cake soften and the flavors come through. The texture is most tender at room temperature.
For presentation, I like to place the cake on a simple white cake stand and let the rainbow sprinkles do the decorating. You can also add fresh flowers around the base for spring celebrations—just make sure they’re food-safe and not treated with pesticides. Edible flowers like pansies or violas are beautiful options.
What to serve with it: A scoop of vanilla ice cream is classic. Fresh strawberries or raspberries on the side add a bright, tart contrast. For adults, a glass of cold milk or a cup of coffee is perfect. For kids, well, they’ll probably just want another slice.
Storage: Store the cake in an airtight container at room temperature for up to 3 days. If your kitchen is warm, refrigerate it—the frosting can get soft. Bring slices to room temperature before serving for the best texture. You can also freeze the unfrosted cake layers (wrapped tightly in plastic wrap and foil) for up to 3 months. Thaw overnight in the refrigerator, then bring to room temperature before frosting.
Reheating: If you want that just-baked warmth, microwave individual slices for 10-15 seconds. Be careful not to overheat, or the frosting will melt. Alternatively, warm slices in a 300°F (150°C) oven for 5 minutes.
The flavors actually develop over time. Day-old cake is often even better than fresh—the moisture distributes more evenly, and the vanilla flavor deepens. So don’t stress about making it the day before. In fact, I often bake the cakes a day ahead and frost them the morning of the party.
Nutritional Information & Benefits
Let’s be honest—this is a celebration cake, not a health food. But here’s the estimated nutritional information for one slice (based on 12 servings):
- Calories: Approximately 520
- Total Fat: 28g
- Saturated Fat: 17g
- Carbohydrates: 66g
- Sugar: 48g
- Protein: 5g
- Sodium: 280mg
That said, there are some redeeming qualities. The eggs provide high-quality protein and choline, which is important for brain health. The butter contains fat-soluble vitamins A, D, E, and K. And honestly, there’s a mental health benefit to sharing a homemade cake with people you love. I firmly believe that joy is a nutrient too.
Dietary considerations: This recipe contains gluten, dairy, and eggs. For gluten-free, dairy-free, or vegan versions, see the variations section above. The sprinkles should be checked for common allergens—some brands use artificial colors that may be an issue for sensitive individuals.
My personal wellness perspective: I believe in balance. This cake is for celebrations, not everyday eating. Enjoy a slice, savor it, and don’t feel guilty. Food is about connection and joy, and this cake delivers both.
Conclusion
This classic birthday cake with rainbow sprinkles is more than just a recipe—it’s a celebration in cake form. It’s the cake that says “I love you” without words, the one that makes spring feel official, the one that turns an ordinary day into a party. The tender crumb, the sweet vanilla frosting, those cheerful rainbow sprinkles—every bite is pure joy.
I hope you make this cake for someone you love. Or for yourself, honestly. You deserve a celebration too. Customize it with your favorite variations, add extra sprinkles if that’s your thing, and don’t stress about perfection. The best cakes are the ones made with love, not the ones that look like they came from a bakery.
If you make this classic birthday cake with rainbow sprinkles, I’d love to hear about it. Leave a comment below, tag me in your photos, or share your own twist on the recipe. Did you try the lemon version? Add a different sprinkle color? Bake it as cupcakes? Tell me all about it. Your adaptations might inspire someone else.
Now go preheat that oven. Spring is waiting, and there’s a cake to be baked.
Frequently Asked Questions
Can I use margarine instead of butter?
Technically yes, but I don’t recommend it. Butter gives the cake its rich flavor and tender texture. Margarine has a higher water content, which can make the cake denser and less flavorful. If you need a dairy-free option, use a high-quality plant-based butter like Miyoko’s.
Why did my cake stick to the pan?
Most likely, you didn’t grease the pan well enough or you skipped the parchment paper. I always grease the pan, line the bottom with parchment, and grease the parchment too. Let the cake cool for 10 minutes in the pan before turning out. If it’s still stuck, run a thin knife around the edges and gently coax it out.
Can I make this cake ahead of time?
Absolutely. You can bake the cake layers up to 2 days ahead. Wrap them tightly in plastic wrap once they’re completely cool, and store them at room temperature. You can also freeze the unfrosted layers for up to 3 months. The frosting can be made a day ahead and stored in the refrigerator—just let it come to room temperature and re-whip before using.
My frosting turned out too runny. What went wrong?
You probably added too much cream, or your butter was too soft. Fix it by adding more powdered sugar, one tablespoon at a time, until it reaches the right consistency. If your kitchen is warm, pop the frosting in the refrigerator for 10-15 minutes to firm up, then re-whip.
How do I get the sprinkles to stick to the sides of the cake?
Apply the sprinkles immediately after frosting, while the frosting is still soft. Hold a handful of sprinkles in your palm and gently press them into the sides of the cake. Work from the bottom up, and catch the falling sprinkles on a plate to reuse. If the frosting sets before you’re done, the sprinkles won’t stick as well.
Pin This Recipe!
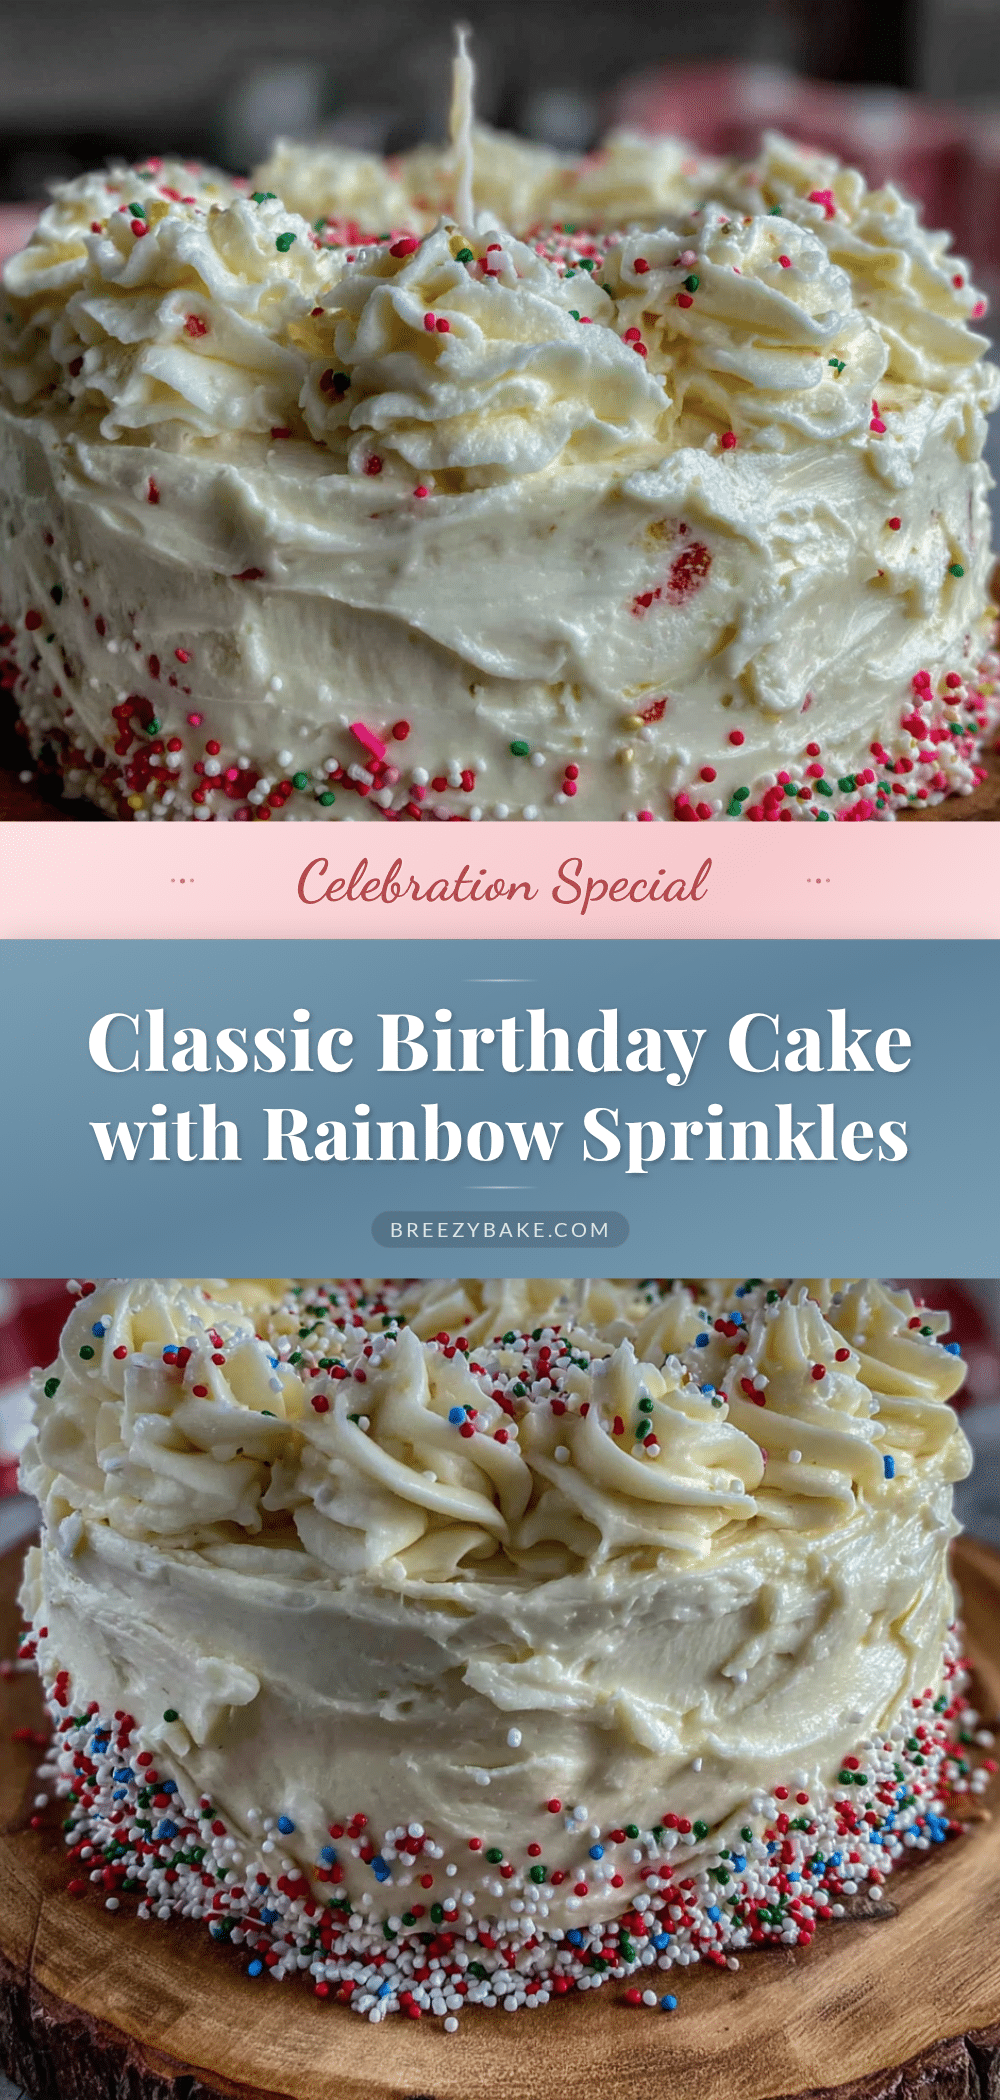
Classic Birthday Cake with Rainbow Sprinkles – Perfect Spring Celebration
A tender, moist vanilla cake studded with rainbow sprinkles and topped with a creamy buttercream frosting. Perfect for spring celebrations, this forgiving recipe delivers a joyful, crowd-pleasing dessert every time.
- Prep Time: 30 minutes
- Cook Time: 30 minutes
- Total Time: 2 hours 30 minutes (includes cooling)
- Yield: 12 servings 1x
- Category: Dessert
- Cuisine: American
Ingredients
- 1 cup (226g) unsalted butter, softened
- 2 cups (400g) granulated sugar
- 4 large eggs, room temperature
- 3 cups (360g) all-purpose flour
- 1 tablespoon (14g) baking powder
- 1 teaspoon (6g) salt
- 1 cup (240ml) whole milk, room temperature
- 2 teaspoons (10ml) vanilla extract
- 1/2 cup (80g) rainbow sprinkles (jimmies)
- 1 1/2 cups (340g) unsalted butter, softened (for frosting)
- 4 cups (480g) powdered sugar, sifted
- 3–4 tablespoons (45-60ml) heavy cream
- 2 teaspoons (10ml) vanilla extract (for frosting)
- 1/4 teaspoon (1.5g) salt (for frosting)
- 1/4 cup (40g) rainbow sprinkles (for decorating)
Instructions
- Preheat oven to 350°F (175°C). Grease two 9-inch round cake pans and line bottoms with parchment paper. Grease parchment as well.
- In a large bowl, beat softened butter and granulated sugar on medium-high speed until light and fluffy, about 3-4 minutes (5 minutes with a hand mixer). Scrape bowl halfway through.
- Add eggs one at a time, beating well after each addition (about 30 seconds per egg). Add vanilla extract with the last egg. Mixture should be smooth and glossy.
- In a separate bowl, whisk together flour, baking powder, and salt.
- With mixer on low, add about one-third of the flour mixture to the butter mixture, mixing until just combined. Add half of the milk, mix briefly. Repeat with remaining flour and milk, ending with flour. Mix just until no dry flour remains. Finish folding with a rubber spatula.
- Gently fold in the 1/2 cup rainbow sprinkles with a spatula, about 10-12 folds.
- Divide batter evenly between prepared pans (about 680g each). Smooth tops. Bake for 25-30 minutes, rotating pans halfway through, until a toothpick inserted in center comes out clean or with a few moist crumbs.
- Let cakes cool in pans for 10 minutes. Run a knife around edges, turn out onto wire rack, peel off parchment. Cool completely (1-2 hours) before frosting.
- For frosting: Beat softened butter on medium-high until smooth and creamy, about 2 minutes. Gradually add powdered sugar, one cup at a time, beating on low. Add vanilla and salt. Add heavy cream one tablespoon at a time, beating on medium-high until light, fluffy, and spreadable.
- Place one cake layer on serving plate. Spread about 1 cup frosting evenly on top. Place second layer upside down on top. Apply thin crumb coat of frosting all over cake. Refrigerate 20 minutes. Apply final layer of frosting, creating swirls or smooth sides. Decorate with remaining 1/4 cup sprinkles while frosting is soft.
Notes
Use jimmies (long cylinder-shaped sprinkles) not nonpareils to avoid color bleeding. Room temperature ingredients are crucial for proper emulsification. Weigh flour for accuracy. Let cakes cool completely before frosting. Crumb coat helps achieve a smooth finish. Cake can be stored at room temperature for up to 3 days or frozen unfrosted for up to 3 months.
Nutrition
- Serving Size: 1 slice
- Calories: 520
- Sugar: 48
- Sodium: 280
- Fat: 28
- Saturated Fat: 17
- Carbohydrates: 66
- Protein: 5
Keywords: birthday cake, rainbow sprinkles, spring celebration, vanilla cake, buttercream, classic cake, party cake


