There used to be a tiny bakery tucked behind a hardware store on Main Street in my town called The Little Honey Bee. They made these peanut butter oat energy bites that were honestly life-changing for a busy mom. When they closed their doors three years ago after the owner retired, I actually stood outside staring at the “For Lease” sign like I’d lost a friend. I mean, that’s dramatic, but those little bites got me through soccer practices, school pickups, and Tuesday afternoon meltdowns more times than I can count.
After about twelve tries — and some truly sad, crumbly failures that my kids politely refused to eat — I finally cracked the code. The secret was in the right ratio of sticky ingredients to dry ones, and a little trick with the peanut butter that I stumbled on by accident one afternoon when I was too distracted to follow my own notes. The power went out halfway through my third attempt, and I had to eyeball everything. That chaotic batch turned out to be the one.
These Kid-Approved Peanut Butter Oat Energy Bites are the result of my obsessive quest to recreate that bakery magic. They’re chewy, just sweet enough, and sturdy enough to survive a lunchbox without falling apart. The best part? No oven required, which means even the hottest summer day won’t stop you from making a batch. Maybe you’ve been there — chasing a recipe that felt just out of reach, something your family loved that disappeared from your life. This is that recipe, finally back where it belongs.
Why You’ll Love This Recipe
I’ve tested this recipe more times than I care to admit, and I can tell you with confidence — these energy bites deliver every single time. Here’s why they’ve become a staple in my kitchen and why I think they’ll become one in yours too.
- Quick & Easy: These come together in under 15 minutes with zero baking. Perfect for those afternoons when you need something fast and the kids are circling the pantry like hungry sharks.
- Simple Ingredients: You probably have everything already. Oats, peanut butter, honey, chocolate chips — no fancy grocery trips or specialty stores required.
- Perfect for Busy Families: Great for lunchboxes, after-school snacks, road trips, or that 4 PM hunger window before dinner. They travel beautifully and don’t need refrigeration for a few hours.
- Crowd-Pleaser: My kids inhale these, and so do their friends. Even the picky eater who “doesn’t like oats” asks for seconds. I’ve brought them to playdates and watched them disappear in minutes.
- Unbelievably Delicious: The texture is spot-on — soft but not mushy, chewy but not sticky. The chocolate chips melt slightly against the peanut butter, and the oats give it that satisfying bite that makes you reach for another one.
What makes this recipe different from the dozens of energy bite recipes out there? It’s the ratio. I spent weeks tweaking the wet-to-dry balance so these hold together without being greasy or falling apart. Plus, I add a pinch of salt that makes the flavors pop in a way most recipes miss. This isn’t just another version of energy bites — it’s the one that finally works for real life.
These energy bites are the kind of snack that makes you feel good about feeding them to your kids. They’re wholesome, satisfying, and honestly, they taste like a treat. That’s the sweet spot, right? Food that feels like a win for everyone at the table.
What Ingredients You Will Need
This recipe uses simple, wholesome ingredients that you likely already have in your pantry. Each one plays a specific role in creating that perfect texture and flavor, so let’s walk through what you’ll need and why it matters.
- Old-Fashioned Rolled Oats (2 cups / 180g) — These are the backbone of the recipe. I recommend old-fashioned oats over quick oats because they give a better chewy texture and hold their shape after mixing. Quick oats can turn mushy. If you only have quick oats, reduce the amount by about a quarter cup to compensate.
- Creamy Peanut Butter (1 cup / 240g) — Use a standard creamy peanut butter like Jif or Skippy for best results. Natural peanut butter that separates can work, but you need to stir it really well and it may make the bites a bit greasier. I’ve tested both, and the commercial stuff gives a more consistent texture. If you’re using natural, add an extra tablespoon of honey to help with binding.
- Honey (1/2 cup / 120ml) — This is your sweetener and binder. Honey adds moisture and helps everything stick together. Maple syrup works as a substitute, but it makes the mixture slightly looser, so you may need to chill it longer before rolling.
- Mini Chocolate Chips (1/2 cup / 85g) — Mini chips distribute more evenly throughout the bites than regular-sized ones. You get chocolate in every bite without giant chunks that fall out. Semi-sweet or milk chocolate both work great. Dark chocolate chips add a nice contrast if your family likes a little bitterness.
- Ground Flaxseed (2 tablespoons / 15g) — This is my secret ingredient. Flaxseed adds fiber, omega-3s, and helps bind the mixture together without making it taste weird. You can skip it, but the bites will be a bit more crumbly. I use Bob’s Red Mill brand and keep it in the fridge for freshness.
- Vanilla Extract (1 teaspoon) — A little vanilla rounds out the flavors and makes everything taste more like a cookie. Don’t skip it — it makes a noticeable difference.
- Salt (1/4 teaspoon) — This balances the sweetness and makes the peanut butter flavor pop. If your peanut butter is already salted, you can reduce this to a pinch or skip it entirely.
Optional add-ins that work beautifully: shredded coconut (1/4 cup), chia seeds (1 tablespoon), or chopped nuts (1/4 cup). Just keep the total add-ins to about 1/2 cup so the mixture doesn’t get too dry.
For substitution guidance: use sunflower seed butter for a nut-free version, agave nectar instead of honey for a vegan option, and certified gluten-free oats if you need these to be gluten-free. The texture will vary slightly, but the flavor stays delicious.
Equipment Needed
You don’t need fancy kitchen tools for this recipe, which is part of the beauty. Here’s what you’ll need to get the job done.
- Large Mixing Bowl — Any big bowl works. I use a glass mixing bowl because it doesn’t slide around on the counter, but metal or ceramic is fine too.
- Measuring Cups and Spoons — Standard set for dry and liquid ingredients. For the peanut butter, spray your measuring cup with a little non-stick spray first — it slides right out and saves you the frustration of scraping.
- Wooden Spoon or Rubber Spatula — A sturdy spoon works, but a rubber spatula makes it easier to scrape the sides and get every last bit mixed in.
- Baking Sheet or Large Plate — To hold the rolled bites while they chill. Line it with parchment paper or wax paper for easy cleanup.
- Cookie Scoop (optional but helpful) — A 1-inch or 1.5-inch scoop gives you uniform bites that look professional. If you don’t have one, just use a tablespoon measure. I got mine at a dollar store and it’s lasted years.
- Refrigerator Space — You need room to chill the bites for at least 30 minutes. Clear a shelf before you start mixing so you’re not scrambling later.
That’s it. No food processor, no stand mixer, no special equipment. This is the kind of recipe that works with whatever you have, and honestly, that’s why I make it so often.
Preparation Method
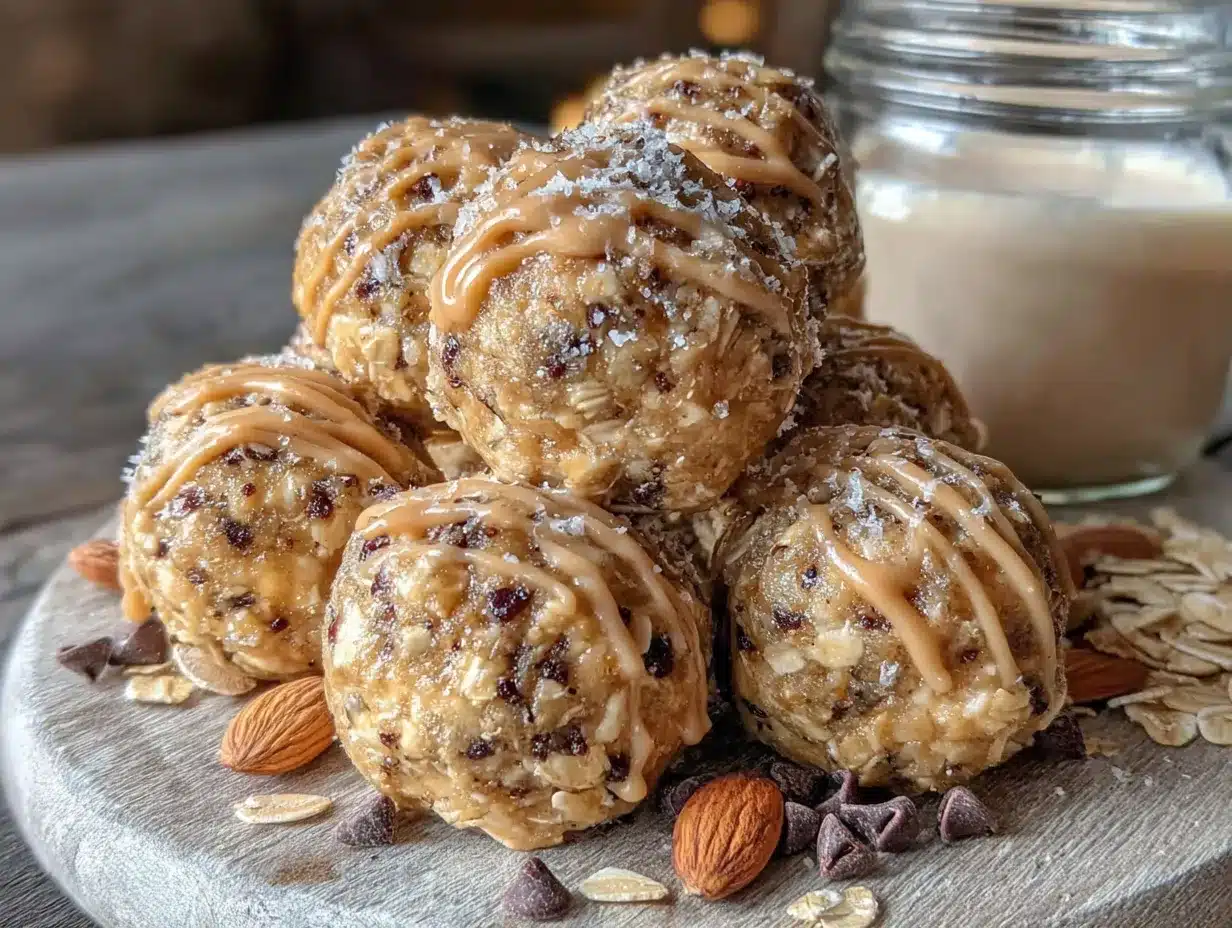
Let’s get rolling — literally. This comes together fast, so have everything measured and ready before you start. Here’s how to make these Kid-Approved Peanut Butter Oat Energy Bites step by step.
- Combine the dry ingredients. In a large mixing bowl, add 2 cups (180g) old-fashioned rolled oats, 2 tablespoons (15g) ground flaxseed, and 1/4 teaspoon salt. Stir them together with your spoon or spatula until evenly distributed. This takes about 30 seconds. You want the flaxseed to be mixed throughout so every bite gets some.
- Add the wet ingredients. Scoop 1 cup (240g) creamy peanut butter into the bowl, then pour in 1/2 cup (120ml) honey and 1 teaspoon vanilla extract. Don’t worry if it looks messy at first — it always does. Start stirring slowly, folding the dry ingredients into the wet. The mixture will look crumbly and dry for the first minute or so. Keep going. As you stir, the peanut butter and honey will start to coat the oats, and everything will come together into a thick, cohesive dough.
- Check the consistency. After about 2 minutes of stirring, the mixture should hold together when you squeeze a handful in your palm. If it’s too dry and crumbly, add a tablespoon more honey or peanut butter. If it’s too sticky and wet, add a tablespoon more oats. I’ve had to adjust maybe one out of every five batches depending on the humidity or the brand of peanut butter. It’s normal, so don’t panic.
- Fold in the chocolate chips. Add 1/2 cup (85g) mini chocolate chips to the bowl. Gently fold them in with your spatula until they’re evenly distributed. Be careful not to overmix at this point — you want the chips to stay whole, not get smushed into the dough. If the mixture is getting too warm from your hands, pop the bowl in the fridge for 10 minutes before rolling.
- Chill the mixture. Cover the bowl with plastic wrap or a clean kitchen towel and place it in the refrigerator for 20-30 minutes. This step is crucial. Chilling firms up the peanut butter and honey so the bites hold their shape when you roll them. I learned this the hard way after making a batch that turned into flat, sad discs on the baking sheet. Patience here pays off.
- Roll into bites. Line a baking sheet or large plate with parchment paper. Scoop out about 1 tablespoon of the chilled mixture (or use a 1-inch cookie scoop). Roll it between your palms into a smooth ball. If the mixture sticks to your hands, lightly dampen your palms with water or rub a tiny bit of oil on them. Place each ball on the prepared sheet, spacing them about an inch apart. You should get about 24-28 bites depending on size.
- Final chill. Place the baking sheet with the rolled bites back in the refrigerator for at least 30 minutes. This sets them completely so they hold their shape when stored. If you’re in a hurry, 15 minutes in the freezer works too, but don’t leave them longer than that or they’ll get too hard.
- Enjoy or store. Once chilled, the energy bites are ready to eat. Transfer them to an airtight container with parchment paper between layers if you’re stacking them. They’ll keep in the fridge for up to two weeks — if they last that long.
A quick note: the mixture will feel a little sticky when you’re rolling, especially if your kitchen is warm. That’s totally fine. Just keep your hands slightly damp and work quickly. The bites firm up beautifully in the fridge, so trust the process.
Cooking Tips & Techniques
After making these energy bites more times than I can count, I’ve picked up a few tricks that make the process smoother and the results more consistent. Here’s what I’ve learned the hard way so you don’t have to.
Don’t skip the chill step. I know it’s tempting to skip straight to rolling, especially when hungry kids are watching. But the mixture needs that 20 minutes in the fridge to firm up. Without it, the bites will be too sticky to roll and they’ll flatten out on the sheet. I made this mistake on my second attempt and ended up with peanut butter oat blobs instead of nice round bites. Learn from my impatience.
Use room temperature ingredients. Cold peanut butter straight from the fridge is harder to mix and won’t incorporate evenly. Let it sit on the counter for 15 minutes before you start. Same goes for honey if it’s crystallized — a quick 10-second zap in the microwave softens it right up.
Wet your hands for easier rolling. This is the number one tip I share with friends. Keep a small bowl of water nearby and dip your fingertips before rolling each bite. The moisture prevents the mixture from sticking to your palms without adding any extra oil or mess. It sounds weird, but it works like magic.
Toast the oats for extra flavor. If you have an extra 5 minutes, spread the oats on a baking sheet and toast them at 350°F (175°C) for 5-7 minutes until they’re lightly golden and fragrant. Let them cool completely before using. This adds a nutty depth that makes the bites taste even more like a bakery treat. I do this when I’m making them for company or when I want to feel extra fancy.
Use a cookie scoop for uniform bites. Not only does this make the bites look professional, but it also ensures they all chill and store evenly. Different-sized bites will have different textures — smaller ones get harder, larger ones stay softer. A consistent size means consistent results every time.
Multitask smartly. While the mixture chills, clean up your dishes or prep lunchboxes for the next day. The 20-30 minute chill time is perfect for getting ahead on other kitchen tasks. I usually pack the kids’ snacks while I wait, which makes the whole process feel efficient instead of drawn out.
One more thing — if your energy bites turn out too dry, don’t throw them away. Add a tablespoon of honey and a teaspoon of water, mix it in, and rechill. If they’re too sticky, add a tablespoon of oats and a pinch of flaxseed. These are forgiving little bites, and almost every problem has a simple fix.
Variations & Adaptations
One of the best things about this recipe is how flexible it is. You can change it up based on what you have in the pantry, what your family likes, or what dietary needs you’re working with. Here are some variations I’ve tried and loved.
Nut-Free Version: Swap the peanut butter for sunflower seed butter or WowButter. The texture is almost identical, and the flavor is still delicious. Just note that sunflower seed butter can turn green when combined with baking soda or other alkaline ingredients, but since this recipe doesn’t use any, you’re safe. My youngest has a friend with a nut allergy, and this version gets the same thumbs-up from both kids.
Vegan Option: Replace honey with agave nectar, maple syrup, or brown rice syrup. Maple syrup gives a slightly thinner consistency, so you may need to add an extra tablespoon of oats to firm it up. Agave nectar works beautifully and has a neutral sweetness that lets the peanut butter shine. I’ve made this version for a vegan playdate and nobody noticed the difference.
Gluten-Free Adaptation: Use certified gluten-free oats. That’s literally the only change. Bob’s Red Mill makes a reliable gluten-free rolled oat that works perfectly. Just double-check your chocolate chips too — some brands use wheat-based additives. Enjoy Life makes a great gluten-free and dairy-free mini chip option.
Add-In Ideas: Try shredded coconut (1/4 cup) for a tropical twist, chia seeds (1 tablespoon) for extra fiber, chopped dried cranberries or raisins (1/4 cup) for a fruity pop, or crushed pretzels (1/4 cup) for a sweet-salty crunch. My personal favorite is adding 2 tablespoons of cocoa powder for a chocolate peanut butter version that tastes like a brownie in bite form.
Seasonal Variations: In the fall, add 1/2 teaspoon pumpkin pie spice and swap chocolate chips for white chocolate chips. In the summer, use dried cherries or chopped dried mango instead of chocolate chips. Around the holidays, add a sprinkle of cinnamon and a dash of nutmeg for a cozy flavor that feels festive.
Different Texture Preference: If your family likes crunchier bites, add 1/4 cup chopped peanuts or almonds. If they prefer softer bites, reduce the oats by 1/4 cup and add an extra tablespoon of peanut butter. I’ve made both versions depending on my mood, and honestly, there’s no wrong answer.
The beauty of this recipe is that it’s a template, not a strict formula. Once you make it a few times, you’ll know exactly how to tweak it for your family. That’s the kind of recipe that earns a permanent spot in your rotation.
Serving & Storage Suggestions
These energy bites are at their best when they’re cold, straight from the fridge. The texture is firm but chewy, and the chocolate chips have a satisfying snap. Here’s how to serve and store them for maximum enjoyment.
Serving Temperature: Serve them chilled for the best texture. If you leave them out at room temperature for more than an hour, they’ll soften and become a bit sticky. That’s fine for a picnic or lunchbox situation, but for the ideal experience, keep them cold. On hot summer days, I pack them in a small insulated lunch bag with an ice pack.
Presentation Ideas: Arrange them on a plate or in a small bowl for a snack table. For parties or playdates, I put them in mini paper cupcake liners — it makes them look like little treats and keeps hands from touching more than one. For lunchboxes, I wrap two bites together in a small piece of parchment paper or pop them in a reusable silicone bag.
What to Serve With: These pair beautifully with a glass of cold milk, a cup of coffee, or a smoothie. They’re substantial enough to be a snack on their own, but I’ve also crumbled them over yogurt for a fun crunch. My kids love them with apple slices on the side for a balanced after-school snack.
Storage Instructions: Store the energy bites in an airtight container in the refrigerator for up to two weeks. Layer parchment paper between stacks to prevent them from sticking together. If you’re storing them for longer, they freeze beautifully — more on that below.
Freezer Tips: Place the rolled bites on a baking sheet in a single layer and freeze for 1-2 hours until solid. Transfer them to a freezer-safe bag or container, removing as much air as possible. They’ll keep in the freezer for up to three months. To thaw, just move them to the fridge overnight or let them sit at room temperature for 15-20 minutes. I always keep a stash in the freezer for busy weeks when I know we’ll need quick snacks.
How Flavors Develop: These energy bites actually taste better the next day. The flavors meld together as they sit, and the oats soften slightly, creating an even better texture. If you can resist eating them all on day one, you’ll be rewarded on day two. I’ve found that the chocolate chip flavor becomes more pronounced after 24 hours in the fridge.
One more storage tip: if you’re packing these for a road trip or a day out, keep them in a cooler bag with an ice pack. They’ll stay firm and delicious for hours, even in warm weather. Trust me on this — I’ve tested them on multiple car trips and beach days.
Nutritional Information & Benefits
These energy bites aren’t just delicious — they’re packed with good-for-you ingredients that make them a smart choice for growing kids and busy adults alike. Here’s a breakdown of what you’re getting in each bite.
Estimated Nutritional Values (per 1 bite, based on 24 bites):
- Calories: 145
- Total Fat: 8g
- Saturated Fat: 2g
- Carbohydrates: 16g
- Fiber: 2g
- Sugar: 9g
- Protein: 5g
- Sodium: 85mg
Health Benefits: Oats provide soluble fiber that supports heart health and keeps kids full longer. Peanut butter offers plant-based protein and healthy fats that fuel active bodies. Flaxseed adds omega-3 fatty acids and extra fiber for digestive health. Chocolate chips? Well, they make everything better and provide a little antioxidant boost from the cocoa.
Dietary Considerations: This recipe is naturally vegetarian and can easily be made vegan, gluten-free, and nut-free with the substitutions mentioned earlier. It’s also free from eggs and dairy if you use dairy-free chocolate chips, making it a great option for families with multiple dietary needs.
Potential Allergens: Contains peanuts and may contain traces of tree nuts, dairy, and soy depending on the brands you use. Always check labels if you’re serving to someone with allergies. The nut-free version using sunflower seed butter is a safe alternative for peanut allergies.
My Personal Take: I love that these energy bites give my kids sustained energy without a sugar crash. They’re not a health food pretending to be a treat — they’re a genuinely good snack that happens to be nutritious. That balance is hard to find in store-bought snacks, and it’s why I keep coming back to this recipe week after week.
Conclusion
These Kid-Approved Peanut Butter Oat Energy Bites are more than just a recipe — they’re a solution to that daily question of what to feed hungry kids when you’re short on time and patience. They come together in minutes, use ingredients you already have, and deliver a snack that feels like a treat while actually fueling little bodies with good stuff.
I love that this recipe has room for your family’s personality. Swap in different add-ins, adjust the sweetness, make it nut-free or vegan — it adapts to whatever your kitchen looks like. That’s the kind of recipe that earns a permanent spot in your rotation, and I genuinely hope it becomes a staple in your home too.
Have you tried making these? I’d love to hear how they turned out for your family. Drop a comment below with your favorite add-in combination or any tweaks you made — your ideas might inspire another busy parent looking for snack solutions. And if you snap a photo, tag me so I can see your beautiful bites in action. Happy rolling, friends!
Frequently Asked Questions
Can I use quick oats instead of old-fashioned rolled oats?
Yes, you can, but the texture will be softer and less chewy. Quick oats absorb moisture faster and can make the bites a bit mushy. If you only have quick oats, reduce the amount by about 1/4 cup and expect a denser final texture. Old-fashioned oats really are the best choice for that classic energy bite chewiness.
How do I keep the energy bites from falling apart?
The key is getting the right moisture balance and chilling the mixture properly. If your bites are falling apart, the mixture is too dry. Add a tablespoon of honey or peanut butter and mix again. Also, make sure you’re chilling the mixture for at least 20 minutes before rolling and another 30 minutes after rolling. Patience with the chilling step makes a huge difference.
Can I make these without chocolate chips?
Absolutely. The chocolate chips add sweetness and flavor, but they’re not essential for the structure. You can replace them with an equal amount of dried fruit like raisins, cranberries, or chopped dates. Or simply leave them out for a plainer version that’s still delicious. If you omit them, the bites will be slightly less sweet, so you might want to add an extra tablespoon of honey.
How long do these energy bites last at room temperature?
They’re best kept refrigerated, but they can sit at room temperature for up to 4-6 hours without issues. If you’re packing them for a lunchbox or a day out, they’ll be fine until lunchtime. For longer periods, use an insulated bag with an ice pack. In warm weather, the peanut butter can soften and make the bites sticky, so refrigeration is your friend.
Can I double this recipe?
Yes, and I do it all the time. Double all the ingredients and mix in a larger bowl. The chilling time stays the same, but you’ll need a bigger baking sheet or two sheets for rolling. Doubling the recipe is perfect for stocking the freezer — I make a double batch every other week and we’re set for snacks for days.
Pin This Recipe!
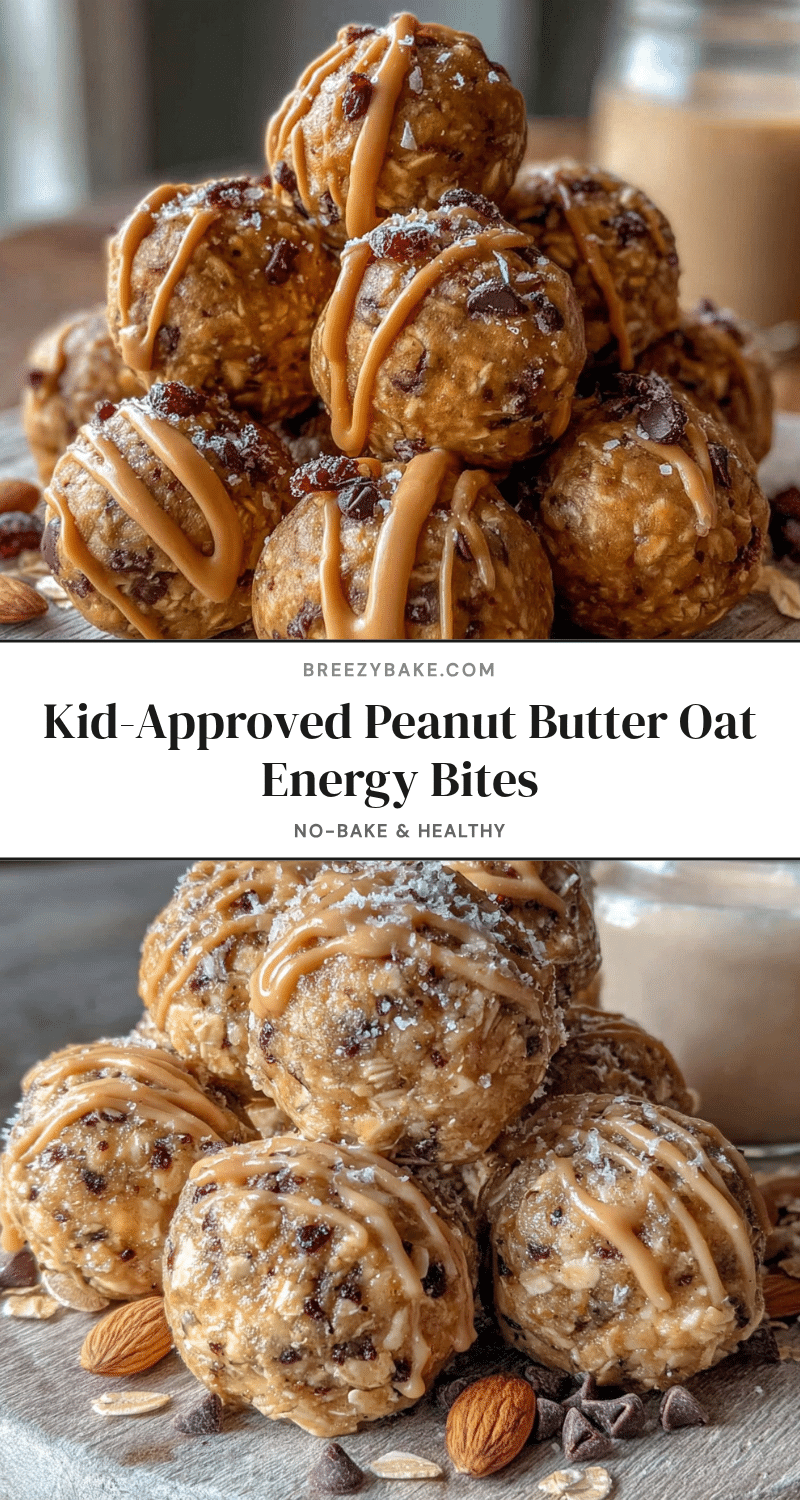
Kid-Approved Peanut Butter Oat Energy Bites: Easy No-Bake Recipe

These no-bake energy bites are chewy, sweet, and sturdy enough for lunchboxes. Made with simple ingredients like oats, peanut butter, honey, and chocolate chips, they come together in under 15 minutes and are perfect for busy families.
- Prep Time: 15 minutes
- Cook Time: 0 minutes
- Total Time: 1 hour 15 minutes
- Yield: 24-28 bites 1x
- Category: Snack
- Cuisine: American
Ingredients
- 2 cups (180g) old-fashioned rolled oats
- 1 cup (240g) creamy peanut butter
- 1/2 cup (120ml) honey
- 1/2 cup (85g) mini chocolate chips
- 2 tablespoons (15g) ground flaxseed
- 1 teaspoon vanilla extract
- 1/4 teaspoon salt
Instructions
- Combine the dry ingredients. In a large mixing bowl, add 2 cups (180g) old-fashioned rolled oats, 2 tablespoons (15g) ground flaxseed, and 1/4 teaspoon salt. Stir them together until evenly distributed.
- Add the wet ingredients. Scoop 1 cup (240g) creamy peanut butter into the bowl, then pour in 1/2 cup (120ml) honey and 1 teaspoon vanilla extract. Stir slowly, folding the dry ingredients into the wet, until a thick, cohesive dough forms.
- Check the consistency. After about 2 minutes of stirring, the mixture should hold together when squeezed in your palm. If too dry, add a tablespoon more honey or peanut butter. If too sticky, add a tablespoon more oats.
- Fold in the chocolate chips. Add 1/2 cup (85g) mini chocolate chips and gently fold them in until evenly distributed. If the mixture gets too warm, chill the bowl for 10 minutes before rolling.
- Chill the mixture. Cover the bowl and refrigerate for 20-30 minutes to firm up.
- Roll into bites. Line a baking sheet with parchment paper. Scoop about 1 tablespoon of the chilled mixture and roll into smooth balls. Place on the prepared sheet, spacing about an inch apart. You should get about 24-28 bites.
- Final chill. Place the baking sheet in the refrigerator for at least 30 minutes to set completely.
- Enjoy or store. Transfer to an airtight container and refrigerate for up to two weeks.
Notes
For best results, use old-fashioned rolled oats and creamy peanut butter like Jif or Skippy. Chill the mixture before rolling to prevent sticking. If the mixture is too sticky, dampen your hands with water. These energy bites taste even better the next day. Store in the refrigerator for up to two weeks or freeze for up to three months.
Nutrition
- Serving Size: 1 bite
- Calories: 145
- Sugar: 9
- Sodium: 85
- Fat: 8
- Saturated Fat: 2
- Carbohydrates: 16
- Fiber: 2
- Protein: 5
Keywords: energy bites, no-bake, peanut butter, oats, kid-friendly, snack, lunchbox, healthy