Jen wasn’t trying to impress anyone. I’d stopped by her place last October to drop off a book I’d borrowed, and the smell of something warm and toasty hit me before I even got through the screen door. It wasn’t pumpkin pie, and it wasn’t a candle. It was something nutty and buttery and just a little bit smoky. She was standing at her kitchen counter, pulling a tray of pumpkin seeds out of her air fryer, looking like she’d just done the most ordinary thing in the world. “Oh, those?” she said when I asked. “I just had a pumpkin from the porch and didn’t want to waste the seeds.” She tossed them in a bowl like they were nothing. But I stood there eating them straight from the bowl, one after another, and honestly, I couldn’t stop. They were perfectly crunchy, lightly salted, and had this warm, golden flavor that made me forget why I’d even come over. I mean, the book was still in my hand. I just didn’t care anymore.
That moment stuck with me. Maybe you’ve been there — you taste something simple at someone’s house, and you realize you’ve been overcomplicating it your whole life. That’s exactly what happened with these air fryer pumpkin seeds. I’d always roasted them in the oven, and they were fine. But fine is not the same as I can’t stop eating these. Jen’s method was quicker, crunchier, and way less fussy. She didn’t soak them overnight or boil them in salt water. She just cleaned them, tossed them with a little oil and salt, and let the air fryer do its thing. And honestly? I haven’t roasted pumpkin seeds in the oven since. This is the recipe that changed everything for me, and I’m pretty sure it’ll do the same for you.
Why You’ll Love This Recipe
Let me tell you why these air fryer pumpkin seeds have become my go-to snack every single fall. I’ve tested this method more times than I can count, and it never lets me down. Here’s what makes it special:
- Quick & Easy: From start to finish, you’re looking at about 20 minutes. No preheating a big oven, no waiting around. The air fryer works fast, and the results are consistently perfect.
- Simple Ingredients: You only need three things — pumpkin seeds, oil, and salt. That’s it. No fancy spices or hard-to-find items. You probably have everything in your kitchen right now.
- Perfect for Fall: Whether you’re carving pumpkins for Halloween, making pumpkin pie for Thanksgiving, or just enjoying a cozy autumn afternoon, these seeds are the ultimate seasonal snack. They’re great for parties, movie nights, or just munching while you’re cooking.
- Crowd-Pleaser: I’ve brought these to gatherings and watched them disappear in minutes. Kids love them, adults love them, and people always ask for the recipe. It’s one of those snacks that feels special but is secretly super simple.
- Unbelievably Crunchy: The air fryer gives these seeds a texture that oven roasting just can’t match. They’re crispy all the way through, not chewy or soft in the middle. Every single seed is perfectly toasted.
What makes this recipe different from all the others? It’s the method. Most recipes tell you to boil the seeds first or soak them overnight. I tried that, and honestly, it’s a pain. This method skips all the extra steps and still gives you the crunchiest, most flavorful seeds you’ve ever had. The air fryer circulates hot air so efficiently that every seed gets evenly toasted without any fuss. Plus, the sea salt flakes stick perfectly to the oil-coated seeds, giving you that satisfying salty crunch in every bite.
This isn’t just another pumpkin seed recipe — it’s the one you’ll come back to every year. It’s the kind of snack that makes you close your eyes after the first bite because it’s just that good. And the best part? It takes almost no effort. You get all the flavor and texture of perfectly roasted seeds without any of the hassle. Trust me, once you try these, you’ll never go back to oven roasting.
What Ingredients You Will Need
This recipe uses just a handful of simple ingredients to create something truly special. The beauty of these air fryer pumpkin seeds is that the ingredients are basic, but the technique makes them shine. Here’s what you need and why each one matters:
- Fresh pumpkin seeds — These come straight from your pumpkin carving project. You’ll want about 1 cup of seeds, which is what you typically get from one medium-sized pumpkin. Look for seeds that are plump and fully formed, not flat or shriveled. If you’re buying them pre-packaged, make sure they’re raw and unsalted. I’ve used seeds from sugar pumpkins and carving pumpkins, and both work great. The smaller seeds from sugar pumpkins tend to be a bit more tender, while the larger ones from carving pumpkins have a more substantial crunch.
- Olive oil — You only need about 1 tablespoon. The oil helps the salt stick to the seeds and promotes even browning in the air fryer. I prefer extra virgin olive oil for its flavor, but you can use avocado oil or melted coconut oil if that’s what you have. The oil also helps the seeds get that beautiful golden color as they cook. Don’t skip it — dry seeds in the air fryer can turn out pale and dusty-tasting.
- Sea salt flakes — This is where the magic happens. I use about 1 teaspoon of flaky sea salt, like Maldon or another high-quality brand. The flakes are larger and more irregular than table salt, which means they stick to the seeds better and give you little bursts of salty flavor. If you only have fine sea salt, use about ¾ teaspoon instead. Kosher salt works too, but the flakes are smaller, so you might need a bit more. Trust me, the type of salt really matters here — it’s the main seasoning, so make it a good one.
- Optional seasonings — While the classic version is just salt, you can add other flavors if you want. Garlic powder, smoked paprika, cayenne pepper, or even a little cinnamon and sugar for a sweet version. But for this recipe, we’re keeping it simple with just sea salt to let the natural nutty flavor of the seeds shine through.
One thing I’ve learned from making these so many times is that the quality of your pumpkin seeds matters more than you’d think. Fresh seeds from a pumpkin you just carved have a higher moisture content, which actually helps them cook more evenly in the air fryer. If you’re using seeds that have been sitting out for a few days, they might be a bit drier and could cook faster. Just keep an eye on them and adjust the timing if needed.
I also want to mention that you don’t need to rinse the seeds excessively. A quick rinse to remove the pumpkin pulp is fine, but you don’t want to soak them. Too much water can make the seeds steam instead of roast in the air fryer, and nobody wants soggy seeds. Just give them a good rinse, pat them dry, and you’re ready to go.
Equipment Needed
You don’t need much to make these perfect air fryer pumpkin seeds, but having the right tools makes the process smoother. Here’s what I use:
- Air fryer — Any model works, but I prefer a basket-style air fryer for this recipe. It allows for better air circulation and more even cooking. I use a 5.8-quart Cosori, and it handles a cup of seeds perfectly. If you have a larger air fryer, you might need to adjust the cooking time slightly. If you’re using an oven-style air fryer with racks, just make sure the seeds are in a single layer for best results.
- Colander — For rinsing the seeds after you scoop them out of the pumpkin. A fine-mesh colander works best because the seeds won’t fall through. I’ve used a regular colander before, and a few seeds always escape into the sink. Learn from my mistakes!
- Paper towels or clean kitchen towel — For drying the seeds after rinsing. You want them as dry as possible before adding oil and salt. Wet seeds will steam instead of roast, and the texture won’t be as good. I usually spread them out on a towel and pat them gently.
- Mixing bowl — Any medium-sized bowl works for tossing the seeds with oil and salt. I use a stainless steel bowl because it’s easy to clean, but glass or ceramic is fine too.
- Spatula or spoon — For stirring the seeds halfway through cooking. A silicone spatula is gentle on the air fryer basket, but a wooden spoon works too. Just be careful not to scratch the non-stick coating if your air fryer has one.
- Measuring spoons — For the oil and salt. I know it seems obvious, but using the right measurements makes a difference. Too much oil and the seeds get greasy; too little and they’re dry. I use standard measuring spoons and level them off for accuracy.
If you don’t have an air fryer, you can still make these in the oven. Preheat to 350°F, spread the seeds on a baking sheet in a single layer, and roast for 12-15 minutes, stirring halfway through. They won’t be quite as crunchy as the air fryer version, but they’ll still be delicious. The air fryer is just faster and gives you that perfect texture every time.
Preparation Method
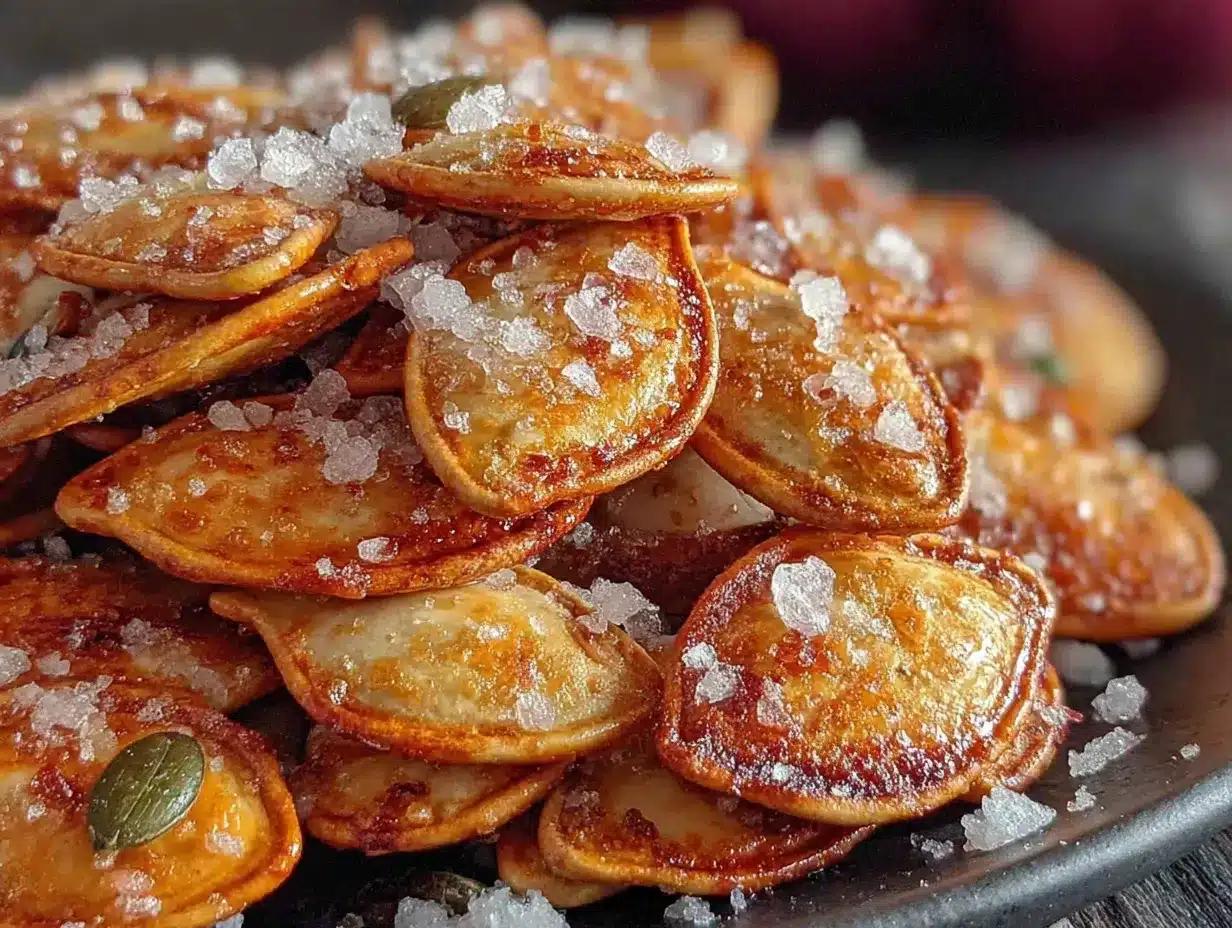
Making these air fryer pumpkin seeds is so simple that you’ll wonder why you ever bothered with the oven. Follow these steps, and you’ll have perfectly crunchy, salty seeds in no time.
- Scoop and separate the seeds. After you’ve carved your pumpkin, scoop out all the seeds and pulp into a bowl. Don’t worry about getting every bit of pulp off at this stage. Separate the seeds from the larger chunks of pumpkin flesh, but leave some of the stringy bits — they’ll come off during rinsing. This is the messiest part, but it’s also kind of satisfying. I like to do this over the sink to contain the chaos.
- Rinse the seeds thoroughly. Place the seeds in a colander and rinse them under cool running water. Use your fingers to gently rub the seeds together, which helps loosen any remaining pulp. Keep rinsing until the water runs clear and the seeds feel clean. This usually takes about a minute. Don’t soak them — just a quick rinse is all they need. Too much water can make the seeds soggy and affect the texture.
- Dry the seeds completely. Spread the rinsed seeds out on a clean kitchen towel or paper towels. Pat them dry with another towel on top. You want them as dry as possible before adding oil. If they’re still wet, the oil won’t stick properly, and the seeds might steam instead of roast. Let them sit on the towel for about 5 minutes to air dry a bit more. I’ve been impatient before and skipped this step, and the seeds came out chewy instead of crunchy. Don’t make my mistake!
- Toss with oil and salt. Transfer the dried seeds to a mixing bowl. Add 1 tablespoon of olive oil and 1 teaspoon of flaky sea salt. Stir well with a spoon or spatula until every seed is coated. The oil should glisten on the seeds, and you should see salt flakes distributed throughout. Take your time with this step — even coating is key to consistent flavor. If you’re adding any optional seasonings, now’s the time to add them.
- Preheat your air fryer. Set your air fryer to 350°F and let it preheat for about 3 minutes. Preheating ensures the seeds start cooking immediately, which helps them get crispy faster. Some air fryers don’t require preheating, but I’ve found that it makes a noticeable difference in the final texture. If your air fryer doesn’t have a preheat setting, just run it empty for 3 minutes at 350°F.
- Arrange seeds in the air fryer basket. Spread the seasoned seeds in a single layer in the air fryer basket. Don’t overcrowd them — if they’re piled on top of each other, they won’t cook evenly. If you have a lot of seeds, cook them in batches. It’s better to do two batches than to end up with unevenly cooked seeds. I usually spread mine out so there’s a little space between each seed.
- Cook for 5 minutes, then shake. Air fry the seeds at 350°F for 5 minutes. Then, carefully remove the basket and give it a good shake. This redistributes the seeds so they cook evenly. Use a spatula to stir them around if needed. You’ll notice they’re starting to turn golden and smell amazing.
- Cook for another 3-5 minutes. Return the basket to the air fryer and cook for another 3-5 minutes. Start checking at the 3-minute mark. The seeds are done when they’re golden brown and you can hear them rattling around in the basket. They should sound hollow and dry when you shake them. Be careful not to overcook — they can go from perfectly toasted to burnt very quickly. My first batch ever got a little too dark because I walked away. Now I always stay nearby and check frequently.
- Cool completely before eating. Transfer the cooked seeds to a plate or baking sheet and spread them out in a single layer. Let them cool for at least 5-10 minutes. This is important because the seeds continue to crisp up as they cool. If you eat them right away, they might seem a little soft, but don’t worry — they’ll firm up as they sit. I know it’s hard to wait, but trust me, it’s worth it.
- Enjoy immediately or store for later. Once cooled, dig in! These are best eaten within a day or two, but they’ll stay crunchy for up to a week if stored properly. More on storage below.
Cooking Tips & Techniques
After making these air fryer pumpkin seeds more times than I can count, I’ve picked up a few tricks that make a big difference. Here are my best tips for perfect results every time:
Don’t skip the drying step. I know I mentioned this already, but it’s worth repeating. Wet seeds are the enemy of crunchy seeds. If you don’t dry them thoroughly, the moisture will turn to steam in the air fryer, and you’ll end up with chewy, sad seeds. I learned this the hard way when I was in a rush and skipped the towel-drying step. The seeds came out pale and rubbery, and I had to toss them. Now I always take the extra few minutes to pat them dry.
Watch the cooking time closely. Air fryers can vary quite a bit in temperature and airflow. Your first batch might need a slightly different cooking time than mine. Start checking at the 8-minute mark and look for a deep golden color. The seeds should sound hollow when you shake the basket. If they’re still pale, give them another minute. If they’re browning too fast, reduce the temperature to 325°F next time. It’s better to undercook slightly than to burn them, because you can always pop them back in for another minute.
Use flaky salt for best results. I can’t stress this enough. Flaky sea salt like Maldon or Jacobsen sticks to the seeds much better than fine salt. The larger crystals also give you little bursts of salty flavor that make each bite more interesting. If you only have fine salt, use a little less and toss the seeds gently to avoid the salt falling to the bottom of the bowl. I’ve tried both, and the flaky salt is definitely superior.
Cook in a single layer. This is crucial for even cooking. If you pile the seeds too high, the ones on the bottom will steam while the ones on top get crispy. Spread them out so there’s space between each seed. If you have a lot of seeds, cook them in two batches. It takes a few extra minutes, but the results are worth it. I’ve tried cramming them all in before, and I ended up with half-cooked, half-burnt seeds. Never again.
Let them cool completely. This is the hardest part because the seeds smell so good when they come out of the air fryer. But if you eat them while they’re still warm, they’ll seem softer and less crunchy. As they cool, the moisture evaporates and the texture firms up. Give them at least 5-10 minutes on a plate or baking sheet before you dive in. I usually set a timer so I don’t give in to temptation.
Experiment with seasonings. While this recipe is all about the simple sea salt flavor, don’t be afraid to get creative. I’ve made versions with garlic powder and parmesan, smoked paprika and lime, and even cinnamon and sugar. The basic method stays the same — just add your seasonings along with the salt before cooking. Start with small amounts and adjust to your taste. My personal favorite variation is a pinch of cayenne pepper for a little heat.
Variations & Adaptations
One of the best things about this recipe is how easy it is to customize. Here are some variations I’ve tried and loved:
Spicy Chili Lime Seeds: Add ½ teaspoon of chili powder, ½ teaspoon of lime zest, and a pinch of cayenne pepper along with the salt. The citrus and heat combination is amazing, and it’s perfect for anyone who likes a little kick. I made these for a game day party, and they disappeared faster than the chips and dip.
Garlic and Herb Seeds: Mix in ½ teaspoon of garlic powder, ½ teaspoon of dried rosemary or thyme, and a pinch of black pepper. This savory version is great for snacking or as a topping for soups and salads. I’ve even crushed them up and used them as a crust for baked chicken — it’s delicious.
Sweet Cinnamon Sugar Seeds: Skip the salt and toss the seeds with 1 tablespoon of melted butter, 1 tablespoon of brown sugar, and ½ teaspoon of cinnamon. Cook at 325°F for 8-10 minutes, watching carefully so the sugar doesn’t burn. These are like a healthy-ish dessert, and they’re amazing on top of yogurt or ice cream. My kids go crazy for this version.
Dietary Adaptations: This recipe is naturally gluten-free and dairy-free as written. For a vegan version, just use coconut oil or avocado oil instead of butter in the sweet variation. If you’re watching your sodium, you can reduce the salt or use a salt substitute. The seeds will still be delicious, just less salty. I’ve made them with half the salt for a friend on a low-sodium diet, and they were still a hit.
Different Cooking Methods: If you don’t have an air fryer, you can roast these in the oven at 350°F for 12-15 minutes, stirring halfway through. They won’t be quite as crunchy, but they’ll still be good. You can also cook them in a dry skillet over medium heat, stirring constantly, for about 5-7 minutes. This method requires more attention, but it works in a pinch. I’ve used the skillet method when camping, and it’s surprisingly effective.
Serving & Storage Suggestions
These air fryer pumpkin seeds are incredibly versatile, and I love finding new ways to enjoy them. Here’s how I serve and store mine:
Serving Ideas: The most obvious way to enjoy these is straight from the bowl as a snack. They’re perfect for munching while you’re watching a movie, hosting a party, or just hanging out in the kitchen. But they’re also great as a topping for soups and salads — the crunch adds a wonderful texture contrast. I love sprinkling them over roasted butternut squash soup or a simple green salad with apple slices and goat cheese. You can also crush them up and use them as a crust for chicken or fish, or mix them into granola for extra crunch. Honestly, once you start thinking about it, you’ll find endless ways to use them.
Serving Temperature: These seeds are best at room temperature. After they’ve cooled completely, they’re perfectly crunchy and ready to eat. If you’ve stored them in the fridge, let them sit out for 10-15 minutes before serving to bring back their full crunch. I don’t recommend serving them warm because they can seem a bit soft straight from the air fryer.
Storage Instructions: Store your cooled seeds in an airtight container at room temperature for up to a week. A glass jar with a tight-fitting lid works great, or you can use a resealable plastic bag. The key is to keep them away from moisture, which can make them lose their crunch. If you live in a humid climate, you might want to add a food-safe silica gel packet to the container to absorb excess moisture. I’ve stored mine in a Mason jar on the counter, and they’ve stayed crunchy for a full week.
Freezing Tips: You can freeze these seeds for up to three months. Place them in a freezer-safe bag or container, squeeze out as much air as possible, and seal tightly. When you’re ready to eat them, let them thaw at room temperature for about 15 minutes. They might lose a tiny bit of crunch, but they’ll still be delicious. I’ve frozen batches before and used them as a topping for holiday salads — they work perfectly.
Reheating: If your seeds have lost some of their crunch, you can pop them back in the air fryer at 300°F for 2-3 minutes. This will help re-crisp them without overcooking. Just watch them carefully so they don’t burn. I’ve done this with seeds that were a few days old, and they came out almost as good as fresh.
Nutritional Information & Benefits
Pumpkin seeds are a nutritional powerhouse, and these air fryer seeds are a healthy snack option that you can feel good about. Here’s what you’re getting in a serving (about ¼ cup, or 30 grams):
- Calories: Approximately 150-170 calories per serving
- Protein: About 8-10 grams — that’s a solid amount for a snack!
- Healthy Fats: Around 13-15 grams, mostly unsaturated fats that are good for your heart
- Fiber: About 2-3 grams, which helps with digestion and keeps you feeling full
- Magnesium: Pumpkin seeds are one of the best natural sources of magnesium, which supports muscle function, sleep, and bone health
- Zinc: These seeds are rich in zinc, which is important for immune function and skin health
- Iron: You’ll get about 2-3 mg of iron per serving, which helps with energy levels
These seeds are naturally gluten-free, dairy-free, and low in carbs, making them a great option for various dietary needs. The only potential allergen is the seeds themselves, but pumpkin seeds are not one of the major allergens. If you have a seed allergy, obviously skip this recipe. For everyone else, these are a safe and nutritious snack.
From a wellness perspective, I love that these seeds are a whole food snack with no added preservatives or artificial ingredients. They’re satisfying in a way that processed snacks just aren’t. The combination of protein, healthy fats, and fiber means they’ll keep you full and energized between meals. Plus, they’re so flavorful that a small serving feels like a treat. It’s a win-win in my book.
Conclusion
These perfect air fryer pumpkin seeds with sea salt are the kind of recipe that makes you wonder why you ever did it any other way. They’re quick, easy, and produce the crunchiest, most flavorful seeds you’ve ever had. Whether you’re carving pumpkins for Halloween, prepping for Thanksgiving, or just looking for a healthy snack to get you through the week, this recipe is a game-changer.
I love that this recipe is so simple but so satisfying. It’s proof that you don’t need complicated techniques or fancy ingredients to make something truly delicious. Just fresh pumpkin seeds, good oil, and high-quality salt — and the air fryer does the rest. Every time I make these, I think back to that day at Jen’s house, standing in her kitchen with a book in my hand and a bowl of seeds in the other. I’m so glad she showed me this method, and I’m thrilled to pass it on to you.
So go ahead — scoop those seeds out of your pumpkin, fire up your air fryer, and give these a try. I promise you won’t be disappointed. And when you make them, I’d love to hear how they turned out. Did you stick with the classic sea salt, or did you try one of the variations? Drop a comment below and let me know. Happy snacking!
Frequently Asked Questions
Do I need to boil the pumpkin seeds before air frying?
No, you don’t need to boil them. This recipe skips that step entirely. Just rinse, dry, season, and air fry. Boiling can actually make the seeds softer and less crunchy, so I recommend skipping it.
Can I use store-bought raw pumpkin seeds?
Absolutely. If you don’t have a pumpkin to carve, you can buy raw, unsalted pumpkin seeds at most grocery stores. Just follow the same instructions — no need to rinse them since they’re already clean. You might need to reduce the cooking time slightly since store-bought seeds are usually drier than fresh ones.
Why are my pumpkin seeds chewy instead of crunchy?
Chewy seeds usually mean they weren’t dried thoroughly before cooking, or they were overcrowded in the air fryer. Make sure to pat them completely dry with a towel and spread them in a single layer. Also, let them cool completely after cooking — they continue to crisp up as they cool.
Can I make these without an air fryer?
Yes! You can roast them in the oven at 350°F for 12-15 minutes, stirring halfway through. Or cook them in a dry skillet over medium heat, stirring constantly, for 5-7 minutes. The texture won’t be quite as crunchy as the air fryer version, but they’ll still be delicious.
How long do these stay fresh?
Stored in an airtight container at room temperature, these seeds stay crunchy for up to a week. You can also freeze them for up to three months. If they lose some crunch over time, just pop them back in the air fryer at 300°F for 2-3 minutes to re-crisp them.
Pin This Recipe!
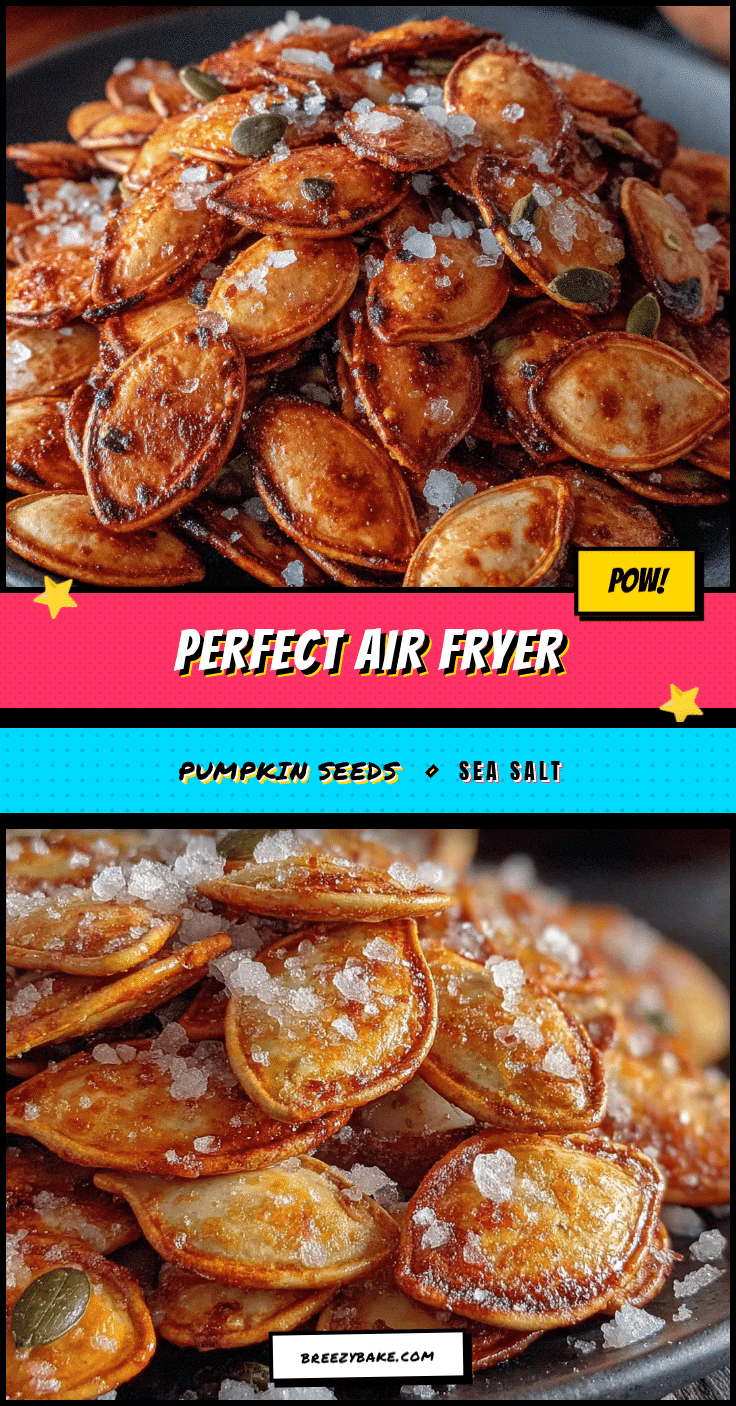
Perfect Air Fryer Pumpkin Seeds with Sea Salt

These air fryer pumpkin seeds are perfectly crunchy, lightly salted, and ready in just 20 minutes. A simple, healthy snack that’s perfect for fall and way easier than oven roasting.
- Prep Time: 10 minutes
- Cook Time: 8-10 minutes
- Total Time: 20 minutes
- Yield: 4 servings 1x
- Category: Snack
- Cuisine: American
Ingredients
- 1 cup fresh pumpkin seeds (from one medium pumpkin)
- 1 tablespoon olive oil (or avocado oil, melted coconut oil)
- 1 teaspoon flaky sea salt (e.g., Maldon; use ¾ teaspoon fine sea salt if substituting)
- Optional seasonings: garlic powder, smoked paprika, cayenne pepper, cinnamon and sugar
Instructions
- Scoop seeds and pulp from pumpkin into a bowl. Separate seeds from larger pumpkin flesh.
- Place seeds in a colander and rinse under cool water, rubbing gently to remove pulp, until water runs clear. Do not soak.
- Spread rinsed seeds on a clean kitchen towel or paper towels. Pat dry with another towel. Let air dry for about 5 minutes.
- Transfer dried seeds to a mixing bowl. Add 1 tablespoon olive oil and 1 teaspoon flaky sea salt. Stir until every seed is evenly coated.
- Preheat air fryer to 350°F for 3 minutes.
- Spread seasoned seeds in a single layer in the air fryer basket. Do not overcrowd; cook in batches if needed.
- Air fry at 350°F for 5 minutes. Remove basket and shake or stir seeds.
- Return to air fryer and cook for another 3-5 minutes, checking at 3 minutes. Seeds are done when golden brown and sound hollow when shaken.
- Transfer cooked seeds to a plate or baking sheet in a single layer. Cool completely for 5-10 minutes before eating.
- Enjoy immediately or store in an airtight container at room temperature for up to a week.
Notes
Don’t skip drying the seeds thoroughly—wet seeds lead to chewy texture. Watch cooking time closely as air fryers vary; start checking at 8 minutes. Flaky sea salt sticks better and gives bursts of flavor. Let seeds cool completely for maximum crunch. For oven method: roast at 350°F for 12-15 minutes, stirring halfway. For skillet method: cook over medium heat, stirring constantly, for 5-7 minutes.
Nutrition
- Serving Size: 1/4 cup (about 30 gr
- Calories: 160
- Sugar: 1
- Sodium: 290
- Fat: 14
- Saturated Fat: 2
- Carbohydrates: 5
- Fiber: 2.5
- Protein: 9
Keywords: air fryer pumpkin seeds, roasted pumpkin seeds, healthy snack, fall recipe, Halloween snack, Thanksgiving snack, crunchy seeds, sea salt pumpkin seeds


