My sister swore she hated fruit trays. For years. Every holiday, every barbecue, every time someone showed up with a platter of melon and grapes, she’d make this face—you know the one. The polite-but-slightly-pained expression of someone who’s about to eat a sad cube of cantaloupe just to be nice. “It’s just… fruit,” she’d say, like that explained everything. Then last Halloween, I made this monster eyeball fruit tray “just for the kids” and found her standing over the coffee table at 9 PM, a grape eyeball halfway to her mouth, caught completely red-handed. Or should I say, green-handed.
Honestly, I wasn’t even trying to convert her. I was just tired of the same old veggie platter that everyone picks at and forgets about. I wanted something that would actually make people stop and laugh before they ate it. Something that said “Halloween” without requiring a chemistry degree or a trip to a specialty store. The fruit tray was supposed to be the easy option, the one I could throw together while dealing with the messier parts of the menu. Instead, it became the star of the table. My sister didn’t say much, but I saw her go back for thirds. That’s the thing about this recipe—it doesn’t try to convince anyone. It just shows up, looks ridiculous, and wins people over one eyeball at a time.
I kept making it every Halloween after that, partly because it’s genuinely good and partly because I’m petty enough to enjoy the silent victory. The best part? It takes maybe fifteen minutes to assemble. Fifteen minutes to create something that looks like you spent an hour being clever. The kids go wild for it, the adults pretend they’re above it while sneaking pieces, and honestly, it makes for a great photo. I mean, let’s be real—if you’re hosting a Halloween party and you don’t have something that looks vaguely disgusting on the table, are you even trying?
Why You’ll Love This Recipe
This isn’t just another fruit platter. This is the fruit platter that gets talked about. I’ve tested this at three different Halloween gatherings now, and every single time, someone asks for the “recipe.” Which is funny, because there’s no actual cooking involved. But the presentation? That’s the secret sauce.
- Quick & Easy: Comes together in under 15 minutes. No oven, no stove, no waiting. You can literally assemble this while answering the door for trick-or-treaters.
- Simple Ingredients: Everything you need is available at any grocery store. No exotic fruits, no specialty items. Just regular fruit and a few pantry staples.
- Perfect for Halloween Parties: This is the dish that gets the Instagram photo. It’s playful, it’s spooky, and it’s completely kid-friendly. Parents love it because it’s healthy disguised as junk food.
- Crowd-Pleaser: I’ve seen picky eaters, fruit-haters, and even my sister go back for seconds. The presentation tricks people into trying something they’d normally skip.
- Unbelievably Fun: There’s something deeply satisfying about watching a grown adult carefully pick up a “monster eyeball” and pop it into their mouth with a grin. It’s pure Halloween joy.
What makes this recipe different from every other fruit tray out there is the detail work. The little veins, the glossy “wet” look from the simple syrup, the way the eyeballs actually look like they’re staring back at you. I spent way too long figuring out the perfect ratio of cream cheese to powdered sugar for the “white” of the eye, and let me tell you—it was worth every messy batch. This isn’t just fruit on a plate. It’s a conversation starter.
And honestly? It’s the kind of recipe that makes you feel like a hosting genius without actually working for it. You bring this to a party, and people assume you’re the creative friend. I’m not going to correct them.
What Ingredients You Will Need
This recipe uses simple, everyday ingredients to create something that looks complicated. Most of these are probably already in your kitchen, which is exactly how I like my recipes. No last-minute store runs, no hunting for obscure items. Just straightforward stuff that works.
For the Eyeballs
- Green grapes, 2 cups (look for large, firm grapes—they make better eyeballs; the rounder the better)
- Cream cheese, 8 ounces, softened to room temperature (I prefer Philadelphia for the smoothest texture, but any block-style cream cheese works)
- Powdered sugar, 2 tablespoons (this sweetens the “white” of the eye just enough without making it candy-sweet)
- Vanilla extract, 1/2 teaspoon (adds a subtle warmth that balances the tanginess of the cream cheese)
- Blueberries, 1/2 cup (for the pupils—fresh is best, but frozen and thawed work in a pinch)
- Red food coloring gel, 1 small tube (the gel kind gives you better control than liquid; you want a deep, bloody red)
For the “Blood Vessels” and Details
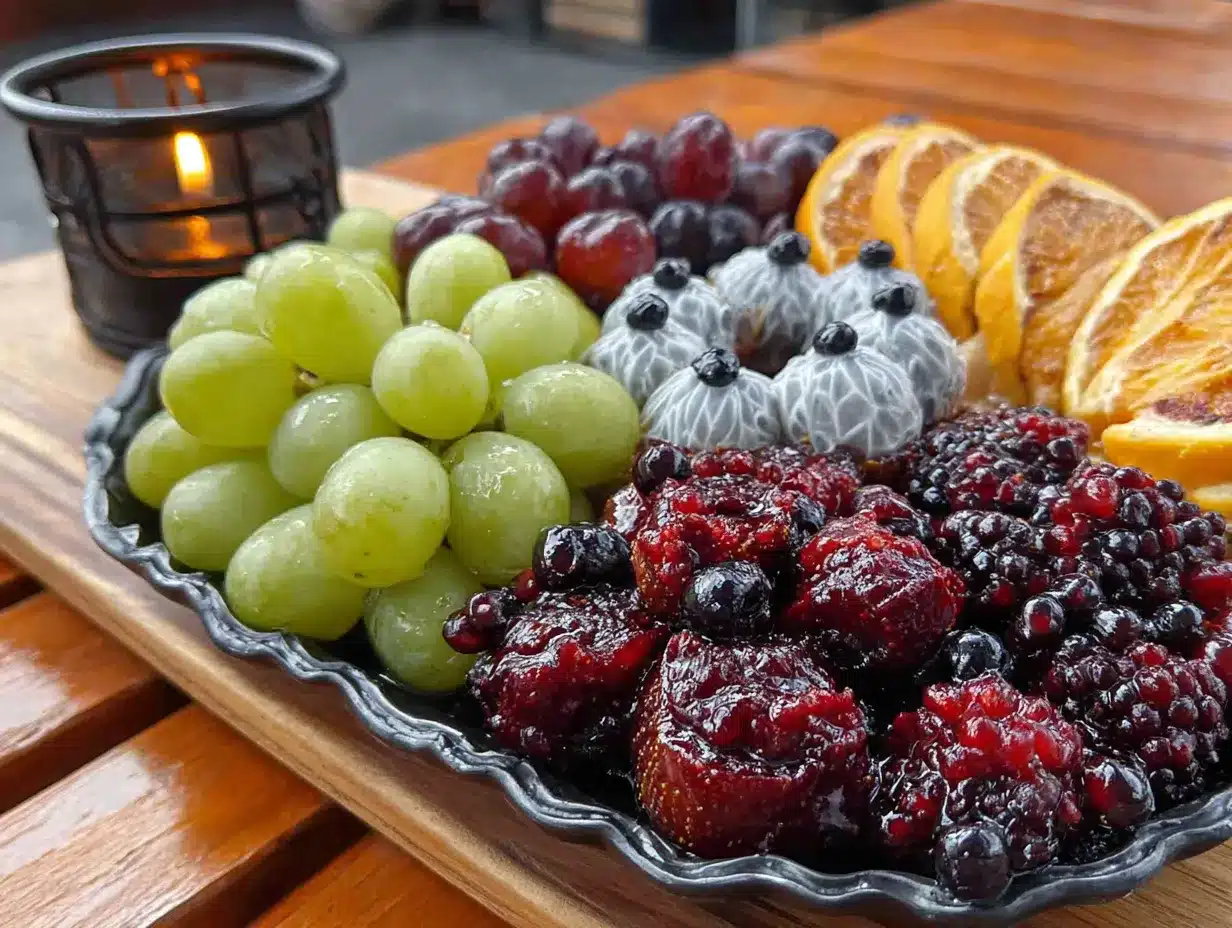
- Strawberry jam, 2 tablespoons (or raspberry—anything red and slightly chunky works; the seeds add to the gross-out factor)
- Honey, 1 tablespoon (for shine and stickiness; helps the “blood” look wet and fresh)
- Black decorating gel, 1 small tube (optional, but great for adding tiny pupil details if the blueberries aren’t cutting it)
For the Tray Base
- Large round platter or serving board, 1 (a white platter makes the colors pop, but any light-colored surface works)
- Fresh mint leaves, optional (for garnish—adds a nice green contrast and makes the tray look intentional)
- Black sesame seeds, 1 teaspoon (optional; sprinkle around the tray to look like dirt or creepy crawlies)
Ingredient Tips: I recommend using seedless green grapes for this. The seeds inside can look a bit weird when you bite into them, and we’re going for fun-weird, not actual-weird. For the cream cheese, let it sit out for about 30 minutes before you start. Cold cream cheese is impossible to pipe smoothly, and you’ll end up with lumpy eyeballs. Trust me on this one—I learned the hard way.
If you’re dairy-free, you can substitute the cream cheese with a dairy-free version, but the texture will be slightly softer. Add an extra tablespoon of powdered sugar to help it hold its shape. For a lower-sugar option, skip the powdered sugar altogether and use plain cream cheese—the grapes provide enough sweetness on their own.
Equipment Needed
You don’t need much for this recipe, which is part of the beauty. Here’s what I use every time:
- Large round platter or wooden board (at least 12 inches across; you need room for the eyeballs to spread out and look creepy)
- Piping bag or zip-top bag (a quart-size bag works perfectly; you’ll cut a small corner off to pipe the cream cheese)
- Small round piping tip (optional, but a Wilton #12 or similar gives you clean, round dollops; without it, the eyeballs look a bit messy—which honestly works for Halloween)
- Small offset spatula or butter knife (for spreading jam and smoothing cream cheese if needed)
- Toothpicks, 10-12 (for adding veins and detail work; also useful for holding blueberries in place)
- Small bowls, 2-3 (for holding your components while you assemble)
- Paper towels (grapes need to be completely dry for the cream cheese to stick; wet grapes = sliding eyeballs)
If you don’t have a piping bag, don’t stress. A zip-top bag with the corner snipped off works just as well. I’ve done it both ways, and honestly, the zip-top bag gives you more control for small details. The piping tip is nice but not necessary—I’ve made perfectly good eyeballs with just a snipped corner. Just make sure the hole isn’t too big, or you’ll get blobs instead of eyeballs.
Preparation Method
This is where the magic happens. Take your time with the assembly—rushing leads to smeared cream cheese and sad-looking eyeballs. I speak from experience.
- Prepare the grapes. Wash the green grapes thoroughly and pat them completely dry with paper towels. Any moisture on the surface will prevent the cream cheese from sticking, and you’ll end up with naked grapes. Remove any stems. You want each grape to be a smooth, round canvas. Set them aside on a paper towel-lined plate.
- Make the cream cheese mixture. In a small bowl, combine the softened cream cheese, powdered sugar, and vanilla extract. Stir until smooth and completely lump-free. This takes about 2 minutes of vigorous mixing. Taste it—it should be slightly sweet with a tangy finish. If it’s too tart for your liking, add another teaspoon of powdered sugar. Cover and refrigerate for 10 minutes to firm up slightly; this makes piping easier.
- Prepare the “blood” mixture. In another small bowl, mix the strawberry jam and honey together until well combined. The honey thins the jam slightly and adds a glossy, wet look. If the mixture is too thick, add a few drops of water. You want it to be spreadable but not runny—think the consistency of thin syrup.
- Set up your assembly station. Place your platter in the center of your work surface. Have your piping bag (or zip-top bag with cream cheese mixture), toothpicks, blueberries, and “blood” mixture within easy reach. This is a assembly-line situation—you don’t want to be reaching for things with sticky fingers.
- Pipe the cream cheese bases. Fill your piping bag with the cream cheese mixture. Snip a small corner (about 1/4 inch wide). On your platter, pipe small, round dollops of cream cheese—these will be the “whites” of the eyes. Make them about the size of a quarter, spaced about 2 inches apart. You should get about 20-24 dollops from the mixture. Don’t worry about perfection; the grapes will cover most of the cream cheese.
- Place the grapes. Gently press one green grape into each cream cheese dollop. The cream cheese should spread slightly around the base of the grape, holding it in place. If the grape wobbles, add a tiny bit more cream cheese underneath. Each grape should look like it’s sitting in a little white nest.
- Add the pupils. Take a blueberry and press it gently into the center of each grape. The blueberry should stick to the grape’s surface—if it doesn’t, dab a tiny bit of cream cheese on the blueberry first. Position the blueberry slightly off-center for a more “monster” look. Eyeballs that are perfectly centered look too normal. We want them to look unhinged.
- Create the blood vessels. Dip a toothpick into the strawberry jam mixture. Starting from the blueberry (pupil), drag the toothpick outward in thin, wavy lines toward the edges of the cream cheese. Think of veins radiating from the center. Make 3-4 veins per eyeball. Some should be thin, some slightly thicker. This is where the creepy factor really comes in—don’t be shy with the jam.
- Add the red food coloring details. Using a clean toothpick, add tiny dots of red food coloring gel around the edges of the cream cheese. These look like burst blood vessels. A little goes a long way—you want it to look gruesome, not like a craft project. Dab off any excess on a paper towel.
- Finish with shine. Using a clean finger or a small brush, gently dab a tiny bit of honey on the surface of each grape and blueberry. This gives them a wet, glossy “just plucked” look. It’s a small detail that makes a huge difference in photos.
- Garnish and serve. If using, scatter fresh mint leaves and black sesame seeds around the platter. The mint adds a pop of green that makes the red and white stand out more. Serve immediately, or refrigerate uncovered for up to 2 hours before serving. Do not cover with plastic wrap—it will smudge the cream cheese and ruin the veins.
Troubleshooting Tip: If your cream cheese mixture is too soft to pipe, pop it in the freezer for 5 minutes. If it’s too stiff, let it sit at room temperature for 10 minutes. The texture should be like thick frosting—spreadable but not runny. I’ve had batches go both ways, and the freezer trick has saved me more than once.
Cooking Tips & Techniques
I’ve made this tray about a dozen times now, and I’ve learned a few things the hard way. Let me save you the trouble.
The grape size matters more than you think. Large, round grapes make the best eyeballs. The small, oval ones look more like… well, small oval things. Not eyeballs. If your grocery store only has small grapes, consider using lychees or even large strawberries (cut flat on the bottom) as an alternative. I tried small grapes once, and the whole tray looked like a science experiment gone wrong.
Dry your grapes like your life depends on it. I cannot stress this enough. Wet grapes + cream cheese = sliding disaster. I pat each grape individually with a paper towel, then let them sit on a dry towel for 5 minutes before I start. It feels excessive, but it’s the difference between eyeballs that stay put and eyeballs that roll off the platter.
Work in batches. Don’t try to pipe all the cream cheese bases at once. Pipe 6-8, place the grapes, add the blueberries, then do the veins. The cream cheese starts to dry out if it sits too long, and dry cream cheese doesn’t hold the jam veins as well. I learned this when I tried to pre-make everything and ended up with cracked, sad-looking eyeballs.
Use a light touch with the jam. It’s tempting to go heavy on the “blood,” but too much jam makes the eyeballs look messy rather than creepy. Think of it like makeup—a little definition goes a long way. I use the tip of a toothpick and drag it gently. If you accidentally add too much, wipe it off with a clean toothpick and start over on that eyeball.
Timing is everything. This tray looks best within the first hour of assembly. After that, the grapes start to release moisture, and the cream cheese can get a bit slippery. If you’re making this for a party, assemble it no more than 2 hours before serving. Store it in the fridge uncovered—covering it creates condensation that ruins the veins.
One more thing: If you’re transporting this to a party, assemble the cream cheese bases and place the grapes at home, but add the blueberries and veins at the destination. The blueberries can shift during transport, and the veins will smudge. I learned this one when I arrived at a party with a platter of what looked like abstract art instead of eyeballs. Not my finest moment.
Variations & Adaptations
This recipe is surprisingly flexible. Here are some variations I’ve tried and loved:
The “Zombie” Version: Swap the green grapes for red grapes and use dark chocolate chips instead of blueberries for the pupils. The red grapes look like bloodshot eyes, and the dark chocolate adds a slightly sweet contrast. I made this for a friend’s zombie-themed party, and it was gone in 20 minutes. The chocolate chips also hold up better in warm weather—blueberries can get soft and leak juice.
The “Alien” Version: Use white grapes instead of green, and swap the strawberry jam for a mixture of honey and matcha powder (for a green “blood”). Add tiny dots of black decorating gel around the edges for an otherworldly look. This one is weirdly beautiful—the green against the white grapes looks almost ethereal. My niece called them “space eyeballs,” and the name stuck.
The Dairy-Free Version: Substitute the cream cheese with a dairy-free alternative like Kite Hill or Miyoko’s. The texture will be slightly softer, so add an extra tablespoon of powdered sugar to help it firm up. You can also use coconut cream (the solid part from a can of full-fat coconut milk) whipped with a bit of powdered sugar. It’s not as stable, but it works for a quick version.
The “Bloody” Upgrade: For a more intense “gore” effect, mix a few drops of red food coloring into the strawberry jam mixture. This creates a brighter, more artificial-looking red that stands out better against the cream cheese. I did this for a Halloween party where the lighting was dim, and the eyeballs practically glowed. Just be careful—the food coloring can stain fabric and countertops.
The Kid-Friendly Version: Skip the red food coloring and use only the strawberry jam for the veins. Some kids (and adults, honestly) find the food coloring a bit intense. The jam alone gives a milder, more cartoonish look that’s still fun but less “horror movie.” I’ve made this version for school parties, and it’s always a hit.
Serving & Storage Suggestions
This tray is best served cold, straight from the fridge. The cream cheese firms up nicely when chilled, and the grapes are refreshingly crisp. I like to set the platter out about 10 minutes before serving to take the edge off the chill, but no longer—the condensation can make the veins run.
What to serve alongside: This fruit tray pairs beautifully with other Halloween-themed snacks. I usually set it next to a bowl of popcorn “monster fingers” (popcorn tossed with melted white chocolate and orange food coloring) and a plate of “witch’s broomsticks” (pretzel sticks with cheese strings tied at the top). The contrast of sweet and savory keeps people coming back. For drinks, a sparkling apple cider or a batch of “witches’ brew” punch (lemonade with green food coloring and dry ice) completes the theme.
Storage: Leftover eyeballs can be stored in an airtight container in the refrigerator for up to 2 days. The cream cheese will soften slightly, and the grapes may release some moisture, but they’re still perfectly edible. I don’t recommend freezing—the texture of the grapes becomes mushy when thawed, and the cream cheese separates.
Reheating: There’s no reheating involved here, but if you’ve stored the tray and the cream cheese has softened, pop the eyeballs in the fridge for 15 minutes before serving. They firm up nicely. If the grapes have gotten a bit wrinkled, toss them—they won’t look right.
Flavor development: Honestly, this tray is best the day it’s made. The flavors don’t really “develop” in a meaningful way, but the presentation does suffer over time. If you’re making it ahead, prep all the components separately and assemble just before serving. The cream cheese mixture can be made up to 3 days in advance and stored in the fridge. The grapes can be washed and dried the night before. Just keep everything separate until you’re ready to put it together.
Nutritional Information & Benefits
Per serving (about 4-5 eyeballs):
- Calories: 145
- Fat: 8g
- Carbohydrates: 18g
- Fiber: 1g
- Sugar: 14g
- Protein: 3g
Health Benefits: Despite looking like something from a horror movie, this tray is actually pretty healthy. Grapes are packed with antioxidants, particularly resveratrol, which supports heart health. Blueberries are a powerhouse of vitamin C and fiber. The cream cheese provides a small amount of calcium and protein. Even the honey has antibacterial properties. It’s a treat that feels indulgent but is mostly just fruit with a bit of creamy goodness.
Dietary Considerations: This recipe is naturally vegetarian. For a gluten-free version, just ensure your food coloring and jam are certified gluten-free (most are, but it’s worth checking). The dairy-free substitution mentioned above works well for those avoiding dairy. It’s not suitable for vegans in its original form, but the dairy-free version with coconut cream is vegan-friendly.
Potential Allergens: Dairy (cream cheese). The blueberries and grapes are generally safe, but always check for cross-contamination if allergies are a concern. The food coloring is typically allergen-free, but some brands may contain soy or corn derivatives.
I personally love that this recipe lets me offer something fun and festive that doesn’t derail anyone’s healthy eating goals. It’s the kind of snack that feels like a cheat but isn’t. Perfect for Halloween when you’re surrounded by candy and sugar cookies.
Conclusion
Look, I’m not going to tell you this fruit tray will change your life. But it might change your Halloween party. It’s silly, it’s simple, and it’s surprisingly satisfying to watch people’s faces when they realize what they’re looking at. The best recipes don’t have to be complicated—they just have to be memorable.
This one stuck with me because it proves that you don’t need a culinary degree or a specialty store to create something that feels special. Fifteen minutes, a few ingredients, and a little bit of creativity. That’s all it takes to turn a bowl of grapes into the talk of the party. And honestly? That’s the kind of cooking I love most.
So go ahead and make this for your next Halloween gathering. Customize it, make it your own, add your own creepy touches. Maybe your version will have “zombie” red grapes, or “alien” white grapes, or something I haven’t even thought of yet. That’s the beauty of a recipe like this—it’s a starting point, not a rulebook.
I’d love to hear how yours turns out. Drop a comment below and tell me about the faces your guests made. Did anyone scream? Did anyone refuse to eat the “eyeballs”? Did anyone, like my sister, get caught sneaking thirds? Share your photos, your stories, your variations. Let’s make this the Halloween recipe that keeps on giving.
Happy Halloween, and happy snacking. You’ve got this.
Frequently Asked Questions
Can I make this fruit tray the night before?
I wouldn’t recommend assembling it fully the night before. The grapes release moisture, and the cream cheese can become watery. Instead, prep all the components—wash and dry the grapes, make the cream cheese mixture, mix the jam—and store them separately. Assemble the tray no more than 2 hours before serving for the best results.
What if I can’t find green grapes?
Red grapes work perfectly fine, though they give a slightly different look. The “eyeballs” will appear more bloodshot, which actually works well for a zombie theme. You can also use large strawberries (cut flat on the bottom) or even lychees for a more exotic version. Just adjust the size of your cream cheese bases accordingly.
How do I keep the blueberries from falling off?
Dab a tiny bit of cream cheese on the bottom of each blueberry before pressing it onto the grape. This acts like glue and holds it in place. Make sure the grape is completely dry, too—moisture is the enemy of adhesion. If you’re transporting the tray, add the blueberries at the destination to avoid shifting.
Can I use something other than cream cheese?
Absolutely. For a dairy-free option, use a dairy-free cream cheese alternative or whipped coconut cream (the solid part from a can of full-fat coconut milk). For a lower-fat option, Greek yogurt mixed with a bit of powdered sugar works, but it’s thinner and won’t hold its shape as well. I’ve also seen versions using marshmallow fluff, but that’s much sweeter and less stable.
How many people does this tray serve?
This recipe makes about 20-24 eyeballs, which serves 4-6 people as a snack. If you’re serving it at a party with other dishes, it’ll stretch to 8-10 people. For a larger crowd, simply double the recipe and use a bigger platter. I’ve made a triple batch for a big Halloween party, and it was gone within an hour.
Pin This Recipe!
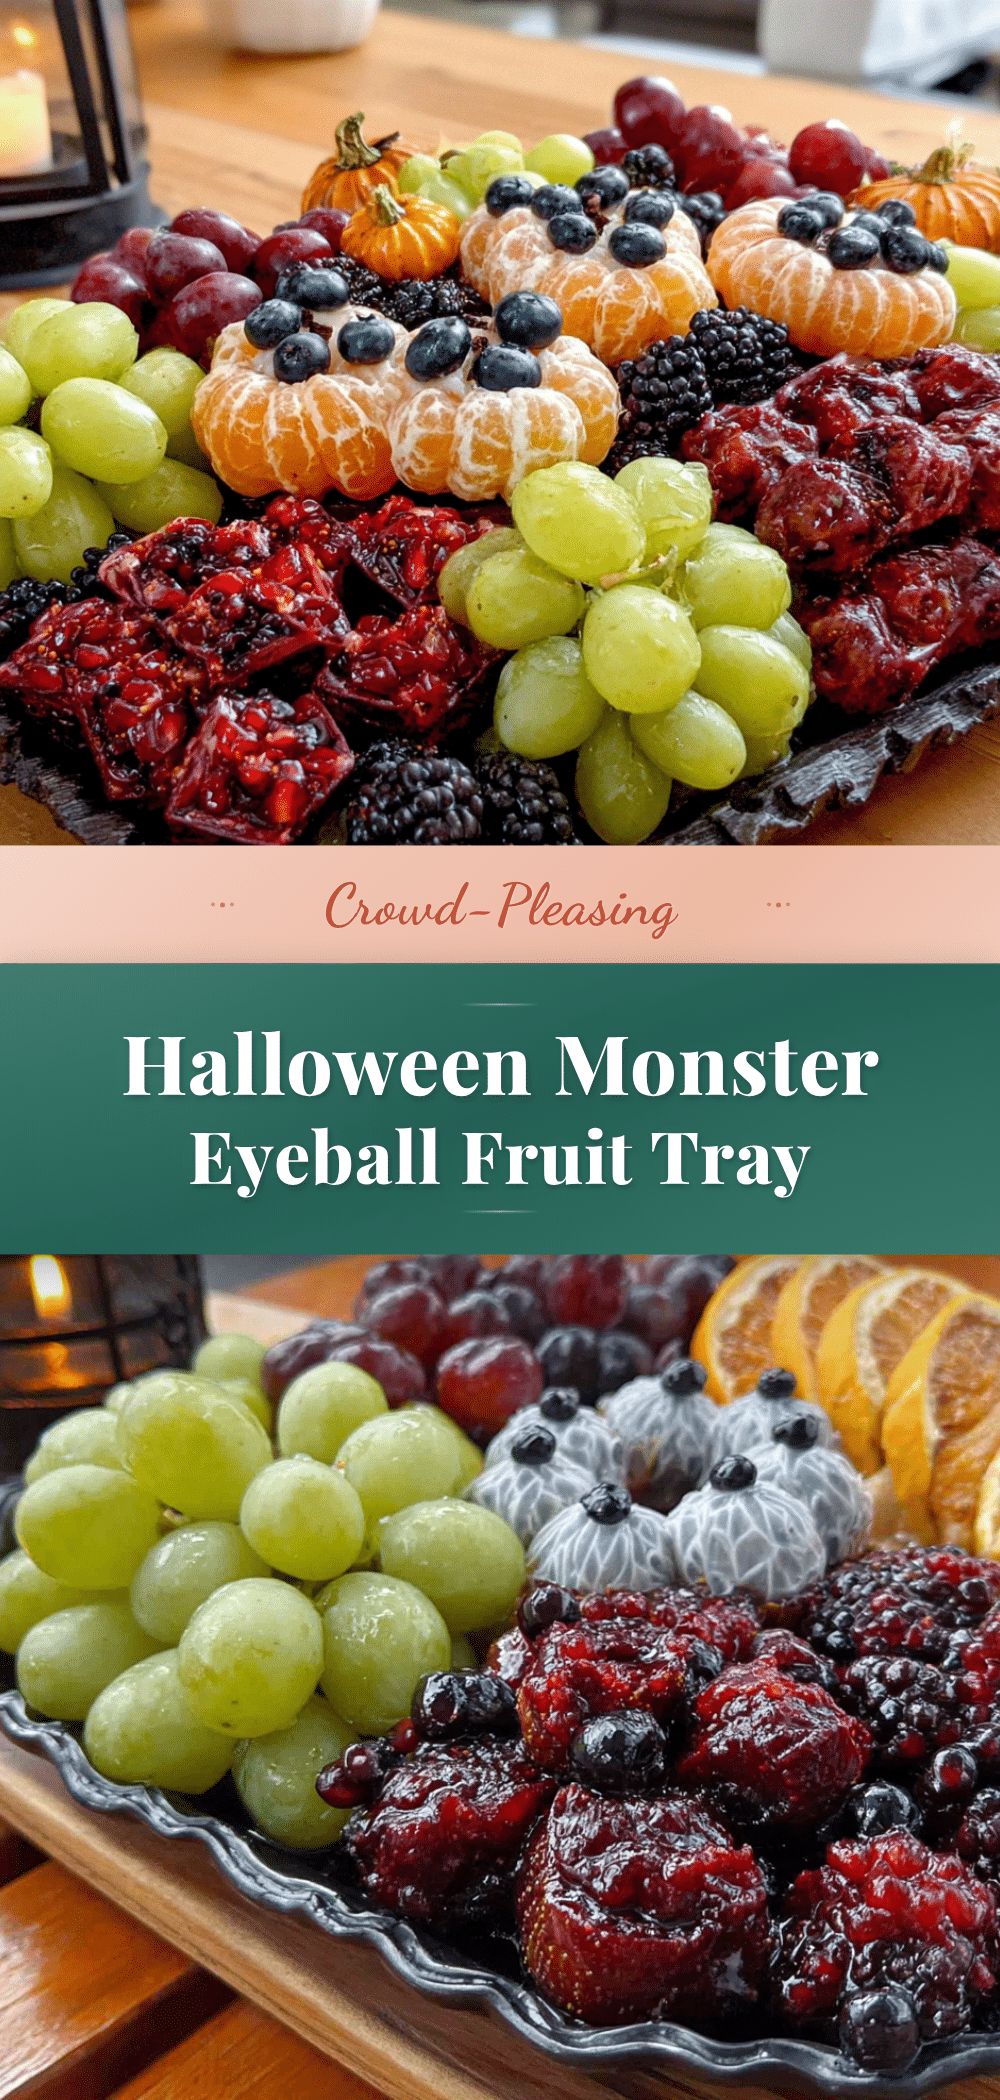
Best Easy Halloween Monster Eyeball Fruit Tray Recipe
A fun and spooky Halloween fruit tray that looks like monster eyeballs. Made with green grapes, cream cheese, and blueberries, this quick and easy recipe is perfect for parties and will have everyone talking.
- Prep Time: 15 minutes
- Cook Time: 0 minutes
- Total Time: 15 minutes
- Yield: 4-6 servings
- Category: Appetizer
- Cuisine: American
Ingredients
- Green grapes, 2 cups
- Cream cheese, 8 ounces, softened
- Powdered sugar, 2 tablespoons
- Vanilla extract, 1/2 teaspoon
- Blueberries, 1/2 cup
- Red food coloring gel, 1 small tube
- Strawberry jam, 2 tablespoons
- Honey, 1 tablespoon
- Black decorating gel, 1 small tube (optional)
- Fresh mint leaves, optional for garnish
- Black sesame seeds, 1 teaspoon (optional)
Instructions
- Wash the green grapes thoroughly and pat them completely dry with paper towels. Remove any stems. Set aside on a paper towel-lined plate.
- In a small bowl, combine the softened cream cheese, powdered sugar, and vanilla extract. Stir until smooth and lump-free. Refrigerate for 10 minutes to firm up slightly.
- In another small bowl, mix the strawberry jam and honey together until well combined. Set aside.
- Place your platter in the center of your work surface. Have your piping bag (or zip-top bag with cream cheese mixture), toothpicks, blueberries, and ‘blood’ mixture within easy reach.
- Fill a piping bag with the cream cheese mixture. Snip a small corner (about 1/4 inch wide). On the platter, pipe small, round dollops of cream cheese (about the size of a quarter), spaced about 2 inches apart. You should get about 20-24 dollops.
- Gently press one green grape into each cream cheese dollop. The cream cheese should spread slightly around the base of the grape, holding it in place.
- Take a blueberry and press it gently into the center of each grape. Position the blueberry slightly off-center for a more ‘monster’ look.
- Dip a toothpick into the strawberry jam mixture. Starting from the blueberry (pupil), drag the toothpick outward in thin, wavy lines toward the edges of the cream cheese. Make 3-4 veins per eyeball.
- Using a clean toothpick, add tiny dots of red food coloring gel around the edges of the cream cheese to look like burst blood vessels.
- Using a clean finger or a small brush, gently dab a tiny bit of honey on the surface of each grape and blueberry for a glossy look.
- If using, scatter fresh mint leaves and black sesame seeds around the platter. Serve immediately, or refrigerate uncovered for up to 2 hours before serving.
Notes
For best results, assemble no more than 2 hours before serving. Keep grapes completely dry for cream cheese to stick. If transporting, add blueberries and veins at the destination. For dairy-free, use dairy-free cream cheese or whipped coconut cream.
Nutrition
- Serving Size: 4-5 eyeballs
- Calories: 145
- Sugar: 14
- Sodium: 90
- Fat: 8
- Saturated Fat: 5
- Carbohydrates: 18
- Fiber: 1
- Protein: 3
Keywords: Halloween, fruit tray, monster eyeballs, spooky, party snack, easy, no-bake


