My sister-in-law wasn’t trying to impress me. Let me be clear about that. I’d stopped by her place on a random Tuesday in October to drop off a pie plate I’d borrowed, and the smell hit me before I even got the screen door open. It wasn’t pumpkin pie — I know that scent. It was something deeper, warmer, with a hint of ginger that made me stop mid-step on her porch. She was in the kitchen, casually wiping down the counter like she hadn’t just created something that smelled like autumn had decided to move in permanently.
“Oh, those are just no-bake pumpkin cheesecake bars,” she said when I asked, barely looking up from her sponge. “Made them for the book club thing tonight.”
Just. No-bake pumpkin cheesecake bars. Like it was nothing. Like she hadn’t just invented a dessert that made me forget why I’d even come over in the first place. I stood there holding that pie plate, honestly a little offended by her casualness. These bars were sitting in her fridge, perfectly chilled, with this gorgeous creamy top layer that had set up like a dream. And she was acting like she’d made toast.
She cut me a piece — okay, maybe two pieces — and I sat at her kitchen island watching her finish prepping for book club. The first bite was one of those moments where you close your eyes without meaning to. The crust had this buttery snap, and the filling was so smooth and rich it almost felt like a cheat. The pumpkin wasn’t overpowering, just present enough to remind you it’s fall. And the spices? Let’s just say she’d nailed the balance better than any bakery pumpkin cheesecake I’d ever paid too much money for.
Maybe you’ve been there — standing in someone else’s kitchen, eating something so good it makes you a little mad that you didn’t make it yourself. That’s exactly how these easy no-bake pumpkin cheesecake bars made me feel. I asked for the recipe before I left, and she texted it to me that night with a single instruction: “Don’t overthink it.”
She was right. That’s the whole point of these bars.
Why You’ll Love This Recipe
Look, I’ve tested a lot of pumpkin desserts over the years. Some are fussy. Some require equipment you don’t own. Some taste great but take three hours of active kitchen time. These easy no-bake pumpkin cheesecake bars are none of those things. They are the dessert you bring to a dinner party when you want everyone to think you spent way more effort than you actually did. And honestly? That’s a beautiful thing.
- No Oven Required: Your oven can stay cold. These bars set up in the fridge, which means you’re not competing for oven space when you’re already roasting a turkey or baking side dishes for a crowd.
- Make-Ahead Magic: You can assemble these a full day before your gathering. The filling actually gets better after 12 hours in the fridge — the flavors meld together and the texture firms up perfectly.
- Simple Pantry Ingredients: Cream cheese, pumpkin puree, graham crackers, butter, sugar, and fall spices. That’s it. No weird specialty items that cost twelve dollars and then sit in your cabinet for two years.
- Crowd-Pleaser Guaranteed: I’ve brought these to Friendsgiving, Thanksgiving, potlucks, and casual weekend dinners. They disappear. Every single time. Kids love them, adults love them, and people who claim they “don’t like pumpkin desserts” have been converted at my kitchen table.
- Stress-Free Hosting: When you’re hosting, you need dishes that don’t demand attention during the party. These bars sit pretty in your fridge until dessert time. Slice them on a platter, add a dollop of whipped cream, and you look like a hero with zero last-minute chaos.
What makes these different from other pumpkin cheesecake recipes? It’s the texture. A lot of no-bake cheesecakes turn out too soft or grainy. This one sets up firm enough to slice cleanly but stays luxuriously creamy on the tongue. The secret is in how you handle the cream cheese — room temperature, beaten until truly smooth, no shortcuts. I learned that the hard way after a few lumpy batches that shall not be discussed further.
These bars are the kind of dessert that makes people close their eyes on the first bite. And as a host, that’s exactly the reaction you want across your table.
What Ingredients You Will Need
This recipe keeps things refreshingly simple. You don’t need a specialty grocery run or a cart full of exotic spices. Here’s what you’ll grab, along with a few notes I’ve picked up from making these bars more times than I can count.
For the Crust
- 2 cups graham cracker crumbs (about 14-16 full sheets, crushed finely) — You can buy pre-crushed crumbs in a box, but honestly, crushing your own in a zip-top bag with a rolling pin gives you a better texture. It’s oddly satisfying too.
- 1/2 cup unsalted butter, melted — Salted butter works in a pinch, just reduce any added salt elsewhere. I use Land O’Lakes because it’s consistent and widely available.
- 1/4 cup granulated sugar — This adds just enough sweetness to balance the buttery graham flavor.
- 1/4 teaspoon salt — Don’t skip this. Salt makes the crust taste like more than just sweet crumbs.
For the Pumpkin Cheesecake Filling
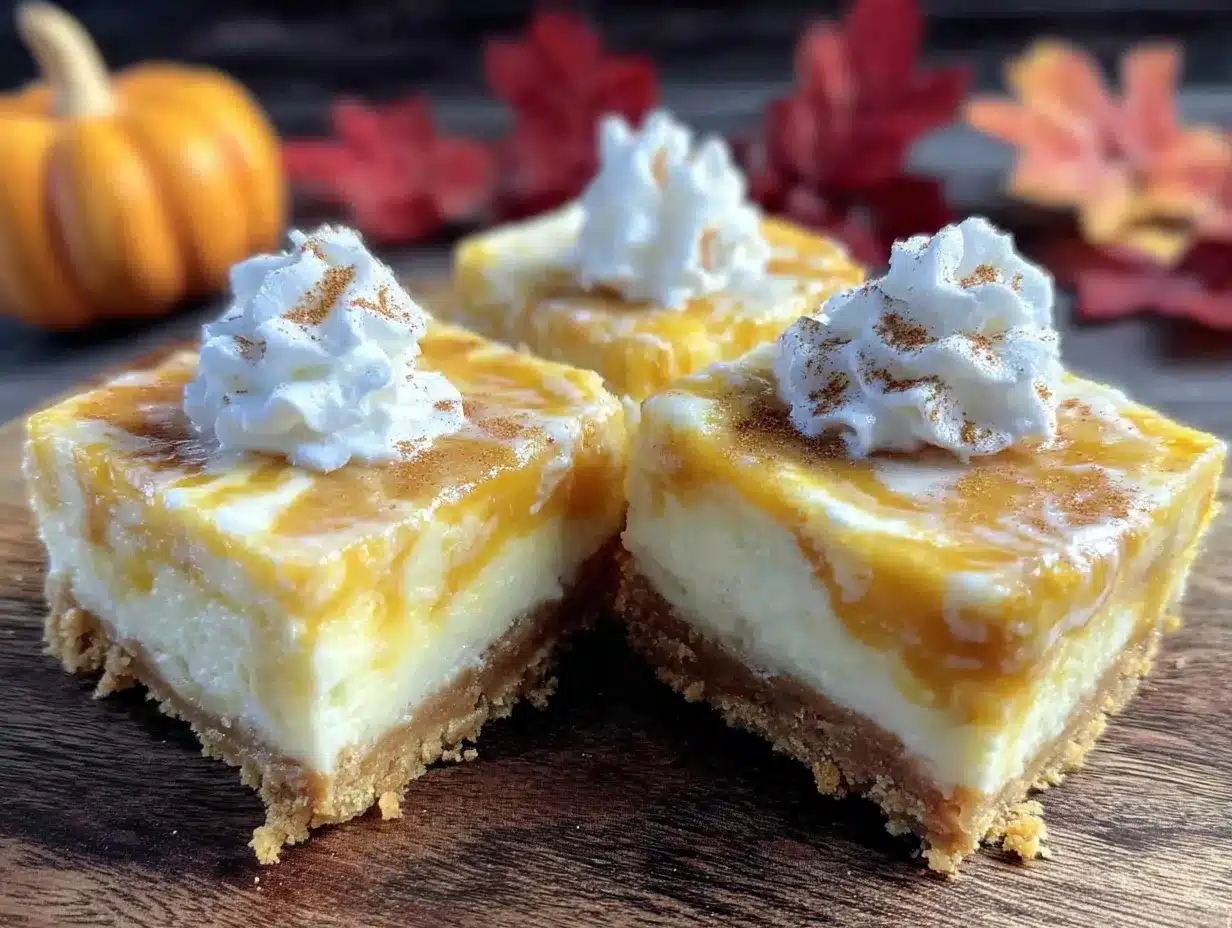
- 16 ounces cream cheese, softened to room temperature — This is non-negotiable. Cold cream cheese creates lumps that no amount of mixing will fully fix. Let it sit on the counter for at least an hour. Philadelphia brand gives the creamiest results in my experience.
- 1 cup pumpkin puree — Not pumpkin pie filling. They’re different. Pumpkin puree is just pumpkin. Pie filling has sugar and spices already added, and it will throw off the whole recipe. Libby’s is my go-to.
- 1/2 cup granulated sugar
- 1/4 cup packed light brown sugar — Brown sugar adds a subtle molasses depth that pairs beautifully with pumpkin and fall spices.
- 1 teaspoon vanilla extract — Pure vanilla extract makes a difference. Imitation works, but pure is worth the splurge here.
- 1 1/2 teaspoons pumpkin pie spice — If you don’t have this, mix 3/4 teaspoon cinnamon, 1/4 teaspoon nutmeg, 1/4 teaspoon ginger, and 1/8 teaspoon cloves. I sometimes add an extra pinch of cinnamon because I’m biased that way.
- 1/2 teaspoon ground cinnamon — For extra warmth.
- 1 cup heavy whipping cream — This gets whipped to stiff peaks and folded into the cream cheese mixture. It’s what gives these bars their light, mousse-like texture instead of being dense and heavy.
For the Topping (Optional but Recommended)
- 1 cup heavy whipping cream
- 2 tablespoons powdered sugar
- 1/2 teaspoon vanilla extract
- Ground cinnamon or pumpkin pie spice for dusting
- Caramel sauce for drizzling — Store-bought is fine. Warm it slightly so it drizzles beautifully.
Equipment Needed
You don’t need a professional bakery setup for these easy no-bake pumpkin cheesecake bars. Here’s what you’ll actually use:
- 9×9-inch square baking pan — This size gives you nice thick bars. An 8×8 works too, but your bars will be slightly taller and you might need to adjust chilling time by an hour.
- Parchment paper — Line your pan with two overlapping strips that hang over the sides. This creates “handles” that let you lift the entire block of cheesecake out cleanly for slicing. Trust me on this one.
- Electric hand mixer or stand mixer — You need power to get that cream cheese truly smooth. Whisking by hand is possible but your arm will hate you.
- Mixing bowls — One large, one medium.
- Food processor or zip-top bag and rolling pin — For crushing graham crackers. The food processor is faster and gives more even crumbs.
- Rubber spatula — For folding the whipped cream into the cream cheese mixture gently.
- Plastic wrap or foil — For covering the pan while it chills.
If you don’t have a 9×9 pan, a 9-inch round springform pan works beautifully and makes for a pretty presentation. Just note that the bars will be cut into wedges instead of squares. I’ve used both and honestly prefer the square bars for parties — they’re easier for guests to grab and eat standing up.
Preparation Method
Let me walk you through this step by step. I’ve made these bars at least two dozen times, so I’ll tell you exactly what to watch for at each stage.
- Prepare your pan. Cut two long strips of parchment paper and lay them crosswise in your 9×9 pan, leaving overhang on all sides. This seems fussy now, but when you lift the entire block of cheesecake out later without any sticking or breaking, you’ll thank me. Lightly grease the parchment with butter or non-stick spray so the crust doesn’t stick.
- Make the crust. In a medium bowl, combine 2 cups graham cracker crumbs, 1/4 cup granulated sugar, and 1/4 teaspoon salt. Pour in 1/2 cup melted butter and stir with a fork until every crumb is moistened. The mixture should look like wet sand and hold together when you squeeze it in your fist. If it crumbles apart, add another tablespoon of melted butter.
- Press the crust. Dump the crumb mixture into your prepared pan. Use the bottom of a measuring cup or a flat glass to press it down firmly and evenly. Don’t just pat it with your fingers — really compress it. A loose crust will fall apart when you cut the bars. Press it firmly into the corners and make sure the surface is level. Pop this in the fridge while you make the filling.
- Soften the cream cheese. This is where people mess up. Your cream cheese needs to be at genuine room temperature — not cold, not microwaved. Cut it into cubes and let it sit on the counter for 60-90 minutes. If you’re in a rush, you can microwave it at 50% power in 10-second bursts, but honestly, patience gives better results.
- Beat the cream cheese. In a large bowl, beat the softened cream cheese with an electric mixer on medium speed until completely smooth — about 2 minutes. Scrape down the bowl and beaters halfway through. There should be zero lumps. This is the foundation of your filling, so take your time.
- Add the sugars and pumpkin. Add 1/2 cup granulated sugar and 1/4 cup packed brown sugar. Beat until combined and smooth. Then add 1 cup pumpkin puree, 1 teaspoon vanilla, 1 1/2 teaspoons pumpkin pie spice, and 1/2 teaspoon cinnamon. Beat on medium until everything is thoroughly incorporated and the mixture looks uniform and creamy. Scrape the bowl well.
- Whip the cream. In a separate medium bowl, pour 1 cup cold heavy whipping cream. Using clean beaters, whip on high speed until stiff peaks form. You’re looking for peaks that hold their shape when you lift the beaters — not soft and droopy, but not butter either. This usually takes 3-4 minutes. Stop when the cream looks billowy and stands up firmly.
- Fold, don’t stir. Add about one-third of the whipped cream to the pumpkin-cream cheese mixture. Fold it in gently with a rubber spatula — cut down through the center, scrape along the bottom, and bring it up over the top. Rotate the bowl as you go. Once that’s mostly incorporated, add the remaining whipped cream and fold until no white streaks remain. The mixture should be light, airy, and uniform in color. Be gentle here. Over-mixing deflates the air and makes the bars dense.
- Spread the filling. Spoon the filling over your chilled crust. Use an offset spatula or the back of a spoon to spread it evenly to the edges. Give the pan a few gentle taps on the counter to release any air bubbles.
- Chill thoroughly. Cover the pan with plastic wrap and refrigerate for at least 6 hours, but overnight is better. I know 6 hours feels like forever, but this is a no-bake cheesecake — it sets through chilling, not baking. Rushing this step gives you a soft, sliceable-at-best situation instead of clean, firm bars.
- Make the whipped topping (optional but highly recommended). When you’re ready to serve, whip 1 cup cold heavy cream with 2 tablespoons powdered sugar and 1/2 teaspoon vanilla until soft peaks form. Spread or pipe this over the chilled cheesecake layer, or serve it on the side for guests to add themselves.
- Slice and serve. Lift the cheesecake out of the pan using the parchment handles. Use a sharp chef’s knife to cut into 9 or 16 bars — wipe the blade clean between cuts for the prettiest edges. Dust with cinnamon or pumpkin pie spice, drizzle with caramel sauce, and watch them disappear.
Cooking Tips & Techniques
I’ve learned a few things the hard way so you don’t have to. Here are the tips that make these easy no-bake pumpkin cheesecake bars turn out perfect every time.
Room temperature cream cheese isn’t optional. I know I’ve said this already, but let me tell you about the time I was in a hurry and used cream cheese that was still cool to the touch. The filling came out lumpy no matter how long I beat it. The lumps weren’t visible in the finished bars, but you could feel them on your tongue. Not ideal when you’re serving dessert to eight people. Set it out early. Set a timer if you have to.
Chill your bowl and beaters for the whipped cream. Stick your metal mixing bowl and beaters in the freezer for 10 minutes before whipping the cream. Cold equipment helps the cream whip faster and hold its shape longer. On a warm day, this can be the difference between perfect peaks and cream that never quite firms up.
Don’t over-whip the cream. Stiff peaks are your goal. If you push past that, you’ll get grainy butter chunks floating in liquid. I’ve done this exactly once and it was heartbreaking. Watch the cream carefully in the last minute — it goes from soft peaks to stiff peaks quickly.
Use a hot knife for clean slices. Run your knife under hot water, dry it off, then make your cut. Wipe the blade clean and repeat for each slice. This gives you those gorgeous, Instagram-worthy bars with perfectly smooth edges. I learned this from a pastry chef friend and it changed my slicing game completely.
Plan your timing for hosting. These bars need at least 6 hours to set, but they actually taste better after 12-24 hours. The spices meld with the cream cheese and the texture firms up to perfection. Make them the day before your party. Your future self will be so grateful.
If your filling seems too soft after folding, don’t panic. It should be thick but spreadable — think mousse consistency. If it’s genuinely runny, your cream might not have been whipped enough, or your cream cheese was too soft. Pop the bowl in the fridge for 20 minutes and it will firm up enough to spread.
Variations & Adaptations
One of the best things about this recipe is how flexible it is. Here are some variations I’ve tried and loved.
Gluten-Free Version: Swap the graham cracker crumbs for gluten-free graham crackers or use crushed gluten-free shortbread cookies. The texture is slightly different but still delicious. I’ve also used crushed gluten-free vanilla wafers with great results.
Dairy-Free Adaptation: Use dairy-free cream cheese (Kite Hill or Tofutti work well) and coconut cream instead of heavy whipping cream. Chill the can of coconut cream overnight and scoop only the solid white part — not the liquid. The flavor is slightly different but still creamy and satisfying. I made this for a friend with dairy sensitivity and she asked for the recipe twice.
Gingersnap Crust: Replace half the graham cracker crumbs with crushed gingersnap cookies. The molasses and ginger in the cookies add another layer of fall flavor that pairs beautifully with the pumpkin filling. This is my personal favorite variation for Thanksgiving.
Pumpkin Chocolate Swirl: Melt 1/4 cup semi-sweet chocolate chips and drizzle it into the filling before chilling. Use a knife to gently swirl it through — don’t overmix or you’ll lose the marbled effect. The chocolate adds a richness that feels extra special for holiday gatherings.
Mini Bar Bites: Press the crust into a mini muffin tin lined with paper liners, fill with the cheesecake mixture, and chill for 4 hours. These bite-sized versions are perfect for parties where guests are grazing. You’ll get about 24-30 mini bars from one batch.
Maple Pecan Twist: Add 2 tablespoons maple syrup to the filling and top the finished bars with toasted pecans and a drizzle of maple glaze. This variation feels incredibly fancy but takes almost no extra effort.
Serving & Storage Suggestions
These easy no-bake pumpkin cheesecake bars are designed with hosting in mind. Here’s how to serve them like a pro and keep leftovers (if there are any).
Serving Temperature: Serve these bars cold, straight from the fridge. They firm up beautifully when chilled and soften too much if left at room temperature for more than 30 minutes. If you’re serving them at a party, keep the platter chilled or set it on a bed of ice.
Presentation Tips: Arrange the sliced bars on a white platter for maximum visual contrast. Dust lightly with cinnamon or pumpkin pie spice using a fine-mesh sieve. Add a small bowl of whipped cream on the side so guests can add their own. A drizzle of caramel sauce across the top of each bar makes them look bakery-level beautiful.
What to Serve Alongside: These bars pair beautifully with hot coffee, spiced apple cider, or a warm chai latte. For a dessert spread, serve them alongside apple crisp, pecan pie bars, or a simple vanilla panna cotta. They also work wonderfully as the dessert after a heavy meal — the lightness of the no-bake texture is refreshing after turkey and stuffing.
Storage Instructions: Store leftover bars in an airtight container in the refrigerator for up to 5 days. Place a sheet of parchment paper between layers if you’re stacking them. The bars actually taste even better on day two as the flavors continue to meld.
Freezing Instructions: These bars freeze exceptionally well. Freeze the entire block (without whipped topping) wrapped tightly in plastic wrap and then foil, for up to 3 months. Thaw overnight in the refrigerator before adding the whipped cream and slicing. You can also freeze individual bars wrapped in plastic wrap for grab-and-go desserts.
Reheating Note: Don’t warm these up. They’re meant to be served cold. If you prefer a softer texture, let them sit at room temperature for 10 minutes before serving — but no longer.
Nutritional Information & Benefits
These easy no-bake pumpkin cheesecake bars are a dessert, so let’s be real about that. But they do have some redeeming qualities worth mentioning.
Estimated Nutritional Values (per bar, based on 9 servings):
- Calories: approximately 420-450
- Fat: 32g
- Carbohydrates: 34g
- Protein: 5g
- Fiber: 1g
- Sugar: 24g
Health Highlights: Pumpkin puree is packed with vitamin A (over 200% of your daily needs in just one cup), fiber, and antioxidants. It’s also low in calories and adds natural moisture and richness to the filling without requiring eggs or heavy cream in large quantities. The cream cheese provides calcium and protein, while the spices — cinnamon, ginger, nutmeg — have anti-inflammatory properties.
Dietary Considerations: This recipe contains dairy and gluten. For a gluten-free version, use gluten-free graham crackers. For a dairy-free version, use dairy-free cream cheese and coconut cream as noted in the variations section. This recipe is naturally egg-free and can be made nut-free by checking your graham cracker labels.
Portion Perspective: These bars are rich and satisfying. A 9×9 pan serves 9 generous portions or 16 smaller ones. If you’re watching your sugar intake, the smaller portion is plenty to satisfy a sweet craving without overdoing it. I usually cut 16 bars for parties and nobody has ever complained about the portion size.
Conclusion
These easy no-bake pumpkin cheesecake bars have become my signature fall dessert, and I’m not even sorry about it. Every time I bring them somewhere, someone asks for the recipe. Every time I serve them at my own table, I watch people take a second bar before they’ve finished the first. There’s something deeply satisfying about a dessert that delivers this much flavor and texture without requiring you to turn on the oven or stress about timing.
The best part? You can make them your own. Add more cinnamon if that’s your thing. Swap the crust. Drizzle with caramel or chocolate. Serve them plain with just a dusting of spice. The base recipe is forgiving and flexible, which is exactly what you want when you’re cooking for a crowd.
I’d love to hear how these turn out for you. Did you try a variation? Did your guests go back for seconds? Drop a comment below and let me know — I read every single one and I genuinely love hearing about your kitchen wins. And if you’re looking for more fall dessert ideas, don’t miss my crispy garlic chicken for a savory option that balances out all that sweetness.
Go make these bars. Your fall gathering deserves them.
Frequently Asked Questions
Can I use pumpkin pie filling instead of pumpkin puree?
No, please don’t. Pumpkin pie filling already has sugar and spices added, which will throw off the sweetness and spice balance of this recipe. Stick with 100% pure pumpkin puree for the best results. Libby’s is my preferred brand and it’s available year-round at most grocery stores.
How far in advance can I make these bars?
You can make these bars up to 2 days before serving. In fact, they taste better after 24 hours in the fridge because the flavors have time to meld together. Just wait to add the whipped cream topping until the day you’re serving them — it holds up better that way.
My cheesecake filling seems too soft. What went wrong?
This usually happens for one of three reasons: your cream wasn’t whipped to stiff peaks, your cream cheese wasn’t fully softened, or you didn’t chill the bars long enough. If you’ve already assembled the bars and they seem soft, just give them more time in the fridge — at least 8 hours, preferably overnight. If they’re still soft after that, the issue was likely the cream not being whipped enough.
Can I double this recipe for a larger crowd?
Absolutely. Double all the ingredients and use a 9×13-inch baking pan. The chilling time stays the same. You’ll get about 18-24 bars depending on how you cut them. This is my go-to for Thanksgiving when I’m feeding a crowd and want to make sure there’s enough for leftovers.
How do I get clean, neat slices without the bars falling apart?
Use a sharp chef’s knife and run it under hot water between each cut. Dry the blade and make a single clean cut — don’t saw back and forth. Wipe the blade clean, reheat it, and make the next cut. This gives you those beautiful, bakery-style edges. Also, make sure your bars have chilled for the full 6 hours minimum. Patience pays off here.
Pin This Recipe!
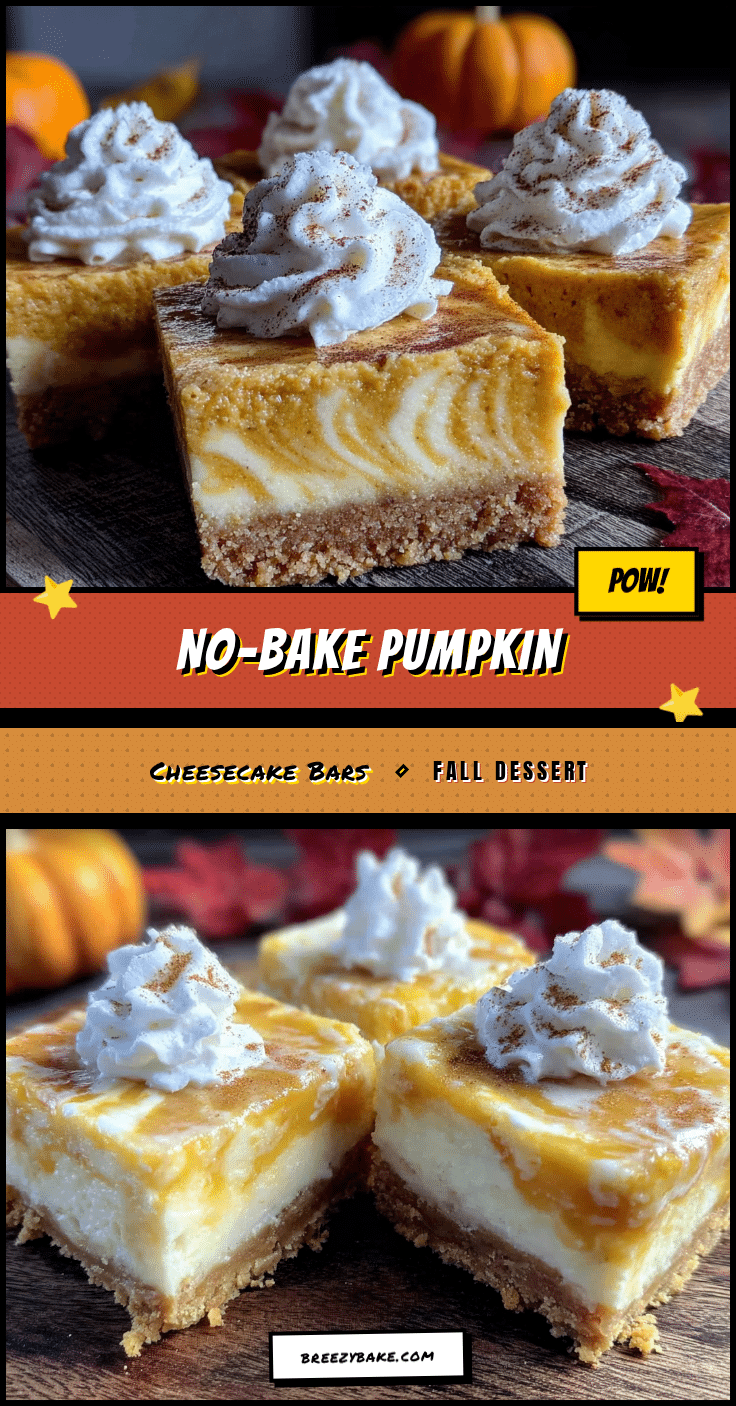
Easy No-Bake Pumpkin Cheesecake Bars: Best Fall Dessert
These easy no-bake pumpkin cheesecake bars are the perfect fall dessert with a buttery graham cracker crust, creamy pumpkin cheesecake filling, and optional whipped topping. No oven required, make-ahead friendly, and guaranteed to impress at any gathering.
- Prep Time: 30 minutes
- Cook Time: 0 minutes
- Total Time: 6 hours 30 minutes (includes chilling time)
- Yield: 9-16 servings 1x
- Category: Dessert
- Cuisine: American
Ingredients
- 2 cups graham cracker crumbs (about 14–16 full sheets, crushed finely)
- 1/2 cup unsalted butter, melted
- 1/4 cup granulated sugar
- 1/4 teaspoon salt
- 16 ounces cream cheese, softened to room temperature
- 1 cup pumpkin puree (not pumpkin pie filling)
- 1/2 cup granulated sugar
- 1/4 cup packed light brown sugar
- 1 teaspoon vanilla extract
- 1 1/2 teaspoons pumpkin pie spice
- 1/2 teaspoon ground cinnamon
- 1 cup heavy whipping cream
- 1 cup heavy whipping cream (for topping)
- 2 tablespoons powdered sugar (for topping)
- 1/2 teaspoon vanilla extract (for topping)
- Ground cinnamon or pumpkin pie spice for dusting (optional)
- Caramel sauce for drizzling (optional)
Instructions
- Prepare your pan: Cut two long strips of parchment paper and lay them crosswise in a 9×9-inch baking pan, leaving overhang on all sides. Lightly grease the parchment with butter or non-stick spray.
- Make the crust: In a medium bowl, combine 2 cups graham cracker crumbs, 1/4 cup granulated sugar, and 1/4 teaspoon salt. Pour in 1/2 cup melted butter and stir with a fork until every crumb is moistened. The mixture should look like wet sand and hold together when squeezed.
- Press the crust: Dump the crumb mixture into the prepared pan. Use the bottom of a measuring cup or a flat glass to press it down firmly and evenly. Pop this in the fridge while you make the filling.
- Soften the cream cheese: Cut the cream cheese into cubes and let it sit on the counter for 60-90 minutes until at genuine room temperature.
- Beat the cream cheese: In a large bowl, beat the softened cream cheese with an electric mixer on medium speed until completely smooth — about 2 minutes. Scrape down the bowl and beaters halfway through.
- Add the sugars and pumpkin: Add 1/2 cup granulated sugar and 1/4 cup packed brown sugar. Beat until combined and smooth. Then add 1 cup pumpkin puree, 1 teaspoon vanilla, 1 1/2 teaspoons pumpkin pie spice, and 1/2 teaspoon cinnamon. Beat on medium until thoroughly incorporated and creamy.
- Whip the cream: In a separate medium bowl, pour 1 cup cold heavy whipping cream. Using clean beaters, whip on high speed until stiff peaks form — about 3-4 minutes.
- Fold, don’t stir: Add about one-third of the whipped cream to the pumpkin-cream cheese mixture. Fold it in gently with a rubber spatula. Once mostly incorporated, add the remaining whipped cream and fold until no white streaks remain.
- Spread the filling: Spoon the filling over the chilled crust. Use an offset spatula or the back of a spoon to spread it evenly to the edges. Give the pan a few gentle taps on the counter to release any air bubbles.
- Chill thoroughly: Cover the pan with plastic wrap and refrigerate for at least 6 hours, but overnight is better.
- Make the whipped topping (optional): When ready to serve, whip 1 cup cold heavy cream with 2 tablespoons powdered sugar and 1/2 teaspoon vanilla until soft peaks form. Spread or pipe this over the chilled cheesecake layer, or serve on the side.
- Slice and serve: Lift the cheesecake out of the pan using the parchment handles. Use a sharp chef’s knife to cut into 9 or 16 bars — wipe the blade clean between cuts. Dust with cinnamon or pumpkin pie spice, drizzle with caramel sauce, and serve.
Notes
Room temperature cream cheese is non-negotiable for a smooth filling. Chill your bowl and beaters for the whipped cream for best results. Use a hot knife for clean slices. These bars taste even better after 12-24 hours in the fridge. For gluten-free, use gluten-free graham crackers. For dairy-free, use dairy-free cream cheese and coconut cream.
Nutrition
- Serving Size: 1 bar (based on 9 se
- Calories: 420450
- Sugar: 24
- Sodium: 320
- Fat: 32
- Saturated Fat: 18
- Carbohydrates: 34
- Fiber: 1
- Protein: 5
Keywords: no-bake pumpkin cheesecake bars, easy fall dessert, pumpkin cheesecake, no-bake cheesecake, pumpkin dessert, Thanksgiving dessert, make-ahead dessert


