My nephew asked why I couldn’t just use olives for the spider bodies instead of cutting up black olives into tiny, fiddly pieces. I started to explain that real spiders need legs, and whole olives would look like blobs—then stopped. He was seven and he was holding a can of sliced black olives, and honestly, I had no good reason except that I’d always done it the other way. I grabbed a paring knife and let him show me what he meant.
That was the moment everything clicked. He lined up six slices for legs and stuck a whole olive on top for the body, and it looked exactly like a spider—no, better than a spider. It looked like a spider a kid would actually think was cool, not fussy or precious. I felt genuinely sheepish standing there with my complicated method while his version was sitting there, perfect, on a deviled egg. The whole batch got eaten in about fifteen minutes at the Halloween party, and I’ve never made them the old way since.
These Kid-Friendly Halloween Deviled Eggs with olive spiders have become our October tradition, and let me tell you—they are the thing the kids actually fight over. Not the candy, not the cupcakes. These weird little eggs with their creepy-crawly toppings. My nephew still reminds me every year about the time he “taught me how to cook,” and honestly, he’s not wrong. Sometimes the best ideas come from the person who hasn’t learned yet that something “shouldn’t work.”
Why You’ll Love This Recipe
I’ve tested this recipe through six Halloweens now, and here is the honest truth: it works every single time. The filling stays creamy, the spiders hold together, and the whole thing comes together faster than you’d think. No fancy techniques, no weird ingredients—just eggs, mayo, mustard, and olives.
- Kid-Friendly Assembly : Let the little ones place the olive legs while you handle the piping. It’s the perfect way to get them involved without the stress of hot stoves or sharp knives.
- Budget-Friendly Ingredients : A dozen eggs and a can of olives costs under five dollars. This is Halloween snacking that won’t wreck your grocery budget.
- Make-Ahead Magic : You can boil the eggs and make the filling a day ahead. Just assemble the spiders right before serving so the olives stay fresh.
- Picky Eater Approved : My nephew is the pickiest eater I know, and he devours these. Something about the creepy factor makes them irresistible to kids.
- Naturally Gluten-Free : No bread, no crackers, no hidden wheat. These work for almost any dietary need.
What makes this recipe different from every other deviled egg out there is the texture. I blend the yolks until they are silky smooth—no lumps allowed—and I add just enough pickle juice to wake up the flavor without making it soggy. The olive spiders sit on top like they own the place, and the whole thing looks like something out of a Halloween cookbook, except you made it yourself in twenty minutes.
There is something deeply satisfying about watching a kid’s face light up when they see a spider on their plate and realize it’s food. That moment alone is worth the price of the eggs.
What Ingredients You Will Need
This recipe uses simple, pantry-friendly ingredients to deliver that classic deviled egg taste with a Halloween twist. Most of these are probably already in your fridge and pantry, which makes this perfect for last-minute party prep.
- Large eggs, 12 (hard-boiled and peeled; older eggs peel easier, so buy them a week ahead if you can)
- Mayonnaise, 1/3 cup (I prefer Duke’s for its tangy flavor, but any full-fat mayo works; avoid Miracle Whip here—it’s too sweet)
- Yellow mustard, 1 tablespoon (adds that classic deviled egg zing; Dijon works too but changes the color)
- Sweet pickle juice, 1 tablespoon (from the jar of sweet pickles; this is my secret ingredient for balanced flavor)
- Salt, 1/4 teaspoon (fine sea salt dissolves better than kosher here)
- Black pepper, 1/8 teaspoon (freshly ground if you can; pre-ground works fine)
- Paprika, for dusting (smoked paprika adds a deeper flavor, but regular is classic)
- Canned sliced black olives, 1 can (15 ounces; look for the large, firm slices—they hold their shape better)
- Whole black olives, 12 (pitted; these become the spider bodies; get the medium size, not jumbo)
For the best texture, use eggs that are at least a week old. Fresh eggs are notoriously hard to peel, and you will end up with pitted, sad-looking whites. I learned this the hard way after a particularly frustrating batch where I lost half the white to the shell.
If you want to swap the sweet pickle juice for dill pickle juice, go ahead—the flavor will be more savory and less sweet. My sister prefers it that way, and I have to admit, it works. Just don’t skip the pickle juice entirely. It adds a brightness that cuts through the richness of the yolks and mayo.
For the olives, I recommend the store brand honestly. I’ve tried fancy olives and cheap olives, and for this recipe, the cheap ones hold their shape better when you’re arranging the legs. Save the fancy Castelvetranos for your martini.
Equipment Needed
You don’t need much for this recipe, which is part of the appeal. I’ve made these in a borrowed kitchen with mismatched tools, and they turned out fine.
- Large pot (for boiling eggs; wide enough to hold a dozen eggs in a single layer)
- Mixing bowl (medium size; glass or stainless steel works best)
- Fork or potato masher (for breaking up the yolks; a fork works fine but a masher is faster)
- Piping bag or zip-top bag (for filling the eggs cleanly; a zip-top bag with the corner snipped off works perfectly)
- Paring knife (for slicing olives if needed; a small sharp knife is best)
- Cutting board (small one is fine; just keep it stable)
- Serving platter (something with a rim so the eggs don’t slide off)
If you don’t have a piping bag, seriously just use a zip-top bag. Snip a tiny corner off—like less than a centimeter—and pipe away. I’ve done it that way for years and it saves me from washing piping tips. The filling comes out smooth and even, and the kids actually enjoy helping squeeze the bag.
For the pot, make sure it’s big enough that the eggs aren’t crowded. Overcrowding leads to uneven cooking and cracked shells. I use my stockpot for this even though it feels excessive, because the eggs cook perfectly every time.
Preparation Method
Let’s get into the actual making of these things. The process is straightforward, but I’ve included every little detail I wish someone had told me the first time I made deviled eggs.
-
Hard-boil the eggs. Place 12 large eggs in a single layer in your pot. Cover them with cold water by about an inch. Bring the water to a full rolling boil over high heat—this takes about 8 minutes depending on your stove. Once boiling, cover the pot, turn off the heat completely, and let it sit for exactly 12 minutes. This method gives you fully cooked yolks with no green ring. While the eggs sit, prepare an ice bath in a large bowl.
-
Shock the eggs. After 12 minutes, transfer the eggs to the ice bath using a slotted spoon. Let them sit for at least 10 minutes. This stops the cooking and makes peeling infinitely easier. I’ve skipped this step when I was in a hurry, and I regretted it every single time. The shells stick like glue to warm eggs.
-
Peel the eggs. Gently crack the shells all over by rolling each egg against the counter. Start peeling from the wider end where the air pocket is—the membrane is looser there. Rinse each peeled egg under cool water to remove any tiny shell fragments. Pat them dry with a paper towel. If you end up with a few eggs that look rough, don’t worry—those can be the ones you chop up for egg salad later, or you can hide them under extra olive spiders.
-
Slice the eggs in half lengthwise. Use a sharp knife and wipe it clean between cuts for the neatest edges. Gently pop out the yolks into your mixing bowl. Arrange the whites on your serving platter cut-side up. I like to put them on a paper towel-lined plate first to absorb any excess moisture, then transfer them to the serving platter right before filling.
-
Make the filling. Mash the yolks with a fork until they are crumbly with no large chunks. Add 1/3 cup mayonnaise, 1 tablespoon yellow mustard, and 1 tablespoon sweet pickle juice. Mix until smooth and creamy. Taste it—this is important. Adjust salt and pepper as needed. I usually add 1/4 teaspoon salt and 1/8 teaspoon pepper, but taste buds vary. If the filling seems too thick, add another teaspoon of pickle juice. If it seems too thin, add another yolk if you have a spare.
-
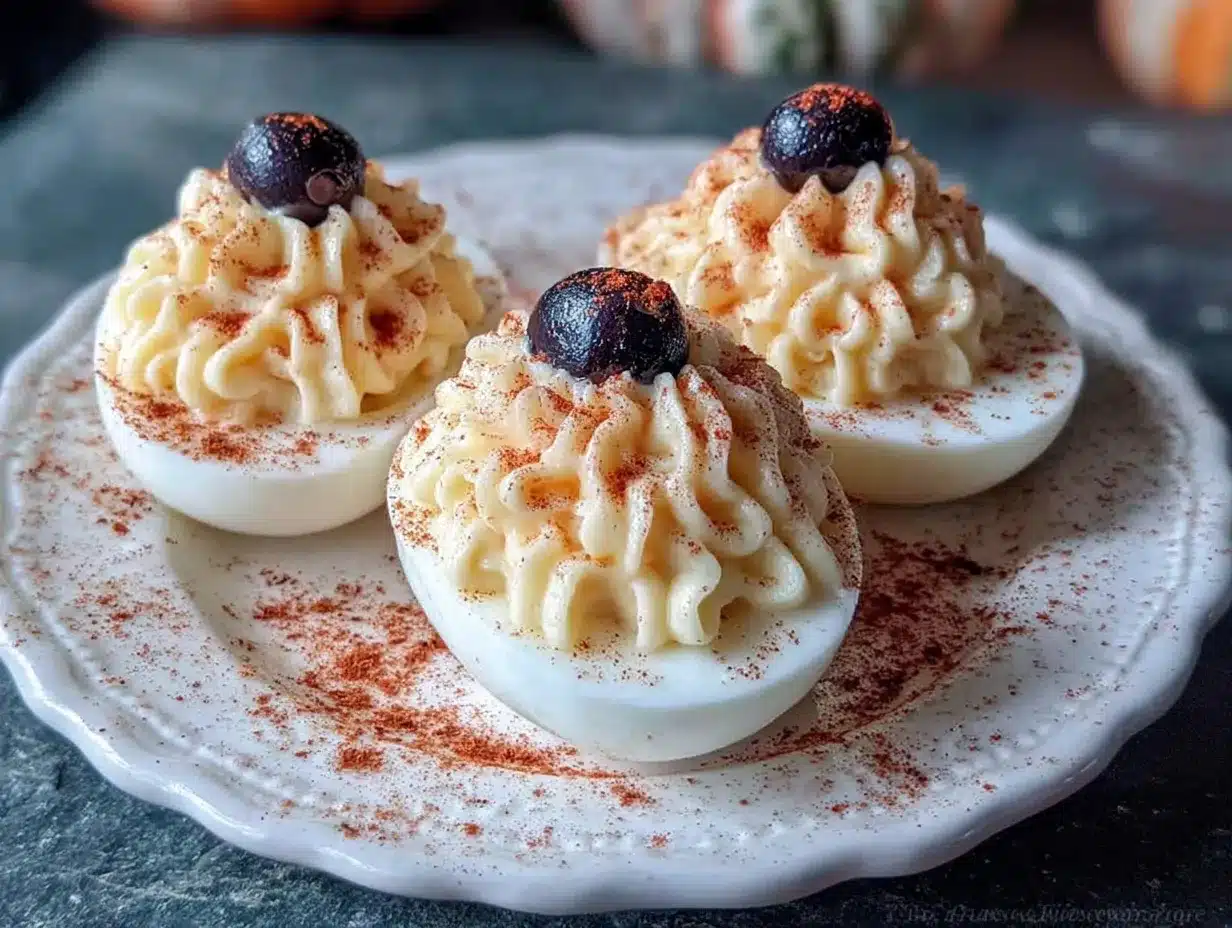
Fill the whites. Spoon the filling into your piping bag or zip-top bag. Snip the corner and pipe the filling into each egg white half. You want a nice swirl that rises above the edge of the white—this gives the spider something to sit on. If you don’t have a bag, you can spoon the filling in and smooth it with a knife. It won’t look as fancy, but it will taste the same.
-
Assemble the spiders. For each spider, you need 6 sliced olive legs and 1 whole olive body. Take the sliced olives and arrange them like legs on top of the filling—three on each side, slightly angled outward. Place the whole olive on top, pressing gently so it sticks. The legs should peek out from under the body. Repeat for all 12 eggs. This is the part where kids can help without making a mess.
-
Dust with paprika. Lightly sprinkle paprika over the entire platter. The red-orange dust against the black olives and yellow filling is very Halloween. Go easy—you can always add more, but you can’t take it away.
One thing I learned through trial and error: don’t assemble the spiders more than an hour before serving. The olive slices start to dry out and curl at the edges, and the whole olives can slide off if the filling gets too warm. Assemble right before the party starts, and you will get the best presentation.
Cooking Tips & Techniques
I’ve made these eggs at least forty times now, and I have the battle scars to prove it. Here is everything I wish I’d known from the start.
Perfect hard-boiled eggs every time. The 12-minute rest method I described above is foolproof. I used to boil eggs for 15 minutes and wonder why the yolks were gray and chalky. The green ring around the yolk is a sign of overcooking—it’s caused by a reaction between iron and sulfur in the egg. The 12-minute rest gives you bright yellow yolks that are fully cooked but still creamy. Trust the process.
Peeling without crying. Older eggs peel better. If you buy your eggs fresh, let them sit in the fridge for a week before you plan to make these. The air pocket inside expands as the egg ages, which separates the membrane from the shell. Also, peeling under running water helps wash away tiny shell fragments that like to hide.
Filling consistency. The perfect deviled egg filling should be smooth enough to pipe but thick enough to hold its shape. If your filling is too runny, add more mashed yolk. If it’s too stiff, add pickle juice a teaspoon at a time. I once added too much mayo and ended up with filling that slid off the whites like melted ice cream. Not my finest moment.
Olive placement. Use the sliced olives as legs first, then place the whole olive body on top. Press gently but firmly so the body sticks to the filling. If the filling is too smooth, the whole olive might slide off—in that case, dip the bottom of the olive in a tiny bit of mayo before placing it. That extra stickiness helps.
Timing is everything. Boil and peel the eggs the night before. Make the filling the morning of the party. Assemble the spiders right before serving. This staggered approach saves you from the last-minute panic that always seems to happen before Halloween gatherings.
Variations & Adaptations
This recipe is flexible, and I’ve tried several variations over the years. Some worked better than others, but they were all interesting.
Spicy version. Add 1/2 teaspoon of sriracha or chipotle powder to the filling. The heat pairs surprisingly well with the briny olives. My brother-in-law requests this version every year, and it always disappears first at the adult table.
Guacamole deviled eggs. Replace half the mayo with mashed avocado. The green color is very Halloween-friendly, and the flavor is rich and creamy. Just add a squeeze of lime juice to keep the avocado from browning. These need to be eaten within a few hours—they don’t hold up well overnight.
Dairy-free version. Use vegan mayo and skip the butter. The rest of the ingredients are naturally dairy-free. I tested this for a friend with a dairy allergy, and honestly, I couldn’t tell the difference. Just make sure your mustard doesn’t contain any dairy additives.
Different spider designs. Use capers instead of sliced olives for tiny spider legs. Use pimento-stuffed green olives for a pop of color. Use pretzel sticks for extra-crunchy legs—though those soften quickly, so add them right before serving. I tried pretzel sticks once and the kids loved the crunch, but they got soggy within twenty minutes.
Egg white alternative. If you want to skip the egg whites entirely, serve the filling in small cups or on cucumber slices. This works for keto or low-carb diets, and the cucumber adds a fresh crunch that contrasts nicely with the creamy filling.
Serving & Storage Suggestions
These deviled eggs are best served chilled or at room temperature. I prefer them cold straight from the fridge, but my sister likes them at room temperature because she says the flavors are more pronounced. Either way works.
For presentation, arrange the eggs on a dark platter or black serving tray. The contrast makes the yellow filling and black olives pop. You could also arrange them on a bed of shredded lettuce or kale for a graveyard vibe. I’ve seen people add fake spider webs made from pulled mozzarella, but that seems like overkill to me.
These pair beautifully with other Halloween snacks. Serve them alongside a platter of spooky Halloween pizza mummies for a full creepy spread. The savory eggs balance the cheesy pizza perfectly, and kids love having a whole “scary” meal.
Storage: Store leftover deviled eggs in an airtight container in the refrigerator for up to 2 days. Do not freeze them—the texture of the filling will become watery and grainy when thawed. I learned this the hard way when I tried to make a double batch for a party and froze half. The thawed eggs were a disaster.
Reheating: You don’t want to reheat these. They are meant to be served cold. If you made them ahead and they’ve been in the fridge, just take them out 15 minutes before serving to take the chill off. The olive spiders might shift slightly as they warm up, so give them a gentle nudge back into place.
The flavors actually develop and deepen after a few hours in the fridge. If you can make the filling the night before and assemble the next day, the filling will taste even better. Something about the mayo and pickle juice melding together overnight creates a more cohesive flavor.
Nutritional Information & Benefits
Each deviled egg half contains approximately 70 calories, 5 grams of fat, 1 gram of carbohydrates, and 4 grams of protein. The olives add healthy monounsaturated fats and a small amount of iron. Eggs are a complete protein source, meaning they contain all nine essential amino acids your body needs.
These deviled eggs are naturally gluten-free, low-carb, and keto-friendly. They contain no added sugar beyond what’s in the pickle juice, which is minimal. For anyone watching their carbohydrate intake, these make an excellent Halloween snack that won’t spike blood sugar.
The olives provide antioxidants and vitamin E, which supports skin health. The eggs are rich in choline, a nutrient important for brain health and development. Honestly, for a Halloween treat, these are surprisingly nutritious. You could do a lot worse than a protein-packed egg with healthy olive fat.
Potential allergens: eggs and mustard. If you’re serving these at a party, make sure to label them clearly so guests with allergies can make informed choices. The dairy-free version I mentioned earlier works well for those avoiding dairy.
Conclusion
These Kid-Friendly Halloween Deviled Eggs with olive spiders have become our family’s most-requested Halloween recipe, and I think they deserve a spot in your rotation too. They are simple enough for a weeknight, fancy enough for a party, and weird enough to delight any kid who loves creepy-crawly things.
The best part is watching the kids’ faces when they realize the spiders are made of olives. My nephew still gets that same delighted expression he had that first day in my kitchen. He’s twelve now and thinks he’s too cool for Halloween, but he still asks for “his” deviled eggs every October.
I encourage you to let your own kids help with the assembly. Let them arrange the legs. Let them place the spider bodies. Let them claim ownership of the recipe. You might be surprised at what they come up with—I certainly was.
If you make these, drop a comment below and let me know how they turned out. Did your kids love them? Did you try a different variation? I genuinely want to hear about it. And if you’re looking for another Halloween snack that’s equally fun, check out this easy Halloween pumpkin cheese ball—it’s another one that disappears fast.
Happy Halloween, and happy cooking!
Frequently Asked Questions
Can I make these deviled eggs a day ahead?
Yes. Boil and peel the eggs, make the filling, and store them separately in the fridge. Assemble the spiders on the eggs right before serving for the best presentation. The olive slices can dry out if left on the eggs overnight.
How do I keep the olive spiders from falling off?
Press the whole olive gently into the filling so it sticks. If your filling is very smooth, dip the bottom of the olive in a tiny bit of mayo before placing it. The mayo acts like glue and keeps the spider body in place.
Can I use a different type of olive?
Absolutely. Green olives with pimentos work well for a pop of color. Kalamata olives add a stronger, more briny flavor. Just make sure you have both sliced olives for legs and whole olives for bodies, or get creative with what you have.
How long do these deviled eggs last in the fridge?
Store them in an airtight container for up to 2 days. After that, the texture of the filling starts to change and the olives may become soggy. They are best eaten within 24 hours of assembly.
Can I freeze deviled eggs?
No. Freezing ruins the texture of the filling. The mayonnaise separates and becomes watery when thawed, and the egg whites become rubbery. Make them fresh or store them in the fridge only.
Pin This Recipe!
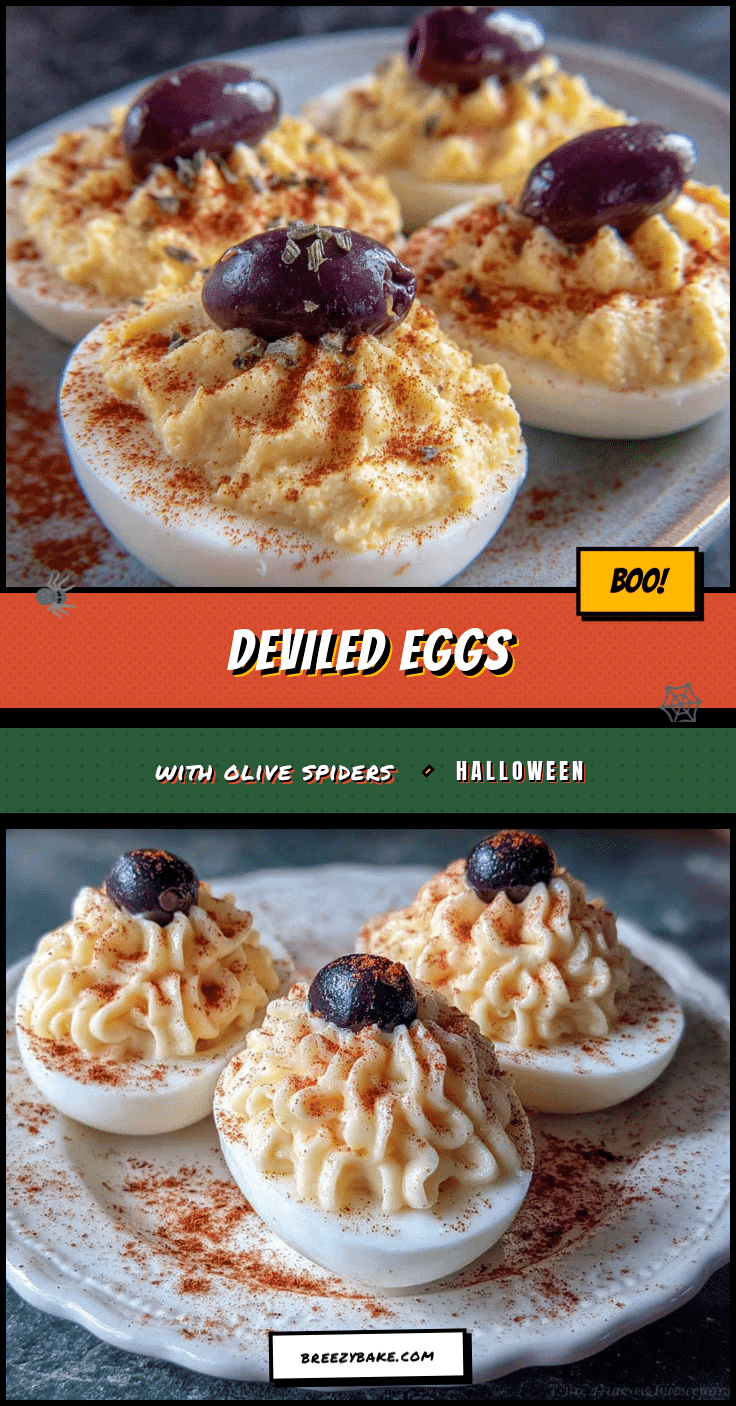
Kid-Friendly Halloween Deviled Eggs with Creepy Olive Spiders
These spooky deviled eggs topped with olive spiders are a kid-friendly Halloween tradition. Creamy, tangy filling and creepy-crawly toppings make them a party favorite that kids actually fight over.
- Prep Time: 20 minutes
- Cook Time: 12 minutes
- Total Time: 32 minutes
- Yield: 24 deviled egg halves (12 servings of 2 halves each) 1x
- Category: Appetizer
- Cuisine: American
Ingredients
- 12 large eggs (hard-boiled and peeled)
- 1/3 cup mayonnaise (preferably Duke’s)
- 1 tablespoon yellow mustard
- 1 tablespoon sweet pickle juice
- 1/4 teaspoon fine sea salt
- 1/8 teaspoon black pepper (freshly ground preferred)
- Paprika for dusting (smoked or regular)
- 1 can (15 ounces) sliced black olives
- 12 whole black olives (pitted, medium size)
Instructions
- Place 12 large eggs in a single layer in a pot. Cover with cold water by about an inch. Bring to a full rolling boil over high heat (about 8 minutes). Once boiling, cover the pot, turn off the heat, and let sit for exactly 12 minutes.
- While eggs sit, prepare an ice bath in a large bowl. After 12 minutes, transfer eggs to the ice bath using a slotted spoon. Let sit for at least 10 minutes to stop cooking and make peeling easier.
- Gently crack the shells all over by rolling each egg against the counter. Start peeling from the wider end where the air pocket is. Rinse each peeled egg under cool water to remove shell fragments. Pat dry with a paper towel.
- Slice each egg in half lengthwise using a sharp knife. Gently pop out the yolks into a mixing bowl. Arrange the whites on a serving platter cut-side up.
- Mash the yolks with a fork until crumbly with no large chunks. Add 1/3 cup mayonnaise, 1 tablespoon yellow mustard, and 1 tablespoon sweet pickle juice. Mix until smooth and creamy. Taste and adjust salt and pepper as needed (usually 1/4 teaspoon salt and 1/8 teaspoon pepper). If too thick, add another teaspoon of pickle juice; if too thin, add another yolk.
- Spoon the filling into a piping bag or zip-top bag. Snip the corner and pipe the filling into each egg white half, creating a swirl that rises above the edge of the white.
- For each spider, arrange 6 sliced olive legs on top of the filling—three on each side, slightly angled outward. Place a whole olive on top, pressing gently so it sticks. Repeat for all 12 eggs.
- Lightly sprinkle paprika over the entire platter. Serve immediately or refrigerate until ready to serve.
Notes
For best results, use eggs that are at least a week old for easier peeling. Assemble spiders no more than an hour before serving to prevent olive slices from drying out. If filling is too smooth and olives slide off, dip the bottom of the whole olive in a tiny bit of mayo before placing. Store leftovers in an airtight container in the refrigerator for up to 2 days; do not freeze.
Nutrition
- Serving Size: 2 deviled egg halves
- Calories: 140
- Sugar: 1
- Sodium: 320
- Fat: 10
- Saturated Fat: 2.5
- Carbohydrates: 2
- Protein: 8
Keywords: Halloween deviled eggs, olive spiders, kid-friendly Halloween, spooky appetizer, gluten-free Halloween snack