This was supposed to be a jack-o’-lantern cheese ball. I had it all planned out—cream cheese, cheddar, some fancy shaping tools I’d bought online. The party was in three hours, and I was feeling pretty good about myself. Then I realized I’d grabbed the wrong block of cream cheese at the store (the low-fat kind that refuses to hold any shape), my fancy shaping tools were still in the Amazon box I’d forgotten to open, and I was already running late because I’d spent twenty minutes trying to find my good mixing bowl. I stood there in my kitchen, staring at a sad pile of lumpy cheese, and honestly? I almost just ordered pizza for the whole thing. But then I spotted the fruit bowl on my counter—apples, grapes, oranges, strawberries—and something clicked. What came out of that moment of panic was nothing like the plan. And it was better. So much better that now I can’t imagine showing up to a Halloween gathering without this monster fruit tray. It’s the kind of accidental discovery that makes you wonder why you were trying so hard in the first place.
I mean, let me tell you—the first time I set this thing down at a friend’s Halloween party, people actually stopped mid-conversation to look at it. The kids started giggling, the adults started taking pictures, and I had to fend off questions about where I’d bought it. When I said I’d made it myself, nobody believed me. That’s the magic of this fruit tray. It looks complicated and impressive, but it’s really just a bunch of fruit arranged to look like a friendly monster. No carving, no special equipment, no stress. Just a whole lot of fruit that happens to look adorable. And since that first happy accident, I’ve made it for potlucks, classroom parties, and family gatherings. Every single time, it steals the show. Maybe you’ve been there—standing in the kitchen, wondering why you signed up to bring something to a party, feeling the pressure to impress. This recipe is for you.
Why You’ll Love This Recipe
Let’s be real for a second—bringing a fruit platter to a Halloween party usually feels like the boring option. Everyone else shows up with creepy cupcakes and spooky cookies, and you’re stuck with a tray of apples that nobody touches. This monster fruit tray changes that completely. It’s the one dish that both kids and adults fight over, and you get to watch people’s faces light up when they realize it’s healthy. Here’s why this recipe works so well for hosting:
- Comes together in under 30 minutes—Perfect for those last-minute party invites or when you’ve been procrastinating all week. I’ve made this in less time than it takes to watch a sitcom episode.
- Simple ingredients you already have—No special trip to a fancy grocery store. Everything comes from the regular produce section, and you can swap based on what’s on sale or in season.
- Perfect for Halloween gatherings—Whether it’s a classroom party, office potluck, or family get-together, this tray fits right in. It’s spooky without being scary, which means even the littlest guests love it.
- Crowd-pleaser guaranteed—I’ve watched picky eaters, health-conscious friends, and dessert-lovers all reach for the same tray. It disappears faster than any candy bowl I’ve ever seen.
- Unbelievably delicious—The combination of fresh fruit with a simple yogurt dip is next-level refreshing. It balances out all the heavy, sugary treats at any Halloween party.
What makes this recipe different from every other fruit platter out there is the presentation. I’ve tested dozens of arrangements over the years—some looked great but took forever, others were quick but looked sloppy. This version hits the sweet spot. The monster face is designed to be forgiving (crooked eyes just make it look more charming), and the whole thing comes together with zero artistic skill required. Plus, unlike carved fruit that browns within hours, this tray stays fresh and beautiful for the entire party. I’ve had friends text me pictures from three hours into their party, and the fruit still looks perfect. That’s the kind of reliability you need when you’re hosting a crowd.
This recipe isn’t just good—it’s the kind that makes you close your eyes after the first bite of a juicy strawberry dipped in creamy yogurt. It’s comfort food disguised as a vegetable platter, healthier than most party options, but with the same satisfying crunch and sweetness that makes you go back for seconds. Perfect for impressing guests without stress, or turning a simple fruit tray into something memorable that people will ask you about for years.
What Ingredients You Will Need
This recipe uses simple, fresh ingredients to create a fun and festive Halloween snack that’s as delicious as it is adorable. Most of these are pantry staples or easy to find at any grocery store, and I’ve included substitution notes so you can adapt based on what’s available in your area or what your guests prefer.
For the Monster Fruit Tray
- 1 large seedless watermelon (about 8-10 pounds) — This forms the base of your monster’s face. Look for a symmetrical, oval-shaped watermelon for the best results. I prefer personal-sized watermelons for easier handling.
- 2 cups green grapes — These become the monster’s eyes or warts. Seedless grapes work best, and you can use red grapes if you want a different color contrast.
- 1 pint fresh strawberries — Sliced strawberries make excellent monster teeth or claws. Choose firm, bright red berries for the best visual impact.
- 2 large bananas — Sliced into rounds, these create perfect monster horns or ears. Slightly green bananas hold their shape better than very ripe ones.
- 1 cup blueberries — These work great for nostrils, pupils, or decorative spots. Fresh blueberries are ideal, but frozen (thawed and patted dry) can work in a pinch.
- 1 large orange — Cut into wedges or slices for the monster’s mouth or tongue. Blood oranges add a dramatic red color if you can find them.
- 2 kiwis — Peeled and sliced, these add a vibrant green color that contrasts beautifully with the other fruits. They’re perfect for monster eyebrows or warts.
- 1 cup pineapple chunks — Fresh or canned (drained well), these add a tropical sweetness and a different texture. They work well for monster teeth or decorative elements.
- 1 cup apple slices — Tossed in lemon juice to prevent browning, these are great for monster ears or additional face features. Honeycrisp or Granny Smith apples hold up well.
For the Yogurt Dip
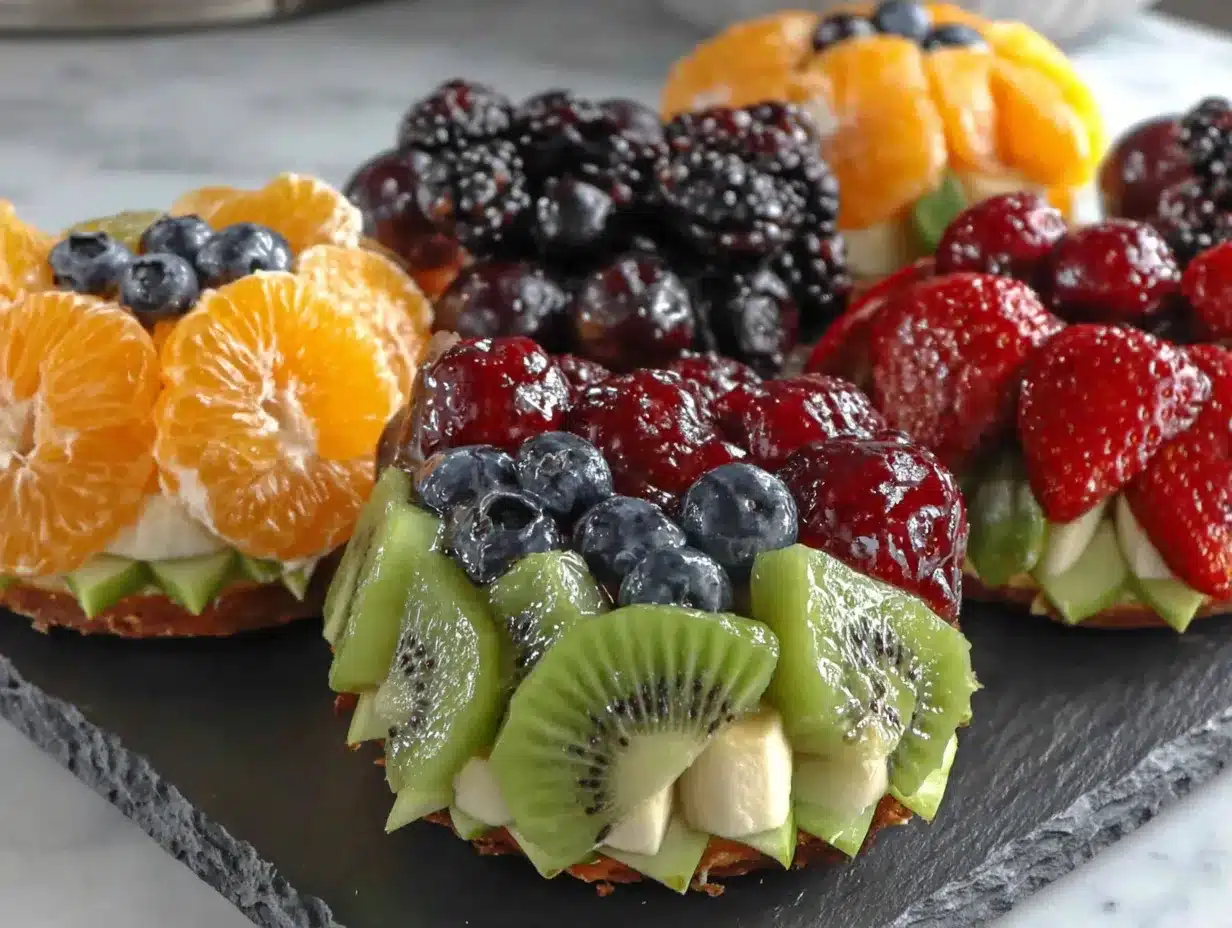
- 2 cups plain Greek yogurt — Full-fat yogurt gives the creamiest texture, but 2% works fine too. I recommend Fage or Chobani for the best consistency.
- 3 tablespoons honey — Local honey adds a lovely floral sweetness, but any honey works. Maple syrup is a great vegan alternative.
- 1 teaspoon vanilla extract — Pure vanilla extract makes a noticeable difference, but imitation vanilla works in a pinch.
- Optional: Food coloring — Green or purple food coloring can turn your dip into “monster slime” for extra Halloween fun. Natural options like spinach powder (for green) or beet powder (for pink) work too.
Substitution Notes
If watermelon isn’t in season or available in your area, you can use a large honeydew melon or cantaloupe as the base. For a lower-sugar option, swap the yogurt dip for a simple cottage cheese blend (blend 2 cups cottage cheese with 2 tablespoons honey until smooth). If you’re serving guests with nut allergies, be sure to check that your yogurt and any added ingredients are processed in nut-free facilities. For a completely dairy-free version, use coconut yogurt and maple syrup—it’s just as creamy and delicious.
Equipment Needed
You don’t need any fancy tools for this recipe, which is part of why I love it. Here’s what you’ll need:
- Large serving platter or cutting board — At least 18 inches wide to accommodate the watermelon base and surrounding fruit. A wooden board gives a rustic feel, while a white platter makes the colors pop.
- Sharp chef’s knife — For cutting the watermelon and larger fruits. A good 8-inch knife makes clean cuts and prevents crushed fruit edges.
- Small paring knife — For detail work like cutting eyes or shaping fruit pieces. I use my trusty Kuhn Rikon paring knife for this.
- Melon baller — Optional but helpful for creating uniform fruit shapes. If you don’t have one, a teaspoon works just fine.
- Cutting board — A large, stable cutting board with a groove to catch juices. Bamboo boards are gentle on knife blades.
- Serving bowl — For the yogurt dip. A small pumpkin-shaped bowl adds extra Halloween flair.
- Toothpicks or small skewers — For attaching fruit pieces to the watermelon base. Wooden toothpicks work perfectly and are easy to find.
If you don’t have a melon baller, don’t worry. I’ve made this tray countless times using just a knife and a spoon. The key is keeping your knife sharp—a dull blade will crush soft fruits like strawberries and kiwi. Also, invest in a good cutting board that won’t slide around on your counter. I learned this the hard way after a watermelon nearly rolled off my counter and onto my foot!
Preparation Method
Follow these steps to create your monster fruit tray. Take your time with the arrangement—the beauty is in the details, and crooked features just make your monster more charming.
- Prepare the watermelon base (10 minutes)
Wash the watermelon thoroughly under cold water and pat it dry. Using your sharp chef’s knife, cut a thin slice off the bottom of the watermelon so it sits flat on your platter without wobbling. This is crucial—a wobbly watermelon will make your monster face look lopsided. Next, cut a slice off the top of the watermelon (about 1 inch thick) to create a flat surface. Set this top slice aside—you’ll use it for the monster’s hat or hair later. Now, place the watermelon on your serving platter. I like to position it slightly off-center to leave room for the surrounding fruit display. - Create the monster face (15 minutes)
Using your paring knife, carve out two eye sockets on the front of the watermelon. These should be oval-shaped and about 2 inches wide. Don’t worry about making them perfectly symmetrical—monsters look better with slightly uneven features. For the eyes, cut the green grapes in half lengthwise and place them in the eye sockets, cut side facing out. Use a toothpick to secure each grape half if needed. For pupils, place a small blueberry in the center of each grape half. For the mouth, cut a crescent shape about 4 inches wide below the eyes. Line this with sliced strawberries, pointy ends facing inward like teeth. For the monster’s nose, use a blueberry positioned between and slightly below the eyes. You can also add banana slices as horns on top of the watermelon, securing them with toothpicks. - Add monster features (10 minutes)
Get creative with additional features. Kiwi slices make excellent eyebrows—place them above the eye sockets in a slightly angled position for a friendly or grumpy expression. Apple slices can become ears on the sides of the watermelon. Use orange wedges to create a tongue sticking out of the mouth—this always gets a laugh from kids. For warts or bumps, use additional grape halves or blueberry clusters scattered across the watermelon surface. The beauty of this design is that there’s no wrong way to do it. I once made a monster with three eyes because I accidentally carved an extra socket, and everyone thought it was intentional and hilarious. - Prepare the surrounding fruit (10 minutes)
While your monster takes center stage, prepare the remaining fruit for the display. Slice the strawberries into halves or quarters depending on their size. Cut the bananas into 1/2-inch rounds—toss them in a little lemon juice to prevent browning if you’re making this ahead. Peel and slice the kiwis into rounds, then cut each round in half. Cut the orange into wedges. Arrange all the prepared fruit around the watermelon base on your platter. I like to create a colorful border that looks like a fruit rainbow. Group similar colors together for visual impact, or mix them up for a more chaotic, monster-like feel. - Make the yogurt dip (5 minutes)
In a medium bowl, combine the Greek yogurt, honey, and vanilla extract. Whisk until smooth and creamy. If you’re using food coloring, add a few drops and stir until you reach your desired color. I usually go for a pale green that looks like monster slime, but purple or orange work great too. Transfer the dip to your serving bowl and place it in the center of the fruit arrangement or off to one side. Pro tip: If you’re worried about the dip bowl sliding around, put a small dab of yogurt on the platter first to anchor the bowl in place. - Final assembly and presentation (5 minutes)
Step back and look at your creation. Adjust any fruit pieces that have shifted. Add any final decorative touches—I sometimes add a small sign made from a toothpick and a piece of paper that says “Feed Me!” or “Eat My Face!” The kids love it. If you’re serving immediately, you’re done. If you’re transporting this to a party, cover the entire platter with plastic wrap and refrigerate until you’re ready to leave. Just be careful not to let the plastic wrap press down on the fruit features.
Cooking Tips & Techniques
After making this monster fruit tray more times than I can count (and messing it up plenty along the way), I’ve gathered some tips that will save you time and frustration.
Choose your watermelon wisely. Look for one that’s symmetrical and has a flat side. I once bought a round watermelon thinking it would look cute, and it kept rolling off the platter. I had to cut a huge slice off the bottom to stabilize it, which wasted a lot of fruit. Also, tap the watermelon—you want a deep, hollow sound, which indicates ripeness. An underripe watermelon will be pale and less sweet, which matters less for decoration but still affects the taste.
Prep your fruit the night before. If you’re hosting a party or bringing this to a gathering, wash and dry all your fruit the night before. Store it in separate containers in the refrigerator. In the morning, all you have to do is assemble. This cuts your active prep time down to about 15 minutes. I learned this trick after trying to wash grapes while simultaneously carving a watermelon at 9 AM before a noon party. It was chaos, and I ended up with grape stems all over my kitchen floor.
Use lemon juice to prevent browning. Apples, bananas, and pears will oxidize and turn brown within an hour of being cut. Toss them in a mixture of 1 tablespoon lemon juice and 1 tablespoon water before arranging them on the platter. This buys you several hours of fresh-looking fruit. I’ve also used Sprite or 7Up in a pinch—the citric acid works the same way, and the sugar adds a little extra sweetness.
Don’t overthink the monster face. The biggest mistake I see people make is trying to make the monster look perfect. Monsters are supposed to be a little weird. Crooked eyes, mismatched features, and lopsided mouths make it more charming. I once spent twenty minutes trying to get two grape halves perfectly aligned, and when I finally stepped back, I realized the slight asymmetry was what made it look alive. Embrace the imperfection.
Keep it cold until serving. Fruit tastes best when it’s cold and crisp. If you’re serving this at an outdoor party or potluck, keep the platter in the refrigerator until the last possible moment. You can also set the platter on a bed of ice in a larger tray to keep everything cool throughout the event. I’ve seen fruit trays go limp and sad within an hour at room temperature—don’t let that happen to your monster.
Variations & Adaptations
One of the best things about this recipe is how easy it is to customize. Here are some variations I’ve tried over the years:
Dietary variations: For a vegan version, use coconut yogurt and maple syrup in the dip. For a low-sugar option, skip the honey in the dip and use a sugar-free vanilla yogurt instead. For a nut-free version (important for school parties), just be sure to check all your ingredients for cross-contamination warnings. I’ve made this for a classroom with multiple allergies, and it was a hit with everyone.
Seasonal fruit swaps: In summer, add fresh cherries, peaches, or plums to the display. In fall, incorporate apple slices, pear wedges, and pomegranate seeds for a harvest theme. In winter, use clementines, kiwi, and pineapple for bright color. I made a winter version last December with pomegranate seeds as monster warts, and it looked like a festive snow monster.
Different monster themes: Instead of a friendly monster, try a scary version with a red grape “scar” across the face and a frown made from dark berries. For a cute version, add googly eyes (using cream cheese to attach them) and a smile made from banana slices. You can also make a family of smaller monsters using individual apples or oranges as bases. I once made a whole monster family for a neighborhood block party, and the kids went wild.
Dip variations: Beyond yogurt dip, try a chocolate dip (melted dark chocolate mixed with a little coconut oil), a peanut butter dip (peanut butter thinned with milk and sweetened with honey), or a cream cheese dip (cream cheese whipped with powdered sugar and vanilla). For a healthier option, blend cottage cheese with a little honey and vanilla until smooth. Each dip brings a different flavor profile that complements the fresh fruit beautifully.
Serving & Storage Suggestions
This monster fruit tray is best served cold, right after assembly. The contrast between the crisp, cold fruit and the creamy dip is what makes it so satisfying. For presentation, I like to place the platter on a slightly elevated surface so it becomes a centerpiece. If you’re serving at a buffet, put it near the beginning of the line so guests see it before they fill their plates with heavier foods.
What to serve alongside: This fruit tray pairs beautifully with other Halloween-themed snacks. Consider serving it alongside a spooky Halloween dip platter with veggies, or next to a bowl of popcorn balls for a sweet-and-salty combo. For a full party spread, add some easy Halloween cupcake recipes and a pitcher of apple cider. The fruit tray provides a fresh, healthy option that balances out all the indulgent treats.
Storage instructions: If you have leftover fruit (which rarely happens in my experience), store it in an airtight container in the refrigerator for up to 2 days. The cut watermelon and other fruits will start to lose their texture after that. The yogurt dip keeps for up to 5 days in a sealed container. Do not freeze the assembled tray—frozen fruit becomes mushy when thawed and loses its visual appeal.
Reheating tips: This is a cold dish, so no reheating needed. However, if your fruit has been sitting out for a while and has lost its chill, you can refresh it by placing the platter in the refrigerator for 15-20 minutes before serving again. The dip should also be refrigerated if it’s been out for more than 2 hours.
Flavor development: Interestingly, the flavors of the fruit actually meld together slightly after a few hours in the refrigerator. The watermelon absorbs a hint of citrus from the orange wedges, and the berries release their juices, creating a natural fruit salad effect. Some people actually prefer the tray after it’s sat for an hour or two. Just don’t leave it out at room temperature for more than 2 hours for food safety reasons.
Nutritional Information & Benefits
This monster fruit tray is packed with vitamins, minerals, and antioxidants, making it one of the healthiest options at any Halloween party. Here’s a rough estimate per serving (based on 12 servings):
- Calories: 180-220 per serving (including dip)
- Carbohydrates: 35-40g
- Fiber: 4-6g
- Sugar: 25-30g (natural fruit sugars)
- Protein: 8-10g (from yogurt dip)
- Vitamin C: 60-80% of daily value
- Potassium: 400-500mg
Health benefits of key ingredients: Watermelon is incredibly hydrating and contains lycopene, a powerful antioxidant that supports heart health. Berries are packed with flavonoids that boost brain function and reduce inflammation. Greek yogurt provides probiotics for gut health and protein for sustained energy. The combination of fiber from fruit and protein from yogurt makes this a satisfying snack that won’t cause a sugar crash like candy does.
Dietary considerations: This recipe is naturally gluten-free, nut-free (if you check your yogurt), and vegetarian. For a vegan option, use coconut yogurt. For a low-FODMAP version, omit the watermelon and apples and focus on berries, grapes, and kiwi. The recipe is also suitable for most allergy-friendly diets with simple substitutions.
From a wellness perspective, I love that this recipe lets people indulge in Halloween fun without sacrificing nutrition. It’s proof that healthy food can be just as exciting and festive as candy and cookies. I’ve had parents tell me that their kids actually preferred this fruit tray over the candy bowl—and that’s a win in my book.
Frequently Asked Questions
Can I make this monster fruit tray the night before a party?
Yes, with a few precautions. Assemble the entire tray, then cover it tightly with plastic wrap and refrigerate. The key is to toss apple and banana slices in lemon juice to prevent browning. The yogurt dip should be stored separately and added just before serving to maintain its texture. I’ve made this the night before many times, and it always looks fresh the next day.
How long will the fruit stay fresh at a party?
At room temperature, the fruit will stay fresh and crisp for about 2-3 hours. If you’re hosting a longer event, set the platter on a bed of ice in a larger tray or serving dish. This keeps the fruit cold and prevents it from wilting. Avoid placing the tray in direct sunlight or near a heat source. If the party is outdoors, consider bringing the tray out only when guests are ready to eat.
What if I can’t find a watermelon?
No problem! You can use a large honeydew melon or cantaloupe as the base. Honeydew gives a pale green monster, while cantaloupe creates an orange monster. Both work beautifully. You can also use a large pineapple for a spiky-haired monster look—just leave the leafy top attached for hair. I’ve even used a large pumpkin (the edible kind, not the carving kind) for a truly Halloween-themed base.
Can I use frozen fruit for this recipe?
I don’t recommend frozen fruit for the display portion because it becomes mushy when thawed and releases excess water that can make the platter soggy. However, you can use frozen berries in the yogurt dip (blend them in for a fruity pink or purple dip) or as a base layer under the fresh fruit to keep everything cold. Just be sure to drain any excess liquid before adding fresh fruit on top.
How do I transport this monster fruit tray without it falling apart?
Transporting a large fruit tray can be tricky. I recommend assembling the monster face on the watermelon at home, then transporting the watermelon separately from the surrounding fruit. At your destination, arrange the remaining fruit around the base. If you must transport the fully assembled tray, place it on a large, flat surface in your car (like the floor of the trunk or back seat) and surround it with towels or bags to prevent sliding. Drive carefully and avoid sharp turns!
Conclusion
This monster fruit tray started as a kitchen disaster and turned into one of my most-requested recipes. It’s proof that sometimes the best things come from happy accidents—and that you don’t need fancy skills or equipment to create something memorable. Whether you’re hosting a Halloween party, bringing a dish to a potluck, or just want to make a regular Tuesday feel special, this fruit tray delivers.
What I love most about this recipe is how it brings people together. I’ve watched strangers become friends over a shared laugh at a crooked monster eye. I’ve seen kids who “don’t like fruit” reach for a strawberry because it looks like a monster tooth. Food has a way of connecting us, and this silly, colorful, delicious tray does exactly that.
So go ahead—embrace the imperfections, get creative with your fruit choices, and don’t stress if your monster looks a little goofy. That’s the whole point. If you make this recipe, I’d love to hear how it turned out. Drop a comment below and tell me about your monster’s personality, or share a photo of your creation. And if you’re looking for more Halloween party ideas, check out our Halloween party snack ideas for more crowd-pleasing recipes. Happy Halloween, and happy snacking!
Pin This Recipe!
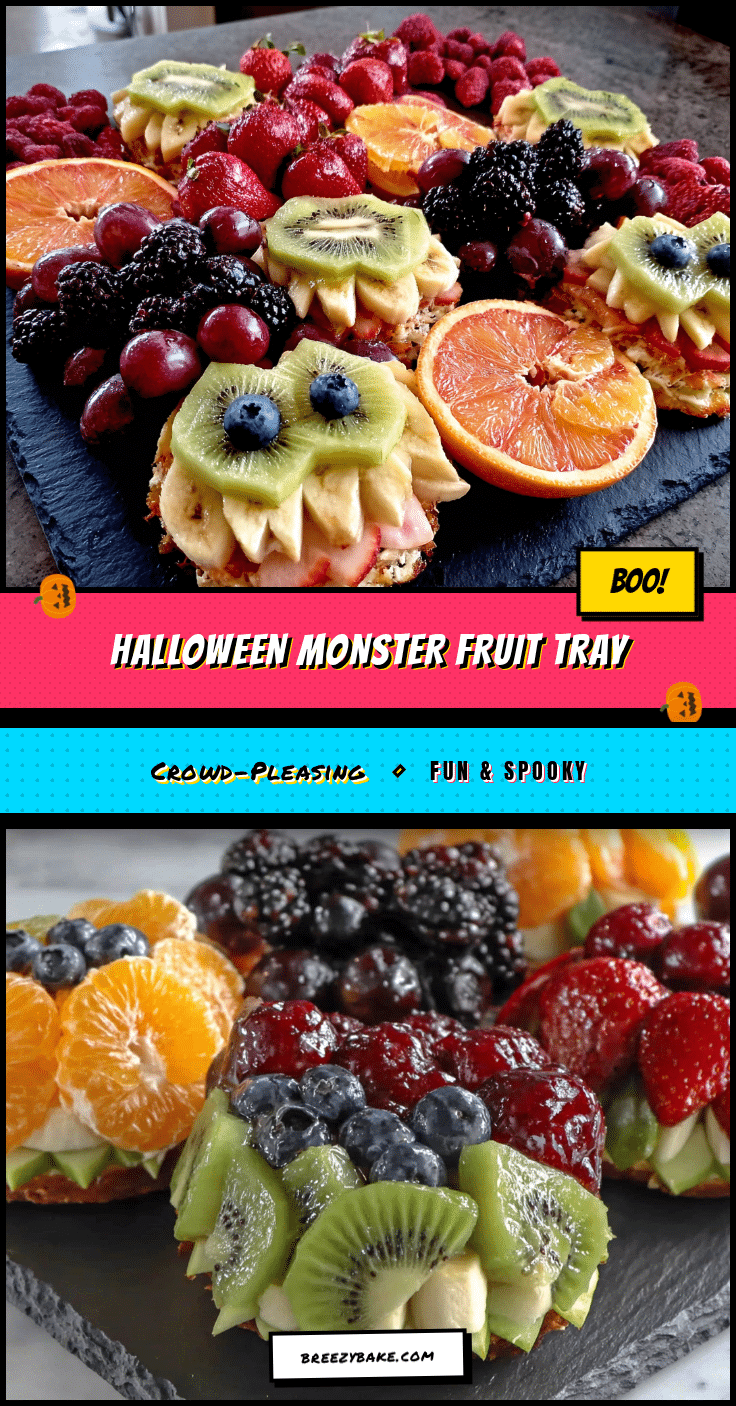
Best Halloween Monster Fruit Tray for a Crowd
A fun and festive Halloween fruit tray shaped like a friendly monster, made with fresh fruit and a creamy yogurt dip. It’s a healthy, crowd-pleasing centerpiece that comes together in under 30 minutes.
- Prep Time: 30 minutes
- Cook Time: 0 minutes
- Total Time: 30 minutes
- Yield: 12 servings 1x
- Category: Appetizer
- Cuisine: American
Ingredients
- 1 large seedless watermelon (about 8–10 pounds)
- 2 cups green grapes
- 1 pint fresh strawberries
- 2 large bananas
- 1 cup blueberries
- 1 large orange
- 2 kiwis
- 1 cup pineapple chunks
- 1 cup apple slices
- 2 cups plain Greek yogurt
- 3 tablespoons honey
- 1 teaspoon vanilla extract
- Optional: Food coloring (green or purple)
Instructions
- Prepare the watermelon base: Wash and dry the watermelon. Cut a thin slice off the bottom so it sits flat. Cut a 1-inch slice off the top and set aside. Place the watermelon on a large serving platter.
- Create the monster face: Carve two oval eye sockets (about 2 inches wide) on the front. Cut green grapes in half lengthwise and place in the sockets, cut side out. Add a blueberry pupil in each. Cut a crescent mouth below the eyes and line with sliced strawberries (pointy ends in). Add a blueberry nose. Secure banana slices as horns with toothpicks.
- Add monster features: Place kiwi slices as eyebrows above the eyes. Add apple slices as ears on the sides. Use orange wedges for a tongue. Scatter additional grape halves or blueberry clusters as warts.
- Prepare the surrounding fruit: Slice strawberries, bananas (toss in lemon juice to prevent browning), kiwis, and orange wedges. Arrange all fruit around the watermelon base on the platter.
- Make the yogurt dip: In a medium bowl, whisk together Greek yogurt, honey, and vanilla extract until smooth. Add food coloring if desired. Transfer to a serving bowl and place on the platter.
- Final assembly: Adjust any fruit pieces. Add decorative touches like a small sign. Cover with plastic wrap and refrigerate until serving.
Notes
Choose a symmetrical watermelon with a flat side for stability. Prep fruit the night before to save time. Toss apple and banana slices in lemon juice to prevent browning. Don’t worry about making the monster face perfect—crooked features add charm. Keep the tray cold until serving; set on ice for outdoor parties.
Nutrition
- Serving Size: 1 serving (about 1/1
- Calories: 200
- Sugar: 28
- Sodium: 50
- Fat: 2
- Saturated Fat: 1
- Carbohydrates: 38
- Fiber: 5
- Protein: 9
Keywords: Halloween, fruit tray, monster, party snack, healthy, kid-friendly, fruit platter