I was standing in the checkout line at the grocery store last October when a kid behind me started whining about wanting a scary Halloween treat. His mom sighed, and I felt this weird jolt—not sympathy, exactly, but a flash of my own 8-year-old self, standing on a step stool in my aunt Rita’s tiny kitchen. She was rolling out this pale dough, and I remember thinking it looked like play-dough. Then she pressed an almond onto the end of each little log, and I got it. They were fingers. Real witch fingers. My aunt has been gone for almost fifteen years now, but I swear I could smell that butter and almond extract combo right there in the grocery store line.
Honestly, I almost laughed out loud. Here I was, a grown woman with my own kids, getting emotional over cookie dough in the middle of a fluorescent-lit aisle. But that’s the thing about food memories—they hit you when you least expect them. I grabbed my bags and practically raced home to dig out her recipe card, the one with the faded handwriting and a grease stain in the corner. And let me tell you, making these Easy Witch Finger Cookies with Almond Nails with my own kids last weekend was pure magic. They’re creepy, they’re fun, and they’re so simple that even a preschooler can help shape the fingers.
Maybe you’ve been there, trying to find a Halloween activity that doesn’t involve a ton of fancy ingredients or a mess that takes hours to clean up. These cookies are your answer. They look genuinely spooky—like something out of a haunted house—but they’re just a basic sugar cookie dressed up for the occasion. No scary techniques, no expensive tools, just a few pantry staples and a little imagination. I mean, what’s Halloween without a little edible fright?
Why You’ll Love This Recipe
These Easy Witch Finger Cookies with Almond Nails aren’t just another Halloween treat. They’re the kind of recipe that makes you look like a kitchen genius with almost zero effort. Here is why this one works so well for busy families on a budget:
- Kid-Friendly Fun : My 6-year-old shaped most of these herself. The dough is forgiving, and the almond nails are just press-and-go. No piping bags or special tools needed.
- Budget-Friendly Ingredients : Butter, sugar, flour, eggs, and a jar of almonds. That’s it. You probably have most of this in your pantry right now.
- Perfect for Halloween Parties : These things are a total conversation starter. I took a batch to our neighborhood potluck, and they were gone in ten minutes. Kids love the creepy factor, and adults appreciate the nostalgia.
- Surprisingly Delicious : Let’s be real—some Halloween treats look better than they taste. Not these. The almond extract gives them this almost marzipan-like flavor that’s absolutely addictive. I may or may not have eaten three before the kids woke up.
- Leftovers Reheat Well : Stored in an airtight container, these stay fresh for almost a week. They actually taste better on day two, which is perfect for spreading out the Halloween fun.
What makes this recipe different from the dozens of other witch finger cookies out there? It’s the texture. I tested this dough about four times before I got it right—not too crumbly, not too soft, with just enough structure to hold those creepy knuckle indentations. Plus, I use a trick that keeps the almonds from sliding off during baking. No one wants a witch with missing nails, right?
What Ingredients You Will Need
This recipe uses simple, wholesome ingredients to deliver bold flavor and satisfying texture without the fuss. Most of these are pantry staples, so you probably don’t need a special trip to the store.
- 1 cup (226 g) unsalted butter , softened (I use Land O’Lakes for consistent results. Make sure it’s really soft—like, leave-it-out-for-an-hour soft.)
- 1 cup (200 g) granulated sugar (adds sweetness and helps with that slight crispiness on the edges)
- 1 large egg , room temperature (cold eggs can make the dough stiff and hard to shape)
- 1 teaspoon almond extract (this is the secret to that authentic witch-finger flavor. Don’t skip it!)
- 1/2 teaspoon vanilla extract (rounds out the almond flavor so it’s not too overpowering)
- 2 1/2 cups (312 g) all-purpose flour (spoon and level it—don’t scoop straight from the bag or you’ll get dry dough)
- 1/2 teaspoon baking powder (gives just a tiny bit of lift without making them puffy)
- 1/4 teaspoon salt (balances the sweetness and brings out the almond flavor)
- 1/3 cup sliced almonds , about 24 pieces (for the fingernails. Whole almonds work too, but sliced ones look more like actual nails.)
- Red food coloring , gel or liquid (for the bloody cuticle area. Totally optional, but the kids insisted.)
Ingredient Tips from My Kitchen : I recommend using a good-quality almond extract—the cheap stuff can taste artificial. Nielsen-Massey is my go-to, but any brand with real almond oil will work. For the almonds, look for raw sliced almonds. Toasted ones are too brittle and break when you press them into the dough. If you only have whole almonds, slice them lengthwise with a sharp knife. And if you’re out of almond extract? Use 2 teaspoons of vanilla extract instead. The flavor will be different (more like vanilla shortbread), but they’ll still taste great.
Substitution Guidance : Need a dairy-free version? Swap the butter with a high-quality vegan butter stick. I’ve used Earth Balance with good results. Just make sure it’s the stick form, not the spreadable tub. For a gluten-free option, use a 1:1 gluten-free baking flour blend. The texture will be slightly softer, but they’ll still hold their shape.
Equipment Needed
You don’t need a fancy kitchen to pull these off. Here’s what I used:
- Large mixing bowl (stainless steel or glass works best)
- Electric hand mixer or stand mixer (a whisk and some elbow grease will work too, but your arm will thank you for the mixer)
- Measuring cups and spoons
- Baking sheets (I use two—these cookies don’t spread much, so you can fit about 12 per sheet)
- Parchment paper or silicone baking mat (absolutely essential for easy cleanup)
- Small offset spatula or butter knife (for spreading the red food coloring)
- Cooling rack
- Plastic wrap (for chilling the dough)
Budget-Friendly Tip : If you don’t have a stand mixer, a hand mixer from the thrift store works perfectly. I actually used my grandma’s old hand mixer for this batch—it’s probably older than me, and it worked like a charm. No need to buy expensive equipment for a simple cookie recipe.
Preparation Method
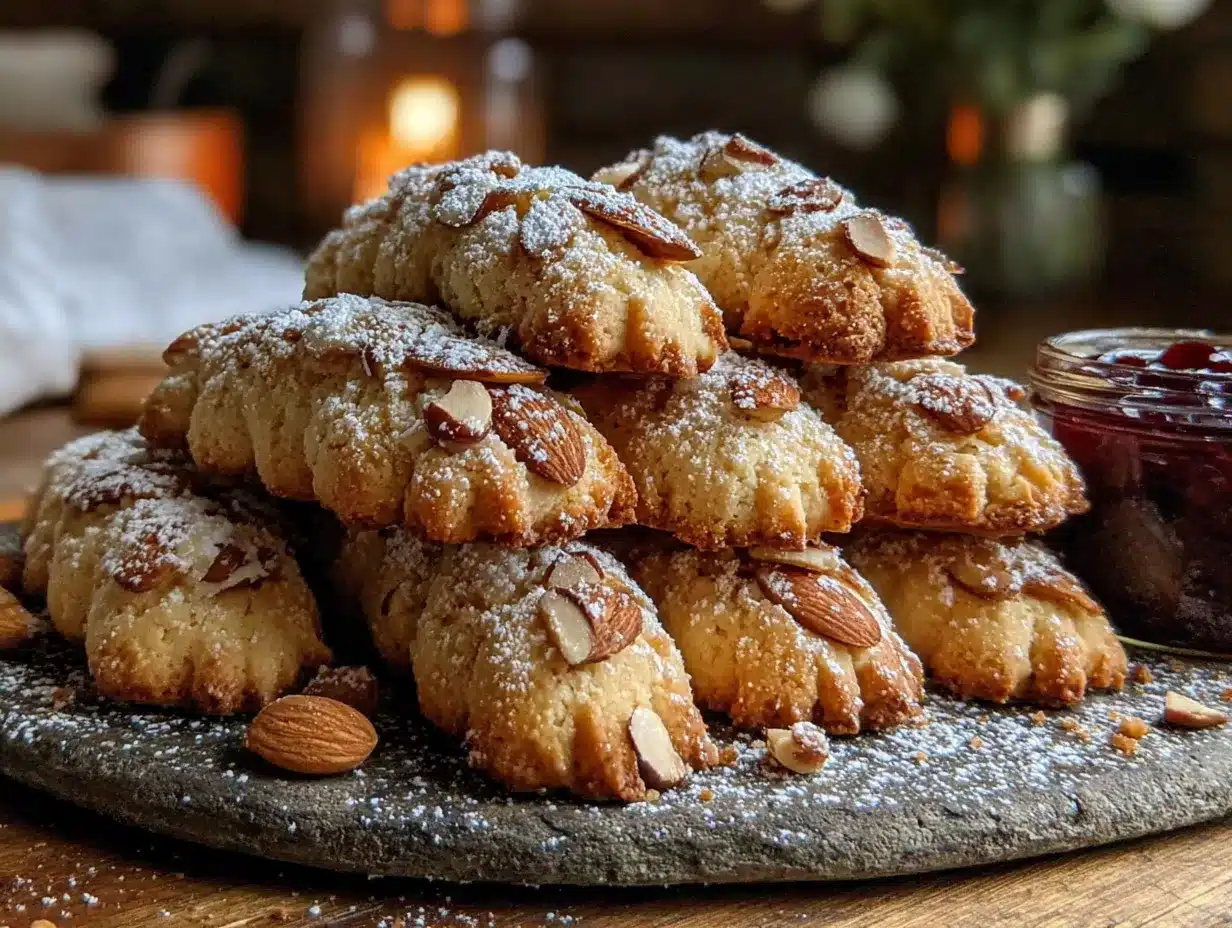
Let’s get to the fun part. Here’s how to make these creepy cookies step by step.
- Cream the butter and sugar. In a large bowl, beat the softened butter and granulated sugar together on medium speed until light and fluffy, about 3 minutes. You want it to look pale and airy. Scrape down the sides of the bowl halfway through. I forgot to do this once, and ended up with butter chunks in my dough—not a disaster, but annoying.
- Add the wet ingredients. Beat in the egg, almond extract, and vanilla extract until combined. The mixture might look slightly curdled at this point—that’s totally normal. Don’t panic. Just make sure everything is well incorporated.
- Mix the dry ingredients. In a separate bowl, whisk together the flour, baking powder, and salt. This ensures the baking powder is evenly distributed. I learned this the hard way after biting into a cookie that tasted like a salt lick.
- Combine wet and dry. Gradually add the dry ingredients to the wet mixture, mixing on low speed until a soft dough forms. It should pull away from the sides of the bowl but still feel slightly sticky. If it’s too sticky to handle, add another tablespoon of flour. If it’s too dry, add a teaspoon of milk.
- Chill the dough. Wrap the dough in plastic wrap and refrigerate for at least 30 minutes. This is non-negotiable. Chilled dough is so much easier to shape—it won’t stick to your hands, and the fingers will hold their shape better during baking. I once skipped this step because I was in a rush, and my witch fingers looked more like blobs. Don’t be like me.
- Preheat and prepare. Preheat your oven to 350°F (175°C). Line two baking sheets with parchment paper or silicone mats.
- Shape the fingers. Take a small piece of dough (about 1 tablespoon) and roll it into a log shape. It doesn’t have to be perfect—real fingers aren’t perfectly uniform either. Gently taper one end to look like a fingertip. Place on the prepared baking sheet. Repeat with the remaining dough, spacing the fingers about 2 inches apart. They don’t spread much, so you can fit about 12 per sheet.
- Add the knuckles. Using the back of a butter knife or a small spatula, gently press lines into the dough to create knuckle creases. Don’t press too deep—you want indentations, not cuts. I made this mistake on my first batch and ended up with finger segments that fell apart after baking.
- Attach the nails. Press one sliced almond onto the tapered end of each finger. Press firmly so it stays in place during baking. If the almond doesn’t stick, dab a tiny bit of water underneath it.
- Bake. Bake for 12-15 minutes, or until the edges are just barely golden. The centers should still look slightly pale. Overbaking makes them dry, and nobody wants dry witch fingers. Let them cool on the baking sheet for 5 minutes, then transfer to a cooling rack.
- Add the bloody details (optional). Once the cookies are completely cool, use a small brush or a toothpick to dab a tiny bit of red food coloring around the cuticle area. A little goes a long way. My kids went overboard with this step, and our cookies looked like they’d been in a horror movie. Which, honestly, was perfect.
Cooking Tips & Techniques
Here are some things I wish someone had told me before I started making these:
Chill the dough twice if you need to. If your kitchen is warm, the dough might get soft and sticky while you’re shaping the fingers. Just pop the baking sheet in the fridge for 10 minutes before baking. This helps the cookies hold their shape and keeps the almonds from sliding off.
Don’t overwork the dough. When you’re rolling the fingers, handle the dough as little as possible. Too much handling warms up the butter and makes the cookies spread. If the dough starts feeling greasy, refrigerate it again for 15 minutes.
My biggest failure : I once used margarine instead of butter because I thought it would be healthier. Big mistake. The cookies spread into flat, greasy pancakes that looked nothing like fingers. Stick with real butter, folks. It’s worth the extra few cents.
Timing strategy : Make the dough the night before and let it chill overnight. Then all you have to do the next day is shape and bake. This is a lifesaver if you’re hosting a Halloween party after work.
Consistency tip : For perfectly uniform fingers, use a small cookie scoop to portion the dough. But honestly, real fingers aren’t all the same size. The slightly uneven ones look more authentic. My 4-year-old made one that was basically a ball with an almond stuck in it, and it was everyone’s favorite.
Variations & Adaptations
These cookies are super customizable. Here are a few versions I’ve tried:
- Chocolate Witch Fingers : Replace 1/4 cup of the flour with unsweetened cocoa powder. The chocolate version looks even creepier—like mud-covered fingers. My kids said these were “way more Halloween-y.”
- Gluten-Free Version : Use a 1:1 gluten-free baking flour blend. I tested this with Bob’s Red Mill, and the texture was slightly softer but still delicious. Add an extra tablespoon of flour if the dough feels too sticky.
- Vegan Adaptation : Replace the butter with vegan butter sticks and use a flax egg (1 tablespoon ground flaxseed mixed with 3 tablespoons water, let sit for 5 minutes). The texture is a bit more crumbly, but the flavor is still great.
- Spooky Spider Fingers : Instead of almonds, press a chocolate chip into the fingertip for a different look. My neighbor tried this, and her kids called them “robot witch fingers.”
- Extra-Creepy Version : Brush the baked cookies with a little corn syrup mixed with red food coloring for a glossy, bloody effect. I did this for a grown-up Halloween party, and people were genuinely disturbed. Success!
Serving & Storage Suggestions
These cookies are best served at room temperature, which is perfect for parties. Arrange them on a platter with the fingers pointing in different directions for maximum creepiness. I like to serve them alongside a bowl of “witches’ brew” (punch) or hot apple cider.
Storage : Store in an airtight container at room temperature for up to 5 days. Layer them between sheets of parchment paper so the almonds don’t get knocked off. I actually think they taste better on day two—the almond flavor seems to deepen.
Freezing : You can freeze the shaped, unbaked cookies on a baking sheet, then transfer them to a freezer bag. Bake straight from frozen, adding 2-3 minutes to the baking time. I do this every October so I always have a batch ready for unexpected guests.
Reheating : If you want that just-baked warmth, pop them in a 300°F oven for 5 minutes. Don’t use the microwave—it makes the almonds soggy.
Flavor development : These cookies actually improve with age. The almond extract mellows out and blends with the butter, creating a more complex flavor. So don’t be afraid to make them a day or two ahead.
Nutritional Information & Benefits
Let’s be honest—these are cookies, not health food. But here’s the breakdown per cookie (based on 24 cookies):
- Calories: 145
- Fat: 8g
- Carbohydrates: 17g
- Protein: 2g
- Sugar: 8g
Health Highlights : Almonds are a good source of vitamin E and healthy fats. And since these cookies are smaller than a typical bakery cookie, portion control is built right in. I tell myself that every time I eat four of them.
Dietary Considerations : These contain gluten, dairy, eggs, and tree nuts (almonds). For a nut-free version, skip the almond extract and use sliced banana chips for the nails. For a lower-sugar option, reduce the sugar to 3/4 cup—the texture will be slightly less tender, but they’ll still taste great.
My personal perspective : I believe in balance. Halloween comes once a year, and these cookies are part of the fun. I’d rather my kids eat a homemade cookie with real ingredients than a store-bought one with preservatives and artificial flavors. Plus, the act of making them together—shaping the fingers, adding the nails—is a memory that lasts longer than any nutritional concern.
Conclusion
These Easy Witch Finger Cookies with Almond Nails are everything you want in a Halloween treat: spooky, simple, and genuinely delicious. They’re the kind of recipe that brings people together—kids and adults alike—and creates those sticky, flour-covered memories that last a lifetime. I’ve made them for five Halloweens in a row now, and they never get old. Every time I press an almond into that pale dough, I think of my aunt Rita and that tiny kitchen. And every year, my kids ask if we can make “the finger cookies” again.
So go ahead and give them a try. Customize them however you like—add more red food coloring, swap the almonds for chocolate chips, or just leave them plain and creepy. The best part about this recipe is that it’s yours to play with. And if you come up with a fun variation, I’d love to hear about it. Drop a comment below or tag me in your photos. Happy Halloween, friends—may your cookies be creepy and your kitchen be full of laughter.
FAQs
Can I make these cookies ahead of time?
Absolutely. The dough can be refrigerated for up to 3 days or frozen for up to 3 months. Baked cookies stay fresh for 5 days in an airtight container.
Why did my cookies spread too much?
Your dough was probably too warm. Make sure to chill it for at least 30 minutes before shaping, and if your kitchen is hot, chill the shaped cookies for 10 minutes before baking.
Can I use almond flour instead of all-purpose flour?
I don’t recommend it. Almond flour doesn’t have enough structure to hold the finger shape. Stick with all-purpose flour or a gluten-free baking blend.
How do I keep the almonds from falling off?
Press them firmly into the dough before baking. If they still fall off, dab a tiny bit of water or corn syrup underneath the almond before pressing it on.
Can I use vanilla extract instead of almond extract?
Yes, but the flavor will be more like a traditional sugar cookie. Use 2 teaspoons of vanilla extract if you’re skipping the almond extract entirely.
Pin This Recipe!

Easy Witch Finger Cookies Recipe with Almond Nails

These spooky witch finger cookies are a fun and easy Halloween treat made with a buttery sugar cookie dough and almond fingernails. Perfect for parties, they are kid-friendly, budget-friendly, and surprisingly delicious with a marzipan-like flavor.
- Prep Time: 15 minutes
- Cook Time: 15 minutes
- Total Time: 1 hour (includes 30 minutes chilling)
- Yield: 24 cookies 1x
- Category: Dessert
- Cuisine: American
Ingredients
- 1 cup (226 g) unsalted butter, softened
- 1 cup (200 g) granulated sugar
- 1 large egg, room temperature
- 1 teaspoon almond extract
- 1/2 teaspoon vanilla extract
- 2 1/2 cups (312 g) all-purpose flour
- 1/2 teaspoon baking powder
- 1/4 teaspoon salt
- 1/3 cup sliced almonds (about 24 pieces)
- Red food coloring (gel or liquid, optional)
Instructions
- Cream the butter and sugar: In a large bowl, beat the softened butter and granulated sugar together on medium speed until light and fluffy, about 3 minutes. Scrape down the sides of the bowl halfway through.
- Add the wet ingredients: Beat in the egg, almond extract, and vanilla extract until combined. The mixture may look slightly curdled; this is normal.
- Mix the dry ingredients: In a separate bowl, whisk together the flour, baking powder, and salt.
- Combine wet and dry: Gradually add the dry ingredients to the wet mixture, mixing on low speed until a soft dough forms. It should pull away from the sides of the bowl but still feel slightly sticky. If too sticky, add another tablespoon of flour; if too dry, add a teaspoon of milk.
- Chill the dough: Wrap the dough in plastic wrap and refrigerate for at least 30 minutes.
- Preheat and prepare: Preheat your oven to 350°F (175°C). Line two baking sheets with parchment paper or silicone mats.
- Shape the fingers: Take a small piece of dough (about 1 tablespoon) and roll it into a log shape. Gently taper one end to look like a fingertip. Place on the prepared baking sheet. Repeat with remaining dough, spacing fingers about 2 inches apart.
- Add the knuckles: Using the back of a butter knife or a small spatula, gently press lines into the dough to create knuckle creases. Do not press too deep.
- Attach the nails: Press one sliced almond onto the tapered end of each finger. Press firmly so it stays in place. If the almond doesn’t stick, dab a tiny bit of water underneath it.
- Bake: Bake for 12-15 minutes, or until the edges are just barely golden. Let cool on the baking sheet for 5 minutes, then transfer to a cooling rack.
- Add the bloody details (optional): Once the cookies are completely cool, use a small brush or toothpick to dab a tiny bit of red food coloring around the cuticle area.
Notes
Chill the dough for at least 30 minutes; this is non-negotiable for easy shaping. For perfectly uniform fingers, use a small cookie scoop, but uneven fingers look more authentic. If the dough gets too warm while shaping, chill the baking sheet for 10 minutes before baking. These cookies taste even better on day two as the almond flavor deepens.
Nutrition
- Serving Size: 1 cookie
- Calories: 145
- Sugar: 8
- Sodium: 55
- Fat: 8
- Saturated Fat: 4.5
- Carbohydrates: 17
- Fiber: 0.5
- Protein: 2
Keywords: Halloween cookies, witch finger cookies, almond cookies, spooky treats, easy Halloween recipe, sugar cookies, kid-friendly Halloween


