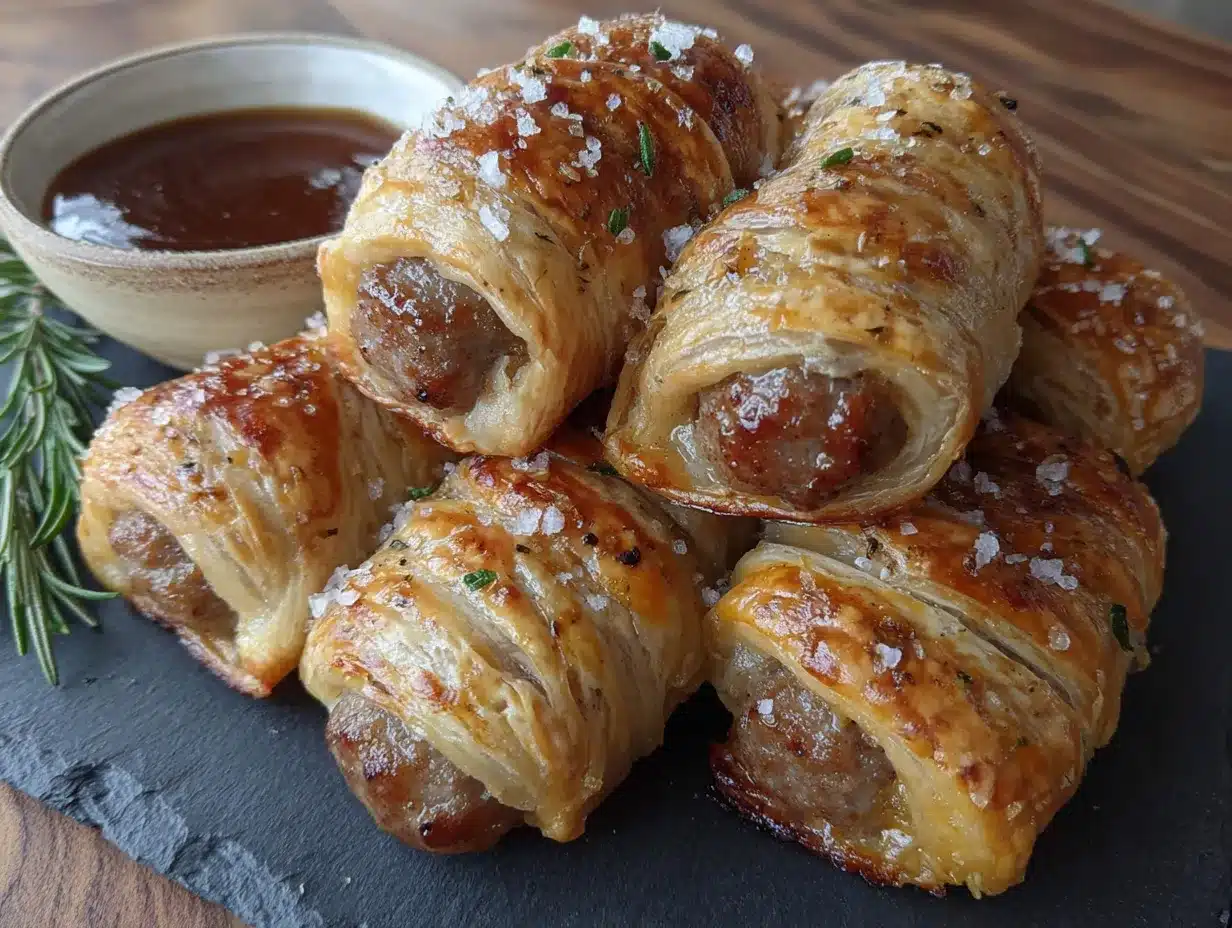
It was 11:47 PM on a random Tuesday in October, and I had a very specific, slightly ridiculous craving. I wanted a sausage roll, but not just any sausage roll—I wanted one that looked like a tiny, edible ghost. My daughter’s school Halloween party was the next morning, and I had promised to bring a “spooky snack.” I didn’t have any puff pastry, which is what a normal person would use for a fancy sausage roll. But I had a pack of crescent rolls that were about to expire, some breakfast links, and a wild idea that arrived fully formed in my sleepy brain. I mean, honestly, sometimes the best recipes come from a place of happy desperation.
I remember standing there in the quiet kitchen, the only light coming from the open fridge, thinking, “What if I just wrap these like a mummy?” The crescent rolls were already cut into triangles, which was perfect for making bandages. I didn’t even bother to separate them neatly—I just sliced the whole sheet into thin strips with a pizza wheel. It was messy. There were bits of dough stuck to my fingers, and I may have dropped a sausage on the floor. But you know that feeling when a plan just clicks? This was that moment.
The best part? They turned out amazing. The kids at the party devoured them, and the other moms actually asked for the recipe. That’s when I knew I had stumbled onto something special. It wasn’t just a Halloween gimmick; it was a genuinely easy, delicious snack that looked way harder than it was. And honestly, that’s my favorite kind of recipe to share. So, if you need a last-minute Halloween treat or just a fun weeknight dinner side, these Quick Mummy Wrapped Sausage Rolls are about to become your new secret weapon. Let me show you how to make them—it’s almost too simple.
Why You’ll Love This Recipe
Let me tell you, after making these for every Halloween party, birthday sleepover, and “spooky movie night” for the last three years, I have a pretty good handle on why this recipe works. It’s not just another cute snack—it’s a total lifesaver. Here is why you are going to absolutely love it:
- Ridiculously Quick: We are talking 20 minutes from start to finish. You can make these while the kids are getting their costumes on, or even after they’ve gone to bed for a fun surprise lunchbox treat the next day.
- Simple Ingredients: You probably already have everything in your fridge and pantry. No special “edible eyes” or fancy pastry dough needed. Just normal stuff you use for breakfast.
- Perfect for Halloween: Obviously, right? But they are also great for game day snacks, birthday parties, or even a fun breakfast. The mummy look is just a bonus.
- Crowd-Pleaser: I have never, and I mean never, seen a kid turn one of these down. They are meaty, flaky, and fun. It’s a guaranteed win.
- Unbelievably Delicious: The combination of the flaky, buttery crescent roll with the savory, juicy sausage is next-level comfort food. It’s the kind of simple snack that makes you close your eyes after the first bite.
What makes this recipe different from all the other “mummy” snacks out there? It’s the texture. By using crescent rolls instead of puff pastry or bread, you get that distinct, soft, flaky layer that looks exactly like mummy bandages. It’s not a dry bread stick wrapped around a hot dog. It’s a proper, buttery pastry that hugs the sausage perfectly. This isn’t just another version of a Halloween snack—it’s my best version.
This recipe is for the tired parent who still wants to show up. It’s for the person who wants to impress without the stress. It’s comfort food reimagined—faster, simpler, but with the same soul-soothing satisfaction. Trust me, you are going to feel like a kitchen genius.
What Ingredients You Will Need
This recipe uses the simplest of ingredients to deliver a big punch of flavor and fun. You don’t need a specialty grocery store for this one. Here is what you will need to grab from your kitchen.
- 1 can (8 oz) Refrigerated Crescent Rolls: This is the star of the show. I prefer the Pillsbury brand for the best flaky texture, but any store brand works fine. Make sure it’s the sheet style, not the perforated triangles, if you can find it. If you only have the perforated ones, just pinch the seams together before cutting.
- 12 Mini Smoked Sausages or Cocktail Wieners: These are the “mummies.” I like using Lit’l Smokies or a similar brand. You can also use breakfast sausage links, just make sure they are fully cooked. For a different flavor, try spicy Andouille sausage or even chicken-apple sausages.
- 12 Candy Eyeballs: These are optional but highly recommended for the full mummy effect. You can find them at any grocery store in the baking aisle around Halloween, or order them online. If you can’t find them, a tiny dot of ketchup or mustard works as a funny, goofy eye.
- 1 large Egg: You will use this for the egg wash. It gives the pastry that beautiful golden-brown color that makes it look bakery-fresh. If you don’t have an egg, you can brush the tops with a little milk or melted butter.
- 1 tablespoon Water: Just a splash to whisk with the egg for the wash.
- Optional: Everything Bagel Seasoning or Sesame Seeds: For a little extra flavor and texture on top. It’s not traditional for a mummy, but it adds a nice savory crunch.
Ingredient Selection Tips
For the best results, look for crescent rolls that are not expired. Fresh dough puffs up much better. If you are using cocktail wieners, pat them dry with a paper towel before wrapping. This helps the dough stick better and prevents the rolls from getting soggy. I learned this the hard way after my first batch turned out a bit steamy instead of crispy.
Substitution Guidance
Need a gluten-free option? Use gluten-free crescent roll dough (it does exist!) or even gluten-free tortillas cut into strips. For a dairy-free version, use a dairy-free crescent roll or puff pastry and brush with plant-based milk instead of an egg wash. You can also swap the smoked sausages for vegetarian sausages or even cheese sticks for a meatless version.
Equipment Needed
You don’t need a fancy kitchen to pull these off. Here is the simple gear that makes the job easy.
- Baking Sheet: A standard half-sheet pan works perfectly. Line it with parchment paper for the easiest cleanup ever. I use the same sheet for everything, and I promise, the parchment paper is non-negotiable for keeping the bottoms from sticking.
- Pizza Cutter or Sharp Knife: This is for cutting the crescent roll dough into thin strips. A pizza cutter makes it a one-second job, but a sharp knife works just as well. A dull knife will just squish the dough.
- Small Bowl: For whisking your egg wash.
- Pastry Brush: To apply the egg wash. If you don’t have one, you can use a folded paper towel or even your finger—just be gentle so you don’t un-wrap your mummies.
- Cooling Rack: Optional, but great for letting the rolls cool so the bottoms don’t get steamy. I usually just let them cool on the baking sheet for a few minutes before moving them.
Preparation Method
Alright, let’s get these little guys wrapped up. This is so simple, you’ll be making them from memory after the first batch.
- Preheat Your Oven: Set your oven to 375°F (190°C). This is the sweet spot for getting the crescent rolls golden and the sausages hot without burning the “bandages.” While it’s heating, line your baking sheet with parchment paper.
- Prepare the Dough: Open your can of crescent rolls. Unroll the dough onto a clean cutting board. If you have the sheet style, great. If you have the perforated triangles, gently press the seams together to form one solid rectangle. Don’t worry if it’s not perfect—the mummies will look even better with a few imperfections.
- Cut the “Bandages”: Using your pizza cutter or knife, cut the dough into long, thin strips. I usually cut them about ¼ to ½ inch wide. They don’t have to be perfectly straight—in fact, wavy, uneven strips look more like authentic mummy wrappings. You should get about 12-15 strips from the whole sheet.
- Wrap the Sausages: Take one mini sausage and start wrapping a strip of dough around it. Leave a small gap at the top for the eyes. Overlap the dough slightly as you go down the sausage. Don’t wrap it too tightly—the dough will expand as it bakes, and you want those little gaps to show. Tuck the end of the strip under the sausage to secure it.
- Place on Baking Sheet: Put each wrapped mummy on your prepared baking sheet, seam-side down. Leave about an inch between each one so they have room to puff up and get crispy on all sides.
- Apply Egg Wash: In your small bowl, whisk together the egg and the tablespoon of water. Using your pastry brush, gently brush the tops of each mummy with the egg wash. This is what gives them that gorgeous, shiny, golden-brown crust. Don’t skip this step!
- Bake: Pop the baking sheet into the preheated oven. Bake for 10-12 minutes, or until the dough is puffed up and a deep golden brown. You’ll see the sausage peeking through the gaps.
- Add the Eyes: Let the mummies cool on the baking sheet for about 2-3 minutes. They will be very hot! Once they are cool enough to handle, gently press a candy eyeball into the exposed sausage at the top of each mummy. The heat from the sausage will help the candy stick. If you are using ketchup or mustard, just dab a tiny dot on.
- Serve Immediately: Transfer to a plate or platter. These are best enjoyed warm, while the dough is still flaky and the sausage is juicy.
Cooking Tips & Techniques
I’ve made these more times than I can count, and I’ve definitely had my share of “learning experiences.” Here are my best tips to make sure your mummies come out perfect every single time.
- Don’t Overwork the Dough: Crescent roll dough is delicate. The more you handle it, the tougher it gets. When you are cutting the strips, be quick about it. If the dough gets too warm and sticky, pop it in the fridge for 5 minutes to firm up.
- The “Soggy Bottom” Fix: This is the most common problem. To avoid it, make sure your sausages are patted dry. Also, don’t crowd the baking sheet. Give them space so the steam can escape. Using parchment paper instead of a silicone mat also helps the bottoms get crispier.
- My Biggest Failure: One year, I tried to make these with low-fat crescent rolls to be “healthy.” Big mistake. They didn’t puff up at all, and they turned out dense and pale. Just use the full-fat version for this recipe—it’s a treat, after all!
- Timing is Everything: These are best eaten within 30 minutes of coming out of the oven. If you are making them for a party, time the baking so they are just coming out as guests arrive. You can prep them completely (wrap them and put them on the tray) up to 4 hours ahead of time. Just keep them in the fridge, and add 2 minutes to the baking time.
- Use a Pizza Cutter: I cannot stress this enough. A pizza cutter makes cutting the strips so much easier and faster than a knife. It’s one of those small kitchen tools that makes a huge difference for this specific task.
Variations & Adaptations
One of the best things about this recipe is how easy it is to change up. Here are a few ways I’ve adapted it over the years.
- Spicy Mummies: For the adults, swap the mini smoked sausages for spicy chorizo links or mini andouille sausages. You can also add a pinch of red pepper flakes to the egg wash for a little heat.
- Cheesy Mummies: Before wrapping the sausage, cut a slit lengthwise down the center and stuff it with a small strip of cheddar or mozzarella cheese. The melted cheese will ooze out of the bandages, and it is absolutely divine.
- Veggie Mummies: For a vegetarian option, use mini mozzarella sticks or pre-cooked veggie sausage links. You can also wrap the dough around asparagus spears or roasted bell pepper strips for a lighter, healthier snack.
- Breakfast Mummies: Use fully cooked breakfast sausage links and wrap them in the crescent strips. Serve them with a side of maple syrup for dipping. It’s a fun, spooky breakfast that kids absolutely love.
- Air Fryer Method: I tried this last year when my oven was full of other party food. Preheat your air fryer to 350°F (175°C). Place the mummies in the basket in a single layer (you might need to do two batches). Cook for 6-8 minutes, or until golden brown. They come out even crispier than the oven version!
Serving & Storage Suggestions
These mummies are best served warm, straight from the oven. The contrast between the hot, juicy sausage and the flaky, cool-ish pastry is the whole point. I like to arrange them on a black or orange platter to make the Halloween theme pop. A little bowl of ketchup or spicy mustard for dipping is always a good idea.
If you have leftovers (which is rare in my house), let them cool completely to room temperature. Store them in an airtight container in the refrigerator for up to 3 days. The dough will soften a bit, but they will still taste great.
Reheating: The best way to bring them back to life is in the oven or air fryer. Pop them in a 350°F (175°C) oven for about 5 minutes, or in the air fryer for 2-3 minutes. The microwave will work in a pinch, but the dough will get very soft and chewy instead of flaky.
Freezing: You can freeze these both before and after baking. To freeze before baking, wrap the mummies on a baking sheet and freeze until solid (about 1 hour). Then transfer them to a freezer bag. Bake from frozen, adding 3-5 minutes to the baking time. To freeze after baking, let them cool completely, then freeze in a single layer on a baking sheet before transferring to a bag. Reheat directly from frozen in the oven or air fryer.
Nutritional Information & Benefits
Let’s be real—these are a treat, not a health food. But here is the estimated breakdown for one mummy roll (based on one sausage and one serving of dough):
| Nutrient | Amount per Serving |
|---|---|
| Calories | ~120-150 |
| Total Fat | 8-10g |
| Saturated Fat | 3-4g |
| Carbohydrates | 10-12g |
| Protein | 4-5g |
| Sodium | 300-400mg |
While they aren’t packed with vitamins, the protein from the sausage does help make this a more satisfying snack than just a cookie or a piece of candy. If you want to make them a bit more balanced, serve them with a side of veggie sticks or an apple slice. The main benefit here is the joy factor—sometimes, a fun, delicious treat is exactly what we need for our mental health.
These are not gluten-free, dairy-free, or low-carb as written, but as noted in the variations section, you can easily adapt them to fit those dietary needs.
Conclusion
So, there you have it. These Quick Mummy Wrapped Sausage Rolls are the perfect blend of fun, flavor, and simplicity. They are the kind of recipe that makes you look like a Halloween hero without spending hours in the kitchen. I love them because they remind me of that sleepy Tuesday night when I just went for it, and it worked out perfectly.
I really hope you give these a try. Don’t be afraid to get a little messy with the dough, or to let the kids help with the wrapping—it’s a great way to get them involved in the kitchen. And honestly, the slightly imperfect ones always taste the best.
If you make them, I would love to hear about it! Leave a comment below and tell me how your little mummies turned out. Did you use spicy sausage? Did you add cheese? Share your photos and tag me on Pinterest! Let’s make this Halloween the most delicious one yet.
Happy Halloween, and happy snacking!
Frequently Asked Questions
Can I use puff pastry instead of crescent rolls?
Yes, absolutely! Puff pastry will give you a much flakier, more buttery result. Just thaw a sheet of puff pastry, cut it into thin strips, and wrap the sausages the same way. The baking time might increase by 2-3 minutes, so keep an eye on them.
Can I make these ahead of time for a party?
You bet. You can fully assemble the mummies (wrap the sausages and place them on the baking sheet) up to 4 hours ahead of time. Just cover them with plastic wrap and keep them in the fridge. When you are ready to bake, just brush on the egg wash and pop them in the oven. You may need to add 1-2 minutes to the baking time since they will be cold.
My dough keeps breaking when I wrap the sausages. What am I doing wrong?
This usually happens if the dough is too cold or too warm. If it’s straight from the fridge, let it sit on the counter for 5 minutes to soften slightly. If it’s too warm and sticky, pop it in the fridge for 5 minutes. Also, make sure you are cutting the strips wide enough—super thin strips are more likely to tear.
Can I use hot dogs instead of mini sausages?
Sure! Just cut a full-size hot dog into thirds or quarters. They will be a bit chunkier, so you’ll need to use a wider strip of dough. The baking time might be the same, but check to make sure the hot dog is heated through.
What can I use instead of candy eyeballs?
No problem at all. You can use tiny dots of ketchup or mustard, small pieces of black olive, or even a sprinkle of poppy seeds to look like little eyes. I’ve also used small dots of cream cheese with a tiny piece of black sesame seed on top. Get creative!
Pin This Recipe!
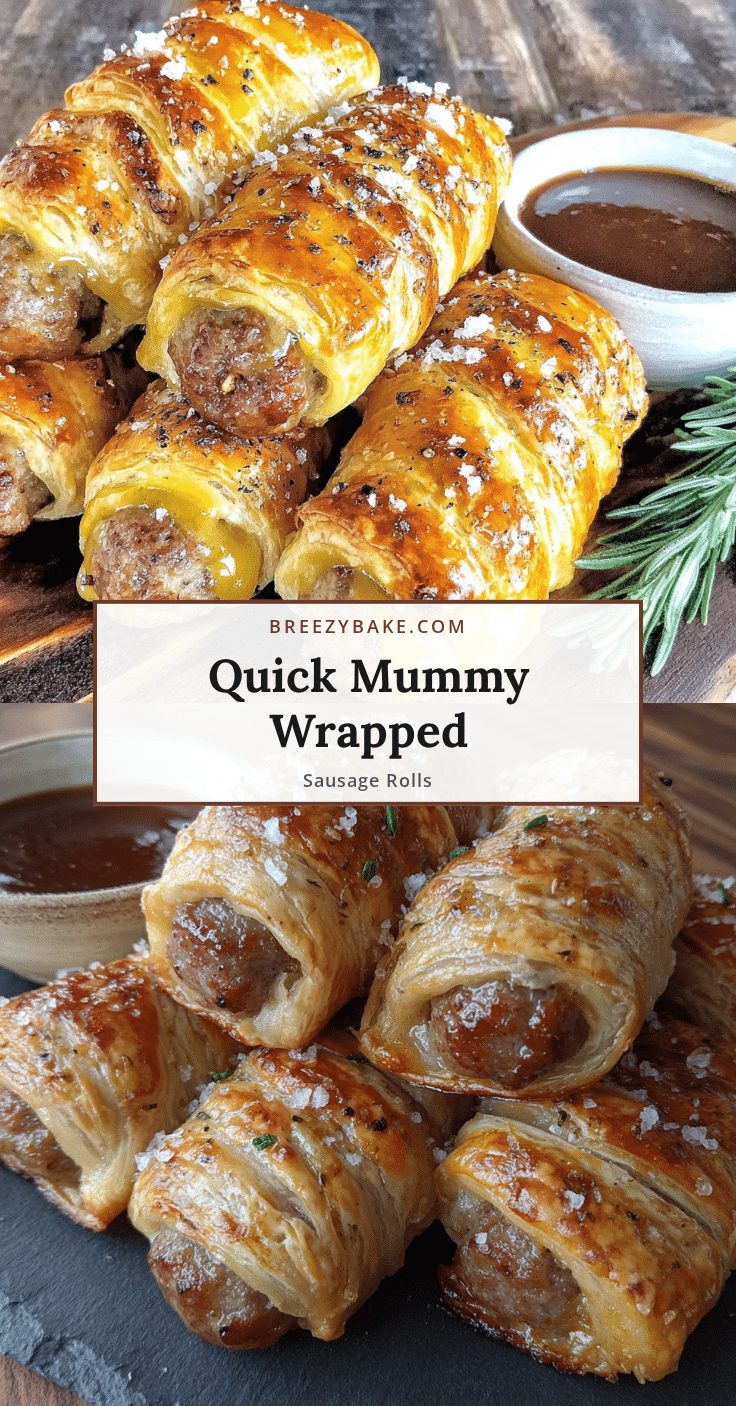
Quick Mummy Sausage Rolls: Easy Halloween Snack Recipe
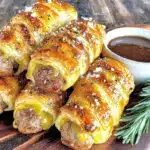
These Quick Mummy Wrapped Sausage Rolls are the perfect blend of fun, flavor, and simplicity. They are the kind of recipe that makes you look like a Halloween hero without spending hours in the kitchen.
- Prep Time: 10 minutes
- Cook Time: 12 minutes
- Total Time: 22 minutes
- Yield: 12 servings 1x
- Category: Appetizer
- Cuisine: American
Ingredients
- 1 can (8 oz) Refrigerated Crescent Rolls
- 12 Mini Smoked Sausages or Cocktail Wieners
- 12 Candy Eyeballs (optional)
- 1 large Egg
- 1 tablespoon Water
- Optional: Everything Bagel Seasoning or Sesame Seeds
Instructions
- Preheat your oven to 375°F (190°C). Line a baking sheet with parchment paper.
- Open the can of crescent rolls. Unroll the dough onto a clean cutting board. If using perforated triangles, gently press the seams together to form one solid rectangle.
- Using a pizza cutter or knife, cut the dough into long, thin strips about ¼ to ½ inch wide. You should get about 12-15 strips.
- Take one mini sausage and start wrapping a strip of dough around it, leaving a small gap at the top for the eyes. Overlap the dough slightly as you go down. Tuck the end under the sausage to secure.
- Place each wrapped mummy on the prepared baking sheet, seam-side down, leaving about an inch between each.
- In a small bowl, whisk together the egg and water. Brush the tops of each mummy with the egg wash.
- Bake for 10-12 minutes, or until the dough is puffed up and deep golden brown.
- Let cool on the baking sheet for 2-3 minutes. Gently press a candy eyeball into the exposed sausage at the top of each mummy.
- Serve immediately while warm.
Notes
For best results, pat sausages dry before wrapping to avoid soggy bottoms. Use full-fat crescent rolls for best puff. Can be assembled up to 4 hours ahead and refrigerated. Add 2 minutes to baking time if starting from cold. For air fryer: cook at 350°F (175°C) for 6-8 minutes.
Nutrition
- Serving Size: 1 mummy roll
- Calories: 120150
- Sugar: 23
- Sodium: 300400
- Fat: 810
- Saturated Fat: 34
- Carbohydrates: 1012
- Protein: 45
Keywords: Halloween, sausage rolls, mummy, crescent rolls, easy snack, party food, spooky