The Halloween party was in six hours and I’d completely forgotten. Everyone else would be bringing those elaborate themed desserts you see on Pinterest — you know, the ones that look like they took three days and a pastry degree. I had a box of brownie mix, a bag of marshmallows, and half a package of white chocolate chips that were probably left over from last Christmas. Honestly, I almost just grabbed a bag of candy and called it a day. But then I saw the tube of black decorating gel in the back of my baking drawer, and a weird, frantic idea hit me. Let me tell you, I was melting marshmallows on that brownie pan while simultaneously trying to figure out how to make it look like a mummy — it was a mess. My kitchen looked like a tiny, sugary explosion had gone off. I mean, there was powdered sugar on the dog. But somehow, between the panic and the half-melted marshmallows, these Melting Witch Mummy Brownies were born. And they were the first thing to disappear from the dessert table. Maybe you’ve been there — that moment when you think you’ve totally blown it, but the thing you threw together in a panic turns out to be the star of the show. That’s this recipe. It’s the one that made my neighbor ask for the recipe before she even tried one. It’s the one I keep making, not because I planned it, but because it’s just that good — and a little bit ridiculous, in the best way.
Why You’ll Love This Recipe
I’ve tested this recipe about six times now, tweaking the marshmallow-to-brownie ratio and figuring out the perfect way to get that “mummy wrap” look without it turning into a sticky disaster. Trust me, I’ve learned a few things the hard way. Here’s why these brownies are a total game-changer for your Halloween spread:
- Quick & Easy: Comes together in under 45 minutes, most of which is just baking time. Perfect for last-minute party panic or a fun weekend project with the kids.
- Simple Ingredients: No fancy grocery trips needed. You likely already have brownie mix, marshmallows, and white chocolate in your pantry. The “spooky” part comes from everyday stuff you can find at any grocery store.
- Perfect for Hosting: Great for Halloween parties, spooky movie nights, or any gathering where you want to impress without spending all day in the kitchen. You can even prep the brownies a day ahead!
- Crowd-Pleaser: Always gets rave reviews from kids and adults alike. It’s the perfect mix of delicious brownie and playful, spooky decoration.
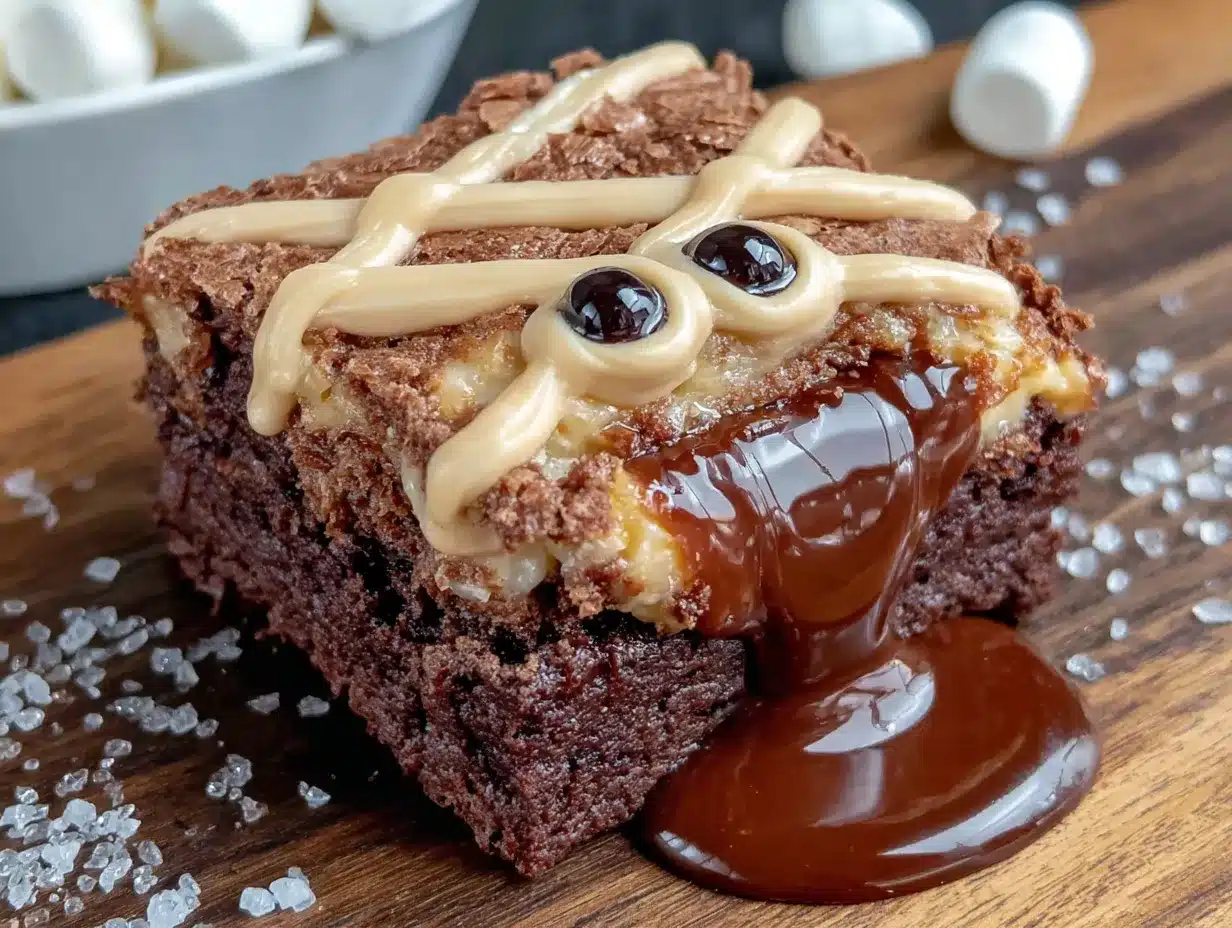
- Unbelievably Delicious: The texture is what gets everyone — a fudgy, rich brownie base topped with a gooey, toasted marshmallow center, all wrapped in a creamy white chocolate “bandage.” It’s next-level comfort food with a Halloween twist.
What makes this recipe different from the rest? It’s not just about slapping some candy eyes on a brownie. The secret is in the technique — how you toast the marshmallows to get that perfect, sticky mummy wrap, and the way the white chocolate melts just enough to look like a creepy bandage. This isn’t just another version of a spooky brownie; it’s your best version. The one that makes people say, “Wait, how did you do that?”
This recipe isn’t just good — it is the kind that makes you close your eyes after the first bite. It’s comfort food reimagined — spookier, gooier, but with the same soul-soothing satisfaction. Perfect for impressing your Halloween guests without stress, or turning a simple dessert into something memorable.
What Ingredients You Will Need
This recipe uses simple, mostly pantry-staple ingredients to deliver that rich, fudgy brownie and spooky marshmallow topping. You won’t need to hunt down any weird specialty items for this one.
For the Brownie Base
- 1 box (18 oz) fudge brownie mix (I recommend Ghirardelli or Duncan Hines for the fudgiest texture; avoid “chewy” style mixes)
- Eggs, oil, and water (as called for on the brownie mix box — usually 2 large eggs, 1/2 cup vegetable oil, and 1/4 cup water)
- 1 teaspoon vanilla extract (adds a little extra depth to the chocolate flavor — trust me on this one)
For the Mummy Wraps & Decor
- 1 bag (10 oz) large marshmallows (you’ll need about 16-20, depending on how many brownies you make; look for fresh, soft marshmallows for easier melting)
- 1 cup white chocolate chips or melting wafers (I prefer Ghirardelli white chocolate melting wafers for the smoothest melt, but regular chips work fine — just add a teaspoon of coconut oil to thin them out)
- 1 tablespoon coconut oil or vegetable shortening (this helps the white chocolate melt smoothly and gives it that perfect “bandage” drizzling consistency)
- Candy eyes (about 24-30, depending on how many mummies you make; you can find these at any craft store or in the baking aisle — Wilton brand is my go-to)
- Black decorating gel (for drawing on little witch hats or spooky details; you can also use melted dark chocolate in a piping bag)
- Powdered sugar (for that final “dusting of spooky” look — optional, but highly recommended for the full effect)
Ingredient Selection Tip: When choosing your brownie mix, look for one that says “fudge” or “supreme” on the box. These tend to be denser and richer, which holds up better under the marshmallow topping. If you’re feeling ambitious, you can absolutely use a homemade brownie recipe — just make sure it’s a fudgy style, not cakey. The marshmallows need a sturdy base to sit on!
Substitution Guidance: For a gluten-free version, use your favorite gluten-free brownie mix (King Arthur Flour makes a great one). You can swap the white chocolate with dairy-free white chocolate chips if needed — just check the label. The coconut oil helps everything melt smoothly, but you can use vegetable shortening if you don’t have it on hand.
Equipment Needed
You don’t need a lot of fancy gadgets for these brownies, which is part of the beauty. Here’s what you’ll need:
- 9×13-inch baking pan (this is the sweet spot for getting enough brownies without them being too thin; glass or metal both work fine)
- Parchment paper or aluminum foil (non-negotiable — you need this to lift the brownies out cleanly for decorating)
- Non-stick cooking spray (to make sure the parchment or foil doesn’t stick)
- Large mixing bowl and whisk (for the brownie batter — nothing fancy needed)
- Small microwave-safe bowl (for melting the white chocolate)
- Spatula or offset spatula (for spreading the batter evenly)
- Toothpicks or skewers (for swirling the marshmallow topping and testing doneness)
- Piping bag or small zip-top bag (for drizzling the white chocolate; a zip-top bag with the corner snipped off works perfectly)
Budget-Friendly Tip: Don’t have a piping bag? No problem. A small zip-top bag is actually easier to control, and you can just toss it when you’re done. I’ve also used a spoon to drizzle the white chocolate, and while it’s a little messier, it gives the mummies a more “undead” look — which honestly works in your favor!
Preparation Method
Alright, let’s get these spooky little guys made. I’ve broken it down into steps so you don’t end up with melted marshmallow everywhere — trust me, I’ve been there.
- Preheat and Prep (5 minutes): Preheat your oven to 350°F (175°C). Line your 9×13-inch baking pan with parchment paper or aluminum foil, leaving a little overhang on two opposite sides. This is your “lift and remove” handle — don’t skip it! Spray the parchment lightly with non-stick cooking spray.
- Make the Brownie Batter (10 minutes): In your large mixing bowl, combine the brownie mix, eggs, oil, water, and vanilla extract. Stir until just combined — about 40 strokes. Don’t overmix! A few lumps are totally fine. You want fudgy, not tough. The batter should be thick and glossy.
- Bake the Brownies (25-28 minutes): Pour the batter into your prepared pan and spread it evenly with your spatula. Bake for 25-28 minutes, or until a toothpick inserted in the center comes out with a few moist crumbs attached — not clean, and not gooey. You want them just barely done because they’re going back in the oven with marshmallows. Let them cool in the pan for about 10 minutes.
- Add the Marshmallows (5 minutes): While the brownies are still warm (this is key!), arrange your marshmallows on top. I like to do a grid pattern — 4 rows of 4, or 5 rows of 4, depending on how many mummies you want. Press them down gently so they stick to the warm brownie surface. Don’t squish them — just a gentle press.
- Toast the Marshmallows (2-3 minutes): Switch your oven to broil on high. Place the pan back in the oven and watch it like a hawk. I mean it — marshmallows go from perfectly toasted to blackened in about 30 seconds. You want them puffed up and golden brown on top. This usually takes 1-3 minutes. Rotate the pan halfway through if your oven has hot spots. Pull them out the second they look toasty.
- Cool Completely (30-40 minutes): Let the brownies cool completely in the pan on a wire rack. This is important! If you try to cut them or add the white chocolate while they’re still warm, everything will turn into a sticky, gooey mess. I know it’s tempting, but be patient. They need to set up so the marshmallow layer firms up a bit.
- Lift and Cut (10 minutes): Once completely cool, use the parchment overhang to lift the entire brownie slab out of the pan. Place it on a cutting board. Use a sharp knife to cut between the marshmallows, creating individual brownie squares with a marshmallow on each one. Wipe the knife clean between cuts for the cleanest edges.
- Melt the White Chocolate (5 minutes): In your small microwave-safe bowl, combine the white chocolate chips and coconut oil. Microwave in 30-second bursts, stirring after each, until smooth and completely melted. It should be thin enough to drizzle — if it’s too thick, add another 1/2 teaspoon of coconut oil.
- Wrap the Mummies (10 minutes): Transfer the melted white chocolate to your piping bag or zip-top bag. Snip off a tiny corner. Working with one brownie at a time, drizzle the white chocolate back and forth across the marshmallow to create “mummy wraps.” Don’t cover the whole marshmallow — leave some brownie and marshmallow peeking through for that authentic mummy look. While the chocolate is still wet, press two candy eyes onto the marshmallow.
- Add Spooky Details (5 minutes): Use the black decorating gel to draw on little witch hats, spooky eyebrows, or tiny mouths on your mummies. Get creative! Some of mine have little “help me” expressions, and others look like they’re plotting something. Let the decorations set for about 10 minutes before serving.
Sensory Cue: When the marshmallows are perfectly toasted, they should be puffed up like little pillows, with a golden-brown top that has a slight crust. The smell is incredible — like a campfire s’more meets a chocolate bakery. When you drizzle the white chocolate, it should flow like a thick ribbon, not drip like water. If it’s too thin, let it cool for a minute; if too thick, zap it for another 10 seconds.
Cooking Tips & Techniques
I’ve made these brownies about six times now, and let me tell you, I’ve had some spectacular failures. Here’s what I’ve learned so you don’t have to repeat my mistakes:
The Marshmallow Timing is Everything: The first time I made these, I put the marshmallows on cold brownies. They didn’t stick at all, and when I tried to toast them, they just slid around. You need the brownies to be warm — not hot, but still warm to the touch — so the marshmallows have something to grip onto. If your brownies have cooled too much, pop them back in the oven at 350°F for 2-3 minutes to warm them up.
Don’t Walk Away from the Broiler: I cannot stress this enough. The second time I made these, I got distracted by a phone call, and my marshmallows turned into little black hockey pucks. The smoke alarm went off, and I had to air out the kitchen for an hour. Set a timer for 1 minute, check, and keep checking. It’s better to pull them out early and let residual heat finish the job.
The White Chocolate Drizzle Trick: If your white chocolate is too thick, it will blob instead of drizzling, and your mummies will look like they got attacked by a snow monster. Add the coconut oil a little at a time until it flows smoothly. Also, let the brownies cool completely before you drizzle — warm marshmallow will melt the white chocolate and turn everything into a white mess.
Cutting Cleanly: Use a sharp knife and wipe it clean between each cut. The marshmallow is sticky and will drag if your knife isn’t clean. I learned this the hard way — my first batch looked like a mummy massacre. A little cooking spray on the knife blade helps, too.
Variations & Adaptations
One of the best things about this recipe is how easy it is to change up. Here are a few variations I’ve tried and loved:
- Spooky Spider Brownies: Instead of mummy wraps, drizzle the white chocolate in a spiral pattern on top of the marshmallow. Add four candy eyes and use black licorice strings for spider legs. My nephew went absolutely wild for these.
- Pumpkin Patch Version: Use orange candy melts instead of white chocolate for the drizzle. Add a small green M&M on top for a “stem.” These are perfect for a fall harvest party or Thanksgiving dessert table.
- Ghostly White Chocolate Drizzle: Skip the candy eyes and just do a full white chocolate drizzle over the entire marshmallow. Let it set, then use black decorating gel to draw on ghost faces. It’s simpler but just as cute.
- Peanut Butter Mummies: Swirl 1/4 cup of melted peanut butter into the brownie batter before baking. The salty peanut butter flavor pairs amazingly with the sweet marshmallow and white chocolate. This is my personal favorite variation.
- Gluten-Free Option: Use a certified gluten-free brownie mix and check that your marshmallows are gluten-free (most are, but always check the label). Everything else in the recipe is naturally gluten-free.
Serving & Storage Suggestions
These brownies are best served at room temperature, which means they’re perfect for setting out on a dessert table. The marshmallow topping is soft and gooey, the white chocolate has a slight snap, and the brownie base is rich and fudgy. It’s a textural dream.
For Hosting: Arrange the mummies on a dark platter or cake stand for maximum spooky effect. A dusting of powdered sugar right before serving makes them look even more “haunted.” I like to serve them alongside a bowl of spooky Halloween punch and some crispy caramel corn for a full Halloween spread. They also pair beautifully with a glass of cold milk or a hot apple cider.
Storage: Store any leftovers in an airtight container at room temperature for up to 3 days. Do not refrigerate them — the marshmallow will get hard and the brownies will dry out. If you need to stack them, place a piece of parchment paper between layers to prevent sticking.
Freezing: You can freeze the undecorated brownies (without marshmallows or white chocolate) for up to 2 months. Wrap them tightly in plastic wrap and then foil. When you’re ready to serve, thaw them at room temperature, then add the marshmallows and toast as directed. The white chocolate decorations should be added fresh for the best look.
Flavor Development: Honestly, these brownies taste even better the next day. The flavors meld together, and the marshmallow gets a little softer and more integrated with the brownie. Just don’t add the white chocolate drizzle until you’re ready to serve, or it might get a little tacky from the marshmallow moisture.
Nutritional Information & Benefits
Let’s be real — these are a treat, not a health food. But here’s the approximate nutritional breakdown per brownie (based on 16 servings):
| Nutrient | Amount per Brownie |
|---|---|
| Calories | 285 |
| Total Fat | 14g |
| Saturated Fat | 5g |
| Carbohydrates | 39g |
| Sugar | 28g |
| Protein | 3g |
While these aren’t exactly a health food, the dark chocolate in the brownie mix does contain antioxidants, and the marshmallows are surprisingly low in fat. If you’re looking to lighten them up a bit, you can use a lower-sugar brownie mix or swap the white chocolate drizzle for a dusting of powdered sugar instead. But honestly, Halloween is about indulgence — I say go for it and enjoy every gooey, spooky bite.
Conclusion
These Melting Witch Mummy Brownies are the kind of recipe that makes you look like a Halloween hero without actually having to work that hard. They’re fun, they’re spooky, and they taste absolutely incredible. Whether you’re hosting a big Halloween party, bringing a dish to a potluck, or just want to do something special with the kids on a rainy October afternoon, this recipe delivers every time.
I love that this recipe started as a total panic move and turned into something I genuinely look forward to making every year. It reminds me that sometimes the best things come from not overthinking it — just throwing some ingredients together and seeing what happens. And honestly, that’s a pretty good life lesson, too.
I’d love to see your mummy creations! Tag me in your photos, leave a comment below with your favorite variation, and don’t forget to share this recipe with your fellow Halloween lovers. Happy haunting, and happy baking!
Frequently Asked Questions
Can I use homemade brownie batter instead of a box mix?
Absolutely! Just make sure you’re using a fudgy brownie recipe, not a cakey one. The marshmallows need a dense, sturdy base to sit on without sinking in. My favorite homemade version uses melted butter and extra cocoa powder for that rich, fudgy texture.
How far in advance can I make these brownies?
You can bake the brownies and add the marshmallows up to 2 days ahead. Just store them in an airtight container at room temperature. Wait to add the white chocolate drizzle and candy eyes until right before serving — they look best fresh.
My white chocolate seized up and got clumpy. What happened?
This usually happens if a drop of water gets into the chocolate, or if you overheated it. White chocolate is sensitive! Always use a completely dry bowl and utensils, and microwave in short bursts. If it seizes, you can try stirring in a teaspoon of warm coconut oil to bring it back — sometimes it works, sometimes it doesn’t.
Can I make these dairy-free?
Yes! Use a dairy-free brownie mix (or make your own with dairy-free butter), vegan marshmallows (Dandies brand works great), and dairy-free white chocolate chips. The rest of the ingredients are naturally dairy-free. Just double-check your candy eyes — some brands contain trace dairy.
How do I get the marshmallows to stay puffy and not deflate?
The key is not over-toasting them. Pull them out of the oven the second they turn golden brown. If you let them get too dark, they’ll deflate as they cool. Also, let them cool completely before adding the white chocolate drizzle — the heat from the marshmallow can melt the chocolate and cause everything to sag.
Pin This Recipe!
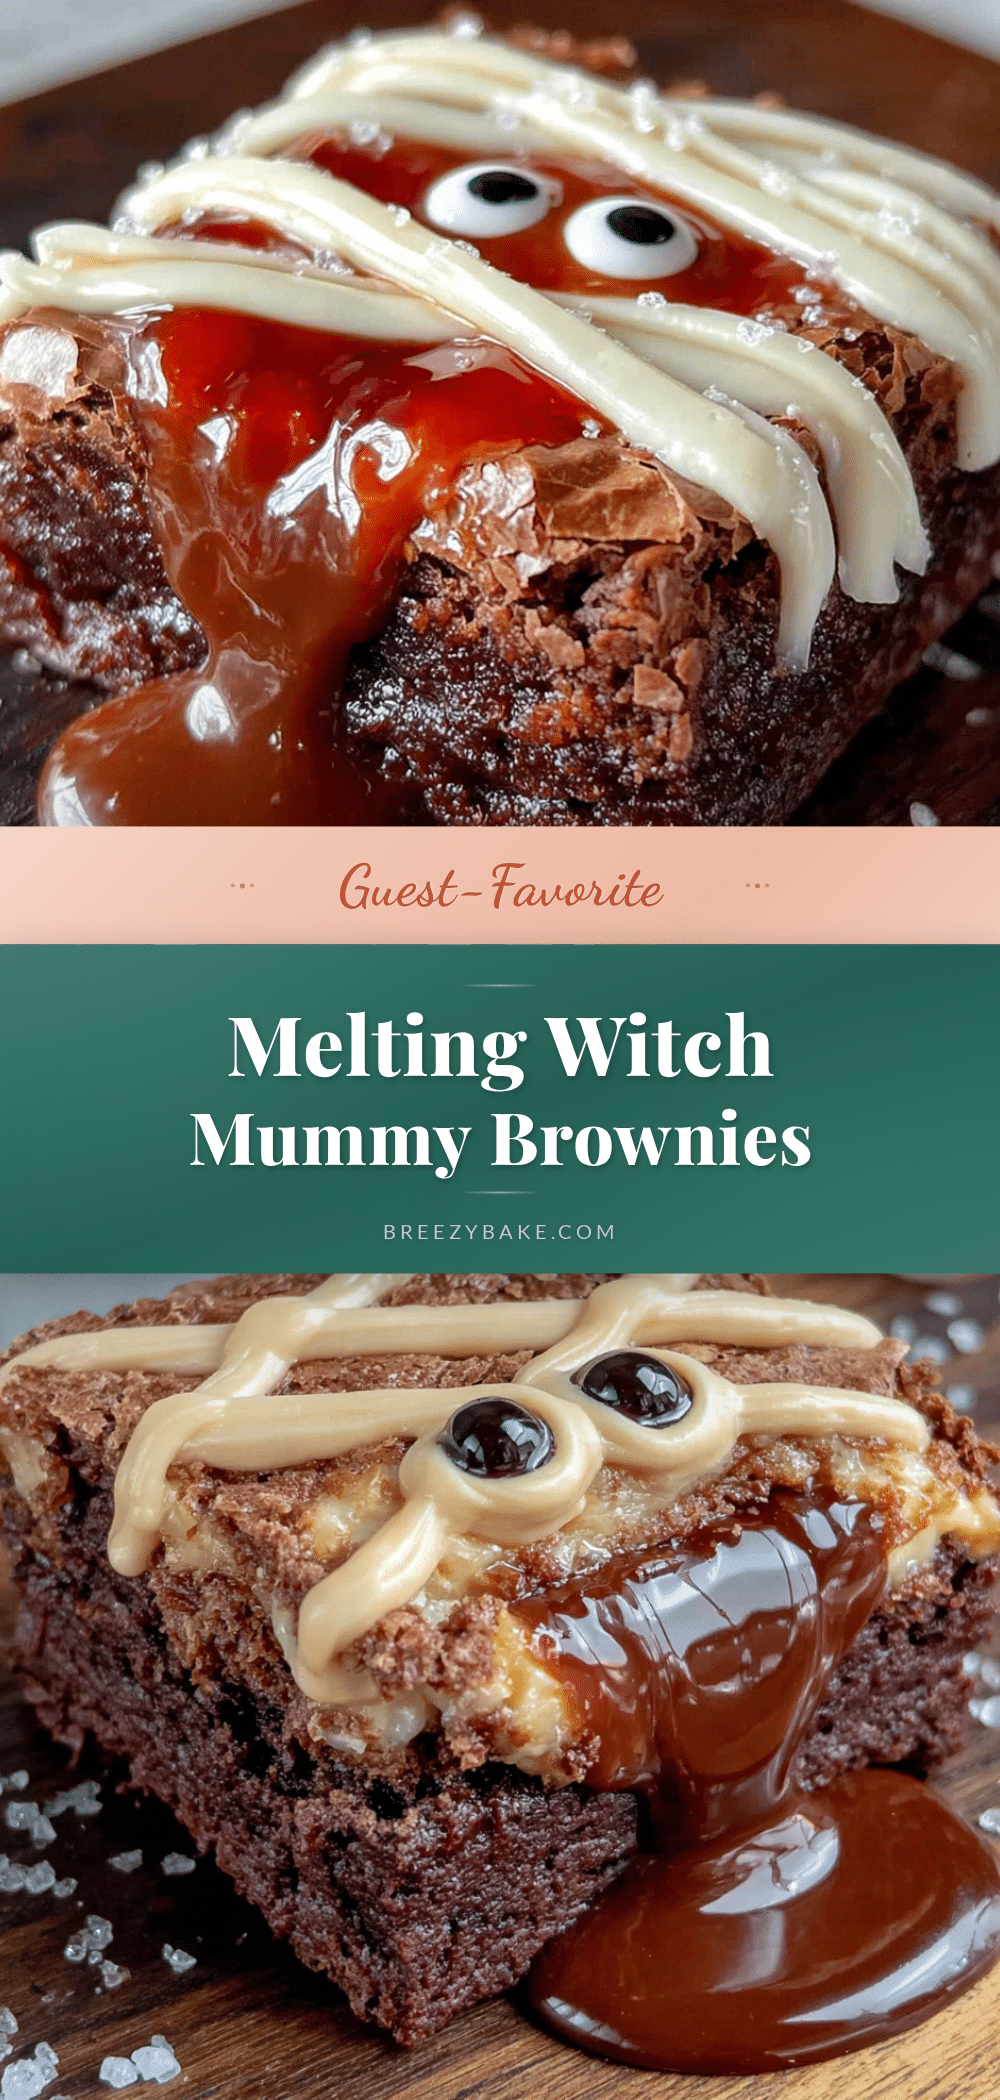
Best Melting Witch Mummy Brownies Recipe (Easy & Spooky)
These Melting Witch Mummy Brownies are a fun, spooky Halloween treat made with a fudgy brownie base, toasted marshmallows, and white chocolate mummy wraps. They come together in under 45 minutes and are perfect for parties or a last-minute dessert.
- Prep Time: 15 minutes
- Cook Time: 30 minutes
- Total Time: 45 minutes
- Yield: 16 servings 1x
- Category: Dessert
- Cuisine: American
Ingredients
- 1 box (18 oz) fudge brownie mix (e.g., Ghirardelli or Duncan Hines)
- 2 large eggs
- 1/2 cup vegetable oil
- 1/4 cup water
- 1 teaspoon vanilla extract
- 1 bag (10 oz) large marshmallows (about 16-20)
- 1 cup white chocolate chips or melting wafers
- 1 tablespoon coconut oil or vegetable shortening
- Candy eyes (about 24-30)
- Black decorating gel
- Powdered sugar (optional, for dusting)
Instructions
- Preheat oven to 350°F (175°C). Line a 9×13-inch baking pan with parchment paper or aluminum foil, leaving overhang on two opposite sides. Spray lightly with non-stick cooking spray.
- In a large mixing bowl, combine brownie mix, eggs, oil, water, and vanilla extract. Stir until just combined (about 40 strokes). Do not overmix.
- Pour batter into prepared pan and spread evenly. Bake for 25-28 minutes, until a toothpick inserted in the center comes out with a few moist crumbs. Let cool in the pan for 10 minutes.
- While brownies are still warm, arrange marshmallows on top in a grid pattern (e.g., 4×4 or 5×4). Press down gently so they stick.
- Switch oven to broil on high. Place pan back in oven and broil for 1-3 minutes, watching constantly, until marshmallows are puffed and golden brown. Rotate pan halfway if needed.
- Let brownies cool completely in the pan on a wire rack (30-40 minutes).
- Once cool, use parchment overhang to lift brownie slab out of pan. Place on cutting board. Cut between marshmallows to create individual brownie squares. Wipe knife clean between cuts.
- In a small microwave-safe bowl, combine white chocolate chips and coconut oil. Microwave in 30-second bursts, stirring after each, until smooth and melted.
- Transfer melted white chocolate to a piping bag or zip-top bag. Snip off a tiny corner. Drizzle white chocolate back and forth across each marshmallow to create mummy wraps. Press two candy eyes onto each marshmallow while chocolate is still wet.
- Use black decorating gel to draw witch hats, eyebrows, or mouths on the mummies. Let decorations set for about 10 minutes before serving.
Notes
For best results, use a fudgy brownie mix (not cakey). Add marshmallows while brownies are still warm so they stick. Watch marshmallows closely under the broiler to prevent burning. Let brownies cool completely before adding white chocolate drizzle to avoid melting. Store leftovers in an airtight container at room temperature for up to 3 days; do not refrigerate.
Nutrition
- Serving Size: 1 brownie
- Calories: 285
- Sugar: 28
- Sodium: 180
- Fat: 14
- Saturated Fat: 5
- Carbohydrates: 39
- Fiber: 1
- Protein: 3
Keywords: Halloween brownies, mummy brownies, spooky dessert, easy Halloween recipe, marshmallow brownies, white chocolate brownies