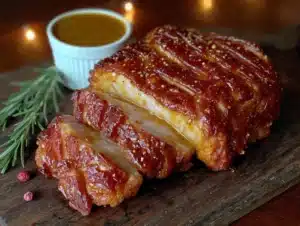
My neighbor Karen wasn’t trying to impress anyone. I’d stopped by to borrow a lug wrench—don’t ask—and the smell hit me before I even made it past her screen door. It was rich and savory, with this hint of something herbal that made my stomach actually growl out loud. She just shrugged and said, “Oh, it’s just a turkey breast. I’m testing something for Christmas.”
Karen is the kind of cook who doesn’t think she’s doing anything special. She’d brined it overnight in a plastic bucket she keeps under her sink, patted it dry while her coffee brewed, and tossed it in the oven before she even finished her morning crossword. The casualness of it all was almost offensive. I mean, here she was, casually making the most succulent turkey I’d ever tasted, and she was more concerned about whether her rosemary was past its prime. Let me tell you, that turkey breast changed how I think about holiday cooking forever.
Maybe you’ve been there—staring down a whole bird for Thanksgiving, wondering if you’ll end up with dry, sad meat that needs a gallon of gravy to be edible. For years, I thought that was just the price you paid for a traditional dinner. But Karen’s little experiment showed me something different. A perfectly brined turkey breast for two isn’t just possible; it’s actually easier than wrestling with a massive bird. That day, standing in her cluttered kitchen with her dog licking my ankle, I realized the best holiday meals don’t have to be a production. They just need a little patience and a whole lot of salt.
This recipe is my adaptation of what I saw Karen do that day. I’ve tweaked the brine ratios, tested the cooking times until they’re bulletproof, and figured out the tricks that make it work every single time. Honestly, it’s become my go-to for small holiday dinners, and I think you’re going to love how simple it feels.
Why You’ll Love This Recipe
This isn’t just another turkey recipe—it’s the one that will make you wonder why you ever bothered with a whole bird. I’ve tested this brine combination more times than I care to admit, tweaking salt ratios and herb combinations until everything clicked. The result is a turkey breast that’s juicy from edge to center, with skin so crispy it shatters when you cut into it.
- Perfect for Two: No more wrestling with a 20-pound bird or eating turkey sandwiches for two weeks straight. This is sized just right for a cozy holiday dinner without the overwhelming leftovers.
- Simple Ingredients: The brine uses basic pantry staples—salt, sugar, peppercorns, and a few fresh herbs. Nothing fancy, nothing hard to find.
- Foolproof Method: Brining eliminates the guesswork. The salt does the heavy lifting, locking in moisture and seasoning the meat all the way through.
- Restaurant-Quality Results: That golden, crispy skin and tender, flavorful meat? It looks and tastes like something from a fancy holiday menu, but you made it in your own kitchen.
- Stress-Free Holiday Cooking: The brine works overnight while you sleep. The actual cooking time is under two hours. You can actually enjoy your holiday instead of being stuck in the kitchen.
What makes this different from every other turkey recipe out there is the balance. I spent months figuring out the exact brine concentration that seasons the meat without making it taste like a salt lick. The herb combination—rosemary, thyme, and a touch of sage—gives it that classic holiday flavor without overpowering the natural taste of the turkey. And the roasting technique? It’s designed to give you perfect results even if your oven runs hot or cold.
This is the kind of recipe that makes you close your eyes after the first bite. It’s comfort food at its finest—simple, satisfying, and deeply connected to the joy of sharing a meal with someone you love. Whether it’s Thanksgiving for two or a Christmas dinner that doesn’t require a week of prep, this turkey breast delivers every single time.
What Ingredients You Will Need
This recipe relies on simple, wholesome ingredients that work together to create something truly special. The brine is the star here, but each component plays an important role in building flavor and texture. Here’s what you’ll need and why each ingredient matters.
For the Brine
- 4 cups water (for dissolving the salt and sugar; use filtered if your tap water is heavily chlorinated)
- 1/4 cup kosher salt (I prefer Diamond Crystal for its clean flavor and easy dissolution; avoid table salt as it’s too dense and can make the brine overly salty)
- 2 tablespoons brown sugar (adds a subtle sweetness that balances the salt and helps with browning; light or dark both work)
- 1 tablespoon black peppercorns (whole, not ground—they infuse the brine without making it gritty)
- 3 cloves garlic, smashed (just crush them with the side of your knife; no need to chop)
- 2 sprigs fresh rosemary (dried works in a pinch, but fresh gives a much brighter flavor)
- 3 sprigs fresh thyme (again, fresh is best; if using dried, use 1 teaspoon)
- 2 bay leaves (adds an earthy, slightly floral note that’s classic in poultry dishes)
- 2 cups ice cubes (to cool the brine quickly so it doesn’t start cooking the turkey)
For the Turkey
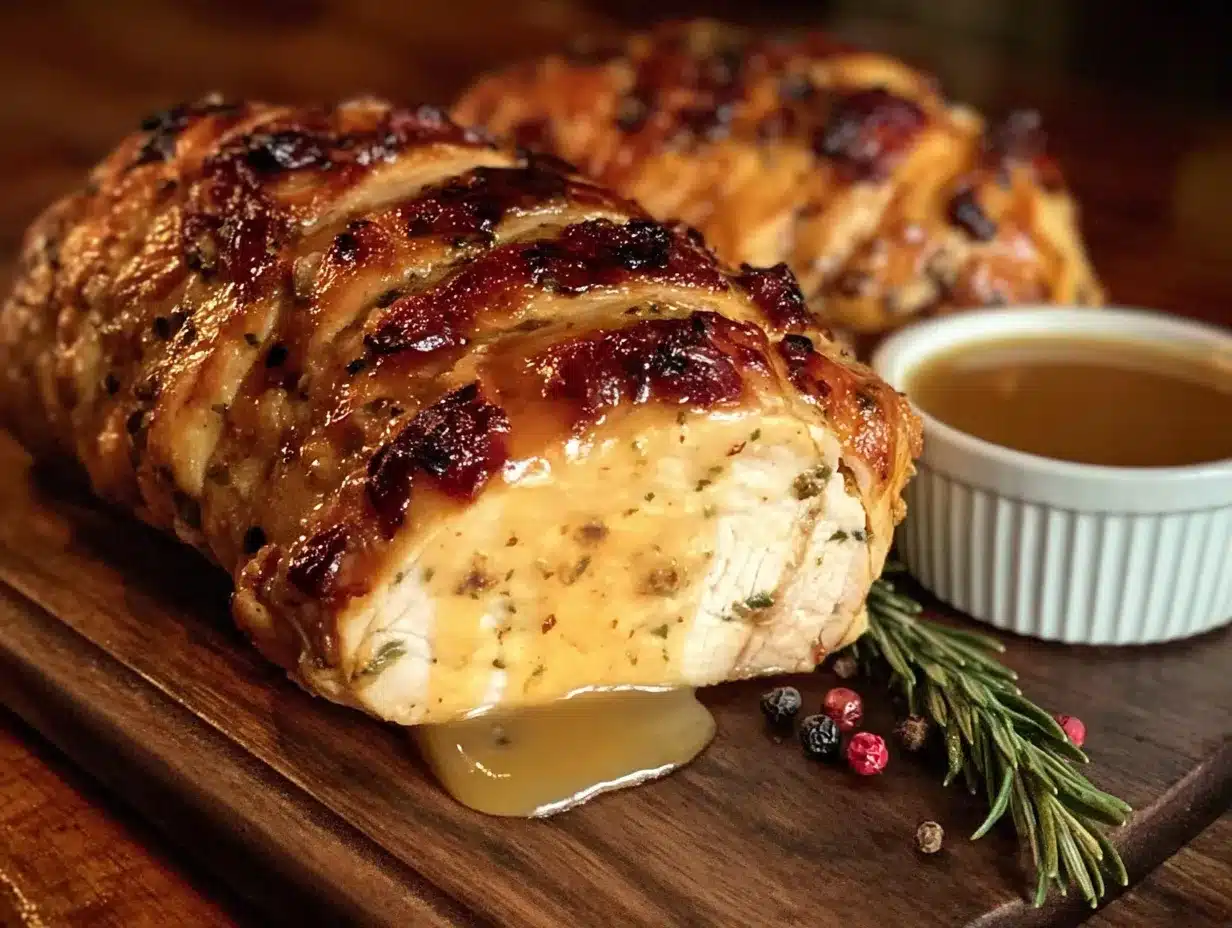
- 1 bone-in, skin-on turkey breast (2.5 to 3 pounds) (the bone adds flavor and helps the meat cook evenly; skin is essential for that crispy finish)
- 2 tablespoons unsalted butter, softened (for rubbing under the skin; adds richness and helps the skin crisp)
- 1 tablespoon olive oil (for rubbing on the skin; helps with browning and crispiness)
- 1/2 teaspoon kosher salt (for seasoning the outside; the brine handles the inside)
- 1/4 teaspoon black pepper, freshly ground (freshly ground makes a difference here)
- 1/2 cup chicken broth or dry white wine (for the roasting pan; keeps the bottom of the breast moist and creates a base for pan sauce)
For the Pan Sauce (Optional but Highly Recommended)
- 2 tablespoons butter
- 2 tablespoons all-purpose flour
- 1 cup chicken broth (use the liquid from the roasting pan plus additional broth as needed)
- Salt and pepper to taste
When selecting your turkey breast, look for one that’s plump and evenly shaped. I’ve found that Butterball brand consistently delivers good results, but any fresh or fully thawed frozen breast will work. If you’re using a frozen breast, give it at least 48 hours to thaw in the refrigerator. Trust me, rushing the thawing process leads to uneven cooking, and you don’t want that after all the effort of brining.
For the herbs, I recommend buying fresh even if you don’t use them often. They last for weeks in the refrigerator if you wrap them loosely in a damp paper towel and store them in a plastic bag. And if you’re feeling adventurous, you can add a strip of orange zest to the brine for a citrusy twist—it’s not traditional, but it’s absolutely delicious.
Equipment Needed
You don’t need a professional kitchen to make this recipe work. Here’s what you’ll need and a few alternatives if you’re missing something.
- Large pot or container (for making and cooling the brine; a stockpot works great, but even a clean plastic bucket will do—just make sure it’s food-safe)
- Large resealable plastic bag or brining bag (for holding the turkey and brine; a 2-gallon bag is perfect; if you don’t have one, use a deep bowl covered with plastic wrap)
- Roasting pan with rack (a rack lifts the turkey off the bottom so air circulates and the skin crisps evenly; if you don’t have a rack, use crumpled aluminum foil to create a makeshift one)
- Instant-read thermometer (this is non-negotiable; guessing doneness leads to dry turkey; I use a ThermoPro digital thermometer and it’s never let me down)
- Basting brush (for applying butter and oil; a silicone brush is easiest to clean)
- Aluminum foil (for tenting the breast if it browns too quickly)
- Sharp chef’s knife and cutting board (for carving; a dull knife will shred the beautiful meat you worked so hard to perfect)
- Small saucepan (for making the pan sauce, if you’re going that route)
If you’re on a budget, skip the fancy brining bag and use a large bowl covered with plastic wrap. The most important investment is a good thermometer—they’re under $15 and will save you from ruining expensive meat. I learned that the hard way after serving dry turkey one too many Thanksgivings.
Preparation Method
This process looks long, but most of it is inactive time where the brine does the work for you. I’ve broken it down into clear stages so you can plan your timing. Start this the day before you plan to serve.
Step 1: Make the Brine (Day Before, 15 minutes active time)
Combine the 4 cups of water, kosher salt, brown sugar, peppercorns, smashed garlic, rosemary, thyme, and bay leaves in a medium saucepan. Bring this to a boil over medium-high heat, stirring occasionally until the salt and sugar are completely dissolved. This usually takes about 3-4 minutes. Once it’s boiling, remove it from the heat immediately and let it sit for 5 minutes to allow the herbs and spices to infuse.
Now here’s the important part: add the 2 cups of ice cubes and stir until they melt completely. This cools the brine down quickly so it doesn’t start cooking the turkey when you add it. The brine should feel cool to the touch, not warm at all. If it’s still warm, pop it in the refrigerator for 10 minutes.
Step 2: Brine the Turkey (Day Before, 5 minutes active time)
Place your turkey breast in a large resealable plastic bag or brining bag. Set the bag inside a bowl or your roasting pan just in case it leaks—trust me on this one, I’ve had brine all over my refrigerator floor before and it’s not fun. Pour the cooled brine into the bag, squeeze out as much air as possible, and seal it tight. Make sure the brine covers the turkey completely; if it doesn’t, add a little more water until it does.
Place the bag in the refrigerator for 12 to 24 hours. I’ve found that 18 hours is the sweet spot—any less and the brine doesn’t penetrate fully, any more and the meat can start getting a bit mushy. Set a timer on your phone so you don’t forget. I once left a turkey brining for 36 hours and it was edible, but the texture was definitely off.
Step 3: Prepare for Roasting (Roasting Day, 15 minutes active time)
When you’re ready to cook, preheat your oven to 325°F (163°C). Remove the turkey breast from the brine and discard the brine bag. Rinse the turkey thoroughly under cold running water—this step is crucial because it washes away excess salt from the surface. Pat the turkey completely dry with paper towels. And I mean completely dry. Any moisture on the skin will steam instead of crisp, and you want that skin golden and shatter-crisp.
Place the turkey breast on a cutting board and let it sit at room temperature for 20 minutes while you prepare the seasoning. This takes the chill off and helps it cook more evenly. In a small bowl, mix the softened butter with a pinch of salt and pepper. Using your fingers, gently loosen the skin from the meat, being careful not to tear it. Slide the butter mixture under the skin, spreading it evenly over the meat. This is the secret to incredibly moist, flavorful meat. Rub the outside of the skin with the olive oil and sprinkle with the remaining salt and pepper.
Step 4: Roast the Turkey (1 hour 15 minutes to 1 hour 45 minutes)
Place the turkey breast on a rack in a roasting pan, breast side up. Pour the 1/2 cup of chicken broth or white wine into the bottom of the pan—this keeps the drippings from burning and creates steam that helps the meat stay moist. Roast the turkey in the preheated oven for about 15 minutes per pound, so for a 3-pound breast, that’s roughly 1 hour and 15 minutes. But honestly, don’t rely on time alone. Start checking the internal temperature at the 1-hour mark.
Insert an instant-read thermometer into the thickest part of the breast, being careful not to touch the bone. You’re looking for 155°F (68°C). I know the USDA says 165°F, but here’s the thing—the turkey’s internal temperature will continue to rise about 10 degrees while it rests. If you pull it at 155°F, it will reach a safe 165°F during resting, and it will be significantly juicier. I learned this trick from a chef friend who makes turkey for a living, and it changed everything.
If the skin is browning too quickly before the meat is cooked, loosely tent the breast with aluminum foil. This usually happens around the 45-minute mark if your oven runs hot. Don’t worry—the foil won’t affect the cooking time much, and it will save you from burnt skin.
Step 5: Rest and Carve (20 minutes active time)
Once the turkey reaches 155°F, remove it from the oven and transfer it to a cutting board. Let it rest for at least 15 to 20 minutes, loosely covered with foil. This is not optional—the resting period allows the juices to redistribute throughout the meat. If you cut into it immediately, all those precious juices will run out onto the cutting board, and you’ll be left with dry meat.
While the turkey rests, you can make the pan sauce if you want. Pour the drippings from the roasting pan into a small saucepan, scraping up any browned bits. Add the 2 tablespoons of butter and melt over medium heat. Whisk in the 2 tablespoons of flour and cook for 1 minute, stirring constantly. Slowly whisk in the 1 cup of chicken broth and bring to a simmer. Cook for 2-3 minutes until thickened, then season with salt and pepper to taste. Strain if you want a smooth sauce, or leave it rustic with the herb bits.
To carve, use a sharp knife to slice against the grain into 1/2-inch thick pieces. The meat should be tender and juicy, with a beautiful golden crust on the outside. Arrange on a platter and spoon a little of the pan sauce over the top if you’re using it.
Cooking Tips & Techniques
I’ve made this recipe more times than I can count, and I’ve learned a few things the hard way. Here are the tips that will save you from my mistakes.
Don’t Skip the Rinse: The first time I made brined turkey, I thought skipping the rinse would give me more flavor. Nope. It gave me saltier-than-the-sea turkey that was almost inedible. Always rinse thoroughly and pat dry. Your taste buds will thank you.
Patience with Patting Dry: I cannot stress this enough—dry skin is crispy skin. Use multiple paper towels and really press into the skin to absorb moisture. Let the turkey sit uncovered in the refrigerator for an hour after patting if you have time. This air-dries the skin even more and guarantees that golden, crackling finish.
The Thermometer Is Your Best Friend: I ruined three turkey breasts before I bought an instant-read thermometer. The difference between perfectly cooked and dry is about 5 degrees. Don’t rely on those pop-up timers that come with some turkeys—they’re notoriously unreliable. A $15 digital thermometer will save you every time.
Resting Is Non-Negotiable: I know it’s tempting to dig in immediately, especially when the kitchen smells amazing. But cutting into a turkey that hasn’t rested is like opening a dam—all that juice floods out and leaves you with dry meat. Set a timer and walk away. Your future self will be grateful.
Butter Under the Skin: This is the trick that takes your turkey from good to unforgettable. The butter melts into the meat as it cooks, keeping it moist and adding incredible flavor. Don’t skip it, and don’t be shy with it. Two tablespoons might not seem like much, but it’s the perfect amount for a breast this size.
One thing I learned from a failed attempt: if your oven runs hot, reduce the temperature to 300°F (149°C) and cook a little longer. The slower cooking gives you more control and reduces the risk of overcooking. It adds about 20 minutes to the total time, but it’s worth it for the peace of mind.
Variations & Adaptations
This recipe is wonderfully flexible. Here are some variations I’ve tried and loved.
Herb-Crusted Variation: Before roasting, mix 2 tablespoons of chopped fresh herbs (rosemary, thyme, sage, and parsley work beautifully) with the softened butter. Spread this herb butter under the skin as directed. The herbs infuse the meat with even more flavor, and the aroma while it roasts is absolutely intoxicating. I made this for a small Friendsgiving and everyone asked for the recipe.
Citrus-Brined Variation: Add the zest and juice of one orange and one lemon to the brine along with the other ingredients. The citrus brightens the flavor and adds a subtle sweetness that pairs beautifully with the turkey. This is my go-to for spring dinners when I want something a little lighter. If you try this, reduce the brown sugar to 1 tablespoon to keep the balance right.
Spicy Cajun Variation: Add 1 tablespoon of Cajun seasoning, 1 teaspoon of smoked paprika, and 1/2 teaspoon of cayenne pepper to the brine. The spice doesn’t make the turkey overwhelmingly hot—it adds a warm, smoky depth that’s absolutely delicious. Serve it with a side of cornbread dressing and you’ve got a Southern-inspired feast.
Dietary Adaptations: For a dairy-free version, simply omit the butter under the skin and use olive oil instead. The meat will still be incredibly moist thanks to the brine. For a gluten-free meal, skip the flour in the pan sauce and use a cornstarch slurry instead—mix 1 tablespoon of cornstarch with 2 tablespoons of cold water and whisk it into the simmering drippings.
I once tried a maple-bourbon brine variation that was incredible. I substituted the brown sugar with 2 tablespoons of maple syrup and added 2 tablespoons of bourbon to the brine. The flavor was rich and complex, with a hint of smokiness from the bourbon. Just be careful—the sugar in the maple syrup can cause the skin to brown faster, so keep an eye on it and tent with foil if needed.
Serving & Storage Suggestions
This turkey breast is best served warm, right after its resting period. The skin is at its crispiest within the first 30 minutes after cooking, so try to time your meal accordingly. Slice the breast and arrange it on a warm platter, spooning a little pan sauce over the top. Garnish with fresh herb sprigs for a beautiful presentation.
What to Serve With It: This turkey pairs beautifully with classic holiday sides. Mashed potatoes or roasted sweet potatoes soak up the pan sauce perfectly. A simple green salad with a tangy vinaigrette cuts through the richness. And if you’re feeling indulgent, a side of homemade cranberry sauce adds that sweet-tart contrast that makes every bite better. For drinks, a crisp white wine like Sauvignon Blanc or a light Pinot Noir complements the herb flavors without overwhelming them.
Storing Leftovers: If you have any leftover turkey—and honestly, with this recipe for two, you might not—store it properly to keep it delicious. Let the turkey cool completely, then wrap it tightly in plastic wrap or aluminum foil. Place it in an airtight container and refrigerate for up to 4 days. The key is to keep air out, which prevents the meat from drying out.
Reheating Tips: The best way to reheat turkey without drying it out is to add a little moisture. Place the slices in a baking dish, add a splash of chicken broth or turkey drippings, cover with foil, and warm in a 300°F (149°C) oven for about 10-15 minutes. You can also reheat individual portions in the microwave, but add a damp paper towel over the plate to create steam. Avoid high heat—it will toughen the meat.
Freezing Instructions: Cooked turkey freezes beautifully for up to 3 months. Slice it first, then wrap portions tightly in plastic wrap and place them in a freezer bag. Squeeze out as much air as possible before sealing. To thaw, move the bag to the refrigerator overnight. Reheat using the oven method above. The flavor stays remarkably good, though the skin won’t be as crispy after freezing.
One thing I love about this recipe is that the flavors actually deepen overnight. Cold turkey slices make incredible sandwiches the next day—layer them on good bread with a little cranberry sauce and a smear of mayonnaise, and you’ve got lunch that rivals the original meal.
Nutritional Information & Benefits
Turkey breast is one of the leanest, healthiest protein options out there, especially when you skip the heavy gravy and let the natural flavors shine. Here’s the approximate nutritional breakdown for a 6-ounce serving of roasted turkey breast (without skin):
| Nutrient | Amount |
|---|---|
| Calories | 280 |
| Protein | 46g |
| Fat | 8g |
| Saturated Fat | 2.5g |
| Carbohydrates | 0g |
| Sodium | 580mg (varies with brining) |
| Potassium | 420mg |
Turkey is packed with high-quality protein that supports muscle health and keeps you feeling full and satisfied. It’s also rich in B vitamins, particularly B6 and B12, which help with energy metabolism and brain function. The selenium content is impressive too—it’s a powerful antioxidant that supports thyroid health and immune function.
If you’re watching your sodium intake, you can reduce the salt in the brine to 2 tablespoons instead of 1/4 cup. The turkey will still be moist and flavorful, just less salty. And if you skip the skin, you’ll save about 50 calories and 5 grams of fat per serving. But honestly? The skin is the best part, and life is too short to deny yourself that crispy, golden goodness in moderation.
This recipe fits beautifully into a balanced eating plan. It’s naturally gluten-free, low-carb, and keto-friendly if you skip the flour in the pan sauce. For a Whole30-compliant version, use ghee instead of butter and omit the brown sugar from the brine—the turkey will still be delicious, I promise.
Conclusion
This brined turkey breast for two has become my secret weapon for small holiday dinners. It’s the recipe that makes people close their eyes after the first bite, the one that gets texted around to friends who want to know how you did it. And the best part? It’s actually simple. The brine does the hard work overnight, and the roasting is straightforward enough that you can actually enjoy your holiday instead of stressing in the kitchen.
I love this recipe because it proves you don’t need a massive bird and a week of prep to have a memorable holiday meal. Whether it’s Thanksgiving for two, a Christmas dinner that feels special without the fuss, or just a Sunday dinner that deserves a little extra effort, this turkey breast delivers. It’s become my go-to for those quiet, meaningful meals where the food is good and the company is even better.
I’d love to hear how yours turns out! Leave a comment below and let me know if you tried any of the variations or came up with your own twist. Did the citrus brine work for you? Did you try the Cajun version? Share your photos and tag me—I love seeing these recipes come to life in your kitchens. And if you have any questions, drop them in the comments and I’ll get back to you. Happy cooking, friends!
Frequently Asked Questions
Can I use a boneless turkey breast for this recipe?
Yes, absolutely. Boneless turkey breasts work perfectly with this brine and roasting method. The cooking time will be slightly shorter—start checking the temperature at the 45-minute mark. Boneless breasts also carve more easily, though you lose a bit of the bone-in flavor. If using boneless, make sure it’s tied evenly so it cooks consistently.
How long can I leave the turkey in the brine?
The sweet spot is 12 to 24 hours. Anything less than 12 hours won’t give you the full benefit of brining, and anything over 24 hours can start to make the meat mushy or overly salty. I’ve found 18 hours to be the perfect balance. Set a timer when you start brining so you don’t forget—I’ve learned that lesson the hard way.
Can I brine a frozen turkey breast?
You can, but you need to thaw it completely first. Brining a partially frozen turkey is ineffective because the brine can’t penetrate the frozen parts. Thaw your frozen turkey breast in the refrigerator for 24 to 48 hours depending on its size, then proceed with the brining process. Never thaw turkey at room temperature—it’s a food safety risk.
What if I don’t have kosher salt for the brine?
If you’re using table salt instead of kosher salt, reduce the amount by half. Table salt is much denser and saltier by volume, so 1/4 cup of table salt would make your brine way too salty. Use 2 tablespoons of table salt instead. For sea salt, use the same amount as kosher salt since they’re similar in density.
Can I make the pan sauce ahead of time?
You can, but it’s best made fresh from the roasting drippings. If you want to prepare ahead, make the sauce using chicken broth and a splash of white wine, but save the turkey drippings to add at the end. Reheat the sauce gently and stir in the drippings just before serving. This gives you the best of both worlds—convenience and that deep, roasted flavor from the pan.
Pin This Recipe!
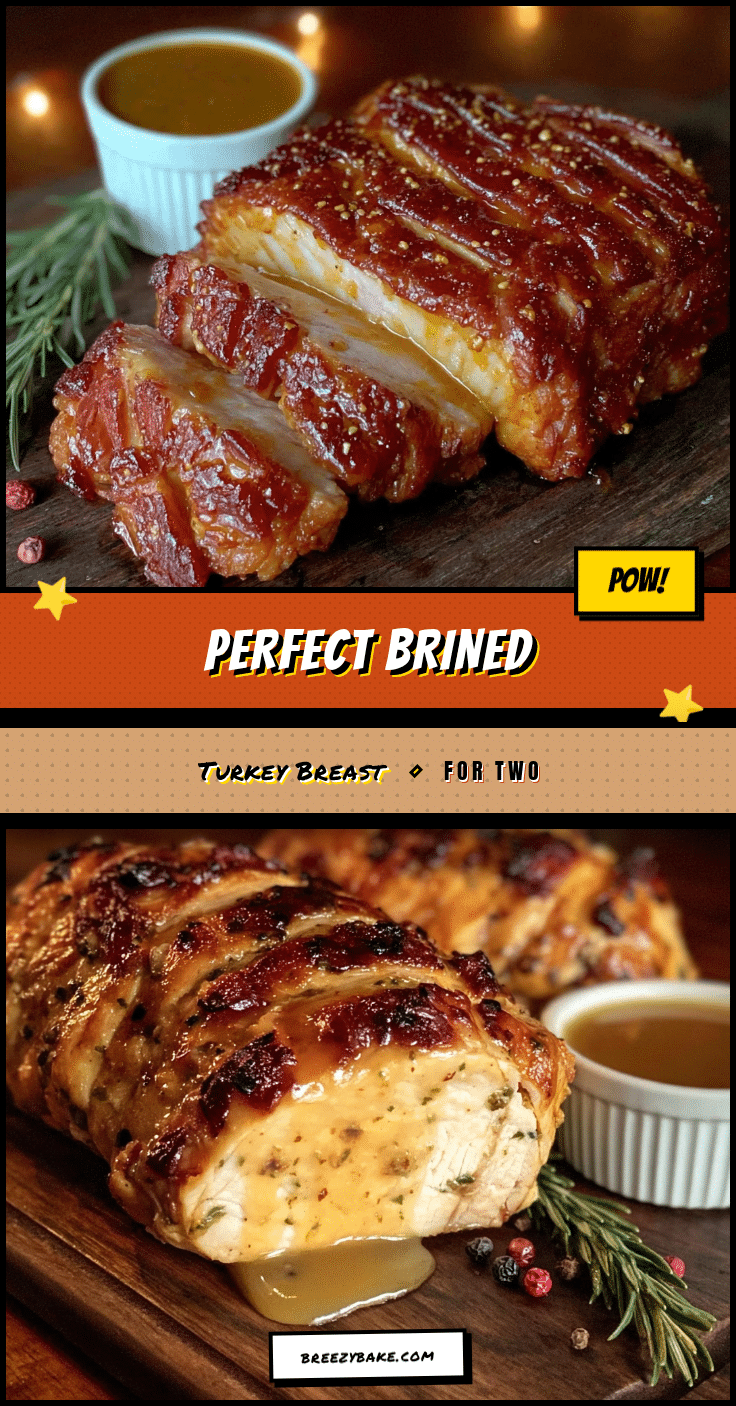
Perfect Brined Turkey Breast for Two: Easy Holiday Dinner
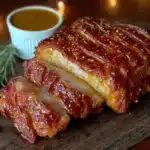
A perfectly brined turkey breast for two that’s juicy from edge to center with crispy, golden skin. This foolproof recipe uses simple ingredients and an overnight brine to deliver restaurant-quality results without the stress of a whole bird.
- Prep Time: 15 minutes
- Cook Time: 1 hour 15 minutes to 1 hour 45 minutes
- Total Time: 1 hour 30 minutes to 2 hours (plus 12-24 hours brining)
- Yield: 2 servings 1x
- Category: Main Course
- Cuisine: American
Ingredients
- 4 cups water
- 1/4 cup kosher salt (preferably Diamond Crystal)
- 2 tablespoons brown sugar (light or dark)
- 1 tablespoon black peppercorns (whole)
- 3 cloves garlic, smashed
- 2 sprigs fresh rosemary
- 3 sprigs fresh thyme
- 2 bay leaves
- 2 cups ice cubes
- 1 bone-in, skin-on turkey breast (2.5 to 3 pounds)
- 2 tablespoons unsalted butter, softened
- 1 tablespoon olive oil
- 1/2 teaspoon kosher salt
- 1/4 teaspoon black pepper, freshly ground
- 1/2 cup chicken broth or dry white wine
- 2 tablespoons butter (for pan sauce)
- 2 tablespoons all-purpose flour (for pan sauce)
- 1 cup chicken broth (for pan sauce)
- Salt and pepper to taste (for pan sauce)
Instructions
- Make the brine (day before, 15 minutes active time): Combine 4 cups water, 1/4 cup kosher salt, 2 tablespoons brown sugar, 1 tablespoon black peppercorns, 3 smashed garlic cloves, 2 sprigs rosemary, 3 sprigs thyme, and 2 bay leaves in a medium saucepan. Bring to a boil over medium-high heat, stirring until salt and sugar dissolve (3-4 minutes). Remove from heat and let sit 5 minutes. Add 2 cups ice cubes and stir until melted. Cool completely.
- Brine the turkey (day before, 5 minutes active time): Place turkey breast in a large resealable plastic bag or brining bag. Set bag in a bowl or roasting pan. Pour cooled brine into bag, squeeze out air, and seal. Refrigerate for 12 to 24 hours (18 hours is ideal).
- Prepare for roasting (roasting day, 15 minutes active time): Preheat oven to 325°F (163°C). Remove turkey from brine, discard brine, and rinse turkey thoroughly under cold water. Pat completely dry with paper towels. Let sit at room temperature for 20 minutes. In a small bowl, mix softened butter with a pinch of salt and pepper. Gently loosen skin from meat and slide butter mixture under skin. Rub outside of skin with olive oil and sprinkle with remaining 1/2 teaspoon salt and 1/4 teaspoon peppe…
- Roast the turkey (1 hour 15 minutes to 1 hour 45 minutes): Place turkey breast on a rack in a roasting pan, breast side up. Pour 1/2 cup chicken broth or white wine into bottom of pan. Roast for about 15 minutes per pound (about 1 hour 15 minutes for a 3-pound breast). Start checking internal temperature at 1-hour mark. Insert instant-read thermometer into thickest part of breast without touching bone. Remove from oven when temperature reaches 155°F (68°C). If skin browns too quickly, tent loose…
- Rest and carve (20 minutes active time): Transfer turkey to a cutting board and let rest, loosely covered with foil, for 15 to 20 minutes. Meanwhile, make pan sauce (optional): Pour drippings into a small saucepan, scraping up browned bits. Add 2 tablespoons butter and melt over medium heat. Whisk in 2 tablespoons flour and cook 1 minute. Slowly whisk in 1 cup chicken broth and bring to a simmer. Cook 2-3 minutes until thickened. Season with salt and pepper. Carve turkey against the grain into 1…
Notes
Don’t skip rinsing the turkey after brining to avoid overly salty meat. Pat the skin completely dry for crispy skin. Use an instant-read thermometer for accuracy; pull the turkey at 155°F (68°C) and let it rest to reach 165°F (74°C). Resting is non-negotiable for juicy meat. For a dairy-free version, omit butter under skin and use olive oil. For gluten-free, use a cornstarch slurry instead of flour for the pan sauce.
Nutrition
- Serving Size: 6 ounces (without sk
- Calories: 280
- Sodium: 580
- Fat: 8
- Saturated Fat: 2.5
- Protein: 46
Keywords: brined turkey breast, turkey for two, small holiday dinner, easy turkey recipe, juicy turkey, crispy skin turkey