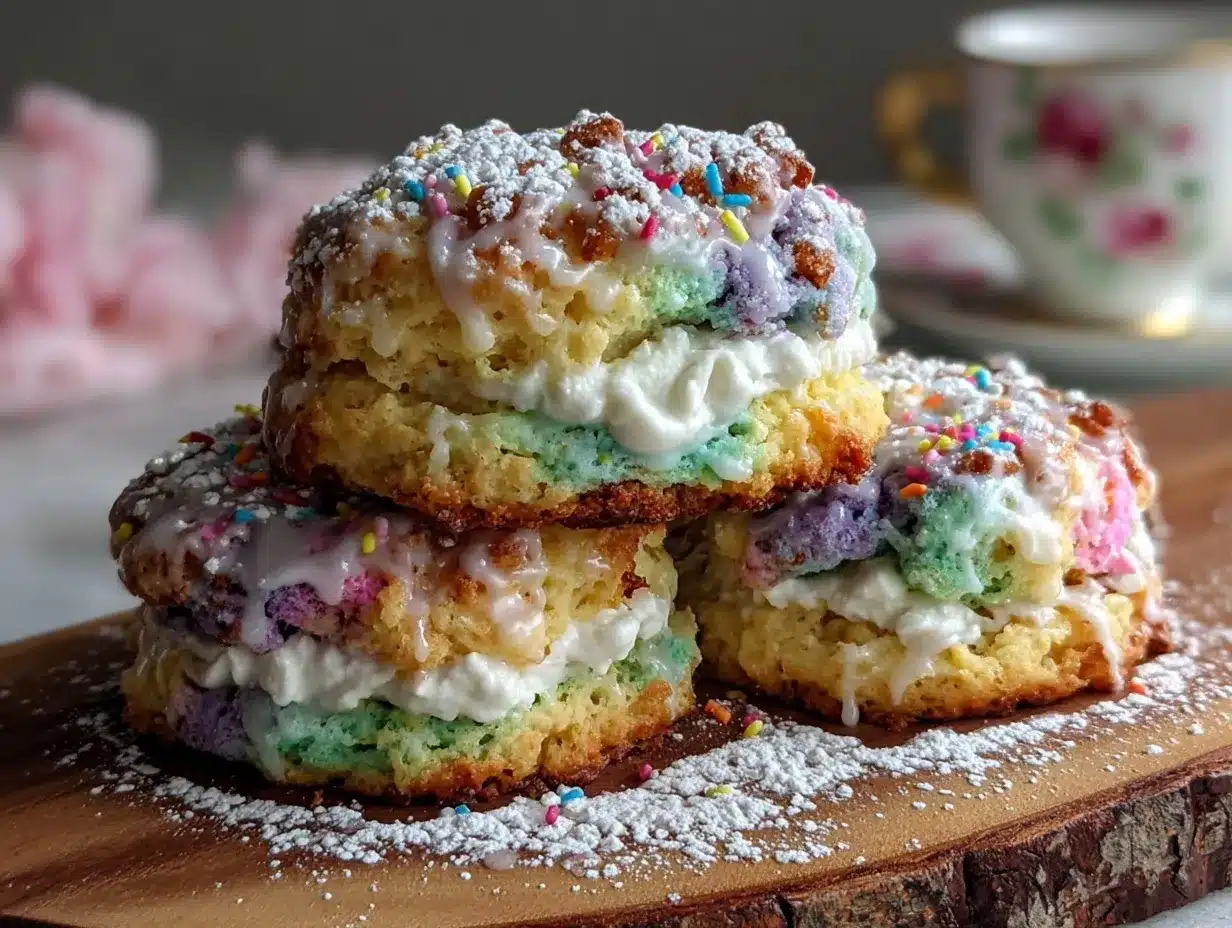
Let me tell you, the sight of vibrant rainbow hues swirling together in a fluffy, cloud-like scone tower is enough to make anyone’s heart do a little happy dance. The first time I baked these Whimsical Flavorful Dr. Seuss Rainbow Scone Cloud Towers, I was instantly hooked. It was one of those rare kitchen moments where you pause, take a deep breath, and just smile because you know you’re onto something truly special.
Years ago, when I was knee-high to a grasshopper, my grandma used to bake the most comforting treats, but nothing quite like these fanciful scone towers. I stumbled upon the idea during a rainy weekend when I wanted to recreate that joyous, playful feeling from childhood—something bright, sweet, and just a little bit magical. Honestly, I wish I had discovered this recipe years ago because it’s dangerously easy and delivers pure, nostalgic comfort with a twist.
My family couldn’t stop sneaking pieces off the cooling rack (and I can’t really blame them). The kids loved stacking the colorful clouds, and adults were charmed by the delightful flavors and textures. These scone cloud towers are perfect for potlucks, a sweet treat for your kids, or brightening up your Pinterest cookie board with a burst of color and whimsy. Tested multiple times in the name of research, of course, this recipe has become a staple for family gatherings and gifting. It feels like a warm hug wrapped in vibrant flavors—you’re going to want to bookmark this one.
Why You’ll Love This Recipe
After many trials and tweaks in my kitchen, I can say this Whimsical Flavorful Dr. Seuss Rainbow Scone Cloud Towers recipe truly stands out. Here’s why you’ll be head over heels for it:
- Quick & Easy: Comes together in under 40 minutes, perfect for busy mornings or spontaneous tea parties.
- Simple Ingredients: No fancy grocery trips needed; you likely already have everything in your pantry.
- Perfect for Celebrations: Great for birthday brunches, family gatherings, or whimsical holiday mornings.
- Crowd-Pleaser: Always gets rave reviews from kids and adults alike, thanks to the playful colors and delightful texture.
- Unbelievably Delicious: The balance of lightly sweetened dough and a hint of vanilla with a tender crumb is next-level comfort food.
This isn’t just another scone recipe. The secret lies in the cloud-like texture achieved by folding cold butter into the dough just right and layering the rainbow colors with care. Plus, a touch of vanilla essence brings a subtle warmth that makes you close your eyes after the first bite. It’s comfort food, but with a joyful, whimsical twist that feels both nostalgic and fresh. Whether you’re impressing guests without breaking a sweat or turning a simple breakfast into something memorable, these scone towers have you covered.
What Ingredients You Will Need
This recipe uses simple, wholesome ingredients to deliver bold flavor and that satisfying cloud-like texture without any fuss. Most of these are pantry staples, with a few easy-to-find additions for the rainbow effect.
- All-purpose flour – 3 cups (360g), the base for tender scones
- Baking powder – 1 tablespoon, for that light, fluffy rise
- Granulated sugar – 1/3 cup (65g), to add just the right sweetness
- Salt – 1/2 teaspoon, to balance flavors
- Unsalted butter – 3/4 cup (170g), cold and cubed (I recommend Kerrygold for the richest flavor)
- Heavy cream – 1 cup (240ml), plus extra for brushing
- Vanilla extract – 1 teaspoon, to infuse warmth
- Large egg – 1, room temperature, for binding
- Food coloring gels – Red, orange, yellow, green, blue, purple (gel colors give vibrant shades without watering down the dough)
- Powdered sugar – 1 cup (120g), for the glaze
- Lemon juice – 1 tablespoon, to add a fresh tang to the glaze
Optional: You can swap heavy cream for full-fat coconut milk if you want a dairy-free spin, or use almond flour for a gluten-free variation (though the texture will be a bit different). For the butter, using cold, high-quality unsalted butter is key to achieving those flaky, cloud-like layers. When selecting your food coloring, gel pastes work best because they won’t change the dough’s consistency.
Equipment Needed
- Mixing bowls: A couple of medium and large bowls for mixing and dividing dough.
- Pastry cutter or food processor: To cut cold butter into the flour. A pastry cutter works great if you don’t have a processor.
- Rolling pin: Essential for rolling out the dough evenly.
- Baking sheet: A rimmed sheet lined with parchment paper helps with easy cleanup.
- Sharp knife or cookie cutter: For shaping the scones.
- Cooling rack: To let the scones breathe and cool properly.
If you’re on a budget, a fork can substitute the pastry cutter by pressing the butter into the flour, but it takes a little more elbow grease. I’ve found that a food processor speeds things up spectacularly and produces a more consistent crumb, but it’s not mandatory. Keeping your butter cold is crucial, so a chilled bowl helps too.
Preparation Method
- Preheat your oven to 400°F (200°C) and line a baking sheet with parchment paper. This ensures your scones bake evenly and don’t stick.
- Mix dry ingredients: In a large bowl, whisk together 3 cups (360g) all-purpose flour, 1 tablespoon baking powder, 1/3 cup (65g) granulated sugar, and 1/2 teaspoon salt. This dry mix is the foundation for your fluffy scones.
- Cut in butter: Add 3/4 cup (170g) cold, cubed unsalted butter into the dry ingredients. Use a pastry cutter or food processor to blend until the mix resembles coarse crumbs with pea-sized butter bits. These butter chunks are what create that cloud-like flakiness.
- Combine wet ingredients: In a separate bowl, whisk together 1 cup (240ml) heavy cream, 1 large egg (room temp), and 1 teaspoon vanilla extract. Pour this mixture into the flour-butter mix and gently fold until just combined. Don’t overmix—your dough should be slightly sticky but hold together.
- Divide dough for coloring: Split the dough evenly into six bowls. Add a small amount of gel food coloring to each, stirring gently to create vibrant rainbow colors. Remember, a little goes a long way!
- Roll and layer: On a lightly floured surface, roll each colored dough ball into a thin circle about 8 inches (20 cm) in diameter. Stack the circles on top of each other in rainbow order, gently pressing them together. This layering creates the whimsical tower effect.
- Cut scones: Using a sharp knife or cookie cutter, cut the stacked dough into triangles or desired shapes. Carefully separate the pieces and place them on your prepared baking sheet, leaving space to expand.
- Brush with cream: Lightly brush the tops of each scone with additional heavy cream to encourage a golden, glossy finish.
- Bake: Pop the tray into the preheated oven and bake for 18-22 minutes, or until the tops are golden and a toothpick inserted comes out clean. You’ll know they’re ready when they smell like a warm vanilla cloud and feel firm to the touch.
- Prepare the glaze: While baking, whisk together 1 cup (120g) powdered sugar and 1 tablespoon lemon juice until smooth. Once scones are slightly cooled, drizzle the glaze over the tops for a sweet, tangy finish.
- Cool completely: Transfer scones to a cooling rack and let them cool fully before stacking into towers. This prevents the glaze from melting and keeps your colors bright.
Pro tip: If your dough feels too sticky after coloring, pop it in the fridge for 10 minutes to firm up before rolling. It makes handling way easier.
Cooking Tips & Techniques
Achieving that perfect cloud-like texture and vibrant colors takes a few insider tricks I’ve picked up along the way. First, keep your butter cold at all times. Warm butter will melt into the flour too much, resulting in dense scones instead of flaky clouds. I learned the hard way when my scones turned out more like biscuits—still tasty, but not quite whimsical.
Next, don’t overmix the dough once wet ingredients are added. Overworking activates gluten and can toughen the scones. Fold gently until just combined—you want to see flecks of butter still peeking through the dough.
When rolling and layering the colored dough, work quickly but gently. The colors can blend if you push too hard, so light pressure is key. If you’re short on time, rolling each color separately and stacking after baking works too, but the layered effect is less magical.
Timing matters: bake at a high temperature (400°F/200°C) to get that golden crust while keeping the inside tender. And don’t forget the cream brush—it’s what gives the scones their shiny, inviting tops.
Multitasking tip: While scones bake, whip up the lemon glaze and clean your station. That way, when they’re out, you’re ready to drizzle and cool without missing a beat.
Variations & Adaptations
This recipe is wonderfully flexible. Here are some fun twists and options you can try:
- Dietary swap: Use almond or coconut flour for a gluten-free version (expect a denser texture). Swap heavy cream with coconut cream for dairy-free scones.
- Flavor twists: Add a teaspoon of ground cinnamon or cardamom to the dry mix for a warm spice note. Or fold in mini chocolate chips between the layers for a surprise chocolate burst.
- Seasonal colors: Instead of rainbow gels, use natural colorants like beet juice for red, turmeric for yellow, spirulina powder for green, or blueberry juice for blue and purple hues.
- Cooking method: Try baking these scones in muffin tins for perfectly shaped cloud towers that are easy to serve.
- Personal fave: I once added a thin layer of lemon curd between the dough layers before baking—an unexpected zing that made these scones even more irresistible!
Serving & Storage Suggestions
Serve these colorful scone towers slightly warm or at room temperature for the best flavor and texture. They look stunning stacked tall on a cake stand or arranged on a platter with fresh berries and a pot of tea. Pair with clotted cream or your favorite jam for an extra indulgent treat.
Store leftover scones in an airtight container at room temperature for up to 2 days. For longer storage, freeze them wrapped tightly in plastic wrap and foil for up to 3 months. When ready to enjoy, thaw at room temperature and warm gently in a 300°F (150°C) oven for 5-7 minutes to revive that fresh-baked softness.
The flavors actually deepen overnight, so if you can wait, the next-day scones have an even more delightful, mellow sweetness. Just keep the glaze in mind—it won’t hold up well in the freezer, so you might want to glaze after thawing.
Nutritional Information & Benefits
Each scone tower slice (about 1/6th of the recipe) is roughly 280 calories, with 14g fat, 30g carbohydrates, and 4g protein. The butter and cream provide richness and satisfying satiety, while the flour gives you energy-boosting carbs.
Using unsalted butter and controlling sugar keeps these scones on a balanced side, and the lemon glaze adds a pop of vitamin C. For those watching dairy, swaps like coconut cream and vegan butter provide tasty alternatives. Just a heads-up: these do contain gluten and dairy by default, so keep that in mind for allergy needs.
From my wellness perspective, this recipe is a joyful treat—perfect for when you want to indulge without guilt because you know it’s homemade with love and better ingredients than store-bought sweets.
Conclusion
Whimsical Flavorful Dr. Seuss Rainbow Scone Cloud Towers are more than just a recipe—they’re a joyful experience packed with color, flavor, and nostalgia. Whether you’re baking for a special occasion or just to brighten a gray day, these scones bring smiles and sweet memories to the table.
Feel free to play around with colors, flavors, and shapes to make the recipe truly your own. Personally, I love how these scones turn an ordinary morning into something magical, and I hope you’ll feel the same.
Give this recipe a try, share your creations, and let me know your favorite twists in the comments below. Trust me, your family and friends will thank you for it! Happy baking, and may your kitchen always be full of colorful clouds.
Frequently Asked Questions
Can I make these scones ahead of time?
Absolutely! You can prepare the dough, shape the scones, and refrigerate them for up to 24 hours before baking. Just cover tightly to prevent drying out.
What if I don’t have gel food coloring?
You can use liquid food coloring, but start with less to avoid altering the dough’s consistency. Natural colorants like beet juice or turmeric also work well.
Can I freeze leftover scones?
Yes! Wrap them tightly in plastic wrap and foil, then freeze for up to 3 months. Thaw and warm in the oven before serving.
How do I prevent the colors from blending together?
Handle the dough gently when layering and cutting. Use light pressure to keep layers distinct, and chill the dough if it becomes too soft.
Are these scones suitable for a dairy-free diet?
With substitutions like coconut cream and vegan butter, you can make a dairy-free version. The texture might vary slightly but will still be delicious.
Pin This Recipe!
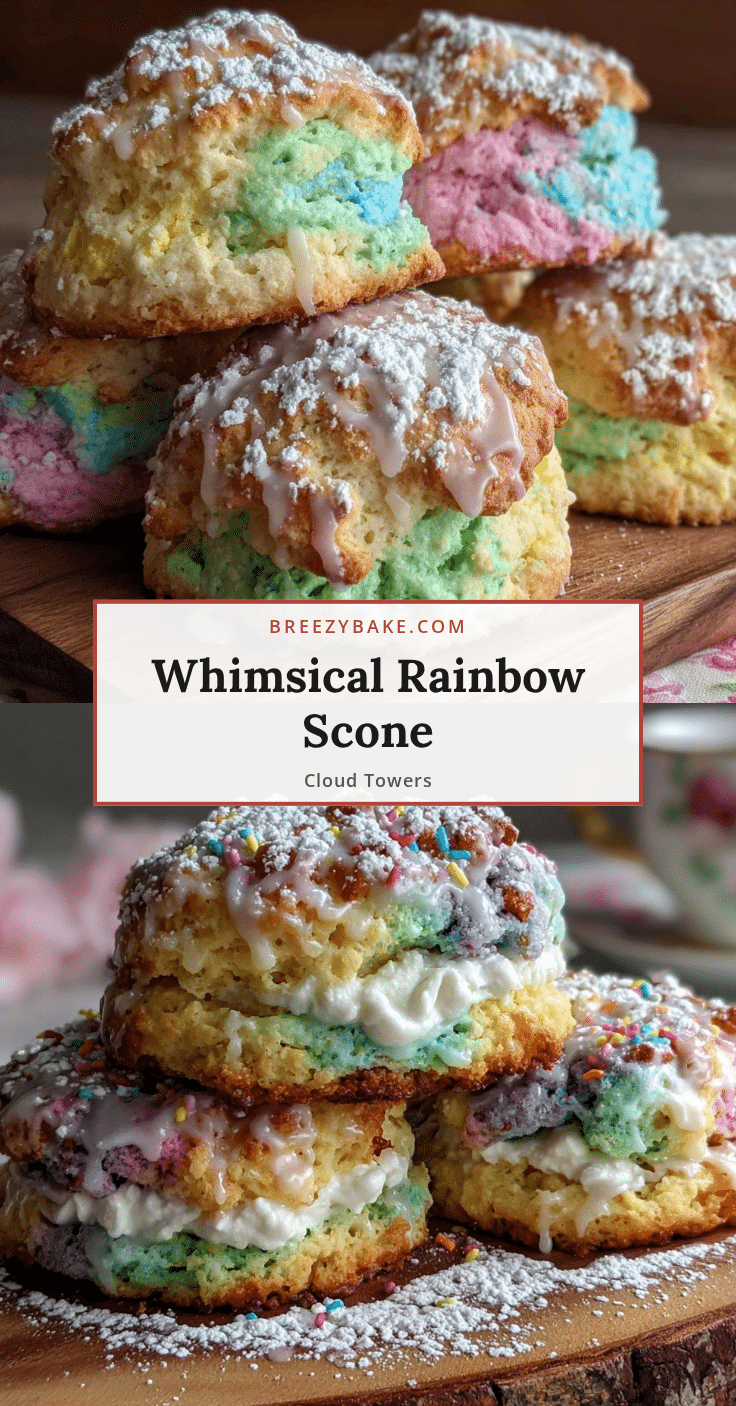
Whimsical Dr. Seuss Rainbow Scone Cloud Towers

A colorful, fluffy scone tower recipe inspired by Dr. Seuss, featuring vibrant rainbow hues and a cloud-like texture. Perfect for celebrations, potlucks, or a whimsical breakfast treat.
- Prep Time: 15 minutes
- Cook Time: 20 minutes
- Total Time: 35 minutes
- Yield: 6 servings 1x
- Category: Breakfast, Dessert
- Cuisine: American
Ingredients
- 3 cups (360g) all-purpose flour
- 1 tablespoon baking powder
- 1/3 cup (65g) granulated sugar
- 1/2 teaspoon salt
- 3/4 cup (170g) cold unsalted butter, cubed
- 1 cup (240ml) heavy cream, plus extra for brushing
- 1 teaspoon vanilla extract
- 1 large egg, room temperature
- Food coloring gels: red, orange, yellow, green, blue, purple
- 1 cup (120g) powdered sugar
- 1 tablespoon lemon juice
Instructions
- Preheat your oven to 400°F (200°C) and line a baking sheet with parchment paper.
- In a large bowl, whisk together all-purpose flour, baking powder, granulated sugar, and salt.
- Add cold, cubed unsalted butter to the dry ingredients. Use a pastry cutter or food processor to blend until the mixture resembles coarse crumbs with pea-sized butter bits.
- In a separate bowl, whisk together heavy cream, egg, and vanilla extract. Pour this mixture into the flour-butter mix and gently fold until just combined. Do not overmix.
- Divide the dough evenly into six bowls. Add a small amount of gel food coloring to each bowl and stir gently to create vibrant rainbow colors.
- On a lightly floured surface, roll each colored dough ball into a thin circle about 8 inches (20 cm) in diameter. Stack the circles on top of each other in rainbow order, gently pressing them together.
- Using a sharp knife or cookie cutter, cut the stacked dough into triangles or desired shapes. Separate the pieces and place them on the prepared baking sheet, leaving space to expand.
- Lightly brush the tops of each scone with additional heavy cream.
- Bake for 18-22 minutes, or until the tops are golden and a toothpick inserted comes out clean.
- While baking, whisk together powdered sugar and lemon juice until smooth to prepare the glaze.
- Once scones are slightly cooled, drizzle the glaze over the tops.
- Transfer scones to a cooling rack and let them cool completely before stacking into towers.
Notes
Keep butter cold to achieve flaky, cloud-like layers. Do not overmix dough after adding wet ingredients to avoid tough scones. Use gel food coloring for vibrant colors without altering dough consistency. If dough is too sticky after coloring, chill for 10 minutes before rolling. Brush tops with cream for a golden finish. Glaze scones after baking and cooling to keep colors bright.
Nutrition
- Serving Size: 1 slice (1/6th of th
- Calories: 280
- Fat: 14
- Carbohydrates: 30
- Protein: 4
Keywords: rainbow scones, colorful scones, Dr. Seuss scones, cloud scones, easy scone recipe, whimsical scones, breakfast scones, party scones