Let me tell you, the scent of sizzling chicken mingling with warm, crispy taco shells fresh out of the oven is enough to make anyone’s mouth water. Honestly, the very first time I made these Crispy Super Bowl Chicken Stuffed Taco Cups, I was instantly hooked—the kind of moment where you pause, take a deep breath, and just smile because you know you’re onto something truly special. It was years ago, on a chilly Super Bowl Sunday, when I was knee-high to a grasshopper and helping my grandma prep snacks for the big game. She had a knack for turning simple ingredients into pure, nostalgic comfort, and this recipe felt like a modern twist on that magic.
My family couldn’t stop sneaking them off the cooling rack (and I can’t really blame them). You know what’s great? These crispy taco cups are dangerously easy to make and perfect for potlucks, last-minute game day cravings, or just a fun weekend treat that brightens up your snack table. I wish I’d discovered this recipe years ago—it’s become a staple for family gatherings, gifting, and whenever I want to impress without the fuss. In the name of research, of course, I’ve tested the recipe multiple times, and trust me, these chicken-stuffed taco cups feel like a warm hug wrapped in crunchy, cheesy goodness. You’re definitely going to want to bookmark this one!
Why You’ll Love This Recipe
There’s a reason these Crispy Super Bowl Chicken Stuffed Taco Cups have become my go-to game day snack. Here’s the scoop from my kitchen trials and family-approved tests:
- Quick & Easy: Comes together in under 30 minutes, perfect for busy game days or spontaneous snack attacks.
- Simple Ingredients: No fancy grocery trips needed; most are pantry staples you probably already have on hand.
- Perfect for Game Day: These bite-sized cups fit perfectly into any Super Bowl spread or casual party lineup.
- Crowd-Pleaser: Kids and adults alike rave about the crispy shell paired with juicy, flavorful chicken.
- Unbelievably Delicious: The combo of crunchy taco cups, creamy cheese, and spiced chicken hits every comfort food note.
What sets this recipe apart? It’s the crispy taco shell cups baked just right to hold juicy chicken and melty cheese without sogginess. Plus, I toss the chicken with a blend of spices that’s balanced—not too hot, but with just enough kick to keep you coming back for more. Honestly, this isn’t just another taco recipe; it’s the best version you’ll find for game day snacks that impress without stress. It’s the kind of recipe that makes you close your eyes after the first bite and savor every mouthful. Comfort food, yes—but with a fun, handheld twist.
What Ingredients You Will Need
This recipe uses simple, wholesome ingredients to deliver bold flavor and satisfying texture without the fuss. Most are pantry staples, and you can easily tweak a few to match your taste or dietary needs.
- Chicken: 2 cups cooked shredded chicken (rotisserie chicken works perfectly for ease and flavor)
- Taco Shells: 12 small flour tortillas (6-inch size, for forming the cups; you can swap corn tortillas for gluten-free option)
- Cheese: 1 cup shredded sharp cheddar cheese (I recommend Tillamook for great melt and flavor)
- Spices for Chicken: 1 tsp chili powder, ½ tsp cumin, ½ tsp smoked paprika, ¼ tsp garlic powder, and a pinch of salt and pepper
- Sour Cream: ½ cup (optional, for topping or dipping; use dairy-free if needed)
- Green Onions: 2 stalks, thinly sliced (adds a fresh crunch)
- Olive Oil: 2 tbsp, for brushing the taco cups to get that perfect crisp
- Optional Toppings: diced tomatoes, sliced jalapeños, cilantro leaves, or avocado slices
For best results, choose small tortillas that aren’t too thick, so they crisp up nicely without becoming tough. If you want a little extra flavor, lightly brush the tortilla cups with olive oil seasoned with a pinch of smoked paprika before baking. For a dairy-free twist, swap cheddar cheese with a plant-based shreds, and sour cream with coconut yogurt. I’ve also found that using leftover rotisserie chicken gives the best juicy texture without drying out during baking.
Equipment Needed
- Muffin tin: Essential for shaping the taco cups. If you don’t have a muffin tin, use a mini bundt pan or even small oven-safe ramekins as an alternative.
- Mixing bowls: For combining chicken with spices and prepping toppings.
- Basting brush: Handy for brushing olive oil on the tortilla cups (a silicone brush works best and is easy to clean).
- Measuring spoons and cups: For precise seasoning and ingredient measurements.
- Oven: To crisp and bake the taco cups. A convection oven can help get extra crispy shells but a regular oven works just fine.
If you’re on a budget, look for non-stick muffin tins—they make cleanup a breeze, and you won’t need to grease heavily. I once tried baking the taco cups in a disposable foil pan when I was in a pinch, and it worked okay, but the muffin tin definitely gives the best shape and even crispness. Just make sure to keep an eye on the baking time if you’re using alternative pans.
Preparation Method
- Preheat your oven to 375°F (190°C). This temperature crisps the tortilla cups without burning.
- Prepare the chicken filling: In a medium bowl, combine the shredded chicken with chili powder, cumin, smoked paprika, garlic powder, salt, and pepper. Mix well until the chicken is evenly coated with spices. This step takes about 5 minutes. Tip: If your chicken is dry, add a splash of chicken broth or a teaspoon of olive oil to keep it juicy.
- Shape the taco cups: Lightly brush both sides of each tortilla with olive oil. Gently press each tortilla into the muffin tin cups, forming a bowl shape. Use your fingers to shape the edges.
- Bake the taco cups for 8-10 minutes or until they’re golden brown and crisp. Watch closely to avoid over-browning. The edges should be firm but not burnt.
- Remove the taco cups from the oven. Spoon about 2 tablespoons (30g) of the seasoned chicken into each cup.
- Top each cup with shredded cheddar cheese, roughly 1 tablespoon (15g) per cup, covering the chicken evenly.
- Return the cups to the oven and bake for an additional 5-7 minutes, or until the cheese is melted and bubbly.
- Remove from oven and let cool for 2-3 minutes. Sprinkle with sliced green onions and your choice of optional toppings like diced tomatoes or jalapeños.
- Serve warm with a side of sour cream for dipping or dolloping on top.
Pro tip: If the taco cups seem floppy after baking, give them a minute or two to rest; they’ll firm up as they cool. If you want extra crispy shells, briefly broil them for 1-2 minutes at the end, but watch carefully to avoid burning.
Cooking Tips & Techniques
Getting those taco cups perfectly crispy and flavorful isn’t rocket science, but a few tricks from my kitchen help every time.
- Brush with oil: This little step makes a huge difference. Lightly coating both sides of the tortillas helps them brown evenly and crisp up without drying out. I prefer olive oil for flavor, but avocado oil works well too.
- Don’t overcrowd the filling: Stuffing too much chicken in each cup can make the shells soggy. Keep it to about 2 tablespoons per cup for balance.
- Use a hot oven: Baking at 375°F (190°C) crisps the tortilla cups quickly before the chicken filling heats through. Lower temps risk soft shells.
- Season well: The spice mix is simple but key. Adjust heat levels with cayenne or chipotle powder if you like more kick. I’ve learned the hard way that bland chicken stuffing makes the whole thing fall flat.
- Multitask smart: While the cups bake the first time, prep your toppings and mix the chicken. Saves time and keeps things moving.
- Let cups cool briefly: They firm up as they cool, so don’t rush to fill or serve immediately out of the oven.
One lesson I learned is that using fresh, warm shredded chicken is better than cold leftovers straight from the fridge. Warm chicken melds with spices and cheese more smoothly, making each bite juicier. Also, if you’re short on time, pre-shredded rotisserie chicken is a lifesaver.
Variations & Adaptations
Want to mix it up? These Crispy Super Bowl Chicken Stuffed Taco Cups are super adaptable.
- Vegetarian Version: Swap chicken for seasoned black beans or spiced sautéed mushrooms. Add corn kernels for sweetness and texture.
- Cheese Variations: Use pepper jack for a spicy twist, or Monterey Jack for a milder melt. Vegan cheese shreds work well too!
- Gluten-Free Option: Use small corn tortillas instead of flour. They crisp up nicely and add authentic taco flavor.
- Seasonal Twist: Add roasted diced sweet potatoes or butternut squash for fall vibes. Fresh summer corn and diced tomatoes also brighten things up.
- Spicy Kick: Mix in a tablespoon of your favorite hot sauce with the chicken or top with pickled jalapeños and a squeeze of lime.
Personally, I once tried a buffalo chicken version by tossing the shredded chicken in buffalo sauce before filling the cups. It was a game changer! Just remember to add a cooling topping like ranch or blue cheese dressing to balance the heat. I also like to customize the toppings based on what’s in season or what my guests prefer—makes this recipe feel fresh every time I make it.
Serving & Storage Suggestions
These taco cups are best served warm, right out of the oven. The crispy shell and melty cheese combo just can’t be beat fresh. I like to arrange them on a big platter with colorful toppings like diced tomatoes, sliced jalapeños, and chopped cilantro for a festive look.
Pair them with classic game day sides like guacamole, salsa, or a crisp green salad to balance the richness. For drinks, a cold beer or sparkling soda complements the spices nicely.
To store leftovers, let the cups cool completely, then place them in an airtight container in the refrigerator for up to 3 days. When reheating, pop them in a preheated 350°F (175°C) oven for 5-7 minutes to regain crispiness. Avoid microwaving if you want to keep the shells crunchy.
Pro tip: The flavors actually deepen if you prep the filling ahead and bake the cups fresh when ready to serve. This way, the chicken stays juicy and the shells don’t get soggy.
Nutritional Information & Benefits
Each Crispy Super Bowl Chicken Stuffed Taco Cup roughly contains:
| Nutrient | Amount (per cup) |
|---|---|
| Calories | 140-160 kcal |
| Protein | 12g |
| Fat | 8g |
| Carbohydrates | 10g |
| Fiber | 1-2g |
Thanks to the lean chicken, these cups pack a solid protein punch, helping keep you full during long game days. The cheese adds calcium and satisfying fats, while the spices bring antioxidants. Using corn tortillas makes the recipe gluten-free, and swapping in plant-based cheese can make it vegan-friendly. Just watch out for dairy and gluten if allergies are a concern.
From a wellness perspective, these taco cups hit the comfort food spot but without the heavy grease of typical fried snacks, making them a smarter choice for gatherings.
Conclusion
In short, these Crispy Super Bowl Chicken Stuffed Taco Cups are a must-try if you want an easy, crowd-pleasing snack that combines crunch, spice, and juicy chicken in every bite. You can customize them endlessly, so feel free to experiment with different fillings and toppings to match your taste. Honestly, I love how they bring people together—whether it’s a casual game day or a fun family night. They’re fast to make, delicious, and just plain fun.
Give this recipe a shot, and let me know how you tweak it! Drop a comment below with your favorite variation or share the post with your game day crew. You’re going to love how these little taco cups steal the show—and the snack table!
FAQs About Crispy Super Bowl Chicken Stuffed Taco Cups
Can I make these taco cups ahead of time?
Yes! Prepare the seasoned chicken filling and store it in the fridge for up to 2 days. Bake the taco cups fresh when ready to serve for the best crispiness.
What’s the best way to reheat leftover taco cups?
Reheat them in a 350°F (175°C) oven for 5-7 minutes. Avoid microwaving to keep shells crispy.
Can I use corn tortillas instead of flour?
Absolutely. Corn tortillas make a great gluten-free option and crisp up nicely, though they can be a bit more fragile, so handle gently when shaping.
How spicy are these taco cups?
The spice blend is mild to medium by default but can easily be adjusted with extra chili powder, cayenne, or hot sauce to suit your heat preference.
What toppings do you recommend?
Classic toppings like sliced green onions, diced tomatoes, jalapeños, cilantro, avocado, and a dollop of sour cream or guacamole work beautifully.
Pin This Recipe!
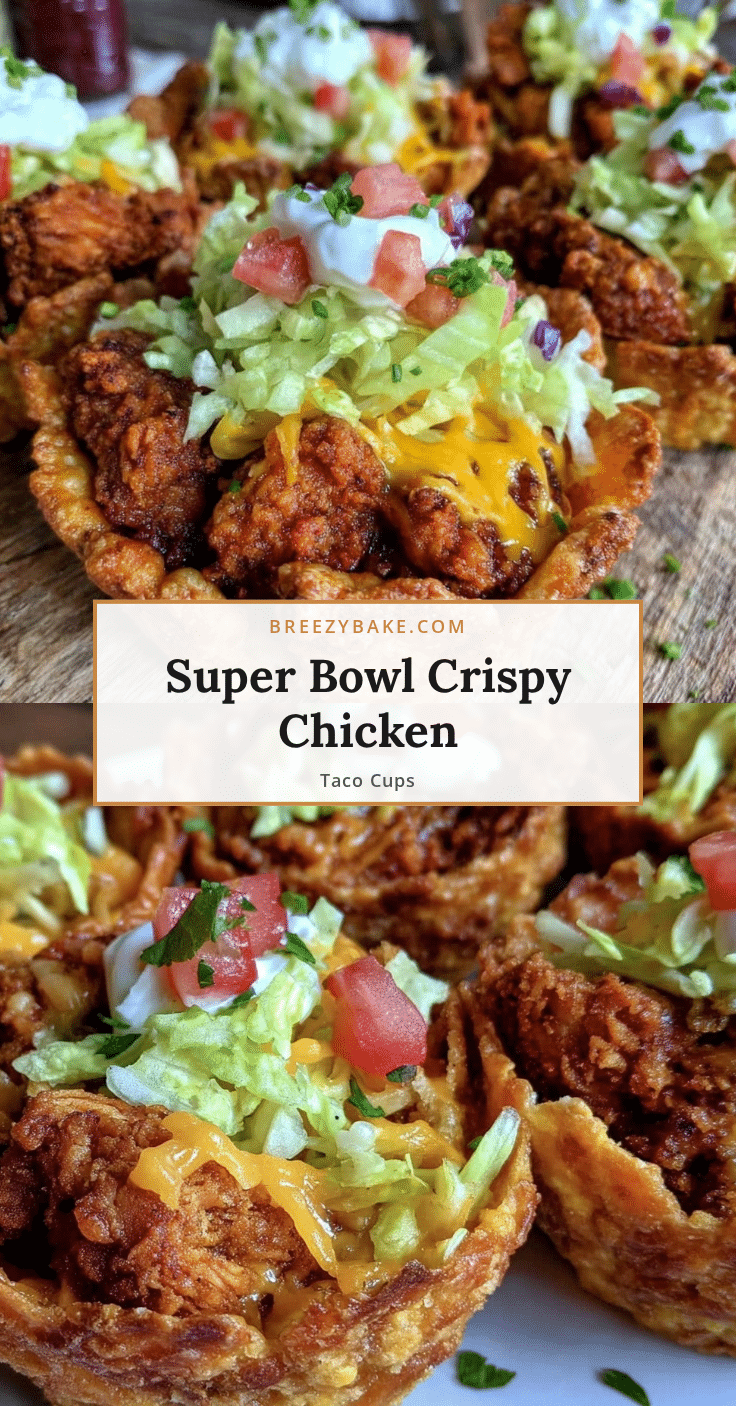
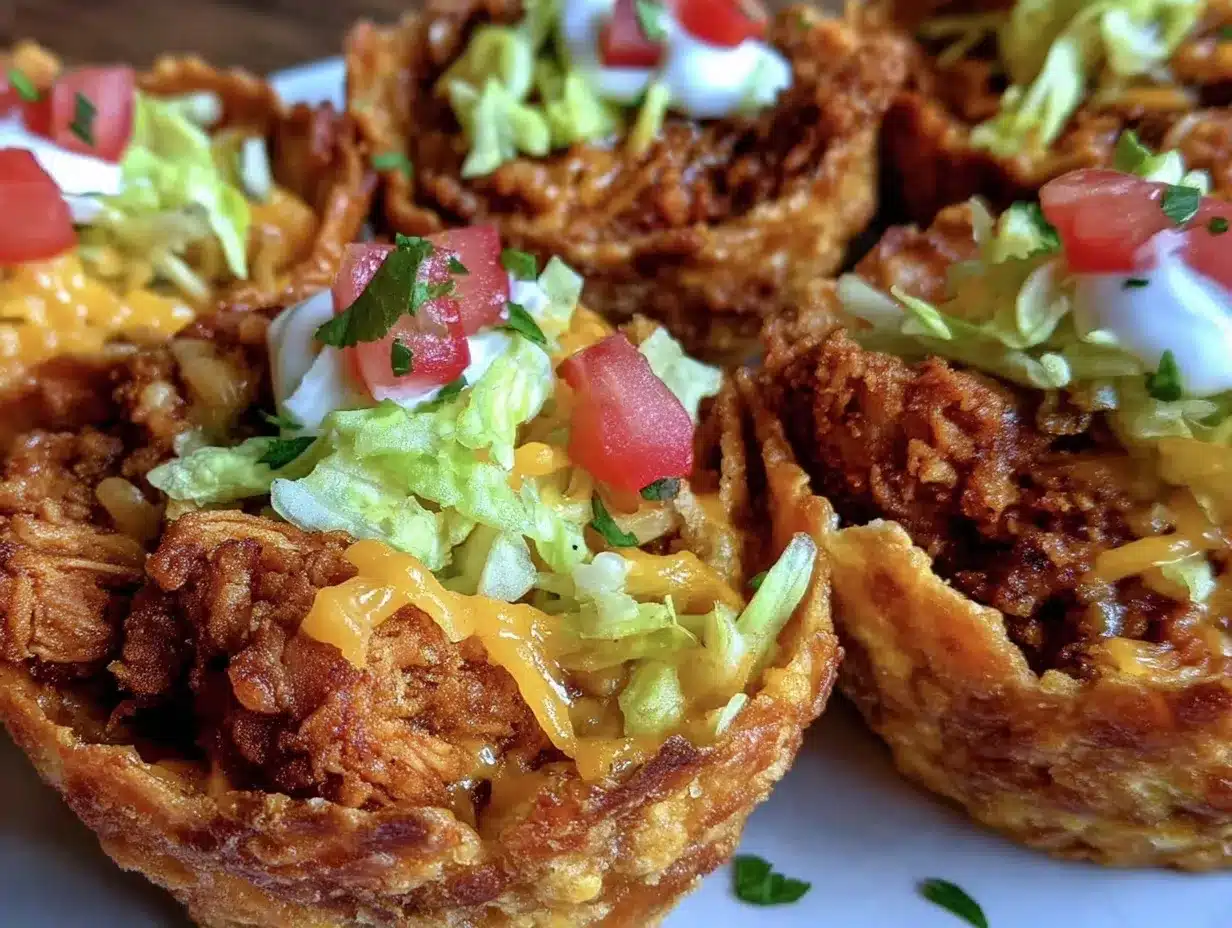
Crispy Super Bowl Chicken Stuffed Taco Cups

These crispy taco cups are an easy, crowd-pleasing game day snack featuring seasoned shredded chicken, melted cheddar cheese, and a crunchy taco shell baked to perfection.
- Prep Time: 10 minutes
- Cook Time: 15 minutes
- Total Time: 25 minutes
- Yield: 12 servings 1x
- Category: Snack
- Cuisine: American
Ingredients
- 2 cups cooked shredded chicken (rotisserie chicken recommended)
- 12 small flour tortillas (6-inch size; can substitute corn tortillas for gluten-free)
- 1 cup shredded sharp cheddar cheese
- 1 tsp chili powder
- ½ tsp cumin
- ½ tsp smoked paprika
- ¼ tsp garlic powder
- Pinch of salt and pepper
- ½ cup sour cream (optional, for topping or dipping; use dairy-free if needed)
- 2 stalks green onions, thinly sliced
- 2 tbsp olive oil, for brushing taco cups
- Optional toppings: diced tomatoes, sliced jalapeños, cilantro leaves, avocado slices
Instructions
- Preheat your oven to 375°F (190°C).
- In a medium bowl, combine shredded chicken with chili powder, cumin, smoked paprika, garlic powder, salt, and pepper. Mix well until evenly coated. If chicken is dry, add a splash of chicken broth or 1 tsp olive oil to keep it juicy.
- Lightly brush both sides of each tortilla with olive oil. Gently press each tortilla into muffin tin cups to form bowl shapes, shaping edges with fingers.
- Bake the tortilla cups for 8-10 minutes until golden brown and crisp, watching closely to avoid burning.
- Remove taco cups from oven. Spoon about 2 tablespoons (30g) of seasoned chicken into each cup.
- Top each cup with roughly 1 tablespoon (15g) shredded cheddar cheese, covering the chicken evenly.
- Return cups to oven and bake for an additional 5-7 minutes until cheese is melted and bubbly.
- Remove from oven and let cool for 2-3 minutes. Sprinkle with sliced green onions and optional toppings like diced tomatoes or jalapeños.
- Serve warm with sour cream for dipping or dolloping on top.
Notes
Use small tortillas that are not too thick for best crispiness. Brush tortillas with olive oil seasoned with smoked paprika for extra flavor. Let taco cups cool briefly after baking to firm up. For extra crispiness, broil for 1-2 minutes at the end but watch carefully to avoid burning. Use warm shredded chicken for juicier filling. Avoid overcrowding filling to prevent soggy shells. Reheat leftovers in a 350°F oven for 5-7 minutes to maintain crispiness; avoid microwaving.
Nutrition
- Serving Size: 1 taco cup
- Calories: 140160
- Fat: 8
- Carbohydrates: 10
- Fiber: 12
- Protein: 12
Keywords: chicken taco cups, game day snacks, Super Bowl recipes, crispy taco cups, easy chicken appetizers, party snacks