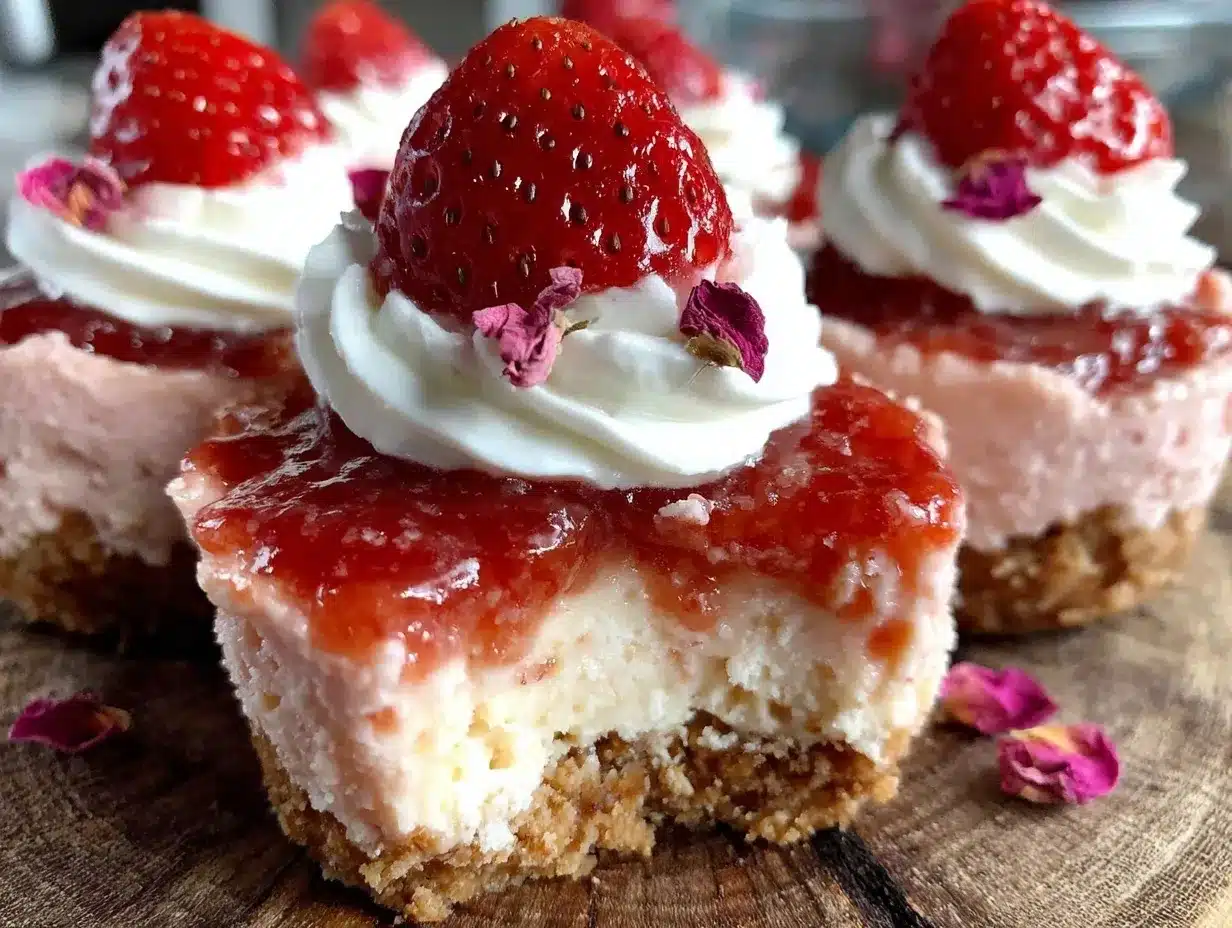
Let me tell you, the scent of fresh strawberries mingling with velvety cream cheese wafting from the kitchen is enough to make anyone’s mouth water—especially when it’s for these Creamy Valentine’s Pink Velvet Strawberry Cheesecake Cups. The first time I whipped these up, I was honestly hooked the moment I scooped that luscious, pink-hued filling into the cups. It was the kind of moment where you pause, take a deep breath, and just smile because you know you’re onto something truly special.
Years ago, when I was knee-high to a grasshopper, my grandma used to make the most delightful strawberry desserts, and I always wished I could capture that same magic in a quick, no-fuss treat. This recipe feels like the grown-up version of those cozy memories—dangerously easy and packed with pure, nostalgic comfort. My family couldn’t stop sneaking these cheesecake cups off the countertop (and I can’t really blame them). Honestly, they’re perfect for Valentine’s Day, but also make a sweet treat for your kids or a charming addition to any potluck or cozy gathering.
You know what’s great? These cheesecake cups are just the right balance of creamy and fruity, with that gorgeous pink velvet color that brightens up your Pinterest cookie board—or in this case, your dessert table. I’ve tested this recipe more times than I can count (in the name of research, of course!), and it’s become a staple for family gatherings, gifting, or whenever I want something that feels like a warm hug in dessert form. You’re definitely going to want to bookmark this one!
Why You’ll Love This Recipe
After making these strawberry cheesecake cups countless times, I can say with confidence they’re an absolute winner for so many reasons. Here’s why you’ll fall for them too:
- Quick & Easy: Comes together in under 30 minutes, perfect for busy weeknights or last-minute Valentine’s Day plans.
- Simple Ingredients: No fancy grocery trips needed; you likely already have everything in your kitchen or can easily grab them.
- Perfect for Valentine’s Day: The pretty pink hue and strawberry flavor make these a showstopper for romantic dinners or sweet surprises.
- Crowd-Pleaser: Kids and adults alike rave about the creamy texture and balanced sweetness—always a hit at parties.
- Unbelievably Delicious: The texture is silky smooth, and the strawberry creaminess is next-level comfort food with a fresh twist.
This recipe isn’t just your average cheesecake cup. The secret is in blending velvety cream cheese with real strawberry puree, giving it that dreamy pink velvet look and a flavor that’s both rich and refreshing. Plus, using crushed vanilla wafer crumbs for the base adds the perfect little crunch to contrast the creamy filling. It’s comfort food reimagined—lighter, faster, but with the same soul-soothing satisfaction you want in a Valentine’s dessert.
Whether you’re aiming to impress guests without stress, or just want to treat yourself to something memorable, these strawberry cheesecake cups hit the spot every time.
What Ingredients You Will Need
This recipe uses simple, wholesome ingredients to deliver bold flavor and satisfying texture without the fuss. Most are pantry staples or fresh basics you can easily find year-round.
- For the crust:
- Vanilla wafer cookies, crushed (about 1 ½ cups) – I like using Keebler for that classic crunch
- Unsalted butter, melted (5 tablespoons) – adds richness and binds the crust
- Granulated sugar (2 tablespoons) – balances sweetness and helps crisp the crust
- For the strawberry filling:
- Fresh strawberries (1 cup), hulled and pureed – ripe berries work best for natural sweetness
- Powdered sugar (⅓ cup) – smooth sweetness without grit
- Vanilla extract (1 teaspoon) – deepens flavor
- For the cheesecake layer:
- Cream cheese (16 ounces), softened – I recommend Philadelphia brand for best texture
- Heavy cream (½ cup), cold – whips up fluffy, light texture
- Granulated sugar (½ cup) – balances the tang of the cream cheese
- Lemon juice (1 tablespoon) – adds brightness and balances sweetness
- Pink food coloring (optional, a few drops) – for that signature pink velvet look
Substitution tips: Use coconut cream instead of heavy cream for a dairy-free twist, and swap vanilla wafers with gluten-free cookies if needed. Frozen strawberries work well too—just thaw and drain excess liquid before pureeing.
Equipment Needed
- Mixing bowls – a medium and a large one
- Hand mixer or stand mixer – for whipping cream and blending cheesecake filling
- Food processor or plastic bag and rolling pin – to crush vanilla wafers
- Spoons and spatulas – for mixing and folding
- Measuring cups and spoons – for precise ingredient amounts
- Serving cups or small mason jars – I love using clear glass ones so you can see all the pretty layers
- Refrigerator – for chilling and setting the cheesecake cups
If you don’t have a food processor, no worries! Just pop the vanilla wafers into a sturdy plastic bag and crush them with a rolling pin or heavy pan. I’ve done that plenty of times, and it works like a charm without extra cleanup. For whipping, a simple hand mixer works fine, but a stand mixer takes the effort out of it, especially when whipping heavy cream. Either way, this recipe is forgiving with equipment.
Preparation Method
- Prepare the crust (10 minutes): Crush 1 ½ cups of vanilla wafer cookies until fine crumbs form. I usually pulse them in my food processor for about 20 seconds, but crushing in a bag with a rolling pin works too. In a medium bowl, combine the crushed wafers, 5 tablespoons melted unsalted butter, and 2 tablespoons granulated sugar. Mix until the crumbs are evenly coated and look like wet sand.
- Assemble crust in cups (5 minutes): Spoon about 2 tablespoons of the crust mixture into each serving cup or jar. Press down firmly with the back of a spoon or your fingers to compact. This base will hold up the creamy filling nicely without crumbling apart. Pop the cups into the fridge while you prepare the filling.
- Make strawberry puree (5 minutes): Hull and roughly chop 1 cup fresh strawberries. Blend in a small food processor or blender until smooth. If the puree seems watery, strain it through a fine sieve to remove excess juice. Stir in ⅓ cup powdered sugar and 1 teaspoon vanilla extract until fully combined.
- Whip the cheesecake filling (15 minutes): In a large mixing bowl, beat 16 ounces softened cream cheese with ½ cup granulated sugar and 1 tablespoon lemon juice until smooth and creamy. In a separate bowl, whip ½ cup cold heavy cream until soft peaks form (about 3-4 minutes on medium speed). Gently fold the whipped cream into the cream cheese mixture until fully combined and fluffy.
- Add strawberry puree and color (5 minutes): Fold the strawberry puree into the cheesecake mixture. For that signature pink velvet effect, add a few drops of pink food coloring and stir until the color is evenly distributed. The filling should be light, creamy, and a lovely pastel pink.
- Fill the cups (5 minutes): Spoon or pipe the strawberry cheesecake filling over the chilled crust layer in each cup. Fill to the top and smooth the surface. Optionally, garnish with fresh strawberry slices or a sprinkle of crushed vanilla wafers for a pretty finish.
- Chill and set (at least 2 hours): Place the assembled cups in the refrigerator for at least 2 hours to firm up. Overnight is even better if you can wait! The flavors meld beautifully, and the texture becomes perfectly creamy but set.
Pro tip: If you notice any watery liquid pooling after chilling, just give the cups a gentle stir before serving to reincorporate the creaminess. Also, take care not to overwhip the cream cheese mixture or it can become grainy—smooth and soft is the goal!
Cooking Tips & Techniques
When making these strawberry cheesecake cups, a few tricks have made all the difference for me over time. First, always use room-temperature cream cheese. Seriously, it’s the secret to a super smooth filling without lumps. I learned this the hard way one time when I was in a rush, and ended up with a curdled mess—lesson learned!
Whipping the heavy cream separately and folding it gently into the cream cheese mixture is crucial. It keeps the texture light and fluffy, and you avoid deflating all that air. Go slow with folding—imagine you’re folding delicate pastry dough, not mixing batter.
Another tip: crush those vanilla wafers finely. You want a sandy texture that holds together but isn’t chunky. If the crust feels too dry when pressed into the cups, add a splash more melted butter. This little tweak keeps the crust from crumbling apart when you serve.
Timing-wise, prepping the crust first and chilling it while making the filling saves you a lot of back-and-forth. Plus, letting the cheesecake cups chill overnight makes the flavors sing and the texture divine—though I know sometimes patience isn’t an option, and that’s okay too!
Variations & Adaptations
Want to shake things up or accommodate different tastes? Here are some of my favorite variations for these cheesecake cups:
- Chocolate Strawberry Cups: Add 2 tablespoons of cocoa powder to the crust mixture and sprinkle mini chocolate chips on top for a rich chocolate-strawberry combo.
- Gluten-Free Version: Swap vanilla wafers for gluten-free cookies or crushed almond flour mixed with a bit of coconut sugar and butter for the crust.
- Dairy-Free Adaptation: Use dairy-free cream cheese (like Kite Hill) and coconut cream whipped to soft peaks instead of heavy cream for a luscious vegan-friendly version.
- Seasonal Twist: In summer, swap strawberries for fresh raspberries or a mix of berries for a more vibrant berry medley.
- Low-Sugar Option: Replace granulated and powdered sugar with your favorite sugar substitute (like erythritol) and adjust to taste.
Personally, I once tried adding a hint of rose water to the filling for Valentine’s Day, and it was surprisingly delightful—just a few drops give it a subtle floral note that pairs beautifully with the strawberries. Give it a try if you’re feeling adventurous!
Serving & Storage Suggestions
These cheesecake cups are best served chilled, straight from the fridge. I like to garnish mine with a fresh strawberry slice or a small mint leaf for a pop of color and freshness. They pair wonderfully with a light cup of tea or a bubbly rosé if you’re celebrating Valentine’s Day in style.
For storage, cover the cups tightly with plastic wrap or lids and keep them refrigerated for up to 3 days. They actually taste better after resting for a day — the flavors settle and deepen, making each bite more indulgent. If you want to keep them longer, they freeze well for up to 2 months. Just thaw overnight in the fridge before serving.
When reheating, just skip the microwave; these are meant to be enjoyed cold. If you want to refresh the crust crunch after chilling, a quick 5-minute broil of the crushed wafers before assembling works like a charm.
Nutritional Information & Benefits
Each serving of these creamy pink velvet strawberry cheesecake cups clocks in around 280 calories, with roughly 18 grams of fat and 20 grams of sugar, depending on your ingredient brands and portion sizes. The fresh strawberries pack a dose of vitamin C and antioxidants, adding a bit of wholesome goodness to this indulgence.
The cream cheese provides a good source of calcium and protein, while the use of real fruit keeps the flavor bright and natural. For those watching carbs, swapping sugar for a low-carb substitute can make these cups friendlier for keto or diabetic diets.
Just a heads-up: these cups contain dairy and gluten unless you make the substitutions mentioned earlier. From my wellness perspective, it’s a treat worth savoring mindfully, especially when shared with loved ones on a special day.
Conclusion
If you’re looking for a dangerously easy yet impressive dessert that brings creamy, fruity goodness with a romantic twist, these Creamy Valentine’s Pink Velvet Strawberry Cheesecake Cups are it. They’re customizable, quick to make, and perfect for adding that little extra magic to your Valentine’s Day celebration or any day you want to feel special.
I love this recipe because it captures the spirit of a classic strawberry cheesecake but in a fun, handheld cup that’s perfect for sharing (or sneaking bites when no one’s looking). Give it a go, tweak it to your taste, and let me know how it turns out!
Don’t forget to leave a comment below with your favorite variations or any questions you have. And if you make these cheesecake cups, share your photos — I’d love to see your creations! Happy baking and happy Valentine’s!
FAQs
How long do these cheesecake cups need to chill before serving?
At least 2 hours in the fridge, but overnight chilling is ideal for the best texture and flavor.
Can I use frozen strawberries instead of fresh?
Yes! Just thaw them first and drain any excess liquid before pureeing to avoid watery filling.
Is it necessary to use pink food coloring?
Nope! The strawberry puree gives a lovely natural pink tint, but a few drops of food coloring make the color pop more for Valentine’s Day.
Can I prepare these cheesecake cups ahead of time?
Absolutely. They store well covered in the refrigerator for up to 3 days or can be frozen for up to 2 months.
What’s the best way to crush the vanilla wafers if I don’t have a food processor?
Place the wafers in a sturdy plastic bag and crush them with a rolling pin or heavy pan until fine crumbs form.
Pin This Recipe!
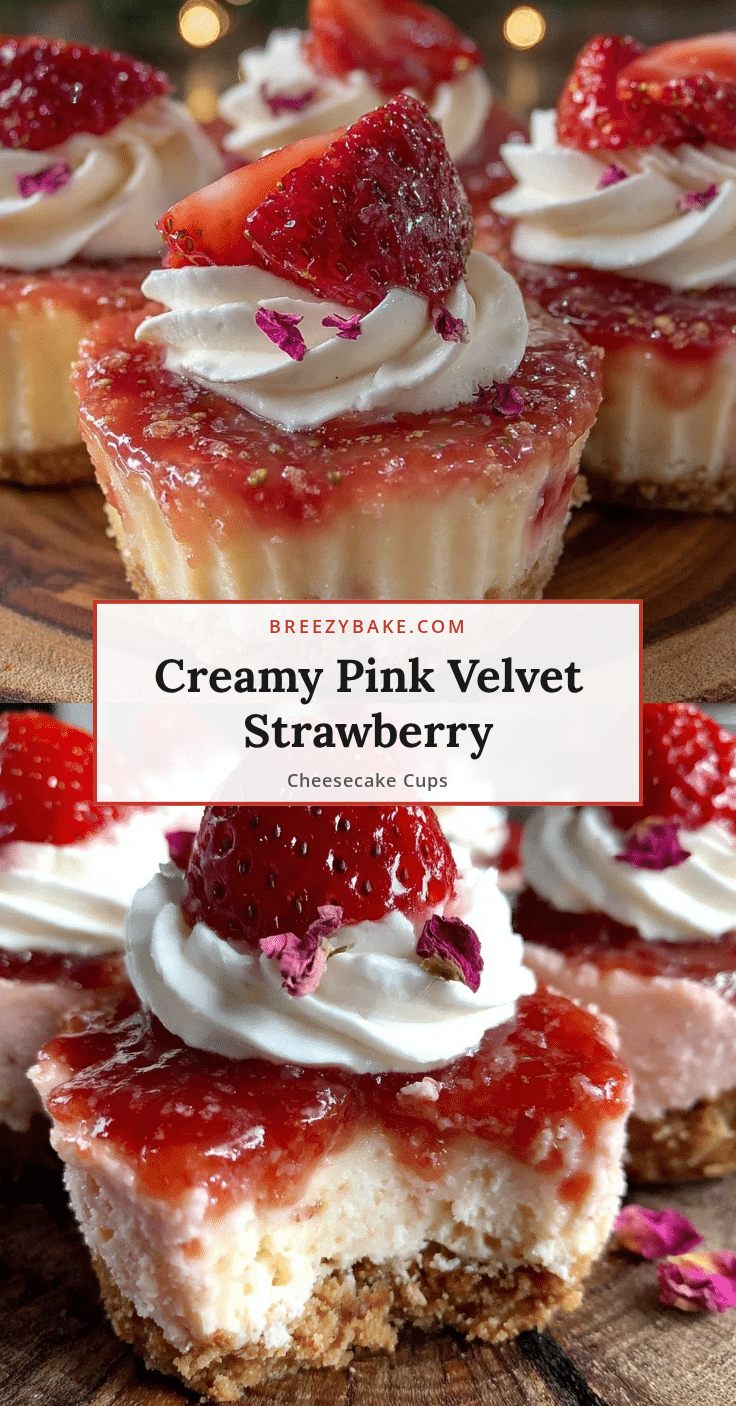
Creamy Pink Velvet Strawberry Cheesecake Cups
These creamy pink velvet strawberry cheesecake cups are a quick and easy dessert perfect for Valentine’s Day or any cozy gathering, featuring a velvety cream cheese filling with real strawberry puree and a crunchy vanilla wafer crust.
- Prep Time: 20 minutes
- Cook Time: 0 minutes
- Total Time: 2 hours 20 minutes
- Yield: 6 servings 1x
- Category: Dessert
- Cuisine: American
Ingredients
- 1 ½ cups vanilla wafer cookies, crushed
- 5 tablespoons unsalted butter, melted
- 2 tablespoons granulated sugar (for crust)
- 1 cup fresh strawberries, hulled and pureed
- ⅓ cup powdered sugar
- 1 teaspoon vanilla extract
- 16 ounces cream cheese, softened
- ½ cup heavy cream, cold
- ½ cup granulated sugar (for cheesecake filling)
- 1 tablespoon lemon juice
- Pink food coloring (optional, a few drops)
Instructions
- Crush 1 ½ cups of vanilla wafer cookies until fine crumbs form.
- In a medium bowl, combine crushed wafers, 5 tablespoons melted unsalted butter, and 2 tablespoons granulated sugar. Mix until crumbs are evenly coated and look like wet sand.
- Spoon about 2 tablespoons of the crust mixture into each serving cup or jar. Press down firmly to compact. Refrigerate while preparing filling.
- Hull and roughly chop 1 cup fresh strawberries. Blend until smooth. If watery, strain to remove excess juice.
- Stir in ⅓ cup powdered sugar and 1 teaspoon vanilla extract into strawberry puree.
- In a large bowl, beat 16 ounces softened cream cheese with ½ cup granulated sugar and 1 tablespoon lemon juice until smooth and creamy.
- In a separate bowl, whip ½ cup cold heavy cream until soft peaks form (3-4 minutes).
- Gently fold whipped cream into cream cheese mixture until fully combined and fluffy.
- Fold strawberry puree into cheesecake mixture. Add a few drops of pink food coloring if desired and stir until color is even.
- Spoon or pipe the strawberry cheesecake filling over chilled crust in each cup. Smooth the surface.
- Optionally garnish with fresh strawberry slices or crushed vanilla wafers.
- Chill assembled cups in refrigerator for at least 2 hours or overnight for best results.
Notes
Use room-temperature cream cheese for smooth filling. Whip heavy cream separately and fold gently to keep texture light. Crush vanilla wafers finely for best crust texture. Chill at least 2 hours or overnight for best flavor and texture. Substitute coconut cream for dairy-free version and gluten-free cookies for gluten-free option. Frozen strawberries can be used if thawed and drained.
Nutrition
- Serving Size: 1 cheesecake cup
- Calories: 280
- Sugar: 20
- Sodium: 220
- Fat: 18
- Saturated Fat: 10
- Carbohydrates: 25
- Fiber: 1
- Protein: 5
Keywords: strawberry cheesecake cups, pink velvet cheesecake, Valentine's Day dessert, no-bake cheesecake, creamy strawberry dessert