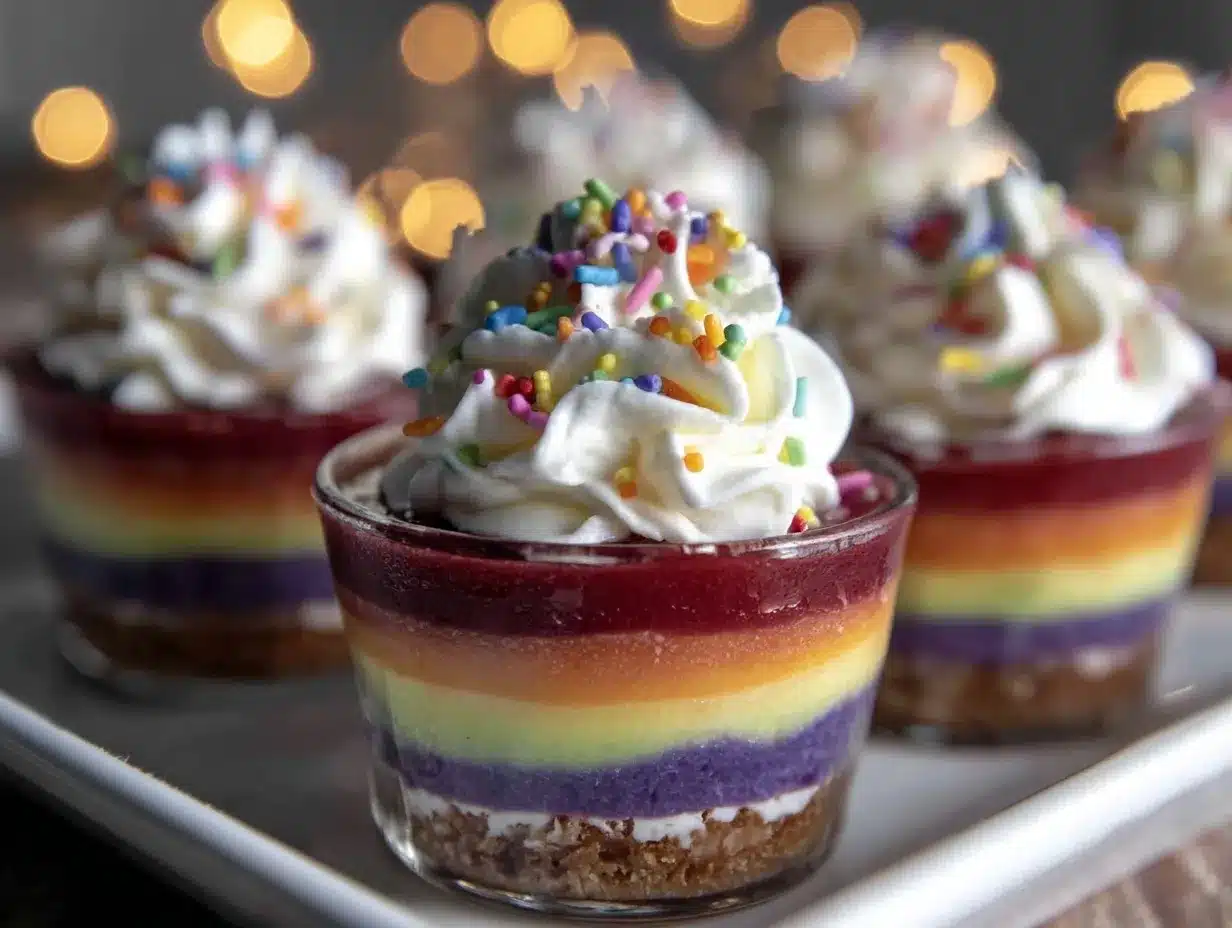
Let me tell you, the sight of those vibrant layers of creamy cheesecake pudding swirling together in a cup is enough to make anyone’s eyes light up with pure delight. The first time I made these Flavorful Dr. Seuss Rainbow Cheesecake Pudding Cups, I was honestly stunned by how something so simple could look so magical—and taste even better. I remember the kind of moment where you pause, take a deep breath, and just smile because you know you’re onto something truly special.
Years ago, when I was knee-high to a grasshopper, my grandma used to make colorful treats that felt like little bursts of joy in the middle of a gloomy day. This recipe reminded me of those times, but with a fresh, fun twist that’s perfect for today’s kids’ parties or anytime you want to brighten up your dessert game. You know what? I wish I’d discovered this recipe years ago because my family couldn’t stop sneaking these pudding cups off the counter (and I can’t really blame them).
Honestly, these pudding cups are dangerously easy to make, and they bring pure, nostalgic comfort in every spoonful. Whether you’re planning a whimsical kids’ party, a cheerful family gathering, or just craving a colorful sweet treat, these Flavorful Dr. Seuss Rainbow Cheesecake Pudding Cups are going to make your day. I’ve tested this recipe more times than I can count—in the name of research, of course—and it’s now a staple for brightening up any occasion.
Why You’ll Love This Recipe
Let me break down why these pudding cups have become a favorite in my kitchen and hopefully yours too. This recipe has been tried and true through many family celebrations and kid-approved events, so you know it’s got the good stuff.
- Quick & Easy: Whip these up in under 30 minutes—perfect for last-minute party prep or a fun weekend activity with the kids.
- Simple Ingredients: No need for fancy shopping trips; you probably have most of what you need right in your pantry and fridge.
- Perfect for Kids’ Parties: The bright rainbow colors and creamy texture make these pudding cups a showstopper for birthdays or school celebrations.
- Crowd-Pleaser: Both kids and adults can’t get enough, with rave reviews for the smooth cheesecake flavor and playful presentation.
- Unbelievably Delicious: The combination of tangy cream cheese with sweet pudding layers is next-level comfort food that feels like a treat and a hug all in one.
This isn’t just another pudding cup recipe. The trick is blending the cheesecake filling until it’s silky smooth and layering the rainbow pudding carefully to keep those vibrant colors distinct yet inviting. Plus, the hint of vanilla and that little squeeze of lemon juice gives these cups a flavor balance that’s both refreshing and indulgent.
Honestly, this recipe closes your eyes after the first bite kind of good. It’s a feel-good dessert that’s perfect for impressing guests without the stress or turning a simple get-together into something memorable.
What Ingredients You Will Need
This recipe uses simple, wholesome ingredients to deliver bold flavor and satisfying texture without the fuss. Most are pantry staples, and the colorful pudding layers add all the fun without any complicated prep.
- For the Cheesecake Pudding Base:
- 8 oz (225 g) cream cheese, softened (I like using Philadelphia for that perfect tang)
- 2 cups (480 ml) whole milk
- 1 package (3.4 oz / 96 g) instant cheesecake-flavored pudding mix
- 1 teaspoon vanilla extract (adds warmth and depth)
- 1 tablespoon fresh lemon juice (brightens the flavor)
- For the Rainbow Layers:
- 6 individual small pudding cups in assorted flavors/colors (strawberry, blueberry, lemon, lime, orange, grape) or alternatively, six small bowls of homemade pudding dyed with food coloring
- Optional Toppings:
- Whipped cream (store-bought or homemade)
- Rainbow sprinkles or edible glitter
- Fresh berries for garnish
If you want to keep it dairy-free, swap cream cheese with plant-based cream cheese and use your favorite non-dairy milk. For a gluten-free version, this recipe is naturally free of gluten, so no worries there!
Equipment Needed
- Mixing bowls – one large for the cheesecake pudding base, plus small bowls if you’re making your own colored puddings
- Electric hand mixer or stand mixer – to whip the cream cheese smooth and mix puddings
- Measuring cups and spoons – for precise ingredient amounts
- Small clear cups or jars (4-6 oz / 120-180 ml size) – perfect for layering the rainbow pudding
- Spoons or small spatulas – for layering each pudding color carefully
- Optional: piping bags – if you want to pipe the pudding layers neatly
If you don’t have an electric mixer, a sturdy whisk and some elbow grease will do just fine, but be prepared for a little more effort. For budget-friendly options, clear plastic cups work just as well as glass and are easier for parties.
Preparation Method
- Soften the Cream Cheese: Let the cream cheese sit at room temperature for about 30 minutes so it’s nice and soft—this makes blending much easier and smoother.
- Make the Cheesecake Pudding Base: In a large mixing bowl, beat the softened cream cheese with an electric mixer until creamy and free of lumps, about 2-3 minutes. Add the vanilla extract and lemon juice, mixing just until combined.
- Prepare the Milk and Pudding Mix: Gradually whisk in the whole milk, then add the instant cheesecake pudding mix. Beat on medium speed for 2 minutes until the mixture thickens. You’ll know it’s ready when it holds a soft, creamy texture and smells sweetly tangy.
- Divide the Base for Coloring: If you’re making your own rainbow layers, divide the cheesecake pudding base evenly into six bowls. Add a drop or two of different food coloring to each bowl (red, orange, yellow, green, blue, purple) and gently fold to combine without deflating the mixture.
- Layer the Pudding Cups: Grab your clear cups and spoon or pipe a layer of one colored pudding at the bottom (about 2 tablespoons or 30 ml). Chill in the fridge for 5-10 minutes to set slightly—this helps keep the layers distinct.
- Repeat layering with the remaining colors, chilling briefly between each layer. This step takes patience, but the result is worth it—a beautiful, bright rainbow in every cup.
- Chill Thoroughly: Once all layers are in place, cover the cups with plastic wrap and refrigerate for at least 2 hours to allow the pudding to firm up and the flavors to meld.
- Add Optional Toppings: Before serving, top with whipped cream, sprinkles, or fresh berries for that extra pop of fun and texture.
Tip: If you find the layers blending too much, chill each layer longer before adding the next. Also, using a small spoon helps keep the layers neat rather than messy.
Cooking Tips & Techniques
Getting those perfect, distinct rainbow layers takes a little finesse, but I’m here to share some of the tricks I’ve learned along the way. First off, patience is key—rushing the layering step can turn your rainbow into a colorful blob, and nobody wants that.
When mixing the cream cheese with the pudding, make sure your cream cheese is fully softened; otherwise, you’ll end up with lumps that no one loves to scoop around. Also, beat the pudding mixture well to get that velvety, thick texture that holds layers.
Using piping bags can be a game-changer for neat layers, especially if you’re making these with kids who want to get creative but might be a little messy. If you don’t have piping bags, small zip-top bags with a corner snipped off work just as well.
Another thing I learned the hard way: don’t skip the chilling time between layers. It seems like an extra step, but it helps the pudding set just enough to keep the colors from bleeding into each other.
Finally, when it comes to serving, these pudding cups taste best chilled but not ice-cold. Let them sit out for 5-10 minutes after removal from the fridge to soften slightly and bring out the full cheesecake flavor.
Variations & Adaptations
There’s plenty of room to make these pudding cups your own. Here are a few ideas I’ve tried and loved:
- Dairy-Free Version: Use dairy-free cream cheese and almond or oat milk for the pudding base. Just make sure your pudding mix is also dairy-free.
- Seasonal Fruits: Swap the rainbow pudding layers with fresh fruit purees or jams for a natural flavor boost. Think strawberry for red, mango for yellow, blueberry for blue, and so on.
- Chocolate Twist: Add a layer of chocolate pudding or sprinkle crushed cookies between layers for a rich surprise.
- Mini Cupcakes: Instead of layering in cups, use this cheesecake pudding as a frosting or filling between mini cupcakes for a fun party snack.
One personal favorite variation is adding a swirl of peanut butter into the cheesecake pudding before layering. It adds a creamy, nutty depth that kids surprisingly adore.
Serving & Storage Suggestions
Serve these pudding cups chilled, ideally after a good 2-hour rest in the fridge, to let the flavors settle and the layers firm up perfectly. For parties, arrange them on a colorful tray or a tiered stand to show off the rainbow magic.
Pair these cups with simple snacks like fruit kabobs or vanilla cookies for a balanced spread. A light, fruity punch or sparkling lemonade complements the creamy sweetness beautifully.
Store leftover pudding cups covered in the refrigerator for up to 3 days. They tend to get a bit softer over time, but the flavors actually deepen, making them even yummier the next day.
When reheating, it’s best to let them come to room temperature naturally if you prefer a softer texture, but avoid microwaving as it can ruin the layered look and texture.
Nutritional Information & Benefits
Each serving of these Flavorful Dr. Seuss Rainbow Cheesecake Pudding Cups contains approximately 220 calories, 10 grams of fat, 30 grams of carbohydrates, and 5 grams of protein. The cream cheese provides a good source of calcium and protein, while the pudding adds a sweet, creamy texture with a modest sugar content.
Using whole milk adds richness and essential vitamins like B12, but you can opt for lower-fat or plant-based alternatives to suit your dietary needs. This recipe is naturally gluten-free, making it accessible to many with dietary restrictions.
From a wellness perspective, these pudding cups offer a fun way to include a bit of dairy and calcium in your diet, paired with colorful fun that encourages kids to enjoy their dessert with a smile.
Conclusion
So, there you have it—Flavorful Dr. Seuss Rainbow Cheesecake Pudding Cups that are as fun to make as they are to eat. This recipe is a cheerful celebration of color, flavor, and simple ingredients that come together to create a dessert that’s perfect for kids’ parties and family fun.
Feel free to customize the colors, flavors, and toppings to suit your style and taste buds. Honestly, I love this recipe because it brings joy and smiles around the table, and it’s become one of those treats I’m always excited to share.
If you try this recipe, I’d love to hear how your pudding cups turned out or if you added your own twist—drop a comment below! And hey, don’t forget to share this recipe with friends who might appreciate a little rainbow magic in their day. Happy layering and happy eating!
FAQs
Can I make these pudding cups ahead of time?
Absolutely! Prepare the pudding cups and store them covered in the fridge up to 3 days in advance. Just chill thoroughly to keep the layers intact.
What if I don’t have all the colored pudding flavors?
No worries! You can use plain cheesecake pudding and add food coloring yourself or even use fruit purees for natural hues.
Can I use low-fat or skim milk for this recipe?
Yes, but keep in mind that the texture might be slightly less creamy. Whole milk gives the best rich flavor.
How do I prevent the layers from mixing?
Chill each layer for about 5-10 minutes before adding the next one. Using a spoon to gently layer helps too.
Is this recipe kid-friendly for allergy concerns?
This recipe contains dairy, so for kids with allergies, consider dairy-free cream cheese and milk alternatives. It’s naturally gluten-free, which is great for many dietary needs.
Pin This Recipe!
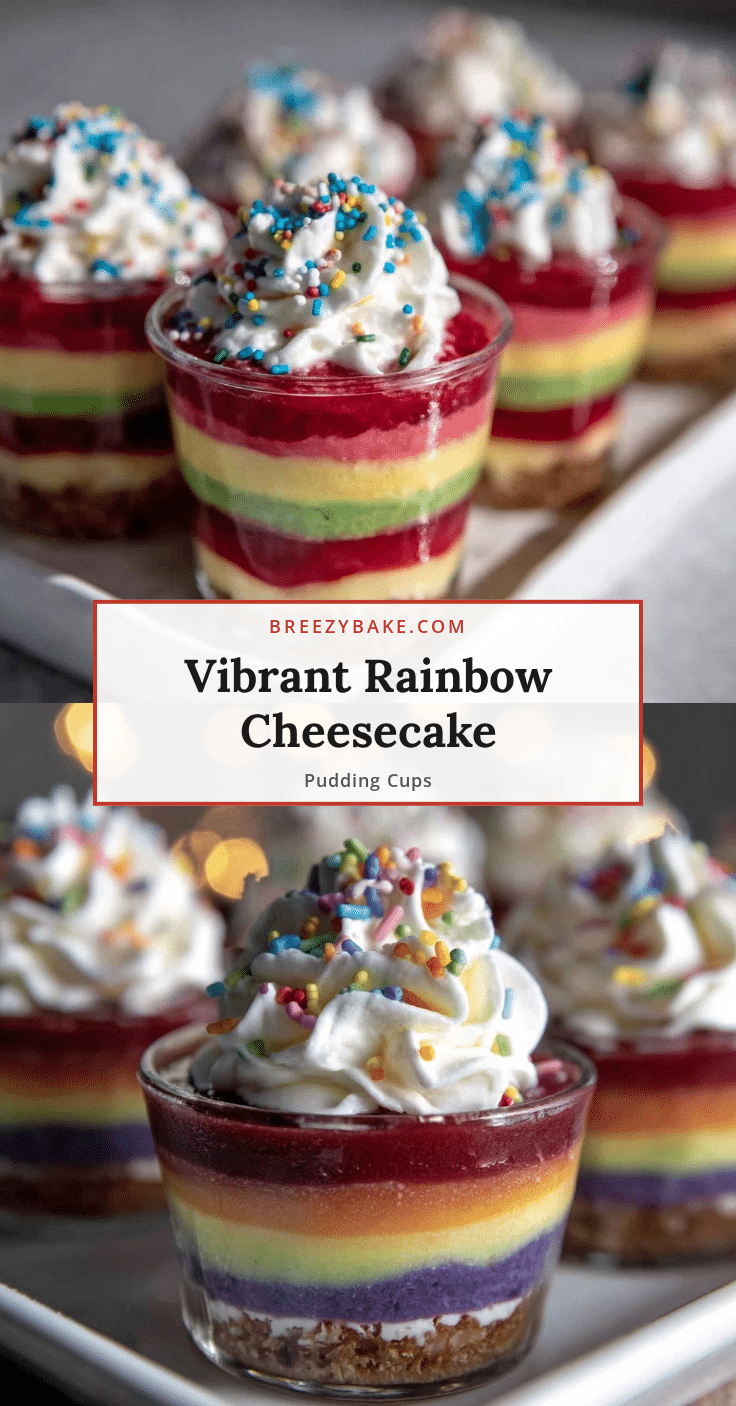
Flavorful Dr Seuss Rainbow Cheesecake Pudding Cups Easy Recipe for Kids Party
These vibrant layered cheesecake pudding cups are quick and easy to make, perfect for kids’ parties and family gatherings. The creamy cheesecake base combined with colorful pudding layers creates a delightful and nostalgic dessert.
- Prep Time: 35 minutes
- Cook Time: 0 minutes
- Total Time: 2 hours 35 minutes
- Yield: 6 servings 1x
- Category: Dessert
- Cuisine: American
Ingredients
- 8 oz cream cheese, softened
- 2 cups whole milk
- 1 package (3.4 oz) instant cheesecake-flavored pudding mix
- 1 teaspoon vanilla extract
- 1 tablespoon fresh lemon juice
- 6 individual small pudding cups in assorted flavors/colors (strawberry, blueberry, lemon, lime, orange, grape) or six small bowls of homemade pudding dyed with food coloring
- Optional toppings: whipped cream, rainbow sprinkles or edible glitter, fresh berries
Instructions
- Let the cream cheese sit at room temperature for about 30 minutes to soften.
- In a large mixing bowl, beat the softened cream cheese with an electric mixer until creamy and free of lumps, about 2-3 minutes. Add vanilla extract and lemon juice, mixing just until combined.
- Gradually whisk in the whole milk, then add the instant cheesecake pudding mix. Beat on medium speed for 2 minutes until the mixture thickens and holds a soft, creamy texture.
- If making your own rainbow layers, divide the cheesecake pudding base evenly into six bowls. Add a drop or two of different food coloring to each bowl (red, orange, yellow, green, blue, purple) and gently fold to combine without deflating the mixture.
- Spoon or pipe a layer of one colored pudding (about 2 tablespoons) into clear cups. Chill in the fridge for 5-10 minutes to set slightly.
- Repeat layering with the remaining colors, chilling briefly between each layer to keep layers distinct.
- Cover the cups with plastic wrap and refrigerate for at least 2 hours to allow pudding to firm up and flavors to meld.
- Before serving, top with optional whipped cream, sprinkles, or fresh berries.
Notes
Chill each pudding layer for 5-10 minutes before adding the next to prevent colors from blending. Use a small spoon or piping bag for neat layers. Let pudding cups sit out 5-10 minutes after refrigeration before serving to enhance flavor and texture. For dairy-free, substitute cream cheese and milk with plant-based alternatives. Store covered in refrigerator up to 3 days.
Nutrition
- Serving Size: 1 pudding cup (appro
- Calories: 220
- Fat: 10
- Carbohydrates: 30
- Protein: 5
Keywords: rainbow cheesecake pudding, kids party dessert, layered pudding cups, easy cheesecake pudding, colorful dessert, no bake dessert