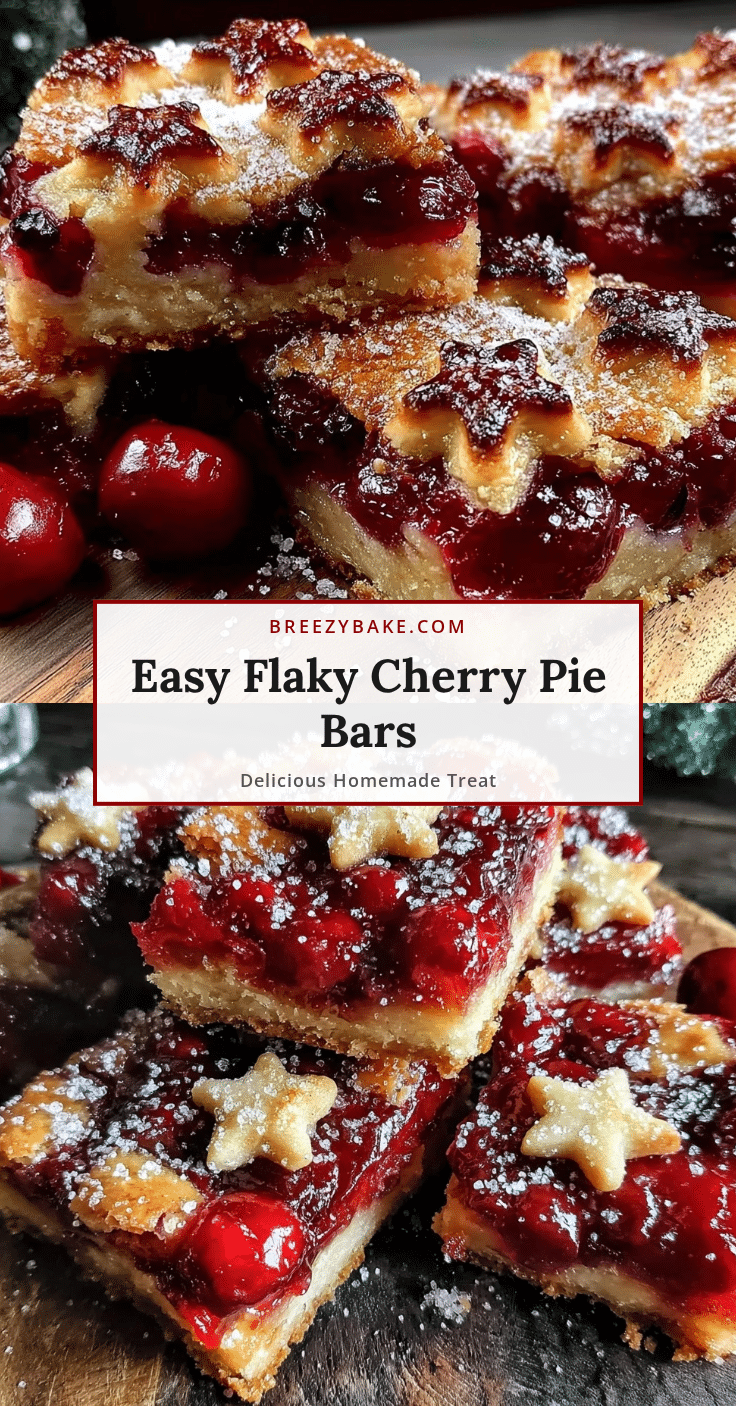
Let me tell you, the smell of sweet cherries mingling with buttery, flaky crusts baking in the oven is downright irresistible. The first time I made these Easy Cherry Pie Bars with Flaky Star Cutouts, I was instantly hooked—the kind of moment where you pause, take a deep breath, and just smile because you know you’re onto something truly special. It was a rainy weekend years ago, and I was craving that nostalgic cherry pie flavor but without all the fuss of rolling out a traditional pie crust. Honestly, these bars delivered pure, nostalgic comfort with a playful twist—the star-shaped cutouts on top added a bit of whimsy that my family couldn’t stop admiring.
Back when I was knee-high to a grasshopper, cherry pie was a holiday staple at family gatherings, but it always felt like an all-day affair. These bars changed the game for me. My family couldn’t stop sneaking them off the cooling rack (and I can’t really blame them). You know what? They’re dangerously easy to make, and perfect for potlucks, sweet treats for your kids, or just brightening up your Pinterest cookie board. After testing this recipe multiple times—in the name of research, of course—it’s become a staple for family gatherings and gifting. Honestly, these cherry pie bars feel like a warm hug, and you’re going to want to bookmark this one for sure.
Why You’ll Love This Recipe
From my kitchen to yours, here’s why this Easy Cherry Pie Bars recipe is a winner every time:
- Quick & Easy: Comes together in under an hour, perfect for busy weeknights or last-minute dessert cravings.
- Simple Ingredients: No fancy grocery trips needed; you likely already have everything in your pantry or fridge.
- Perfect for Any Occasion: Whether it’s brunch, potlucks, cozy dinners, or holiday mornings, these bars fit the bill.
- Crowd-Pleaser: Kids and adults alike rave about the perfect balance of sweet cherry filling and flaky crust.
- Unbelievably Delicious: The texture combo of a tender base and flaky star cutouts on top is next-level comfort food.
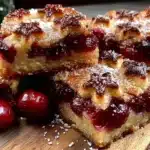
This recipe isn’t just your typical cherry bar. The flaky star cutouts on top add an eye-catching charm and a delightful crispness that you won’t find elsewhere. The cherry filling is perfectly balanced—not too sweet, with a hint of tartness that makes every bite sing. Plus, the crust is buttery but light, thanks to a little secret step I learned after many trials: chilling the dough before rolling it out really locks in that flaky texture. Close your eyes after the first bite—this recipe brings that classic cherry pie experience but faster and with a fun twist. It’s perfect for impressing guests without the stress and turning an everyday dessert into something memorable.
What Ingredients You Will Need
This recipe uses simple, wholesome ingredients to deliver bold cherry flavor and satisfying flaky texture without the fuss. Most ingredients are pantry staples, and substitutions are easy to make if needed.
- For the Crust and Star Cutouts:
- All-purpose flour – 2 ½ cups (315 g), for that tender yet sturdy crust
- Granulated sugar – ½ cup (100 g), adds subtle sweetness
- Salt – ½ teaspoon, to balance flavors
- Unsalted butter – 1 cup (227 g), cold and cubed (I recommend using Kerrygold for best flavor)
- Ice water – 4 to 6 tablespoons, to bring the dough together
- For the Cherry Filling:
- Frozen tart cherries – 3 cups (450 g), thawed and drained (fresh cherries work great in summer)
- Granulated sugar – ¾ cup (150 g), adjust depending on cherry tartness
- Cornstarch – 3 tablespoons, to thicken the filling
- Lemon juice – 1 tablespoon, brightens the cherry flavor
- Vanilla extract – 1 teaspoon, adds warmth and depth
- For Finishing:
- Egg wash – 1 large egg beaten with 1 tablespoon water, for that golden, glossy top
- Coarse sugar – for sprinkling on star cutouts (optional, but adds a lovely sparkle)
If you need gluten-free, swap the all-purpose flour for a 1-to-1 gluten-free baking flour blend. For a dairy-free version, use a vegan butter substitute like Earth Balance. And if you prefer a less sweet filling, just dial back the sugar by a couple of tablespoons—you’ll still get that fresh cherry punch.
Equipment Needed
To make these Easy Cherry Pie Bars with Flaky Star Cutouts, here’s what you’ll want handy:
- 9×13-inch baking pan – for even baking and perfect bar size
- Mixing bowls – one for the dough, one for the cherry filling
- Rolling pin – I love using a wooden one, but silicone works too
- Star-shaped cookie cutter – the star cutouts give these bars their charming look, but any small cutter will do
- Pastry brush – for egg wash application
- Fine mesh sieve – to rinse and drain the cherries (optional but helpful)
- Cooling rack – to let your bars cool completely for the best texture
If you don’t have a star-shaped cutter, no worries! You can freehand simple shapes or small slits to let steam escape. For budget options, silicone rolling pins and plastic cookie cutters work just fine, and they’re easier to clean. I’ve tested this recipe with various tools—the key is just keeping the butter cold to get flaky crust, so don’t sweat the gear too much!
Preparation Method
- Make the Dough: In a large bowl, whisk together 2 ½ cups (315 g) all-purpose flour, ½ cup (100 g) granulated sugar, and ½ teaspoon salt. Cut in 1 cup (227 g) cold, cubed unsalted butter using a pastry cutter or your fingers until the mixture resembles coarse crumbs with pea-sized bits. This should take about 5 minutes. (If the butter warms up, pop the bowl in the fridge for 10 minutes.)
- Add Ice Water: Slowly add 4 to 6 tablespoons of ice water, one tablespoon at a time, mixing gently with a fork until the dough just starts to clump. You want it to hold together but not be sticky. Form the dough into two equal disks, wrap in plastic, and chill for at least 1 hour. This step is crucial for flaky crust!
- Prepare the Cherry Filling: While the dough chills, combine 3 cups (450 g) thawed and drained tart cherries, ¾ cup (150 g) sugar, 3 tablespoons cornstarch, 1 tablespoon lemon juice, and 1 teaspoon vanilla extract in a medium bowl. Mix gently until well combined. Set aside and let the flavors meld.
- Preheat Oven: Preheat your oven to 350°F (175°C). Lightly grease a 9×13-inch baking pan or line it with parchment paper for easy removal.
- Roll Out Bottom Crust: On a lightly floured surface, roll out one disk of dough to fit the bottom of your pan (about 9×13 inches or 23×33 cm). Press it into the pan evenly, trimming edges if needed. Prick the crust a few times with a fork to prevent bubbling.
- Add Cherry Filling: Spread the cherry filling evenly over the bottom crust, making sure not to overload (about 1 inch thick). This helps avoid sogginess.
- Roll Out Top Dough: Roll out the second disk of dough to the same size. Use your star-shaped cookie cutter to cut out stars from the dough. Arrange these stars over the cherry filling, leaving small gaps to let steam escape and add that charming look.
- Apply Egg Wash: Brush the stars gently with the egg wash (1 beaten egg with 1 tablespoon water). Sprinkle with coarse sugar if you like a sparkly finish.
- Bake: Bake for 40 to 45 minutes, or until the crust is golden brown and the filling is bubbling. Keep an eye on the stars—they should look flaky and crisp.
- Cool & Serve: Let the bars cool completely on a wire rack before slicing into squares. This helps the filling set so it’s not too runny. Serve at room temperature or chilled.
Cooking Tips & Techniques
Here are some tips I’ve picked up making these cherry pie bars again and again:
- Keep Butter Cold: This is the secret to flaky crust. Don’t be tempted to skip the chilling step; it really makes a difference.
- Don’t Overwork the Dough: Mix just until combined. Overmixing develops gluten and results in a tough crust, which is not what we want here.
- Drain the Cherries Well: Soggy filling is the enemy! Let the thawed cherries drain in a sieve for at least 15 minutes before mixing with sugar and cornstarch.
- Use Cornstarch for Thickening: It’s great for fruit fillings because it creates a glossy, clear gel and doesn’t cloud the filling like flour might.
- Watch the Baking Time: If your oven runs hot, check the bars around 35 minutes to avoid over-browning the crust stars. If they brown too quickly, tent loosely with foil.
- Slice When Cool: Cutting too soon can lead to a messy filling leak, so patience here pays off.
Variations & Adaptations
Feel free to mix things up with these tasty variations:
- Mixed Berry Pie Bars: Swap tart cherries for a blend of blueberries, raspberries, and blackberries during summer. Adjust sugar slightly based on fruit sweetness.
- Gluten-Free Version: Use a high-quality gluten-free flour blend for the crust, and add 1 teaspoon xanthan gum if your blend doesn’t contain it to mimic elasticity.
- Vegan Adaptation: Replace butter with chilled vegan butter and use a flax egg (1 tablespoon flaxseed meal + 2.5 tablespoons water) for the egg wash to keep that golden finish.
- Nutty Crunch: Add ½ cup chopped toasted almonds or pecans on top of the filling before placing the star cutouts for extra texture.
- Mini Bars: Use a muffin tin instead of a baking pan for individual cherry bars—great for portion control and presentation at parties.
One of my favorite tweaks was adding a pinch of cinnamon and almond extract to the cherry filling—it gave a cozy warmth that made these bars feel like a little holiday celebration in every bite.
Serving & Storage Suggestions
These cherry pie bars are delicious served at room temperature, allowing the flavors to shine and the crust to stay flaky. For a special touch, serve with a scoop of vanilla ice cream or a dollop of whipped cream—honestly, it’s hard to go wrong there!
If you’re planning a dessert buffet, these bars hold up well and look delightful with their starry tops catching the eye. They pair beautifully with a hot cup of coffee or a chilled glass of sparkling rosé.
To store, place leftover bars in an airtight container. They keep well in the refrigerator for up to 4 days. When you’re ready to enjoy again, warm them slightly in a 300°F (150°C) oven for 10 minutes to refresh the crust’s flakiness.
For longer storage, these bars freeze wonderfully. Wrap tightly in plastic wrap and foil, then freeze for up to 3 months. Thaw overnight in the fridge, then warm before serving. The flavors actually deepen after a day or two in the fridge, making them even more delightful.
Nutritional Information & Benefits
Each serving of these Easy Cherry Pie Bars (about 2×2 inch square) delivers roughly:
| Calories | Fat | Carbohydrates | Protein | Fiber |
|---|---|---|---|---|
| 280 kcal | 14 g | 35 g | 3 g | 2 g |
Cherries are packed with antioxidants and vitamins, especially vitamin C and potassium. Using a moderate amount of sugar keeps these bars from being overly sweet, while still satisfying that dessert craving. The buttery crust adds richness but also provides energy-sustaining fats.
This recipe can be adapted to gluten-free and vegan diets, making it accessible to many. Just watch for allergies related to nuts if you add optional toppings. Overall, it’s a treat that feels indulgent yet approachable from a wellness perspective.
Conclusion
These Easy Cherry Pie Bars with Flaky Star Cutouts are a delightful way to enjoy classic cherry pie flavors in a fun, approachable format. Whether you’re baking for a quick weeknight dessert, a festive gathering, or just to brighten your day, this recipe delivers every time. Customize with your favorite fruit or dietary preferences, and don’t be shy about adding your own personal flair.
I love this recipe because it combines nostalgic comfort with a playful look and is just plain fun to make. Plus, watching those flaky star cutouts turn golden and crisp never gets old. If you give it a try, please share your thoughts or any creative twists you come up with—I’m always eager to hear from fellow cherry lovers!
Happy baking, and here’s to many sweet moments with these cherry pie bars!
Frequently Asked Questions
Can I use fresh cherries instead of frozen for the filling?
Absolutely! Fresh cherries work wonderfully in season. Just pit and chop them, then adjust sugar slightly based on their sweetness.
How do I prevent the crust from becoming soggy?
Draining the cherries well and using cornstarch to thicken the filling helps tremendously. Also, avoid overfilling the bars and make sure to let them cool completely before cutting.
Can I make these bars ahead of time?
Yes, these bars keep well for several days refrigerated and can be frozen for longer storage. Just warm them gently before serving for best texture.
What if I don’t have a star-shaped cutter?
No worries! You can use any small cookie cutter or simply cut slits or shapes freehand for steam vents. It’ll still look charming.
Is there a way to make these bars less sweet?
Definitely. You can reduce the sugar in the cherry filling by 1-2 tablespoons without losing that classic flavor. Taste as you go to find your perfect balance.
Pin This Recipe!
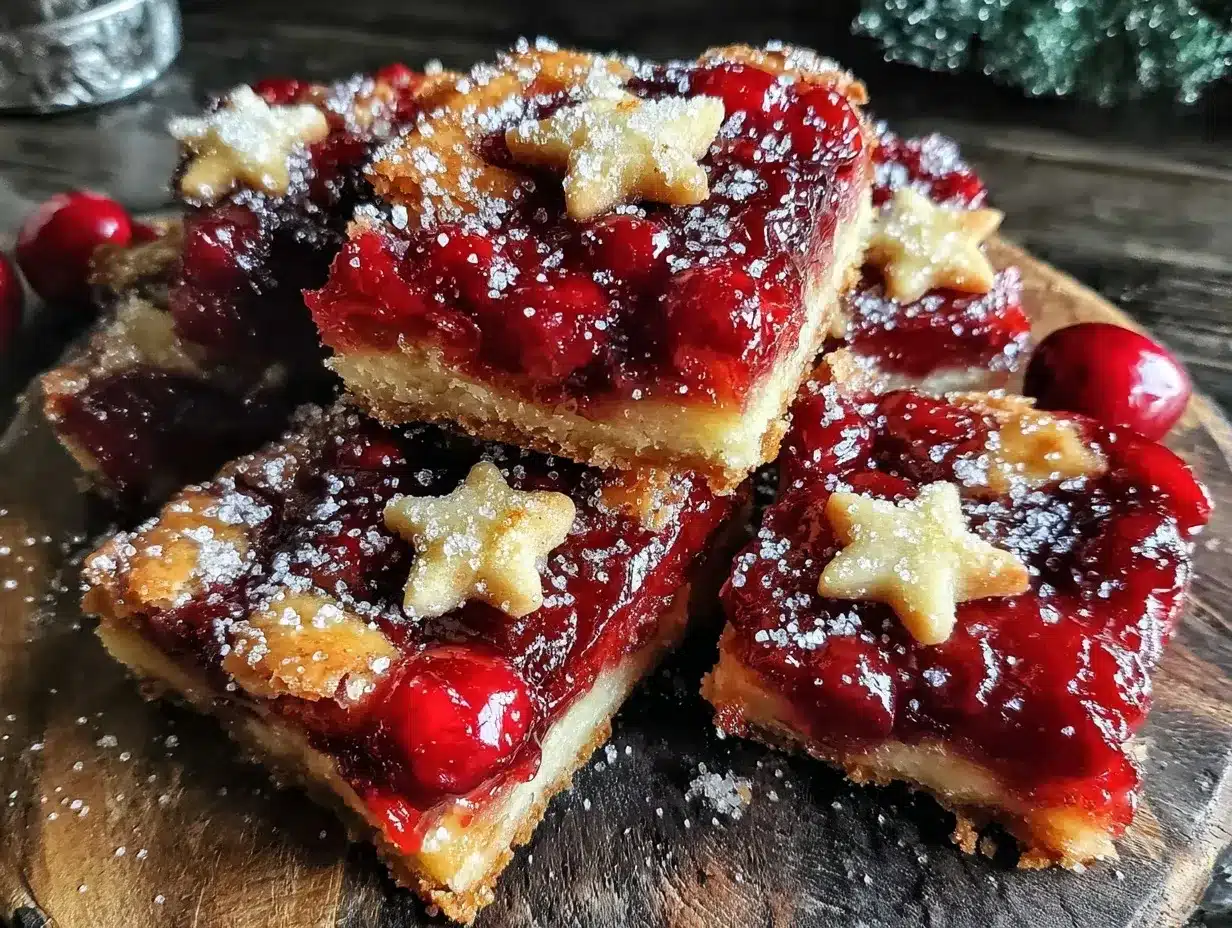
Easy Cherry Pie Bars Recipe with Flaky Star Cutouts Perfect for Desserts
These Easy Cherry Pie Bars combine the nostalgic flavor of cherry pie with a flaky crust and charming star-shaped cutouts, perfect for quick and delightful desserts.
- Prep Time: 15 minutes
- Cook Time: 45 minutes
- Total Time: 1 hour
- Yield: 12 servings 1x
- Category: Dessert
- Cuisine: American
Ingredients
- 2 ½ cups (315 g) all-purpose flour
- ½ cup (100 g) granulated sugar
- ½ teaspoon salt
- 1 cup (227 g) unsalted butter, cold and cubed
- 4 to 6 tablespoons ice water
- 3 cups (450 g) frozen tart cherries, thawed and drained
- ¾ cup (150 g) granulated sugar
- 3 tablespoons cornstarch
- 1 tablespoon lemon juice
- 1 teaspoon vanilla extract
- 1 large egg beaten with 1 tablespoon water (egg wash)
- Coarse sugar for sprinkling (optional)
Instructions
- In a large bowl, whisk together 2 ½ cups all-purpose flour, ½ cup granulated sugar, and ½ teaspoon salt.
- Cut in 1 cup cold, cubed unsalted butter using a pastry cutter or fingers until mixture resembles coarse crumbs with pea-sized bits (about 5 minutes). If butter warms, chill dough in fridge for 10 minutes.
- Slowly add 4 to 6 tablespoons ice water, one tablespoon at a time, mixing gently until dough just starts to clump. Form dough into two equal disks, wrap in plastic, and chill for at least 1 hour.
- While dough chills, combine 3 cups thawed and drained tart cherries, ¾ cup sugar, 3 tablespoons cornstarch, 1 tablespoon lemon juice, and 1 teaspoon vanilla extract in a medium bowl. Mix gently and set aside.
- Preheat oven to 350°F (175°C). Lightly grease a 9×13-inch baking pan or line with parchment paper.
- Roll out one disk of dough on a lightly floured surface to fit bottom of pan (9×13 inches). Press evenly and prick crust with fork to prevent bubbling.
- Spread cherry filling evenly over bottom crust, about 1 inch thick.
- Roll out second dough disk to same size. Use star-shaped cookie cutter to cut out stars and arrange over cherry filling, leaving small gaps for steam.
- Brush stars with egg wash and sprinkle with coarse sugar if desired.
- Bake for 40 to 45 minutes until crust is golden brown and filling bubbles. Watch stars to avoid over-browning; tent with foil if needed.
- Cool bars completely on wire rack before slicing into squares. Serve at room temperature or chilled.
Notes
Keep butter cold to ensure flaky crust. Chill dough for at least 1 hour before rolling. Drain cherries well to avoid soggy filling. Use cornstarch to thicken filling. Let bars cool completely before slicing to prevent filling leakage. If stars brown too quickly, tent with foil.
Nutrition
- Serving Size: 1 bar (about 2x2 inc
- Calories: 280
- Sugar: 22
- Sodium: 120
- Fat: 14
- Saturated Fat: 9
- Carbohydrates: 35
- Fiber: 2
- Protein: 3
Keywords: cherry pie bars, cherry dessert, flaky crust, star cutouts, easy cherry bars, quick dessert, potluck dessert, cherry filling