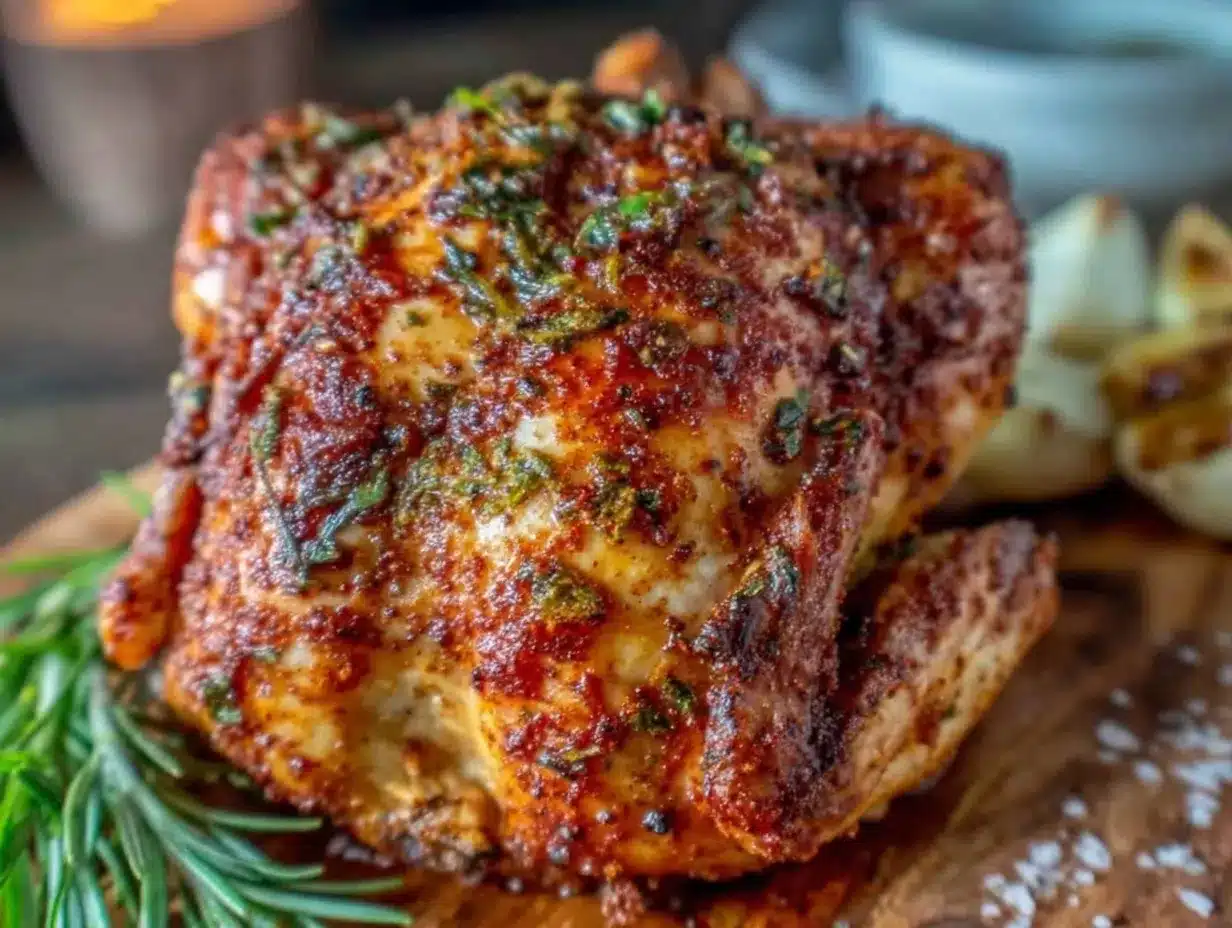
“You really wanna try this beer can chicken,” my buddy Jake said, grinning like he just discovered some secret weapon for backyard cookouts. I was skeptical—beer can chicken always sounded a bit gimmicky to me. But the smoky garlic paprika rub was what got my curiosity going. That day, while the sun dipped low and the grill heated up, I watched that chicken sizzle and crisp like nothing I’d seen before. The skin crackled with this addictively crunchy texture, and the spices hit the right notes—earthy, smoky, with a subtle garlic punch.
Honestly, it felt like the kind of recipe you stumble on by accident, but then keep making over and over (and yeah, I ended up making it three times that week). The beer can trick keeps the chicken super juicy inside while the rub forms this irresistibly crispy crust. I never thought a simple backyard bird could bring that much wow, but it did—without fuss or fancy ingredients.
That smoky garlic paprika rub became my go-to seasoning for any chicken night, and the beer can method? Game changer. What stuck with me was how it turned a classic roast into something festive and fun, without needing hours of prep or complicated steps. Plus, it’s perfect for those moments when friends drop by unannounced or when you just want to treat yourself to something cozy and soulful.
So here’s the deal: this Crispy Beer Can Chicken with Smoky Garlic Paprika Rub isn’t just another grilled chicken recipe. It’s that crispy, juicy, flavorful dish you’ll want to make again and again—whether it’s a casual weeknight or a weekend hangout. And if you’re anything like me, it’ll become one of those recipes you quietly stash away for “just in case” moments that need a little delicious rescue.
Why You’ll Love This Recipe
This Crispy Beer Can Chicken with Smoky Garlic Paprika Rub has seriously become a staple for me and my crew. After testing it in different grills, ovens, and even on a campfire, I can confidently say it delivers every time. Here’s what makes it stand out:
- Quick & Easy: From prep to plate in about 1 hour 15 minutes, including cooking—perfect for busy evenings or impromptu gatherings.
- Simple Ingredients: The rub uses pantry staples you probably already have, with no need for fancy or hard-to-find spices.
- Perfect for Outdoor Parties: It’s the ultimate crowd-pleaser for backyard barbecues, game days, or casual family dinners.
- Crispy Skin, Juicy Meat: The beer can method locks in moisture while the smoky garlic paprika rub crisps up the skin to a golden perfection.
- Flavor That Pops: The paprika and garlic combo isn’t just tasty—it brings a deep, smoky warmth that you don’t get with plain roasted chicken.
What really sets this recipe apart is how the beer can elevates the chicken’s texture without drying it out—something I struggled with in other roast or grilled chicken recipes. Plus, the rub is perfectly balanced; not too salty, with just the right hint of spice and smoke. I’ve found that this recipe is a fantastic alternative to classics like crispy garlic chicken wings or the crispy chicken nacho crust pizza for those nights when I want a whole bird to impress but without the fuss.
What Ingredients You Will Need
This recipe leans on simple, wholesome ingredients to create that bold, smoky flavor and irresistible crispy texture. Most of these are pantry staples, so you won’t have to run to the store just for this.
- Whole chicken: About 4 to 5 pounds (1.8 to 2.3 kg), preferably fresh or fully thawed—look for organic or free-range for the best flavor.
- Beer: One 12-ounce (355 ml) can of lager or pale ale (avoid super bitter IPAs)—this helps steam the chicken from the inside.
- Olive oil: 2 tablespoons (30 ml), for coating the chicken and helping the rub stick.
- Smoky garlic paprika rub:
- 2 tablespoons smoked paprika (I love La Chinata for a deep, authentic smoke flavor)
- 1 tablespoon garlic powder
- 1 teaspoon onion powder
- 1 teaspoon ground cumin
- 1 teaspoon kosher salt (adjust to taste)
- ½ teaspoon freshly ground black pepper
- ½ teaspoon cayenne pepper (optional, adds a mild kick)
- Lemon: 1 medium-sized, cut into wedges (for serving and optional zest in the rub)
- Fresh herbs (optional): Sprigs of rosemary or thyme to tuck under the chicken skin or in the cavity for a fresh note.
Substitution tip: If you want a gluten-free version, most beers are fine, but check labels or swap beer for chicken broth with a dash of apple cider vinegar for a similar effect. And if you’re avoiding alcohol, try a non-alcoholic beer or sparkling water with a splash of soy sauce for umami.
Equipment Needed
- Grill or Oven: A grill (charcoal or gas) is ideal for that smoky crispiness, but your oven works perfectly too.
- Beer can chicken holder or stand: This isn’t mandatory but makes it way easier to keep the chicken upright and stable. If you don’t have one, just use an empty, clean beer can and carefully position the bird.
- Meat thermometer: Crucial for checking doneness without guessing; I swear by my instant-read thermometer for foolproof results.
- Basting brush: For applying olive oil or any additional glaze during cooking.
- Large mixing bowl: To toss the rub and oil together before coating the chicken.
- Aluminum foil: Useful for tenting the chicken if it browns too fast before cooking through.
If you’re on a budget, you can skip the specialized holder and just use a sturdy roasting pan to catch drips. Also, keep your tools clean and dry—especially the thermometer probe—to get consistent readings every time.
Preparation Method
- Prep the chicken (10 minutes): Remove any giblets from inside the cavity. Pat the chicken dry with paper towels—this step is key to getting crispy skin. Let it rest at room temperature while you make the rub.
- Make the smoky garlic paprika rub (5 minutes): In a small bowl, combine smoked paprika, garlic powder, onion powder, ground cumin, kosher salt, black pepper, and cayenne (if using). Mix well.
- Apply the rub and oil (5 minutes): Rub olive oil all over the chicken, including under the skin if you can (careful though). Then sprinkle the spice rub liberally, massaging it into the skin and cavity for full flavor penetration.
- Prepare the beer can (2 minutes): Open the beer and pour out (or drink!) about half the can. You want it roughly half full. Place the can on a stable surface.
- Mount the chicken on the beer can (3 minutes): Carefully lower the chicken cavity onto the beer can, so the bird sits upright. Use a holder if you have one, or balance it inside a roasting pan.
- Preheat grill or oven (10 minutes): Heat the grill to medium-high (around 375°F/190°C) for indirect cooking. If using an oven, preheat to 375°F (190°C).
- Cook the chicken (60 minutes): Place the chicken upright on the grill away from direct flames or in the oven. Close the lid and cook until internal temperature reaches 165°F (74°C) in the thickest part of the thigh. This usually takes about 1 hour, but start checking around 50 minutes.
- Watch for skin color and adjust (optional): If the skin is browning too fast, tent loosely with foil to avoid burning while the inside finishes cooking.
- Rest the chicken (10 minutes): Carefully remove the chicken from the beer can (it’ll be hot—use tongs or oven mitts!) and let it rest on a cutting board. Resting lets juices redistribute for juicy meat.
- Carve and serve: Slice the chicken and serve with lemon wedges and your favorite sides.
Tip: If you want to keep flavors fresh, tuck fresh rosemary or thyme under the skin before cooking. Also, using a meat thermometer saves you from overcooking or undercooking—trust me, I learned the hard way on my first attempt!
Cooking Tips & Techniques
Getting this Crispy Beer Can Chicken just right took a few tries, so here are some lessons from my smoky grill experiments:
- Dry skin is crispy skin: Always pat the chicken dry before seasoning. Moisture is the enemy of crispiness (I once skipped this step and ended up with soggy skin—never again!).
- Indirect heat is your friend: Cooking the chicken over indirect heat helps it cook evenly without burning the skin. On a grill, set burners off directly under the bird and use ambient heat.
- Don’t rush the resting stage: Let that bird chill out after cooking for at least 10 minutes. I know it’s tempting to dig in, but this resting step locks in juiciness.
- Use a thermometer: Guessing doneness leads to dry or unsafe chicken. Aim for 165°F (74°C) in the thigh with an instant-read thermometer.
- Balance the rub: The smoky garlic paprika rub can be tweaked—if you like it spicier, add more cayenne. For less salt, reduce the kosher salt and add a splash of lemon juice after cooking.
Once, my grill flared up mid-cook, and I had to move the chicken around a few times. It still turned out great because the beer can keeps it upright, so juices don’t escape, and the rub forms a protective crust. Patience and attention pay off with this recipe!
Variations & Adaptations
While the classic smoky garlic paprika rub is a winner, it’s fun to mix things up depending on mood or occasion:
- Herb & Citrus Twist: Swap smoked paprika for fresh rosemary, thyme, and lemon zest for a brighter, herbaceous flavor. Great for spring or summer cookouts.
- Spicy Chipotle Rub: Add chipotle chili powder and a touch of brown sugar to the rub for a smoky-sweet heat that’s perfect for fall grilling.
- Low-Sodium Option: Reduce salt and use garlic-infused olive oil to keep flavor while dialing back sodium intake.
- Oven-Baked Variation: For indoor cooking, roast the chicken on a beer can stand or in a deep roasting pan at 375°F (190°C) until done.
- Allergen-Friendly: The recipe is naturally gluten-free, but if you want to avoid nightshades, substitute paprika with smoked turmeric or ground cumin alone.
Personally, I once tried a maple glaze addition in the last 10 minutes of cooking, brushing it on for a caramelized finish—that’s a keeper for cozy fall dinners.
Serving & Storage Suggestions
This Crispy Beer Can Chicken is best served hot or warm right off the grill or oven. I like to slice it up on a big wooden board, surrounding it with lemon wedges for squeezing over, and fresh herbs for garnish. It pairs beautifully with simple sides like grilled veggies, roasted potatoes, or even a fresh salad.
For a relaxed weekend meal, try serving it alongside healthy chicken veggie skillet wraps or a buttery mac-and-cheese casserole for serious comfort vibes.
Leftovers? Store cooled chicken in an airtight container in the fridge for up to 3 days. Reheat gently in the oven at 300°F (150°C) wrapped in foil to preserve moisture. The skin won’t be quite as crispy but still delicious. You can also shred the leftover meat for sandwiches or salads.
Flavors tend to deepen overnight, especially with the smoky paprika rub, so sometimes I actually prefer the second-day taste for meal prep lunches.
Nutritional Information & Benefits
This recipe balances indulgence and nutrition fairly well. A 4-ounce (113 g) serving of chicken (meat only) provides roughly:
| Nutrient | Amount |
|---|---|
| Calories | 220 kcal |
| Protein | 25 g |
| Fat | 12 g |
| Carbohydrates | 1 g |
| Sodium | 350 mg (variable by rub amount) |
Chicken is a great source of lean protein and B vitamins, supporting muscle repair and energy. The smoked paprika adds antioxidants and a flavor punch without extra calories. Using olive oil adds heart-healthy monounsaturated fats.
This recipe is naturally gluten-free and low-carb, making it suitable for many dietary preferences. Just watch the salt if you’re on a low-sodium diet. I appreciate how this dish brings comfort food vibes without the heaviness of breading or deep-frying.
Conclusion
To wrap it up, this Crispy Beer Can Chicken with Smoky Garlic Paprika Rub is one of those recipes that feels like a secret weapon for effortless, flavorful meals. It’s got that crispy skin crunch and juicy meat combo that makes you want to savor every bite. The smoky garlic paprika rub brings a warm complexity that’s easy to tweak based on your taste.
This recipe invites you to get comfortable with simple techniques that deliver impressive results—whether you’re cooking for a crowd or just yourself. I love how adaptable it is, and honestly, it’s become a go-to that I keep coming back to, especially when I want to impress without stress.
If you give it a try, I’d love to hear how you make it your own—feel free to share your rub tweaks, cooking tips, or favorite side dishes! And if you’re in the mood for more chicken inspiration, the low-cal ranch chicken skillet is another one of my favorites that’s quick and wholesome.
Happy cooking, and here’s to many crispy, smoky, juicy chicken nights ahead!
FAQs
What type of beer should I use for beer can chicken?
Choose a mild lager or pale ale with moderate bitterness. Avoid super hoppy IPAs as they can impart a bitter taste. If you prefer, non-alcoholic beer or sparkling water with a splash of apple cider vinegar works too.
Can I make this recipe in the oven without a grill?
Absolutely! Preheat your oven to 375°F (190°C) and roast the chicken upright on a beer can stand or in a deep roasting pan. Cooking time stays about the same, but always use a meat thermometer to check doneness.
How do I keep the skin crispy when reheating leftovers?
Reheat the chicken in a preheated oven at 300°F (150°C) wrapped loosely in foil to retain moisture. For extra crispiness, unwrap during the last 5 minutes of reheating and broil briefly—but watch closely to avoid burning.
Is the beer can method safe to use?
Yes, as long as you use a clean, unopened can and handle the hot chicken carefully. The beer steams the chicken from inside, keeping it juicy while the outside crisps. Just be cautious when removing the chicken after cooking.
Can I prepare the rub ahead of time?
Definitely! The smoky garlic paprika rub keeps well in an airtight container for weeks. Mixing it ahead saves prep time and makes this recipe even quicker to throw together on busy days.
Pin This Recipe!
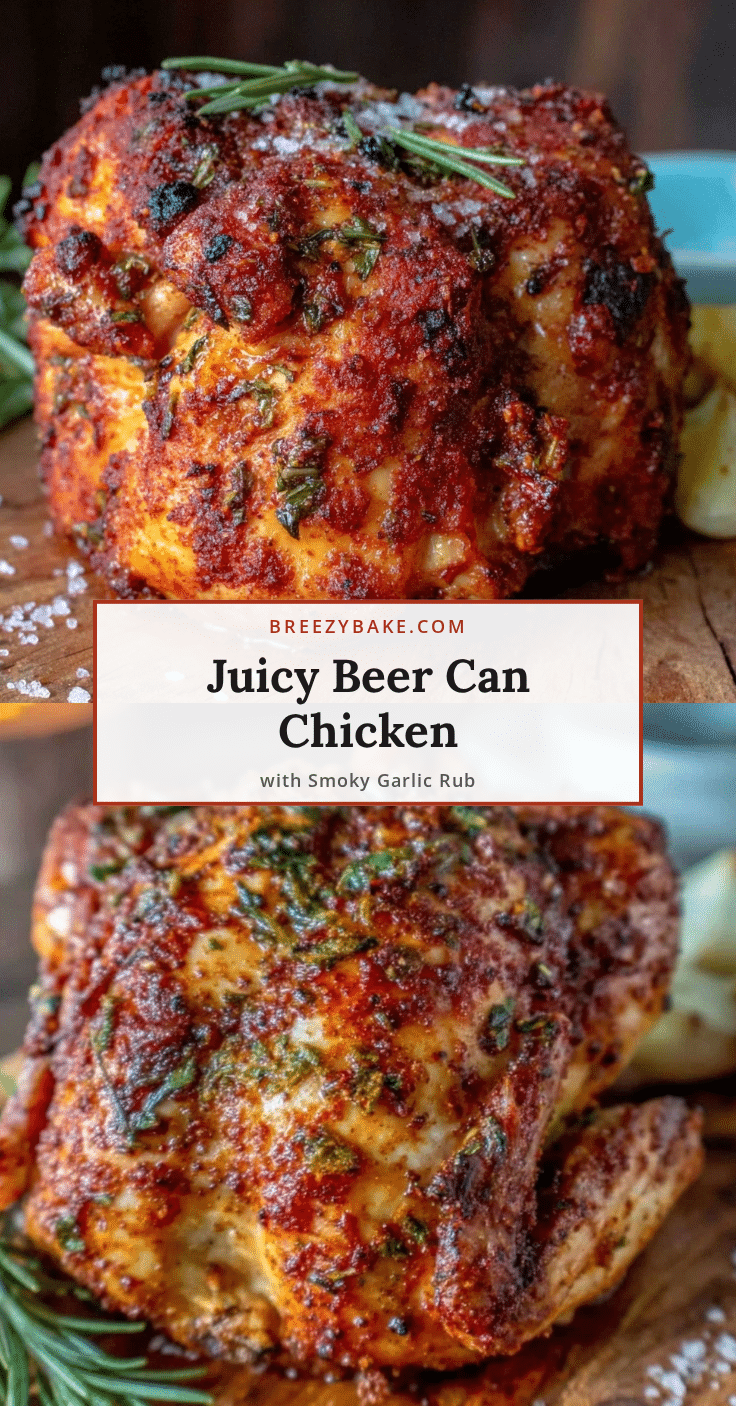
Crispy Beer Can Chicken Recipe with Smoky Garlic Paprika Rub Easy and Perfect

A flavorful and crispy beer can chicken with a smoky garlic paprika rub that locks in juiciness and delivers a crunchy skin. Perfect for quick, easy backyard cookouts or cozy family dinners.
- Prep Time: 22 minutes
- Cook Time: 60 minutes
- Total Time: 1 hour 22 minutes
- Yield: 4 to 6 servings 1x
- Category: Main Course
- Cuisine: American
Ingredients
- 1 whole chicken (4 to 5 pounds / 1.8 to 2.3 kg), fresh or fully thawed, organic or free-range preferred
- 1 (12-ounce / 355 ml) can of lager or pale ale beer (avoid super bitter IPAs)
- 2 tablespoons (30 ml) olive oil
- 2 tablespoons smoked paprika
- 1 tablespoon garlic powder
- 1 teaspoon onion powder
- 1 teaspoon ground cumin
- 1 teaspoon kosher salt (adjust to taste)
- ½ teaspoon freshly ground black pepper
- ½ teaspoon cayenne pepper (optional)
- 1 medium lemon, cut into wedges
- Fresh herbs (optional): rosemary or thyme sprigs
Instructions
- Remove any giblets from inside the chicken cavity. Pat the chicken dry with paper towels and let it rest at room temperature.
- In a small bowl, combine smoked paprika, garlic powder, onion powder, ground cumin, kosher salt, black pepper, and cayenne pepper (if using). Mix well.
- Rub olive oil all over the chicken, including under the skin if possible. Then apply the spice rub liberally, massaging it into the skin and cavity.
- Open the beer can and pour out or drink about half the beer, leaving it roughly half full. Place the can on a stable surface.
- Carefully lower the chicken cavity onto the beer can so the bird sits upright. Use a beer can chicken holder or balance it inside a roasting pan.
- Preheat grill to medium-high (around 375°F / 190°C) for indirect cooking or preheat oven to 375°F (190°C).
- Place the chicken upright on the grill away from direct flames or in the oven. Close the lid and cook until the internal temperature reaches 165°F (74°C) in the thickest part of the thigh, about 60 minutes. Start checking around 50 minutes.
- If the skin browns too fast, tent loosely with aluminum foil to prevent burning while the inside finishes cooking.
- Carefully remove the chicken from the beer can using tongs or oven mitts and let it rest on a cutting board for 10 minutes to allow juices to redistribute.
- Carve the chicken and serve with lemon wedges and your favorite sides.
Notes
Pat chicken dry before seasoning for crispy skin. Use indirect heat on grill to avoid burning. Let chicken rest 10 minutes after cooking for juicy meat. Use a meat thermometer to ensure doneness. Adjust cayenne pepper for spice level. Tent with foil if skin browns too quickly. Substitute beer with chicken broth and apple cider vinegar for gluten-free or non-alcoholic options.
Nutrition
- Serving Size: 4 ounces (113 g) coo
- Calories: 220
- Sodium: 350
- Fat: 12
- Carbohydrates: 1
- Protein: 25
Keywords: beer can chicken, crispy chicken, smoky garlic paprika rub, grilled chicken, backyard barbecue, easy chicken recipe, juicy chicken, beer can cooking